

Fix 0x800706ba Error : Discover Multiple Solutions

Summary
Master the resolution of error 0x800706ba during Windows updates with our guide, ensuring data safety with our included retrieval tips during the repair.
Table of contents
SFC and DISM are built-in utilities in Windows. SFC scans and repairs protected system files, while DISM manages offline Windows images and Windows PE images. Here is the detailed usage method:

SFC /scannow. Press the Enter key. The System File Checker will scan and repair problematic system files. If the detected error cannot be repaired or the problem persists, proceed to the next step.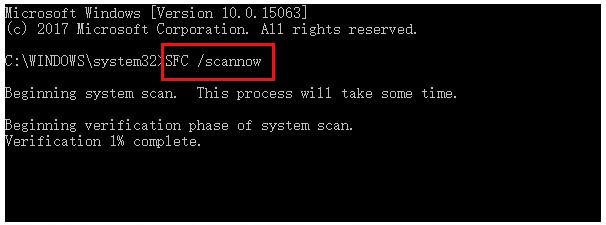
Dism /Online /Cleanup-Image /RestoreHealth in Command Prompt and press Enter to execute the repair command. Restart the computer and check if the issue is resolved.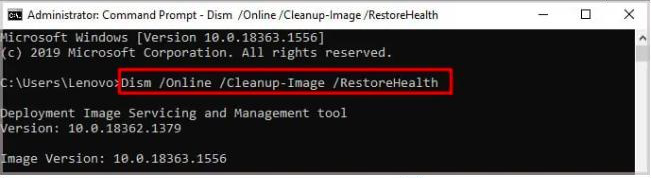

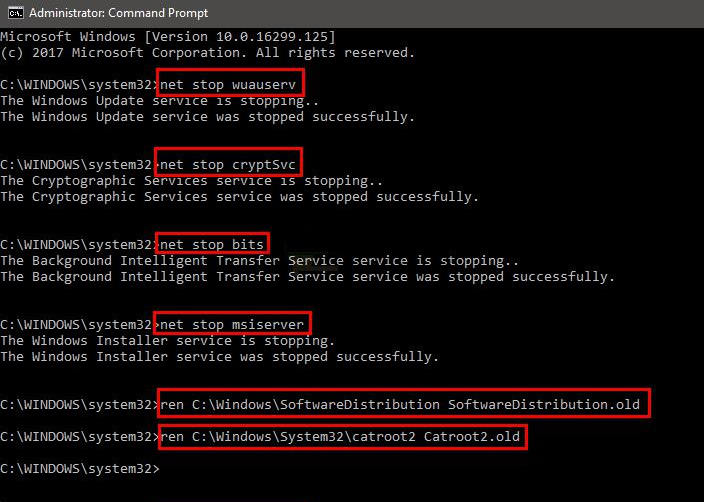
net stop wuauserv
net stop cryptSvc
net stop bits
net stop msiserver
ren C:\Windows\SoftwareDistribution SoftwareDistribution.old
ren C:\Windows\System32\catroot2 Catroot2.old
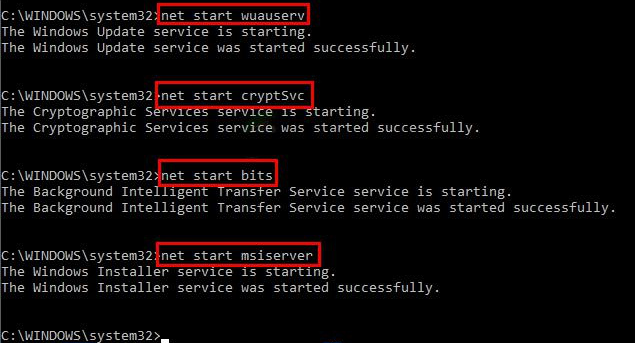
net start wuauserv
net start cryptSvc
net start bits
net start msiserver

Easy to use Recover data by 3 steps;
Multiple scan modes Fast partition scan, whole partition scan and whole disk scan;
Supported file types Image, video, audio, text, email and so on;
Image creation Create a partition image to read and back up data;
Supported devices SD card, SDHC, SDXC, USB flash drive, hard disk and computer.
Easy to use Recover data by 3 steps;
Multiple scan modes Fast partition/whole partition/whole disk scan;
Supported devices SD card/USB/hard disk.
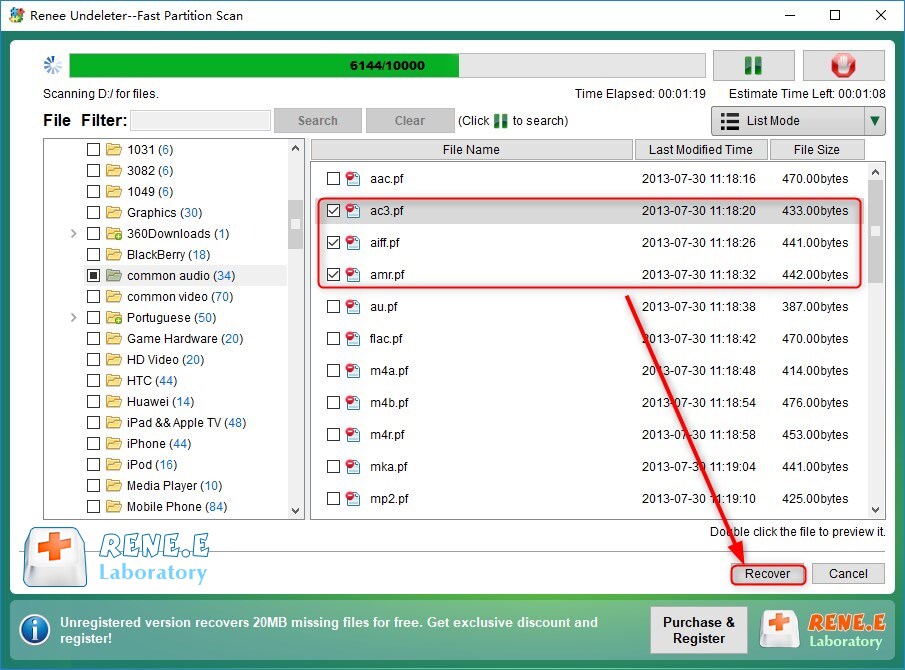
Free TrialFree TrialFree Trial 800 people have downloaded!Note: If the files you need cannot be found by this recovery mode, you can also try other modes for a more thorough scan.


Note that “File Recovery – Fast Scan” only scans the first 30GB of the remaining space on the selected disk. If the desired file is not found, use “File Recovery – Deep Scan” to try scanning the hard disk partition again, but be aware that it will take more time. Please wait patiently.


Relate Links :
How to Fix When Files on SD Card Not Showing up on Android?

27-12-2021
Amanda J. Brook : Sometimes, the SD card files are not showing up on Android. How can we solve the problem? In...
How to Fix GoPro SD Card Error?

14-09-2024
Ashley S. Miller : Some people meet with the GoPro SD card errors, such as “NO SD” and “SD ERR”. In this...
Solutions to SD Card Unexpectedly Removed on Android
24-12-2021
Jennifer Thatcher : Some Android users complain that they always receive the notification saying that the SD is unexpectedly removed. In...
How to Fix Corrupted SD Card on Android?

16-12-2021
John Weaver : SD card is used in various devices, phones, cameras and video games. How to fix the corrupted SD...

