author avatar
    Senior Product Manager
 

Summary
Struggling with the error code 0x800F0922 during a Windows 10 update? You're not alone. Dive into our comprehensive guide to understand the root causes of this issue and explore a variety of reliable solutions to resolve it. Plus, we'll walk you through the steps to recover any data that may have been compromised during the update process. Get your system back on track with ease and confidence.


Fix the error code 0x800F0922

I. What are the common causes of error code 0x800F0922?

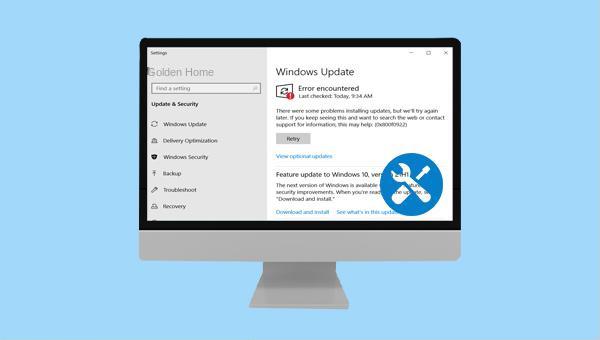
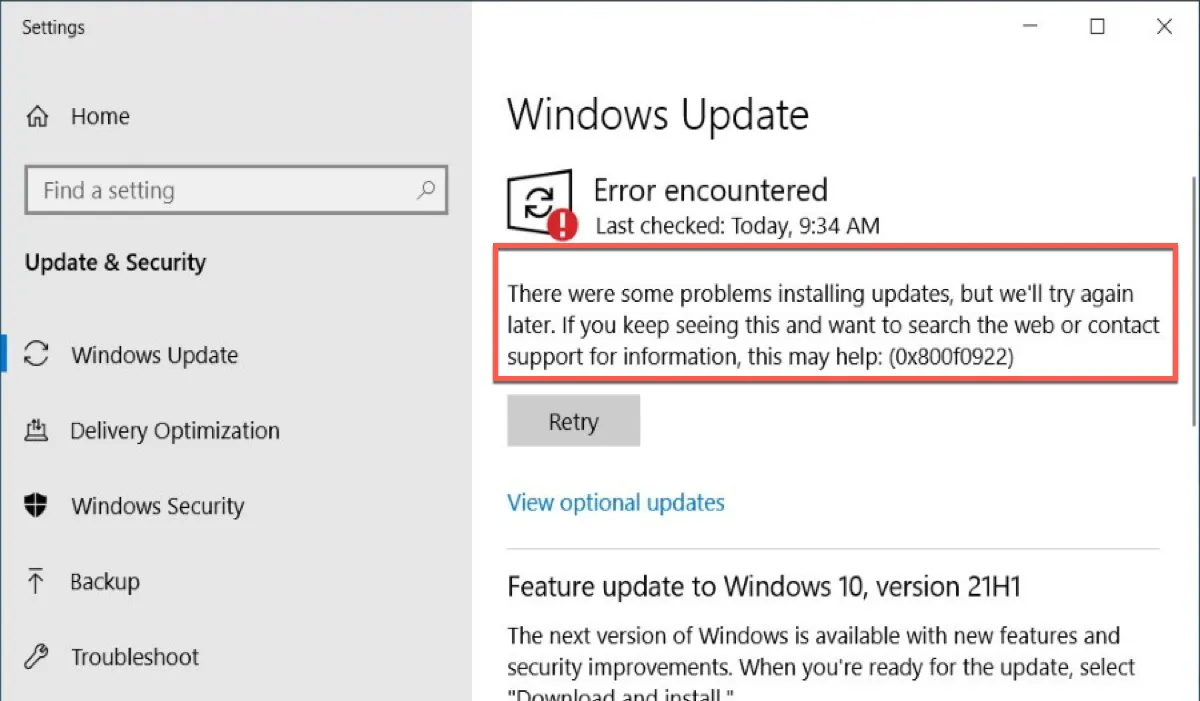
When Windows is updated, it prompts that an error has been encountered. The error code is 0x800f0922. The common reasons for its occurrence may be as follows:
● Attacks from viruses and other malware
● Unreliable network connection
● .NET Framework is not enabled
● Insufficient disk space on the system
● Firewall blocking updates
Update error code 0x800F0922
The following will introduce the corresponding repair methods for these reasons, please continue reading.

II. How to fix error code 0x800F0922?

To resolve the error, begin by running a virus scan with your anti-virus software to eliminate any malware. Ensure the network cable is securely connected and assess network stability using speed test tools or ping commands. If no viruses are found and the network is stable, proceed with the following troubleshooting steps.

1. Check and clean up disk space

Having enough disk space is important for Windows updates to complete smoothly. Please follow the steps below to check and clear the disk space.
Step 1: Boot your computer and press Windows+I to open the Settings. Navigate to System > Storage to check your system disk’s storage usage. Should the free space be less than 8GB, this may not suffice for Windows updates, and clearing disk space would be advisable.
Windows temporary files
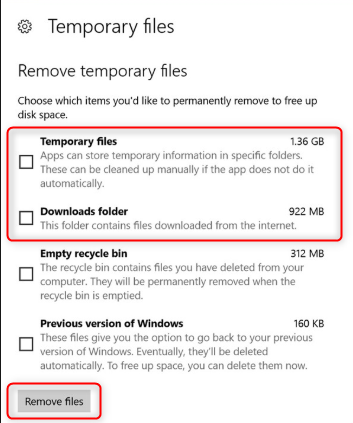
Step 2: To free up disk space, uninstall unnecessary applications, delete dormant local accounts, and remove temporary files. Click on temporary file to see a list of deletable files, choose the ones to remove, and then click Remove file.
remove temporary files
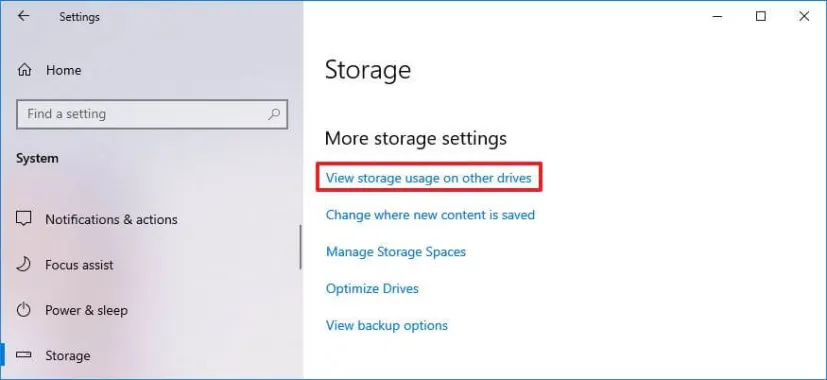
To efficiently clean ancillary disks apart from the system disk (C:), proceed to Windows Settings and choose System > Storage > Check the storage usage on other drives. This enables you to assess whether you should liberate space on those disks.
View storage usage on other drives

2. Enable the .NET framework

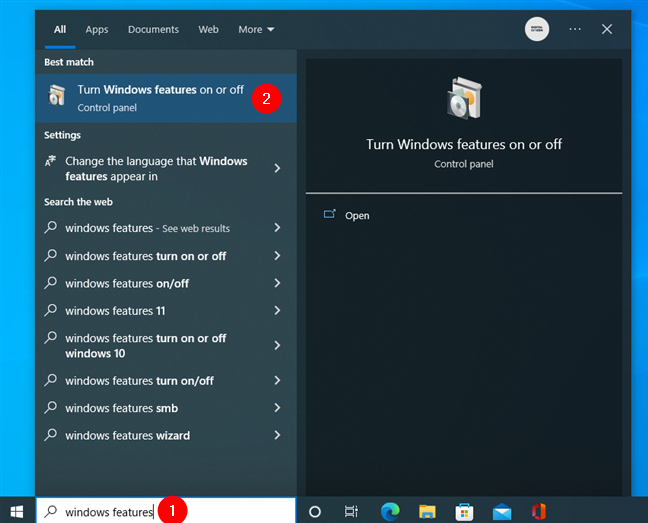
Step 1: Turn on the computer, enter (Windows features) in the search box in the lower left corner, and click (Turn Windows features on or off) in the search results.
Search Windows Features in task bar
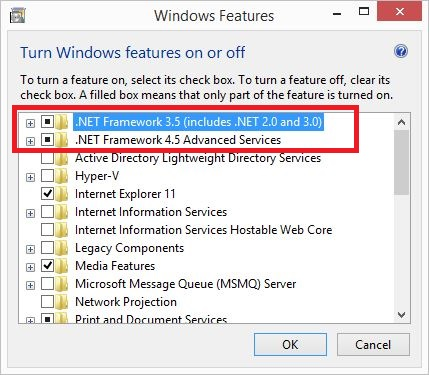
Step 2: In the opened interface, check all the options that include .NET Framework, and click (OK) to enable the .NET Framework. Then restart your computer and try updating again.
Windows Features Enable .NET Framework

3. Run the Windows Update Troubleshooter

We can also try to run the Windows update troubleshooter to solve this problem, the following are the detailed steps:
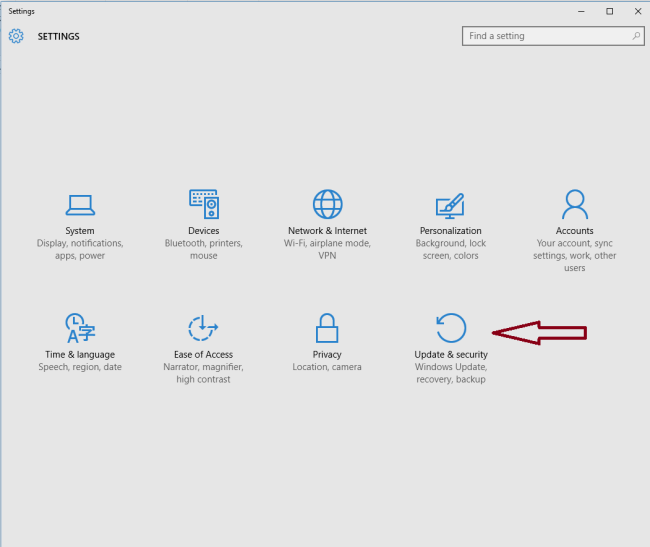
Step 1: Run the computer, press the (Windows+I) key on the keyboard at the same time to open the setting interface. Then click into the (Update and Security) option.
settings Update And Security
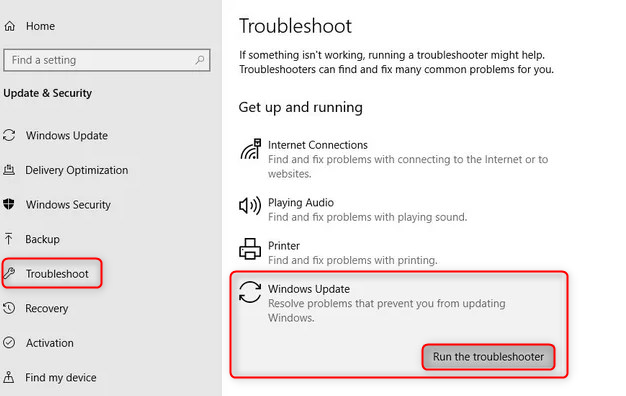
Step 2: Navigate to the function bar on the left and click on Troubleshooting. Select Windows Update on the right and hit the Run Troubleshooting button. After the process finishes, check if the issue is resolved. If your system version doesn’t support direct access to the Windows Update Troubleshooter, go to Other Troubleshooters to launch it.
run windows update troubleshooter

4. Turn off the firewall

The firewall also sometimes blocks updates, try turning it off before installing Windows updates. The specific operation steps are as follows:
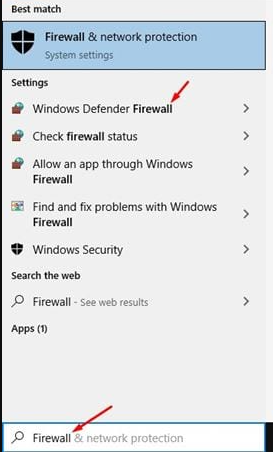
Step 1: Turn on the computer, search for (firewall) in the search box in the lower left corner, and click to open (firewall and network protection).
firewall and network protection
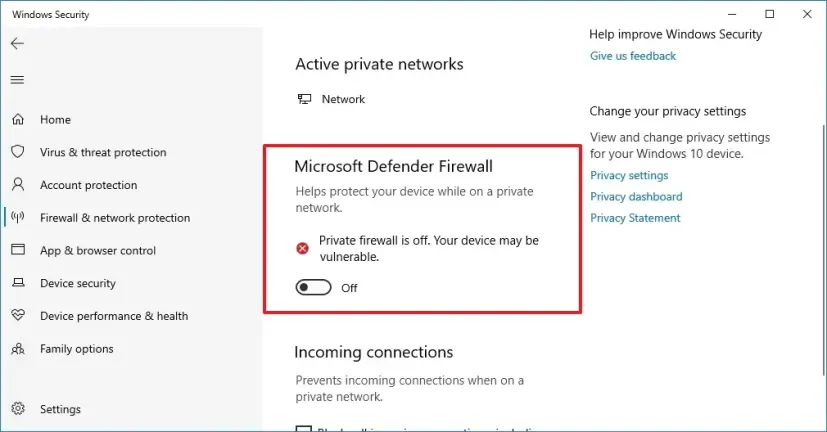
Step 2: Click (Domain Network), (Private Network) and (Public Network) in sequence, and turn off the switch in the newly jumped interface.
turn off firewall
Step 3: After closing the firewall, you can perform Windows update again, and then return to this interface to open the firewall after the update is complete.
Here are four common fixes for error code 0x800F0922. Should you experience data loss after resolving the error, consider using professional data recovery software like Renee Undeleter for retrieval. Follow the detailed instructions provided.

III. Recover lost files with Renee Undeleter

1. What is Renee Undeleter?

Renee Undeleter is a comprehensive data recovery software designed to recover various data files. Whether you’ve accidentally deleted files, cleared the recycle bin, or formatted a disk/storage device, Renee Undeleter can help retrieve your lost data. It features four key modules: file recovery, format recovery, partition recovery, and image creation, addressing a wide range of data loss scenarios. The software is compatible with internal hard drives, external hard drives, SD cards, USB sticks, and other storage devices that can connect to a computer. Additionally, Renee Undeleter supports file preview, allowing you to identify and recover the exact files you need.
Hot Topic - ADsRenee Undeleter – Simple & Powerful Software for Data Recovery

Easy to use Recover data by 3 steps;

Multiple scan modes Fast partition scan, whole partition scan and whole disk scan;

Supported file types Image, video, audio, text, email and so on;

Image creation Create a partition image to read and back up data;

Supported devices SD card, SDHC, SDXC, USB flash drive, hard disk and computer.

Easy to use Recover data by 3 steps;

Multiple scan modes Fast partition/whole partition/whole disk scan;

Supported devices SD card/USB/hard disk.

Free TrialFree TrialFree Trial 800 people have downloaded!
2. How to recover lost files with Renee Undeleter?

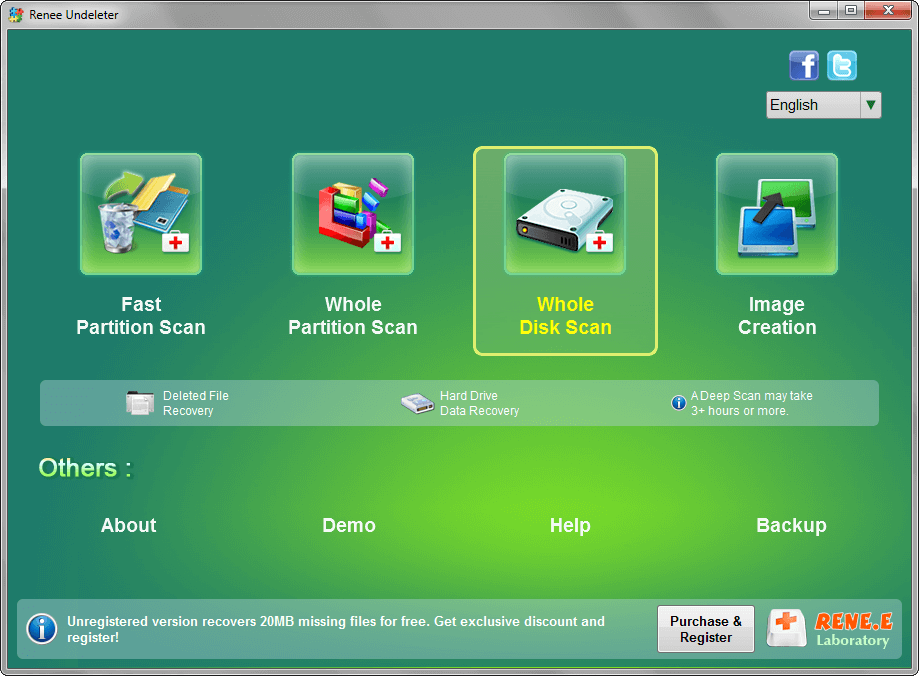
Step 1: Download, install and run Renee Undeleter on the computer, and select the (Whole Disk Scan) option on the main interface.
Note: Do not install Renee Undeleter in the disk where data is lost to avoid data overwriting.
select whole disk scan to scan disk in renee undeleter
Enhanced Data Recovery Capabilities

  • Fast Partition Scan: Recovers files swiftly after accidental deletion or when emptied from the recycle bin.
  • Whole Partition Scan: Restores files from partitions that are inaccessible or have been formatted.
  • Whole Disk Scan: Compiles partition details for an exhaustive disk examination.
  • Image Creation: Produces a partition mirror image for secure backup, enabling data recovery from the image itself.
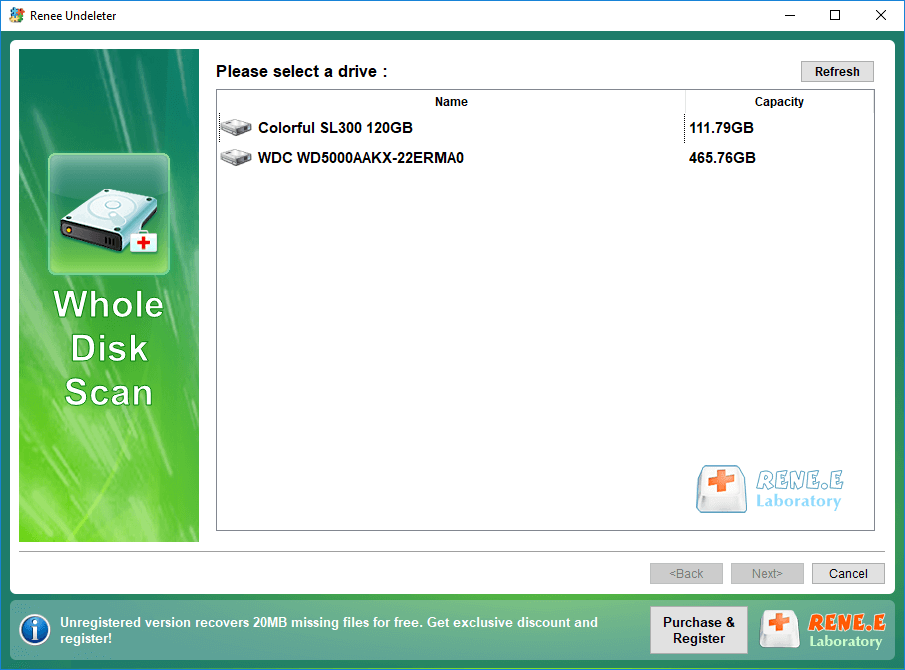
Step 2: Next, select the hard disk device that needs to recover data. After the selection is complete, click (Next).
select a disk to recover in renee undeleter
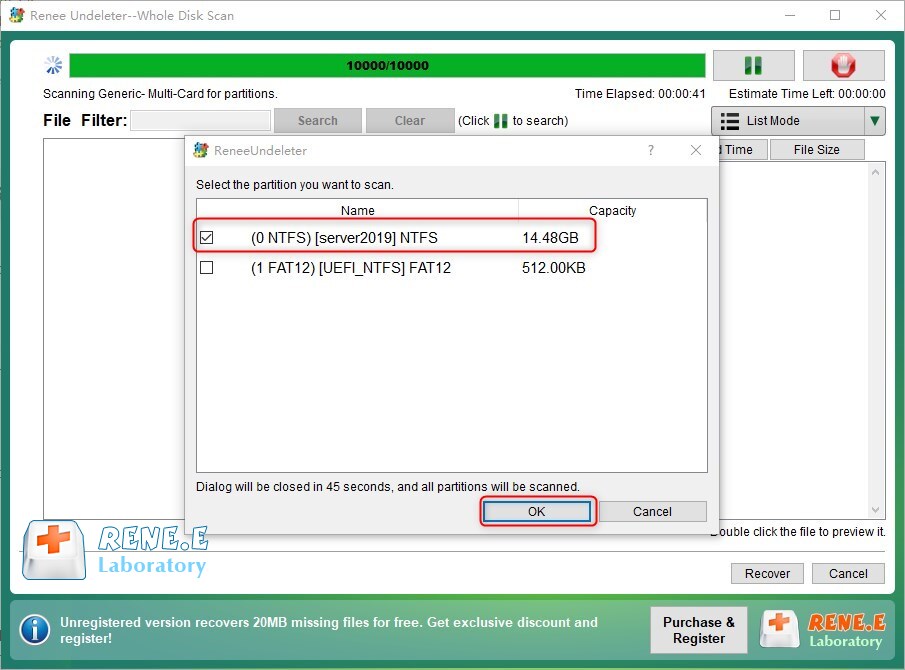
Step 3: Wait for the scan to complete, as it detects all hard disk partitions. Upon the appearance of the “Select the partition you need to scan” window, choose a partition; otherwise, if no partition is selected, the scan will default to all partitions. This will require more time but has the potential to recover more files.
recover partition on SD card with Renee Undeleter
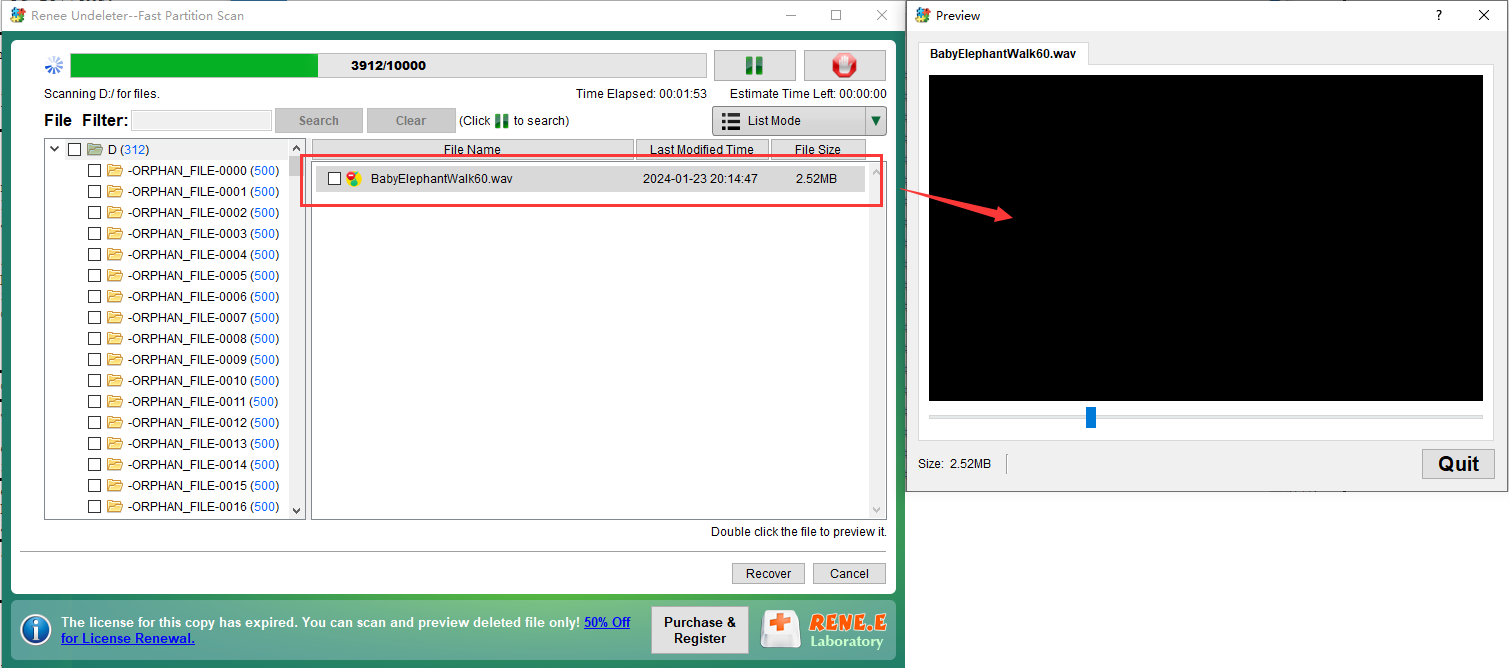
Step 4: Preview files during the scan process. After identifying all required files, select them and click the Recover button to save them onto a separate disk within your system.
Tip: To quickly locate specific files in a large scan result, utilize the “File Filter” feature. Simply type the desired file extension (e.g., mp3, mp4, doc) into the right-side box and press the Search button to identify files for recovery.
preview music files


preview before recovery