author avatar
    Specialist of Customer Service Dept.
 

Summary
Discover simple techniques for data recovery and effortlessly retrieve deleted photos from your mobile phone or camera with our comprehensive guide. Take advantage of Renee Undeleter, a professional-grade photo recovery tool, to ensure your cherished memories are never lost.


deleted photo recovery

I. How to recover deleted photos?

If you’ve mistakenly deleted photos, formatted the hard disk partition containing your images, or erased the partition, causing it to become “unallocated,” you can recover your files with Renee Undeleter by scanning the deleted partition and restoring your photos.

1. Recover via Renee Undeleter

①What is Renee Undeleter?
Renee Undeleter is a versatile data recovery software designed to retrieve various data files lost due to accidental deletion, recycle bin emptying, or disk formatting. It features four key functions: file recovery, format recovery, partition recovery, and image creation, addressing a wide range of data loss scenarios. Compatible with internal and external hard drives, SD cards, USB drives, and other storage media, it enables scanning and restoration of files with the added benefit of file preview to ensure precise recovery.
Renee Undeleter - User friendly & Helpful Formatted Data Recovery Software

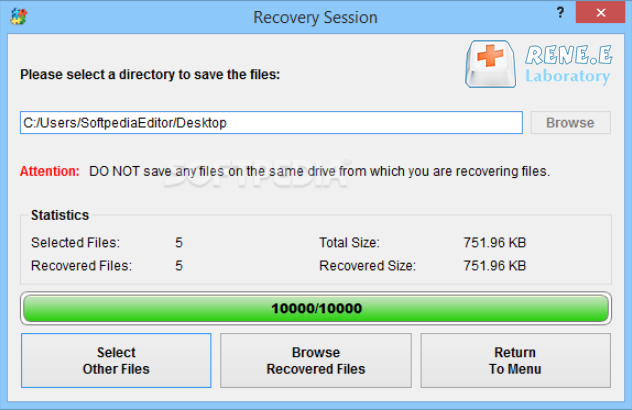
Easy to use 3 steps to recover formatted data back.

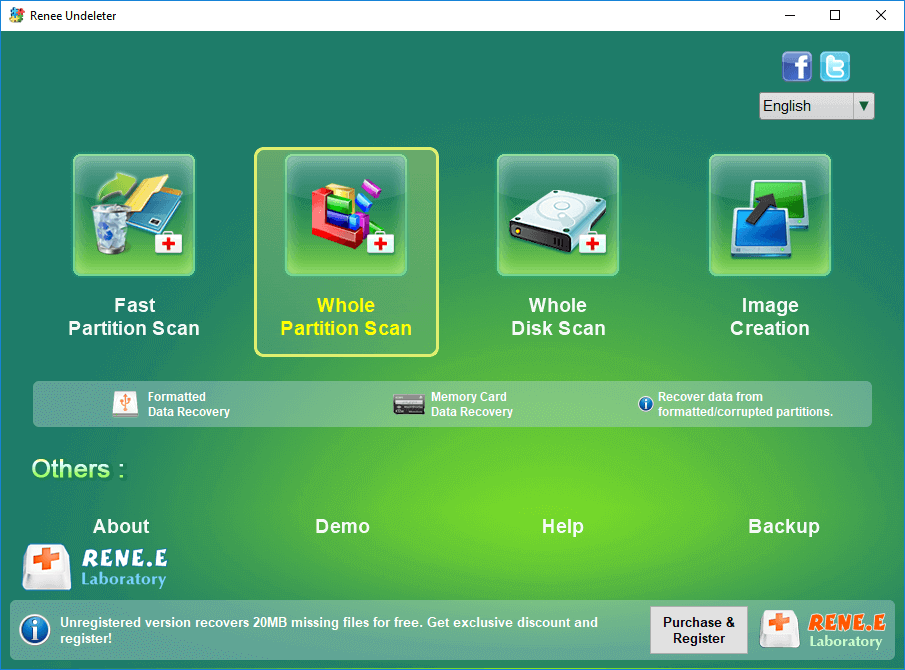
Multi Recovery Modes File recovery, Whole partition recovery and Whole disk recover are available.

Support Different File Types Photos, videos, audios, files, emails, etc.

Image Creation Creat image for disk or parititon.

Compatible with Different Devices SD card, SDHC, SDXC, USB disk, computer, etc.

Easy to go 3 steps for whole recovery.

Multi Recovery Modes Files/partition/disk recovery modes.

Support Different Devices SD card/USB disk/hard disk, etc.

Free TrialFree TrialFree Trial 800 users have downloaded and found data back!
②How to recover deleted photos with Renee Undeleter?
It is very simple to use Renee Undeleter to scan the hard disk and restore deleted files. The specific operation steps are as follows:
Step 1: Download, install, and launch Renee Undeleter. Choose Whole Partition Scan for issues like disk formatting or file system changes to RAW. If photos remain undetected, opt for Whole Disk Scan to conduct an extensive search, which also covers lost or “unallocated” partitions.
Note: Do not install Renee Undeleter in the disk where data is lost to avoid data overwriting.
select whole partition scan in renee undeleter to recover deleted video from sd card
Data Recovery Features:

  • Fast Partition Scan: Recovers files quickly after accidental deletions or recycle bin emptying.
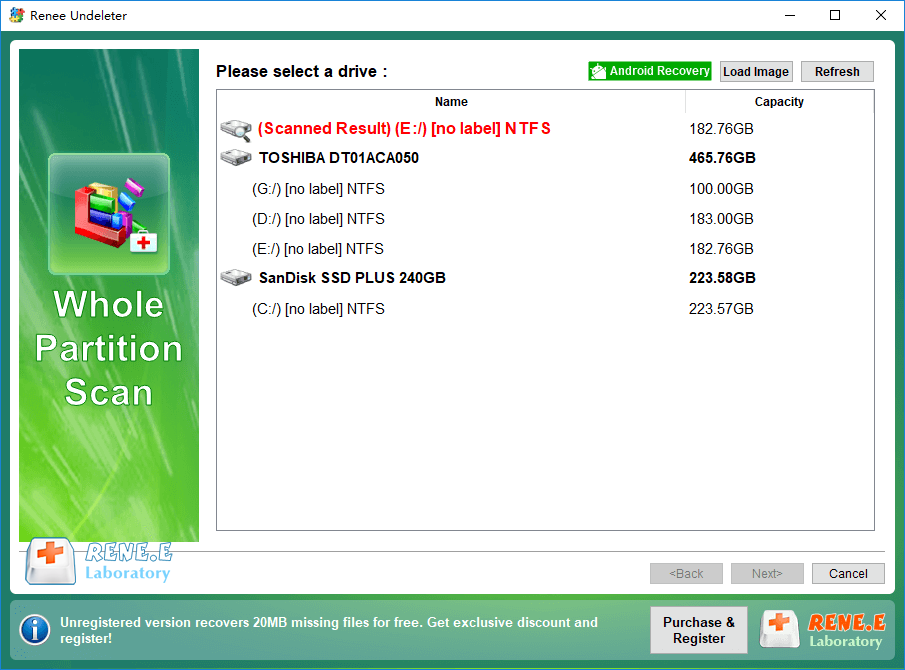
  • Whole Partition Scan: Restores files from inaccessible or formatted partitions.
  • Whole Disk Scan: Analyzes partition information and scans the entire disk thoroughly.
  • Image Creation: Generates a partition mirror image for backup, allowing data restoration from the image file.
Step 2: Next select the hard drive partition from which photos need to be recovered. After the selection is complete, click (Next).
Renee Undeleter Whole Partition Scan
Step 3: Wait patiently for the scan to complete. You can double-click the file to preview it. If it is the file you need, please check the target file and click the (Recover) button.
preview before recovery
Step 4: Choose an alternative hard disk partition for file storage by clicking the Browse button, then select Restore. Upon completion of the recovery process, inspect the retrieved photos by clicking Browse recovered files.
recover the whole disk data
Kind tips If you need to restore the photos in the Mac system, you can use the Mac version of Renee Undeleter to scan and restore them. For the specific steps, click here to view.

2. Restore via Recycle Bin

If you accidentally right-clicked and deleted a photo, you can recover it from the Recycle Bin, unless it’s been emptied. On a Mac, you can restore files by double-clicking the Trash icon, right-clicking the desired file, and choosing “Put Back.”
Step 1: Find (Recycle Bin) on the desktop and double-click the Recycle Bin icon.
open recycle bin windows 10
Step 2: After opening the recycle bin, determine the photo to be restored by file name, original location, deletion date and other information, right-click the target photo, and select (Restore).
Restore PPT files from recycle bin
Step 3: If the photos’ file names do not facilitate recognition, navigate to the View tab, select Detailed Information Pane for thumbnail previews. Find the relevant photo, right-click and select Restore.

3. Restoring from backup

Windows’ “File History” feature allows you to back up files. To use it, go to Settings > Update & Security > Backup, enable “Use File History for backup,” and under More Options, add your photos folder to the backup list. This enables you to recover your photos using File History.
Turn on backup using file history
Step 1: You can enter (file history) in the search bar, and click the (restore your files through file history) option.
Search file history
Step 2: Navigate through the file history using the control buttons to peruse backup files chronologically. Highlight the file or folder you wish to recover, and then press the restore button situated centrally to reinstate the photo file to its initial location.
file history restore file

II. Regularly backup photos to avoid data loss

File history is enhanced with user-friendly backup solutions such as Renee Becca, which provides automated, scheduled backups for a variety of elements such as systems, hard drives, partitions, and files. Below is a comprehensive look at the software’s capabilities.

1. What is Renee Becca

Renee Becca is a specialized tool for system and hard disk data backup and restoration, enabling you to safeguard crucial computer data such as programs, system settings, emails, photos, videos, documents, and bookmarks. By utilizing advanced incremental/differential backup technology, it not only saves time but also conserves disk space. It offers system, partition, hard disk, and file backup, in addition to disk cloning and system migration to cater to a variety of needs.
Renee Becca - Reliable Data Backup & Restore Software

Quick Backup files at up to 3,000MB/min.

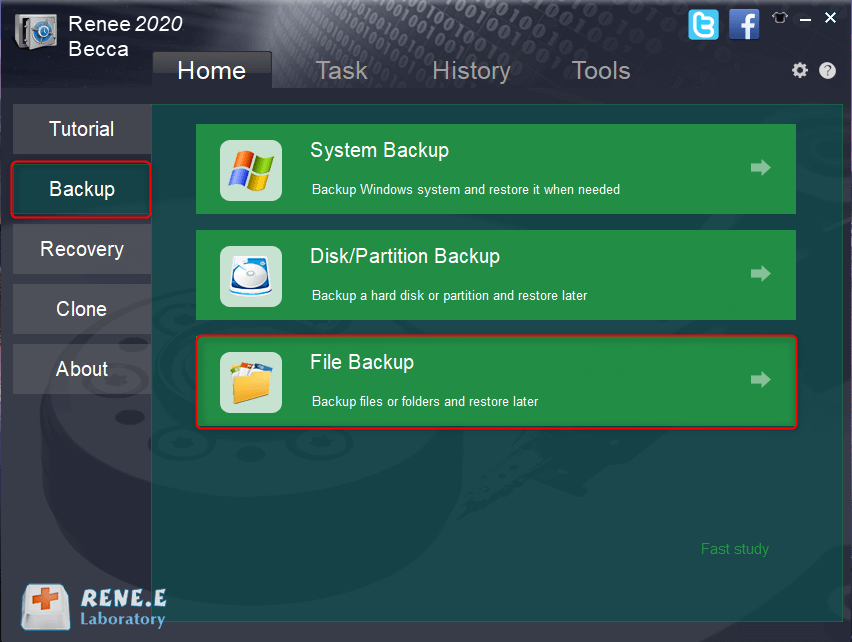
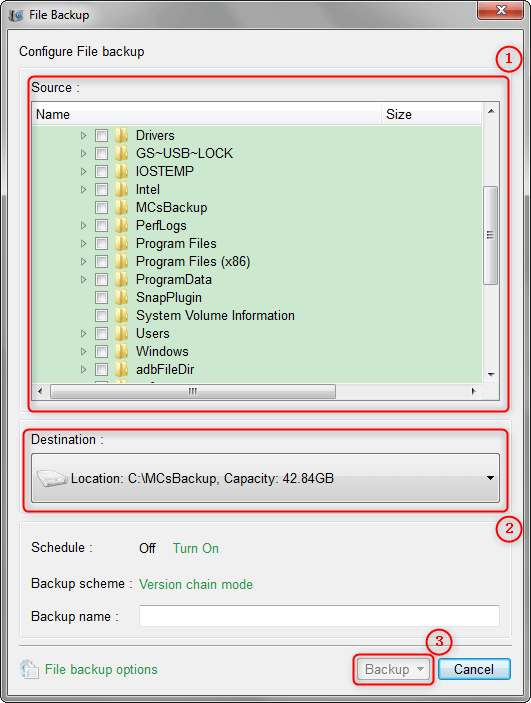
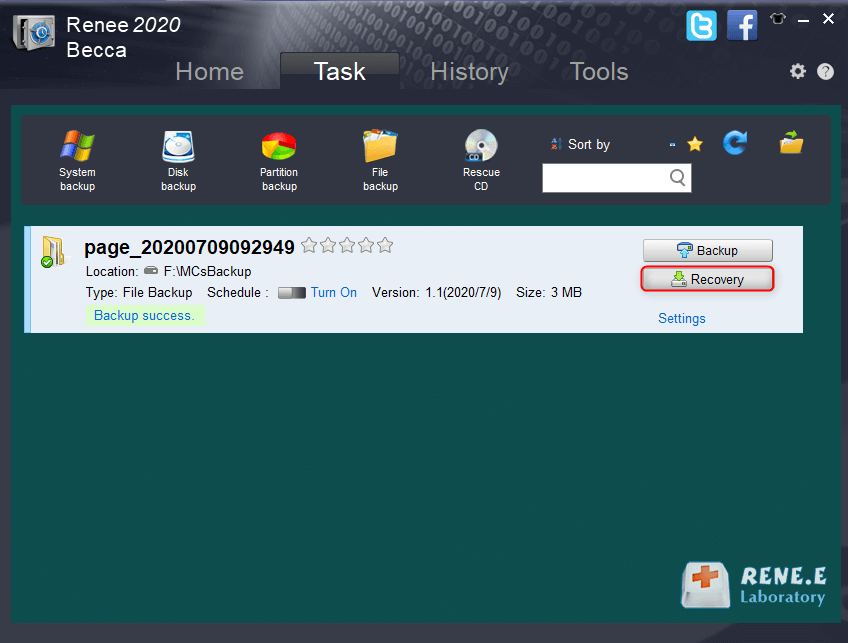
Fullfill different backup needs Supports system backup, disk / partition backup, file backup and disk clone.

Intelligent Automatically analyze the differences between source and backup data.

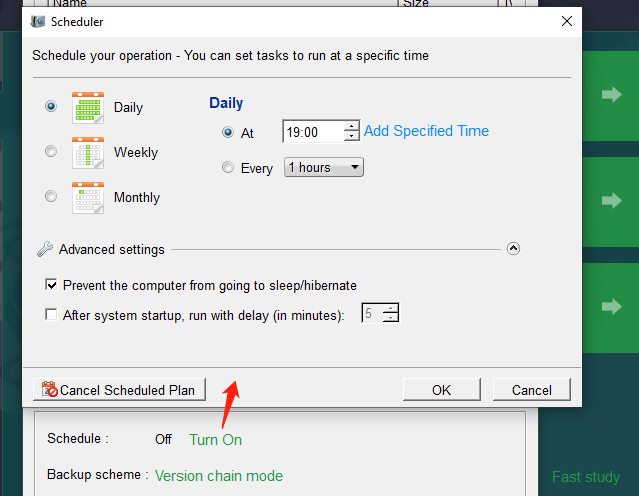
Convenient Support VSS, allowing to freely view webpages when backing up system.

Highly compatible Supports various files and storage devices.

Quick Backup files at up to 3,000MB/min.

Fullfill different backup needs Backup for disk, partition and system. Save disk space by backing up incremental /differential data.

Highly compatible Supports various files and storage devices.

Free TrialFree Trial 2000 users have downloaded and enjoy Renee Becca!

2. How to backup photos regularly with Renee Becca?

Regular backup of files with Renee Becca is very simple, the specific steps are as follows:
Step 1: Download, install and run Renee Becca on the computer, and select the (File Backup) option in the main interface (Backup) column.
click to back up files in renee becca
Step 2: Next, select the folder where the photos to be backed up are located in (source file (device)), and select the hard disk partition to store the backup data in (destination).
backup files
In the (Backup Scheme)-(Scheme Type) settings, select a backup scheme that fits your requirements. Renee Becca offers five options: version chain, single version, full, incremental, and differential modes.
file backup schedule on Renee Becca
Then in (Backup Scheme)-(Scheme Type), choose the appropriate backup scheme mode according to your personal needs. Renee Becca has 5 backup schemes to choose from, namely version chain mode, single version mode, overall mode, incremental mode and difference model.
backup mode of file backup on Renee Becca
Renee Becca provides a suite of five backup solutions:

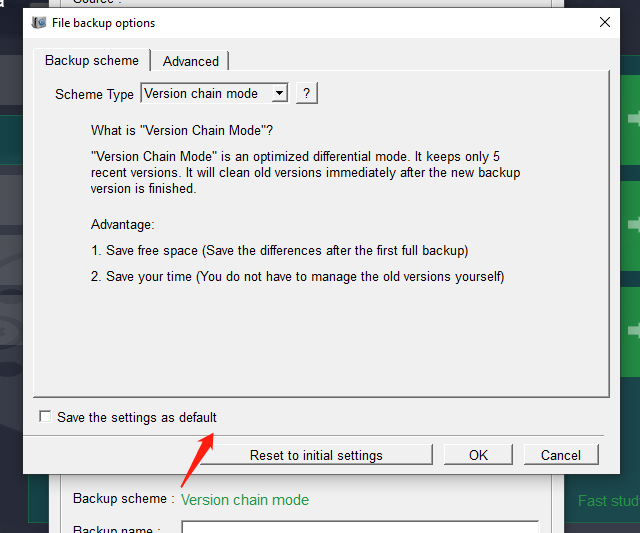
  • Version Chain: Keeps only the latest five versions, removing any versions older than that after each backup.
  • Single Version: Preserves solely the newest version by erasing the previous version following a backup.
  • Entire: Executes a comprehensive backup of all data.
  • Incremental: Performs backups incrementally after an initial full backup.
  • Differential: Creates backups that record the differences since the last full backup.
Step 3: Click the Backup button to initiate the file backup process based on your preferences. Monitor the progress in the taskbar. Once the backup finishes, use the Restore button to recover the files to your chosen hard drive if needed.
recover backup files from renee becca
Step 4: Then select the location where the files are to be restored, and click the (Restore) button.
recover the data from the backup file