30 June 2023Amanda J. Brook Senior Product Manager
Last update by William Davis at 8 February 2024
Summary This article explores the importance of information security for businesses in the face of rapid technological progress and recommends various robust encryption tools to thwart data breaches.
The leakage of enterprise information is caused by security holes in computer systems, including hacker invasions, viruses, internal security management measures, and intentional internal personnel leakage. The impact on enterprises and society is immeasurable.
(1) EXACTIS big data company: 2TB private information leaked
Information breach: 340 million records, involving 230 million people.
In June 2018, EXACTIS, a market and data aggregation company, suffered a server breach, leading to the unauthorized disclosure of approximately 2TB of meticulously detailed personal information. The exposed data encompassed religious beliefs, hobbies, and even clothing sizes of individuals.
(2) Tesla Motors: A large amount of data was stolen by former employees and released to the public
Information leakage: Tesla’s trade secrets and a large amount of internal company data.
On June 20, 2018, Tesla sued a former employee for stealing confidential information. The employee, a former process technician, developed malware to access Tesla’s internal production operating system. They stole a significant amount of data, including confidential photos and videos related to the production and manufacturing system, which they subsequently handed over to third parties.
II. Countermeasures
From the aforementioned cases, it is evident that the lack of file encryption has led to information leakage, creating vulnerabilities for exploitation. To address this issue, the “Rene.E Laboratory” series of encryption tools can be introduced, offering enhanced security effects. For instance, when encrypting USB files, the private disk feature of “Renee SecureSilo” can be utilized, while the monitoring read and write functionality of “Renee USB Block” can oversee the file operations meticulously.
(1) Use Renee SecureSilo private disk to protect files
Renee SecureSilo is a security software that prioritizes data security and file information protection. It utilizes private disk technology and allows for the secure storage of numerous confidential files. The software is user-friendly and easy to use.
Renee SecureSilo – Encrypt Confidential Data
Encrypt files in seconds Encrypt files with virtual encrypted disk and whole process can be finished in 1 second.
User friendly Concise interface helps users master the software in short time.
Here is an introduction to the main function of “Renee SecureSilo”: creating a private disk.
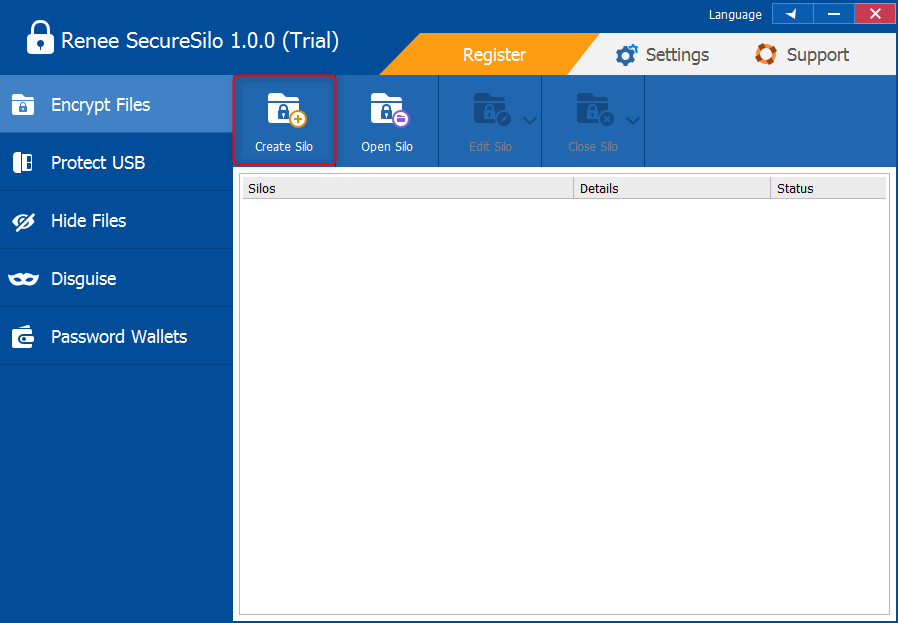
1. Download the “Renee SecureSilo” software on the computer for free, and open it to prepare for operation.
2. On the left side of the software interface, click “Encrypt Files” → select “Create Silo” to enter the creation interface.
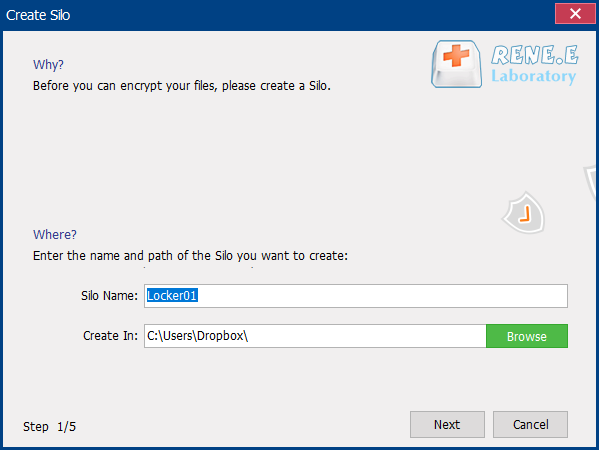
3. Set the name and save location of the private disk(Silo).
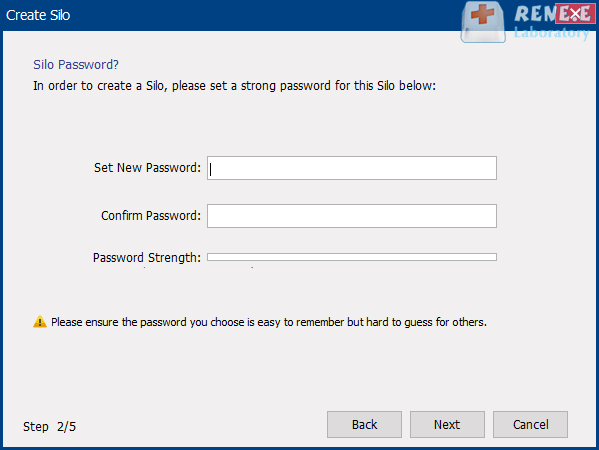
4. Enter the password setting interface, enter the unlock password at the position marked in the figure, and confirm again.
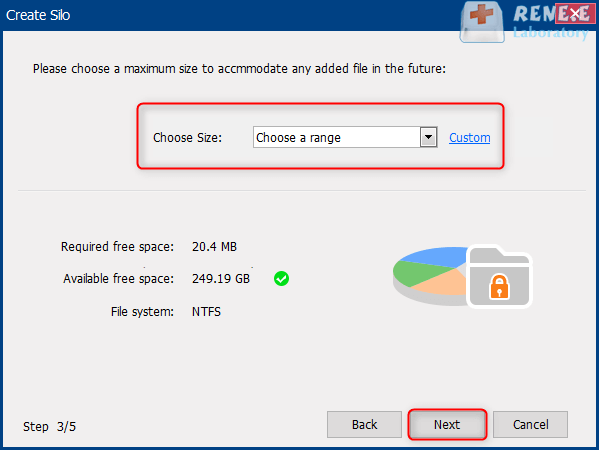
5. After the password is set successfully, enter the interface for selecting the size of the private disk(Silo), and select according to actual needs.
6. After waiting for a while, the private disk(Silo) is successfully created. Return to the previous interface, and the private disk we created will be displayed in the list.
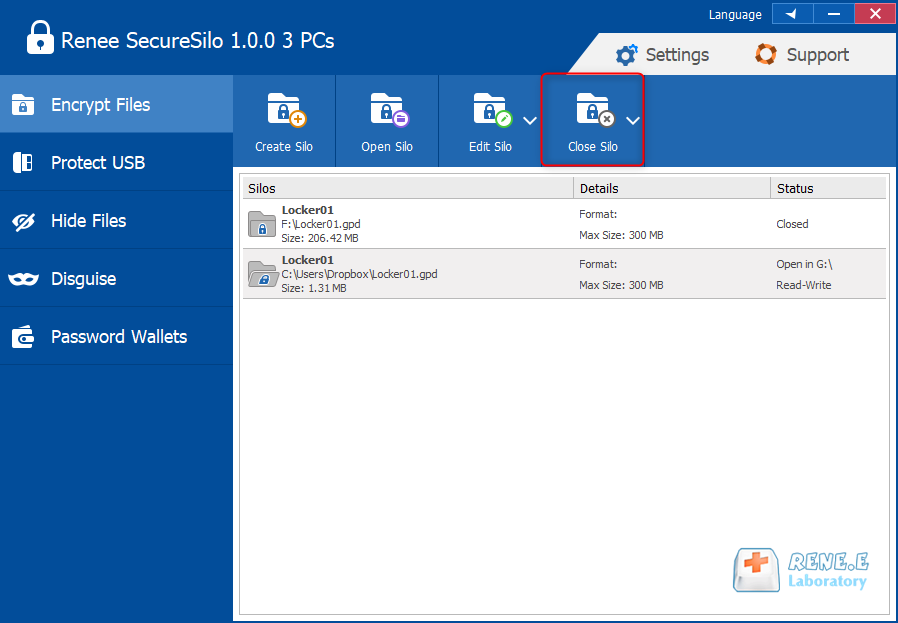
7. When we need to lock the private disk(Silo), select the private disk, and then click “Close Silo” in the upper toolbar.
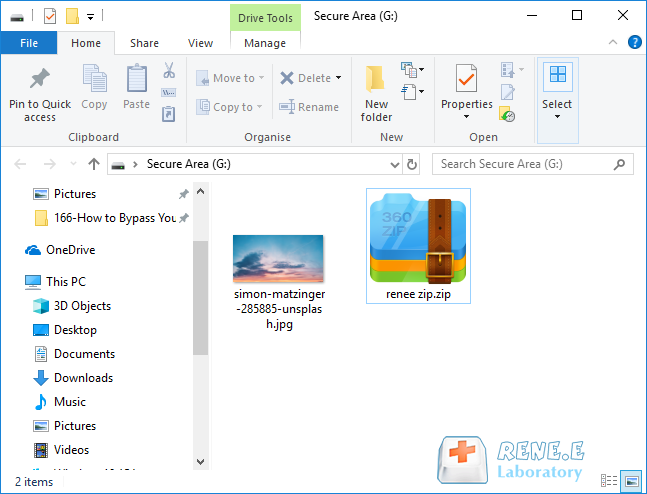
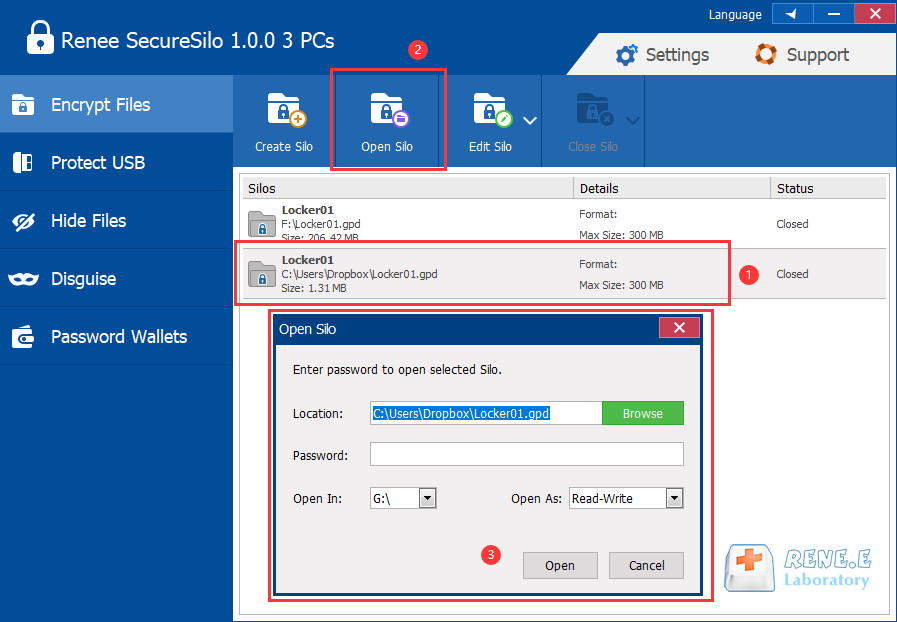
8. When unlocking the private disk, choose the private disk, click “Open Silo”, and enter the unlock password in the dialog window. Note that the opening method can be set to "readable and writable" for viewing and modifying the file, or "Read Only" for viewing without the ability to modify it.
(2) Enable the Renee USB Block locking function to protect files
Renee USB Block effectively manages external devices like USB memory and CD-ROM drive. It limits data writing and reading through mobile storage devices and offers website and program locking functionality.
Renee USB Block – Safe and Effective Solution to Protecting USB Port
Easily use Simple operations fit green hands and professionals.
Prevent from privacy leak Unauthorized external devices cannot run or obtain any information in PC.
Control and lock Users can lock devices, websites, applications and USB ports.
Monitor and logs Users can select the target directory to monitor and generate the history.
Self protection Lock itself if users enter the wrong passwords 5 times. Notification will be sent once wrong password entered over 5 times and password change. Password is also necessary when uninstalling.
Easily use Simple operations fit green hands and professionals.
Prevent from privacy leak Unauthorized external devices cannot run or obtain any information in PC.
Monitor and logs Monitor target directory and generate the history.
To ensure information security, it is important to consider the connection of external devices. Let’s now discuss the locking feature of Renee USB Block and the “white list” function for adding USB devices.ction of adding USB devices”.
1. Download the software for free, open it and prepare for operation.
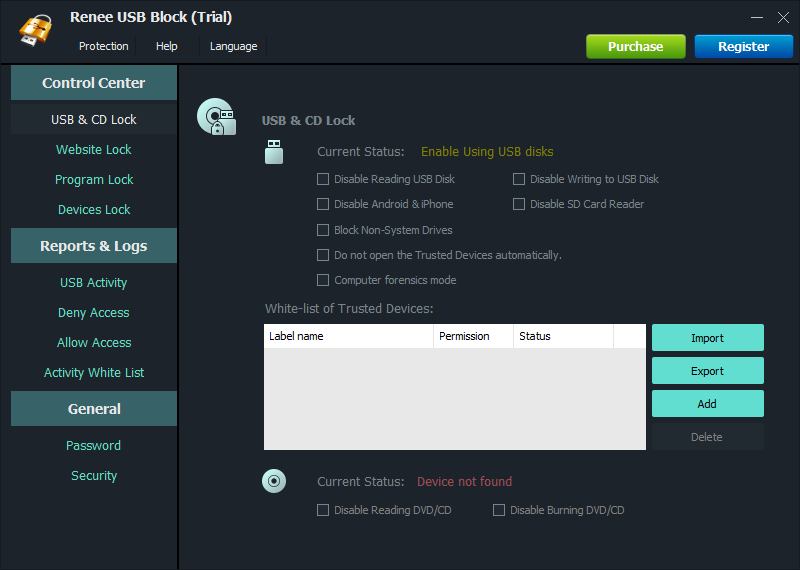
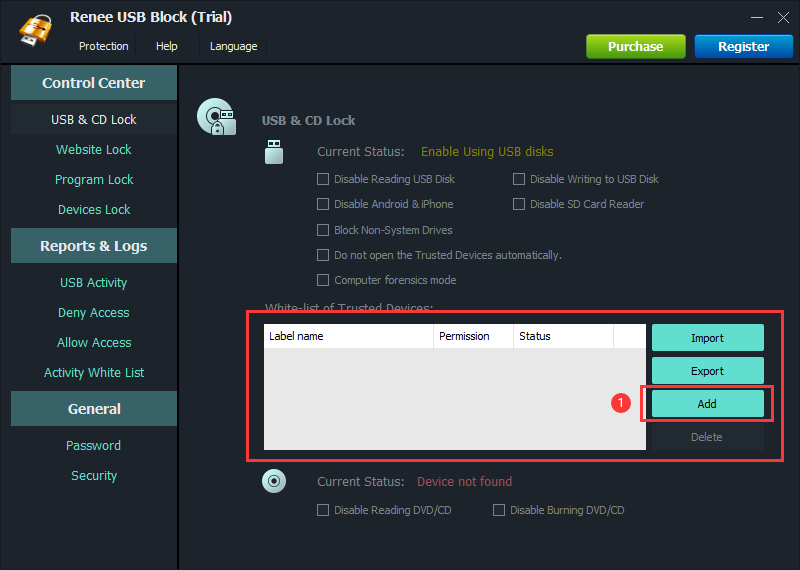
2. On the software interface, go to “Control Center” → “USB & CD Lock” to enter the selection interface. Choose the external device to be locked from the function bar on the right to restrict read and write operations on the external storage device.
3. Notice the “White List” column in the toolbar on the right.
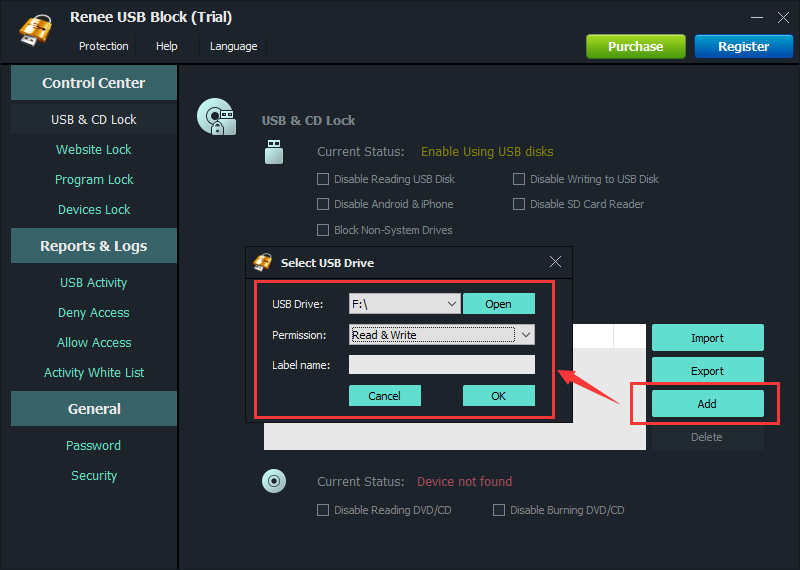
4. Connect the USB to the computer. The software will prompt a successful connection. Click “Add” and select the USB disk to add the trusted USB device to the white list.
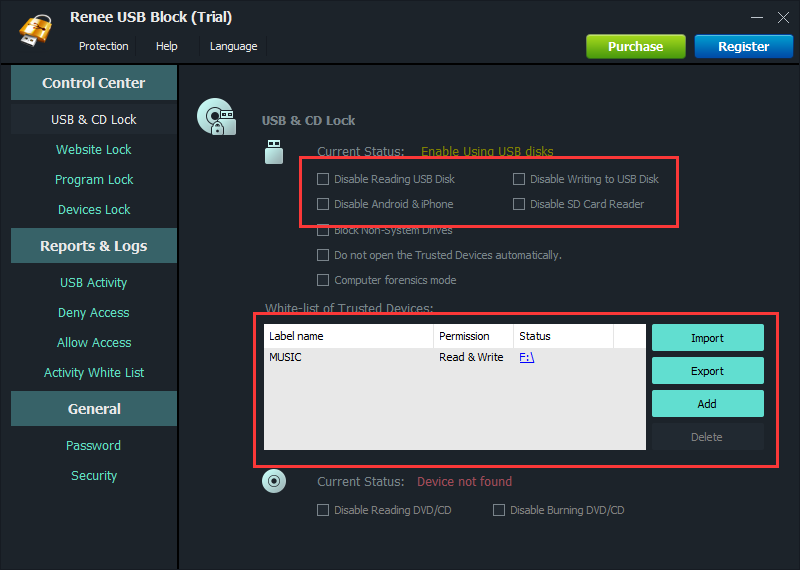
5. The USB mobile hard disk on the “white list” can still be read in the “prohibit USB disk” state, preventing unauthorized USB hard disks from accessing the computer.
(3) Use the file locking function of Renee File Protector
“Renee File Protector” is a powerful software that provides professional file protection. It offers encryption for local disks and external devices, restricts file operations, monitors file reading and writing, accurately records file opening and modification times, and enhances concealment by hiding folders.
Renee File Protector - Overall Protection to Your Data
Easy to use Few clicks for whole folder encryption process.
Overall protection Users can hide, lock or get other protection to files in local disk or USB disk.
High Security Classified encryption method prevents data from leakage.
Compression transfer Support to compress and encrypt any files to secure the file transfer security.
Advanced self protection Provide self
Easy to use Few clicks for whole folder encryption process.
Overall protection Users can hide, lock or get other protection to files in local disk or USB disk.
High Security Classified encryption method prevents data from leakage.
After using the private disk encryption function of “Renee SecureSilo”, you can continue to use “Renee File Protector” to encrypt the private disk twice for double protection.
1. Download the software for free on the computer and open it.
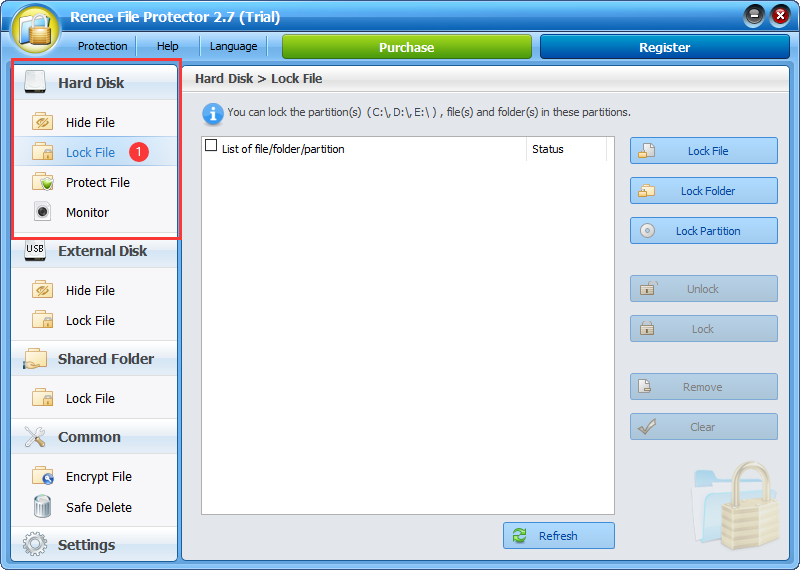
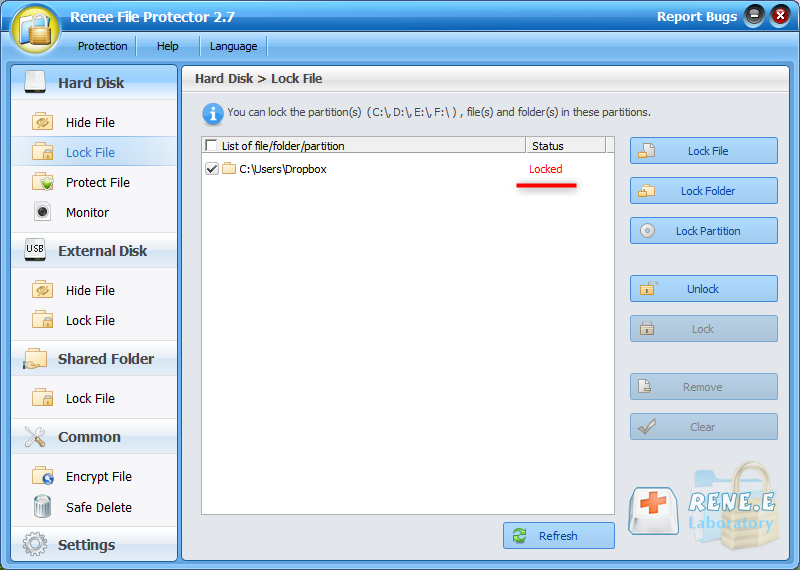
2. Select “Lock File” in the “Hard Disk” column on the left side of the software interface.
3. Click Add in the right menu bar, select Renee SecureSilo’s private disk set, and the software will automatically register and lock it. This restricts the unlocking of the private disk. To use the private disk, simply click and enter the software’s unlock password.
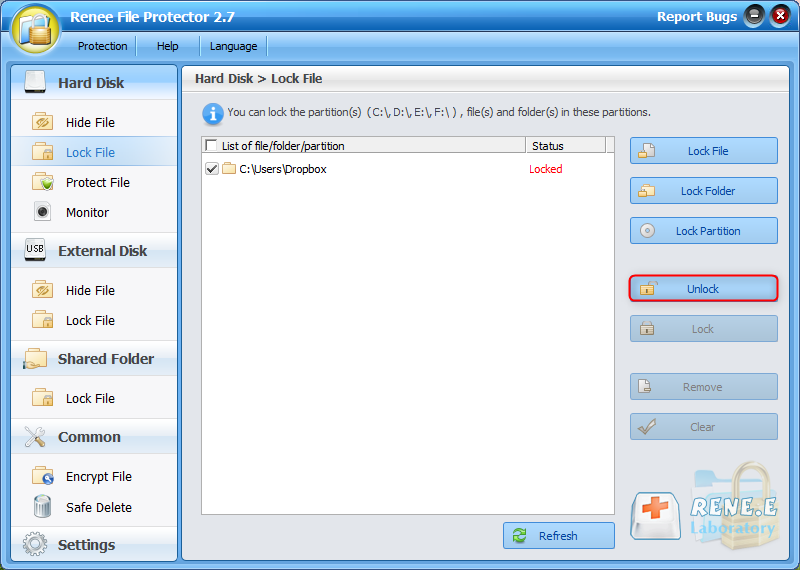
4. When we do not need to lock the private disk, check the disk directly, and then click “Unlock” on the right.
Amanda J. Brook : With the relentless evolution of the Internet, we've unlocked immense conveniences that have transformed our daily existence. However,...