author avatar
    Senior Product Manager
 

Summary
Discover effective solutions to resolve the "Device was not migrated due to partial or ambiguous match" error and prevent it from disrupting your workflow.
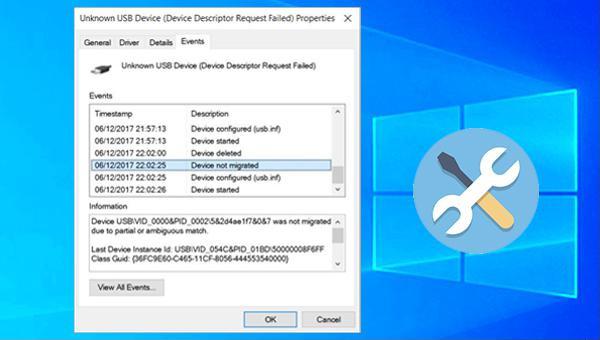
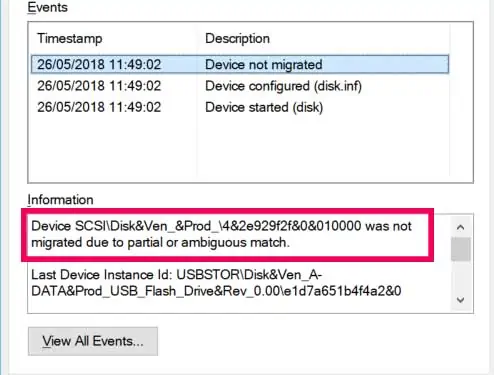

Device was not migrated due to partial or ambiguous match

I. Regarding the Device was not migrated due to partial or ambiguous match error

The error “Device was not migrated due to partial or ambiguous match” often occurs when updating from an older system, establishing a dual-boot system, using incompatible drivers, encountering corrupted system files, dealing with malfunctioning computer interfaces, or attaching unsupported devices.
Device was not migrated due to partial or ambiguous match
After understanding the relevant information about the error that the device cannot be migrated, let’s learn about the solution to this problem together.

II. How to fix Device was not migrated due to partial or ambiguous match?

1. Check the device interface with problems

Check if the USB interface is faulty by removing and reinserting it or replacing it. Close files accessed from a storage device before removal to avoid file damage.

2. Reinstall the driver

The “Device was not migrated due to partial or ambiguous match” error can be caused by incompatible drivers. Therefore, it is recommended to reinstall the driver to solve it.
Step 1: Right click on (Start), select (Device Manager).
right click at start menu and select device manager
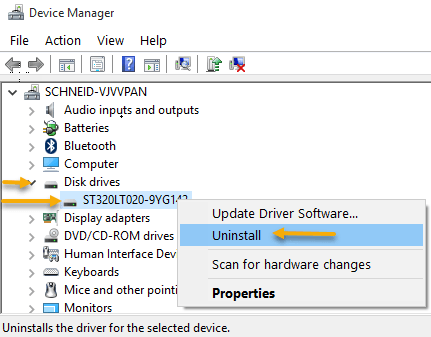
Step 2: After opening the Device Manager, select the device with the error, right-click on it, and select (Uninstall Device).
Uninstall a program
Step 3: Query and open the official website of the device through a browser, download the latest driver file of the device from it, and then install the file.
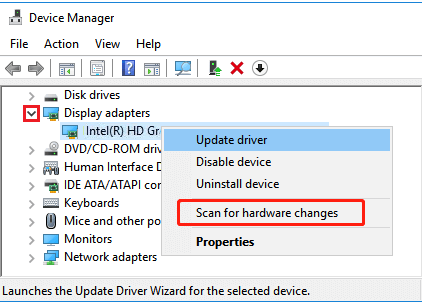
If you cannot find the official website of the device, you can also click (Operation) in the Device Manager and select the (Scan for hardware changes) option after uninstalling the device.
scan for hardware changes-display adapters
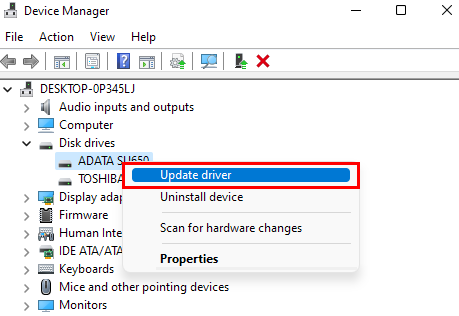
Step 4: After selecting the target device with the mouse, click (Update Driver)-(Automatically Search Driver) to update the device driver to the latest version.
update driver disk
TipsIf you encounter the “Device was not migrated due to partial or ambiguous match” message after updating a driver, you may need to revert to the previous driver version. Follow these steps: right-click the affected device, select Properties > Driver > Roll Back Driver.

3. Perform Windows Update

Some system errors will be fixed in the next Windows update, so try updating Windows to resolve the “The device could not be migrated because it only partially matches or the match is ambiguous” error.
Step 1: On another computer, press (Windows+I) key to open Settings. Select (Update & security).
windows updates and security
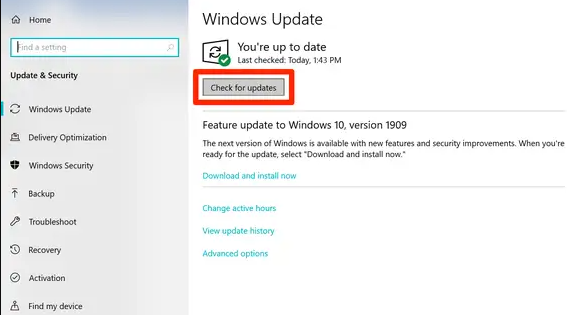
Step 2: Select (Windows Update) on the left, click the (Check for Updates) button on the right, wait for the update to complete, then restart the computer to check for resolution.
check for updates Windows 10

4. Run SFC and DISM commands

The error that the device cannot be migrated may also be caused by system file corruption, which can be scanned and repaired by SFC and DISM. They are utilities built into Windows that scan for and automatically repair corrupted system files.
Step 1: Search (cmd) in the search box on the taskbar in the lower left corner, right-click the search result, and select (Run as administrator) to open the command prompt tool.
run as administrator
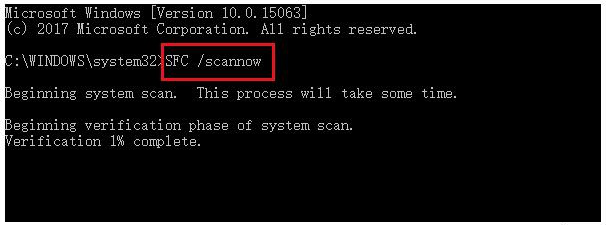
Step 2: Open Command Prompt, type SFC /scannow and press Enter. System File Checker will scan and repair any corrupt system files. If issues persist, proceed to the next step.
sfc command
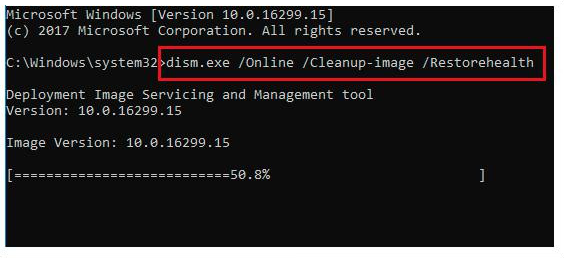
Step 3: In the Command Prompt window, type dism.exe /Online /Cleanup-image /Restorehealth and press Enter. This will repair corrupted system files. Once the command completes, restart your computer to see if the issue is resolved.
dism command

5. Perform System Restore

If you have created a Windows restore point before the “The device could not be migrated because it only partially matches or the match is ambiguous” issue occurs, you can try to perform a system restore. Specific steps are as follows:
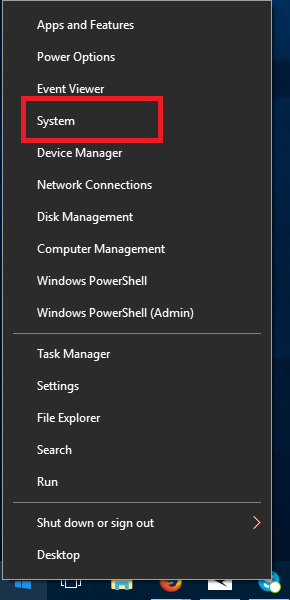
Step 1: Right-click (Start), and select (System).
right click start menu , select system
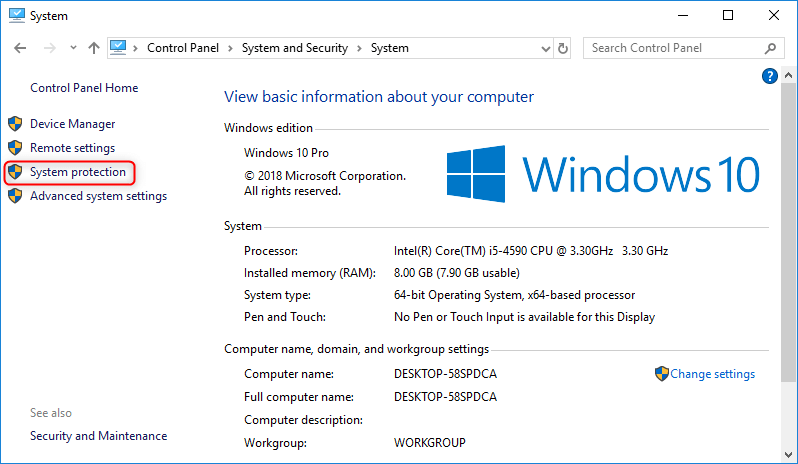
Step 2: In the (About) interface, select (System Protection).
select system protection
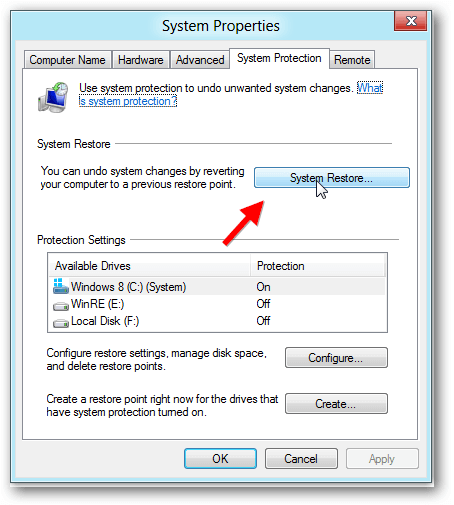
Step 3: Select System Restore under the System Protection tab. Choose the latest restore point from before the problem occurred and click Next. A confirmation prompt will display; click OK to begin the system restoration process.
System Restore Point thumb
To address this issue, consider resetting and updating the BIOS. Additionally, for lost files not found in the recycle bin, use the data recovery software mentioned below to scan and recover them.

III. (Extended information) Use Renee Undeleter to recover lost data

1. What is Renee Undeleter?

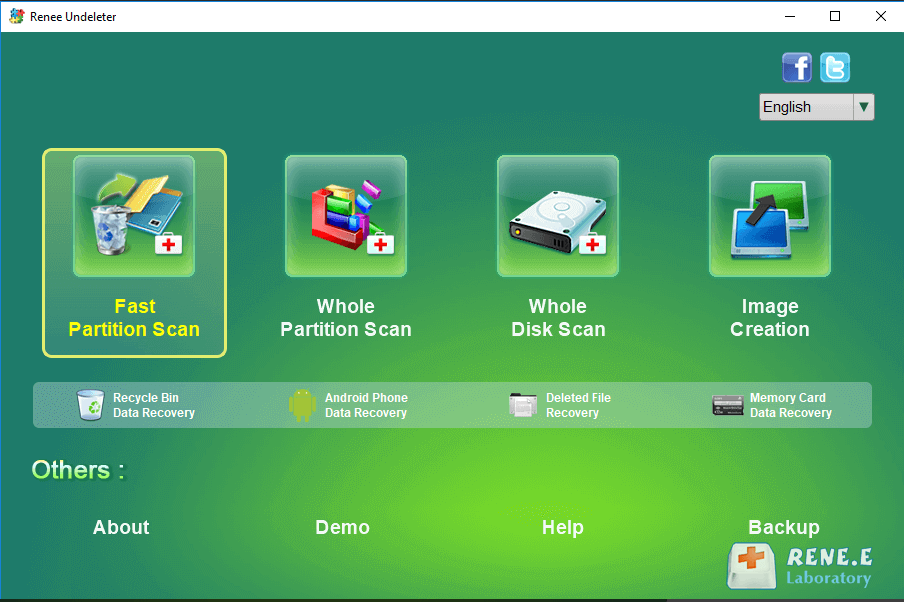
Renee Undeleter is a professional data recovery tool designed to retrieve a wide range of data types such as documents, photos, videos, and compressed files. Whether you have accidentally deleted files, emptied the recycle bin, formatted the hard drive, or mistakenly deleted partitions, this software is equipped to help you recover your lost data. It allows you to perform a scan and recover files as long as they have not been overwritten. Renee Undeleter boasts four functional modules: Fast Partition Scan, Whole Partition Scan, Whole Disk Scan, and Image Creation, catering to a broad spectrum of data recovery needs.
Hot Topic - ADsRenee Undeleter – Simple & Powerful Software for Data Recovery

Easy to use Recover data by 3 steps;

Multiple scan modes Fast partition scan, whole partition scan and whole disk scan;

Supported file types Image, video, audio, text, email and so on;

Image creation Create a partition image to read and back up data;

Supported devices SD card, SDHC, SDXC, USB flash drive, hard disk and computer.

Easy to use Recover data by 3 steps;

Multiple scan modes Fast partition/whole partition/whole disk scan;

Supported devices SD card/USB/hard disk.

Free TrialFree TrialFree Trial 800 people have downloaded!
2. How to recover lost files with Renee Undeleter?

The specific steps to recover files with Renee Undeleter are as follows:
Step 1: Download, install and run Renee Undeleter on a Windows computer, and select the (Fast Partition Scan) option on the main interface.
Avoid installing software on the disk requiring data recovery to prevent data overwriting. Also, refrain from saving new data to the same disk partition after file loss to avoid damaging or losing the lost file.
data recovery in renee undeleter
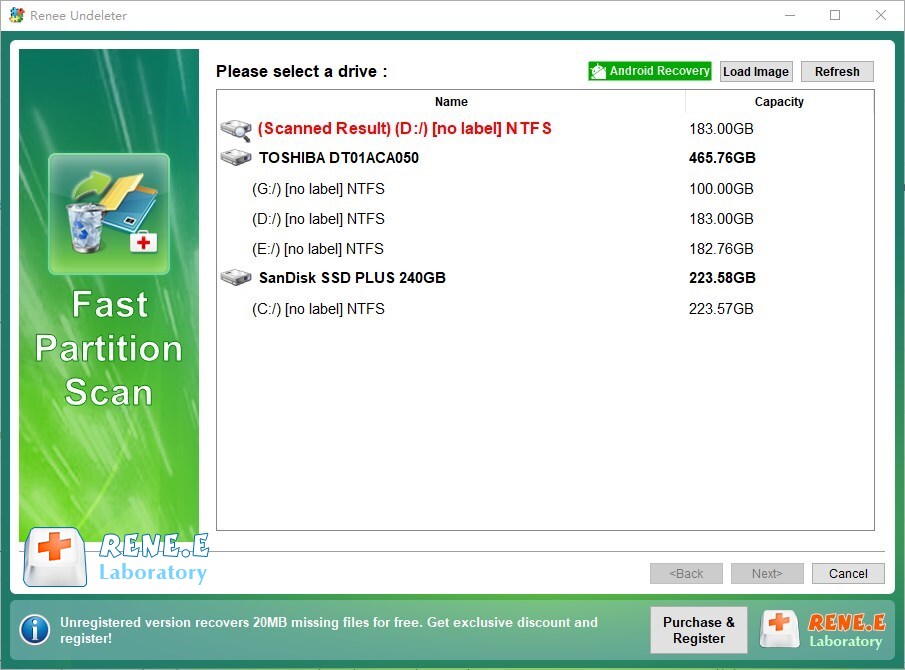
Step 2: Select the partition where the lost data is located and click on (Next).
scan disk with Renee Undeleter
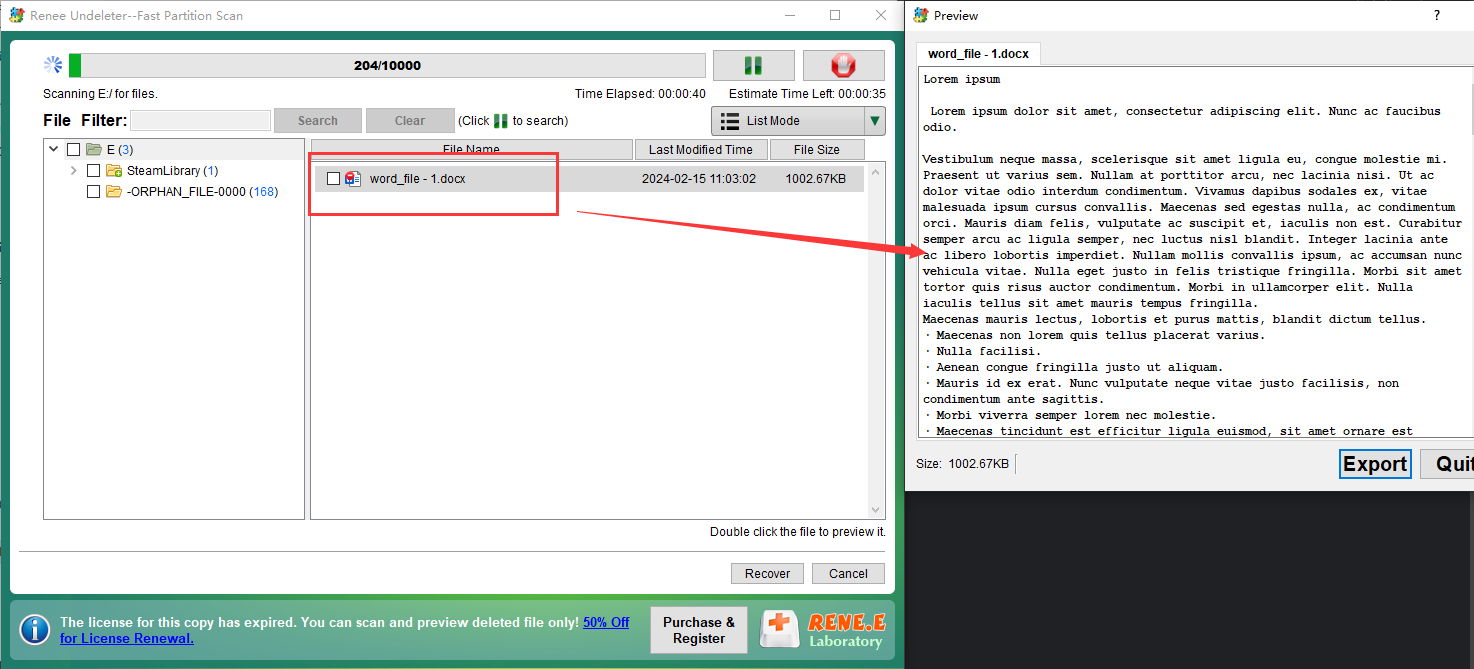
Step 3: Select the (Fast Scan) option and click the (Next) button to scan.
Tips: The fast scan mode scans the first 30GB of remaining space on the selected disk. If the desired file is not found, use the deep scan mode to scan the hard disk partition again for more data.
preview before recovery
undeleter preview docx