author avatar
    Senior Product Manager
 

Summary
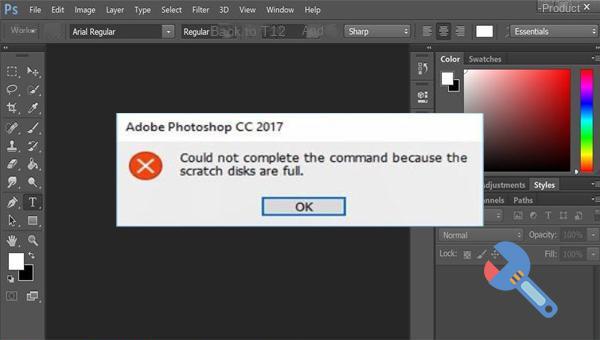
When you hit the "temporary storage disk is full" error in Photoshop, it's a real annoyance, but don't worry—there's a way through it. This guide is packed with proven solutions to fix this hiccup, ensuring you can return to your creative process without delay. And in the off chance you lose any important files while fixing the issue, we've got your back with methods to retrieve them. So let's tackle this together and get your Photoshop running smoothly again.


photoshop scratch disk full windows

I. What is a temporary storage disk, and what is the reason why the temporary storage disk of Photoshop is full?

The Photoshop scratch disk functions as temporary data storage. When working in Photoshop, it generates a temporary file corresponding in size to the project file, which can consume a considerable amount of space. If the scratch disk space becomes insufficient, Photoshop may experience issues, typically signaled by a 'scratch disk full' error. To fix this, you can either delete unnecessary files or reassign the scratch disk to a drive that has more than enough space.
In summary, Photoshop’s disk may become full due to excessive temporary files, cache buildup, and limited disk space. Knowing these causes, we can now explore solutions to address the issue.

II. How to deal with the problem that the temporary storage disk of Photoshop is full?

1. Change the location of the scratch disk

By default, Photoshop utilizes the C drive as its scratch disk, which might be constrained by limited space. To mitigate potential problems, it’s recommended to change the scratch disk location within Photoshop’s preferences.
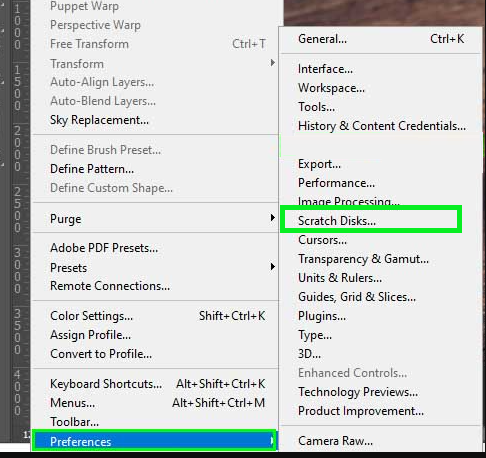
Step 1: Run Photoshop, find the (Edit)-(Preferences)-(Scratch Disk) option in the top function bar.
photoshop, select scratch disks
Step 2: Deselect the system disk C: and choose a drive with sufficient free space, for instance, D: or F:, ensuring it’s not the system disk. After this adjustment, click the OK button and restart Photoshop to confirm the resolution of the issue.
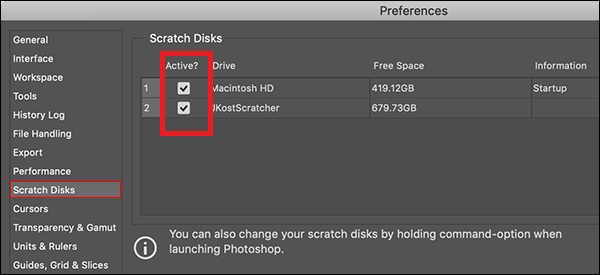
photoshop scratchDisks active more volumes

2. Delete temporary files in Photoshop

When there are too many temporary files in Photoshop, there may be a problem that the temporary storage disk is full. At this time, you need to clean up the temporary files. The specific operation steps are as follows:
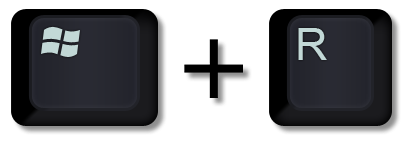
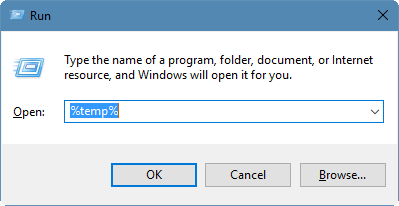
Step 1: Run the computer, press the (Windows+R) key at the same time, then type (%temp%) and press the (Enter) key.
windows Key + R
open command prompt to delete files
Step 2: Navigate to the temporary folder and use the search bar to look for Photoshop_TempXXXXXX or *.PST files. Right-click on these files and select Delete. Afterward, go back to the desktop, right-click the Recycle Bin, and choose Empty Recycle Bin. Relaunch Photoshop to verify if the problem has been resolved.
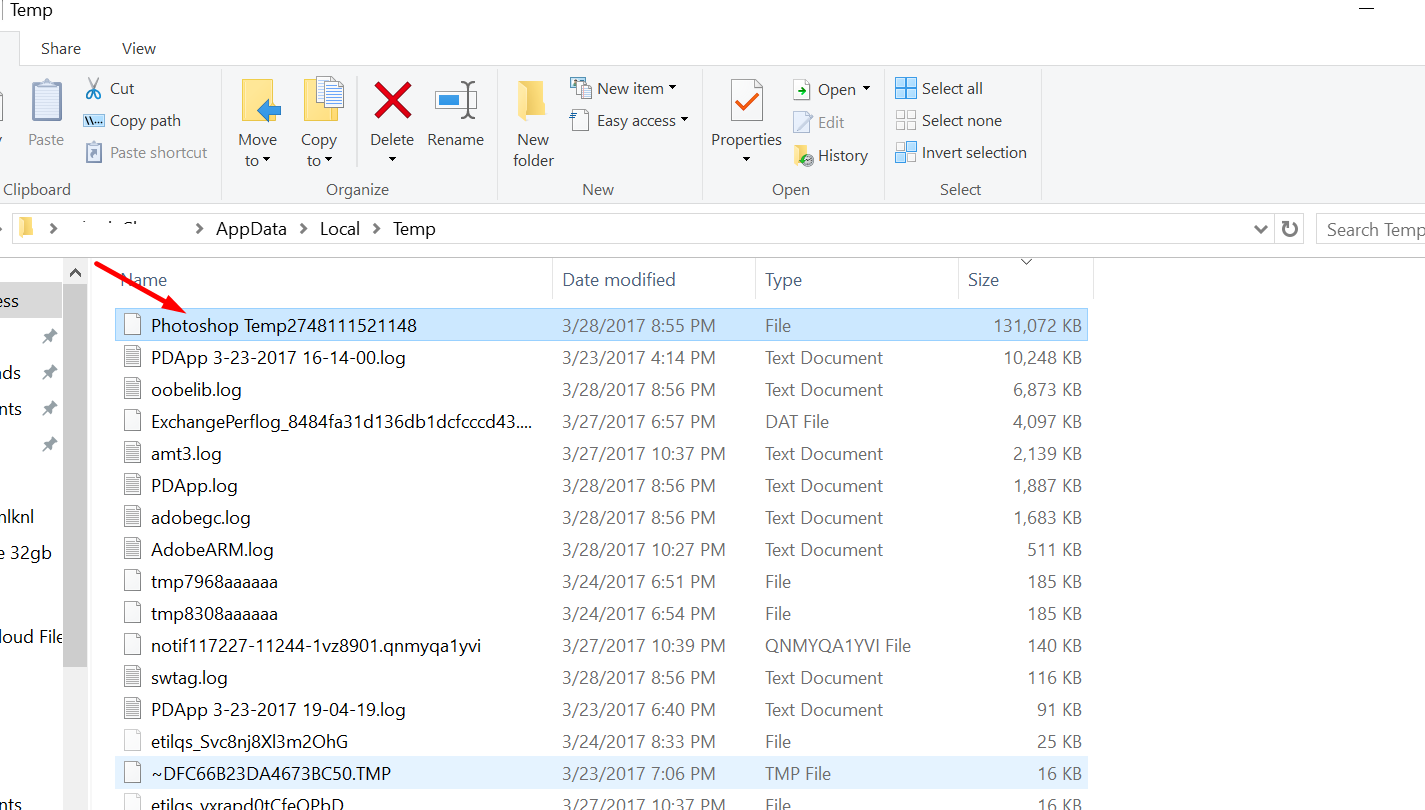
Find Photoshop temporary files

3. Increase the memory space for Photoshop

When the memory space allocated to Photoshop is used up, the scratch disk will be used as additional memory, so you can increase the memory space of Photoshop to solve the problem that the scratch disk is full.
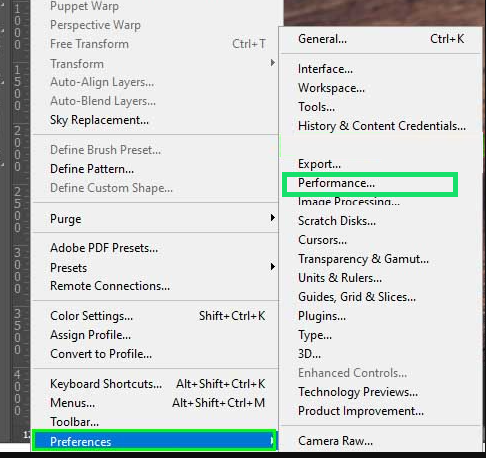
Step 1: Run Photoshop, find the (Edit)-(Preferences)-(Performance) option in the top function bar.
photoshop select performance
Step 2: Adjust the “Memory Usage” slider, ensuring it remains below 80% to avoid performance degradation. Restart Photoshop to implement the modifications and verify if the problem has been resolved.
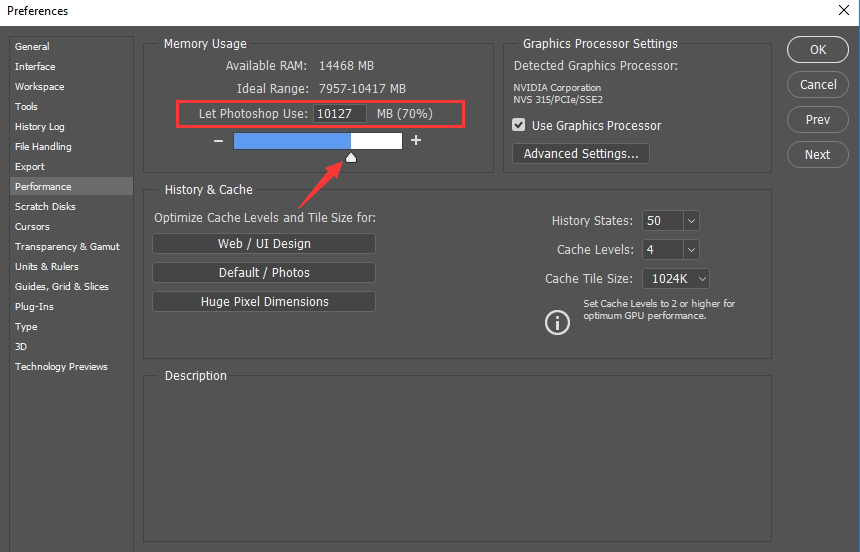
photoshop adjust performance

4. Uncheck Automatically store recovery information

To avoid file loss due to an unexpected exit from Photoshop, the software includes an auto-save recovery feature. However, this feature can consume considerable space on the scratch disk. Should you wish to disable auto-saving, follow these steps:
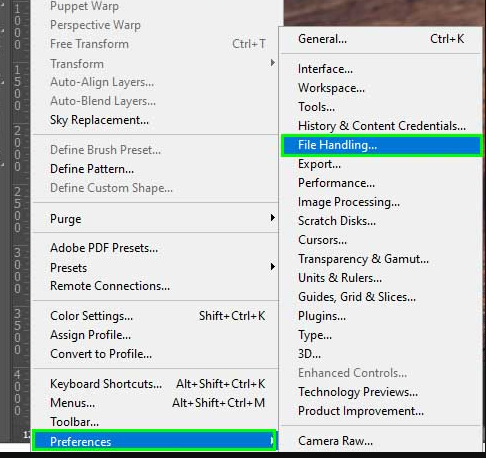
Step 1: Run Photoshop, find the (Edit)-(Preferences)-(File Handling) option in the top function bar.
Auto save in Photoshop and click on file handling
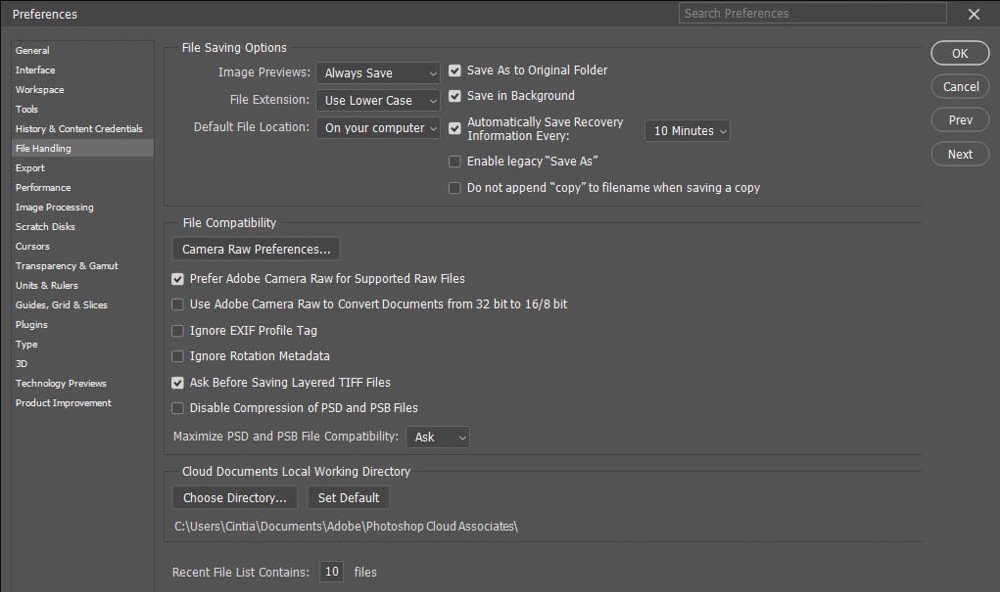
Step 2: Uncheck the “Automatically save recovery information interval” option and click "OK" to disable automatic recovery information storage. Restart Photoshop to see if the issue is resolved.
Auto save in Photoshop and settings
There are several methods to address a full Photoshop temporary storage disk. In the event of accidentally deleting vital files during the troubleshooting process, please see the instructions in part three for data recovery. Without further ado, let’s dive into the solutions.

III. When important files are accidentally deleted, use Renee Undeleter to retrieve them

1. What is Renee Undeleter?

Renee Undeleter is a versatile data recovery software featuring four key modules: file recovery, format recovery, partition recovery, and image creation. Its user-friendly interface ensures easy operation. The software provides a lifeline for recovering crucial files that you’ve accidentally deleted, emptied from the recycle bin, or lost due to disk/formatting issues, as long as the data remains unoverwritten.
Hot Topic - ADsRenee Undeleter – Simple & Powerful Software for Data Recovery

Easy to use Recover data by 3 steps;

Multiple scan modes Fast partition scan, whole partition scan and whole disk scan;

Supported file types Image, video, audio, text, email and so on;

Image creation Create a partition image to read and back up data;

Supported devices SD card, SDHC, SDXC, USB flash drive, hard disk and computer.

Easy to use Recover data by 3 steps;

Multiple scan modes Fast partition/whole partition/whole disk scan;

Supported devices SD card/USB/hard disk.

Free TrialFree TrialFree Trial 800 people have downloaded!
2. How to restore accidentally deleted files with Renee Undeleter?

Restoring files with Renee Undeleter is very simple, the specific steps are as follows:
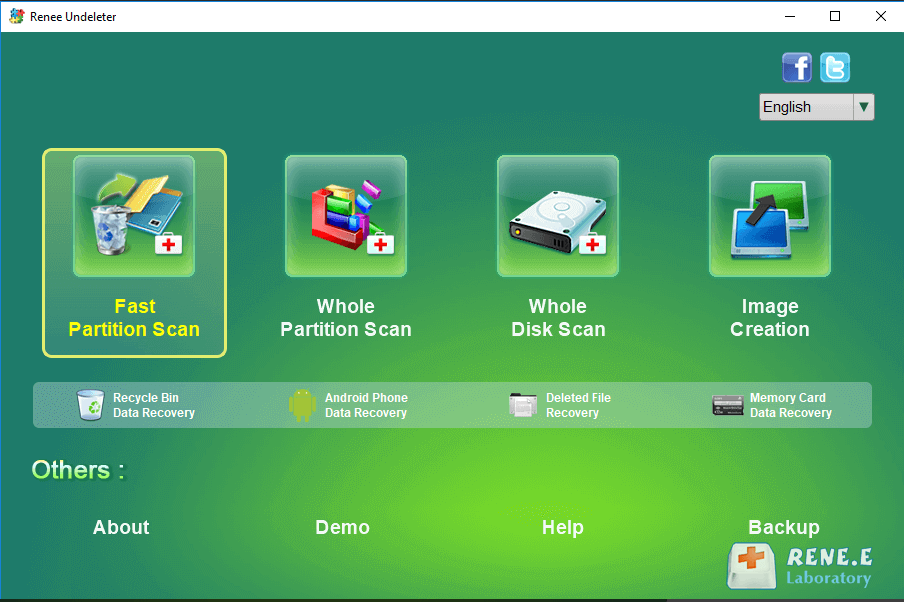
Step 1: Download, install and run Renee Undeleter, select the (Fast Partition Scan) option in the main interface.
data recovery in renee undeleter
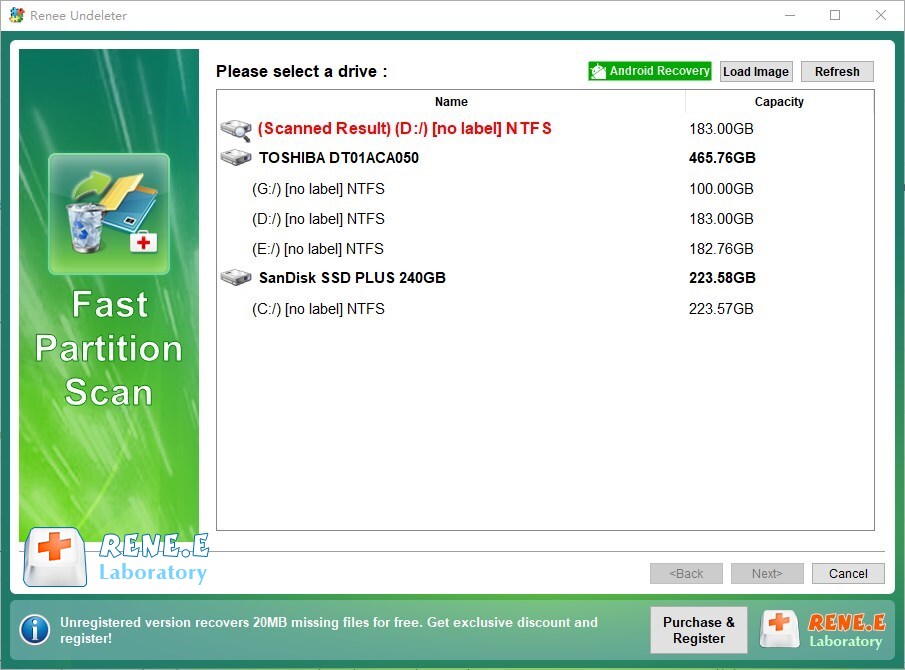
Step 2: Next, select the partition where the lost data is located and click on (Next).
scan disk with Renee Undeleter
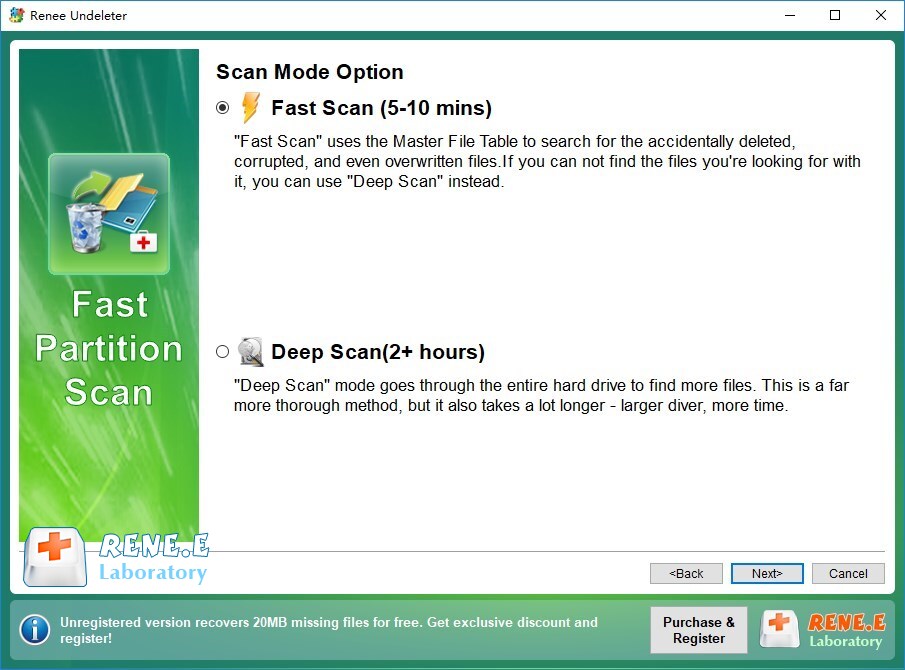
Step 3: Choose Fast Scan and click Next to begin scanning. Note that “Fast Scan” scans only the first 30GB of the selected disk’s remaining space. If the file isn’t found, consider “Deep Scan” for a more thorough search, though this will take longer. Please be patient.
fast scan lost data
Step 4: Wait for the scan to complete, you can double-click the file to preview, then check the file to be recovered, click the (Recover) button to restore the file to another disk.
preview before recovery