author avatar
    Senior Product Manager
 

Summary
Learn how to avoid losing video files in Adobe Premiere by setting up automatic file saving and recovery measures. Discover where to find the automatic save file location and how to set the time interval.
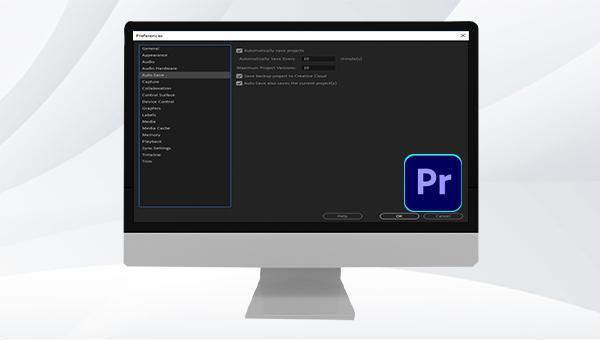
Premiere autosave file location

I. What is Premiere?

Adobe Premiere, short for Pr, is a non-linear editing video editing software developed by Adobe. The software provides a complete set of process functions of acquisition, editing, color correction, audio beautification, subtitle addition, output, and DVD burning, and is efficiently integrated with other Adobe software. It can be used in image design, video editing, and web development. It can be said to be an essential video editing tool for video editing enthusiasts and professionals. Through this software, you can enhance your creative ability and creative freedom. Adobe Premiere supports importing mainstream audio and video formats, such as 3GP, AAC, AVI, M4A, M4V, MP3, MP4, VOB, etc., but the imported video and still image files must not exceed the maximum allowed size, that is, the maximum sequence frame size is 10,240 x 8,192 pixels (width x height).
If you need to know more about the file formats supported by Premiere, you can check the official instructions: https://helpx.adobe.com/premiere-pro/using/supported-file-formats.html

II. How to view and set Premiere auto-save file location and time interval?

1. Where is the Pr automatic save file setting?

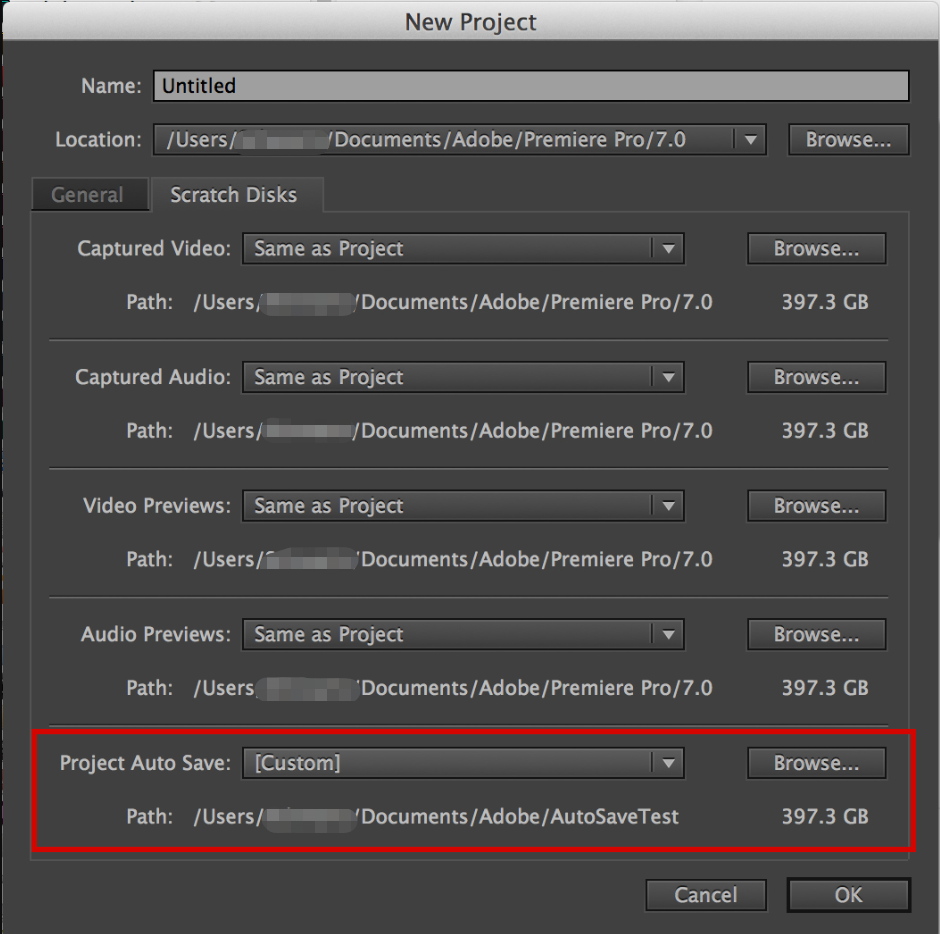
When creating a new project through Premiere, you can actually set the automatic save path of the project. In the new project interface, select Scratch Disks, find Project auto save to view the automatic save path. If you need to change it, click the Browse button to choose again.
premiere auto save setting
If you did not pay attention to this setting when creating a new project, you can check it through the following steps:
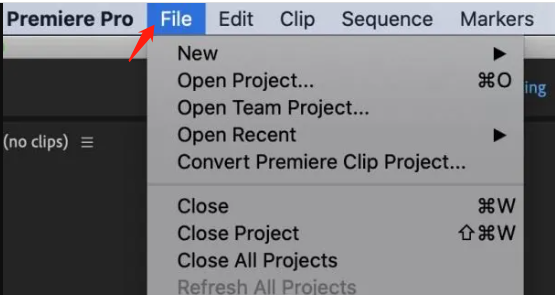
Step 1: Open the target project through Premiere, and then click File in the upper left corner.
click on the file button
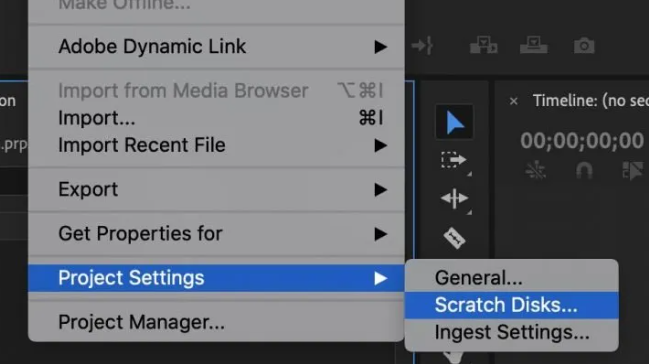
Step 2: Select Scratch Disks in the Project Settings menu.
premiere scratch disk
Step 3: Then check the automatic save path in the Project Auto Save below. If you need to view the automatic save location of other projects, you can select the corresponding project in the drop-down menu on the right of Project.
premiere auto save setting

2. How to set the time interval of Pr automatic saving?

It is not difficult to set the time interval for automatic saving of Pr. The specific steps are as follows:
Step 1: Open Premiere.
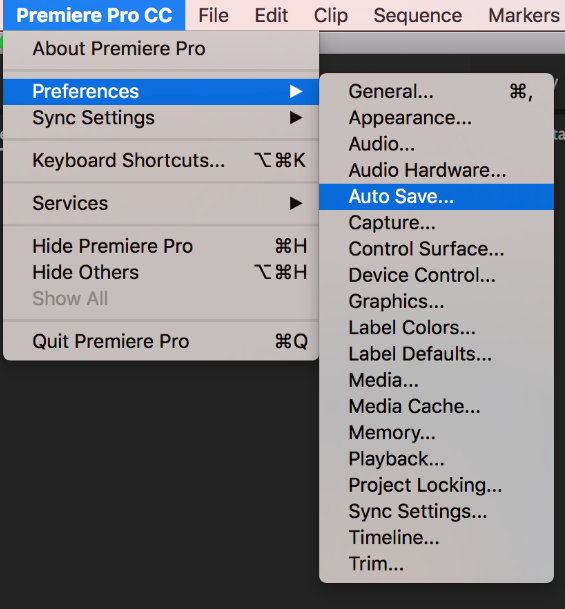
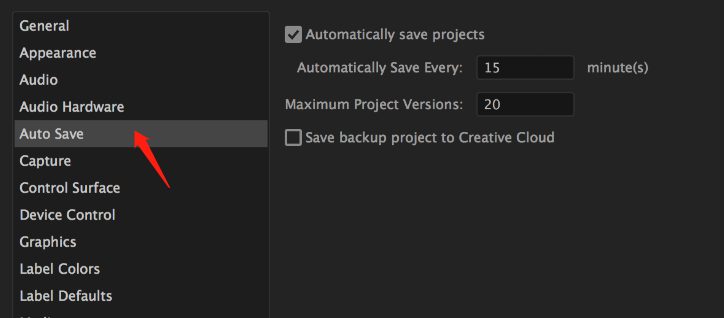
Step 2: Select Auto save in Preferences.
premiere auto save
Step 3: In the Auto Save window, you can set the time interval minutes for automatic saving. You can manually enter a specific value. The smaller the value, the higher the frequency of automatic saving. After setting, click the OK button.
premiere auto save
Although the automatic save function can greatly improve the security of Premiere files, we may still delete Pr project files or exported video files due to misuse. Generally, we can find and restore them in the recycle bin first, but if the recycle bin is emptied Or formatted the disk that saved the Pr file, then you need to use professional data recovery software to scan and recover, this article recommends you to use Renee Undeleter, this software has Windows and Mac versions, and the functions are more comprehensive, you can continue learn.

III. Use Renee Undeleter to recover accidentally deleted Premiere files

1. What is Renee Undeleter?

Renee Undeleter is a software specially used to restore various data files. When you accidentally delete important files, empty the recycle bin, or format the disk/storage, you can use this tool to retrieve the lost data. The software covers four functional modules, including file recovery, format recovery, partition recovery and image creation, which can help you solve all data loss problems in an all-round way. Regardless of the built-in hard disk, mobile hard disk, SD card, U disk and other storage devices, as long as they can be successfully connected to the computer, you can use this software to scan and restore files. The software also supports previewing files to help users accurately find the files that need to be recovered.
Hot Topic - ADsRenee Undeleter – Simple & Powerful Software for Data Recovery

Easy to use Recover data by 3 steps;

Multiple scan modes Fast partition scan, whole partition scan and whole disk scan;

Supported file types Image, video, audio, text, email and so on;

Image creation Create a partition image to read and back up data;

Supported devices SD card, SDHC, SDXC, USB flash drive, hard disk and computer.

Easy to use Recover data by 3 steps;

Multiple scan modes Fast partition/whole partition/whole disk scan;

Supported devices SD card/USB/hard disk.

Free TrialFree TrialFree Trial 800 people have downloaded!
2. How to use Renee Undeleter to recover accidentally deleted Premiere files?

It is very simple to use Renee Undeleter to scan the hard disk and restore deleted files. The specific operation steps are as follows:
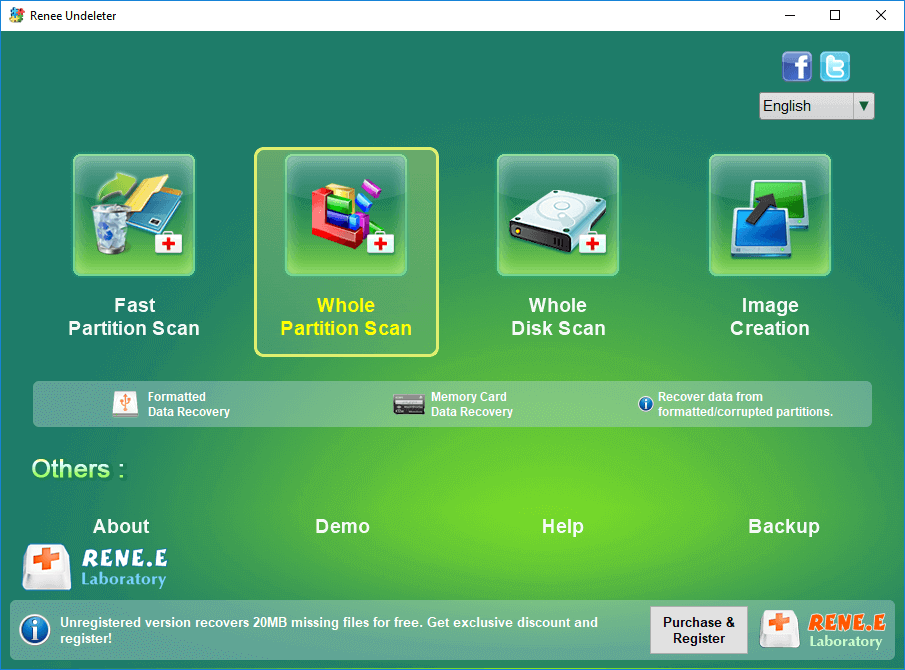
Step 1: Download, install and run Renee Undeleter on the computer, and select the Whole Partition Scan option on the main interface. If the target file cannot be found, you can try the Whole Disk Scan function.
Note: Do not install Renee Undeleter in the disk where data is lost to avoid data overwriting. Whole Partition Scan can scan all partition data in the entire hard disk. If all partitions in the computer belong to the same hard disk, it is recommended to install the software on an external U disk or mobile hard disk, because this function does not support scanning the hard disk where the software is installed.
select whole partition scan in renee undeleter to recover deleted video from sd card
Data recovery function introduction:

Fast Partition Scan: Quickly retrieve files lost due to accidental deletion or emptying the recycle bin.

Whole Partition Scan: Quickly recover files lost due to inaccessible or formatted partitions.

Whole Disk Scan: It can analyze and obtain partition information, and fully scan the entire partition.

Image Creation: You can create a mirror image for a partition to back up the current partition state.
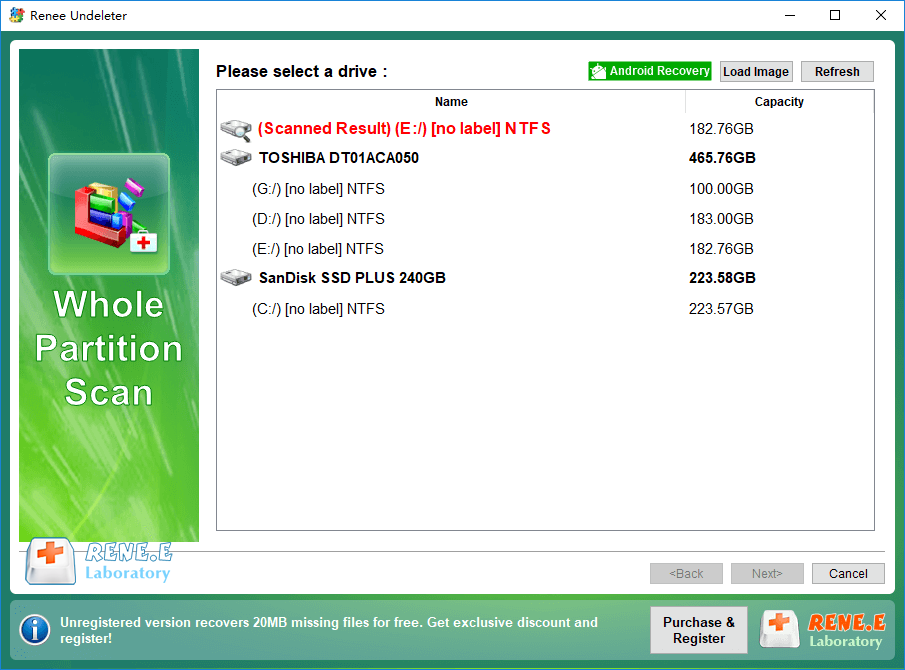
Step 2: Next, select the hard disk partition that needs to recover data (that is, the original storage location of the deleted files). After the selection is complete, click Next.
Renee Undeleter Whole Partition Scan
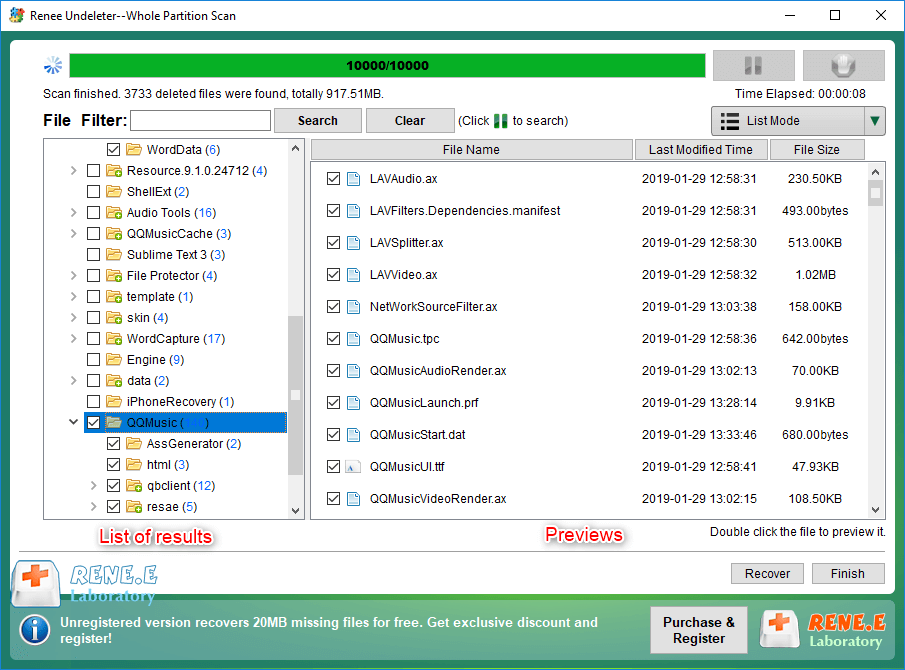
Step 3: Wait patiently for the scan to complete. You can double-click the file to preview it. If it is the file you need, please check the target file and click the Recover button.
preview and select the files to recover in renee undeleter
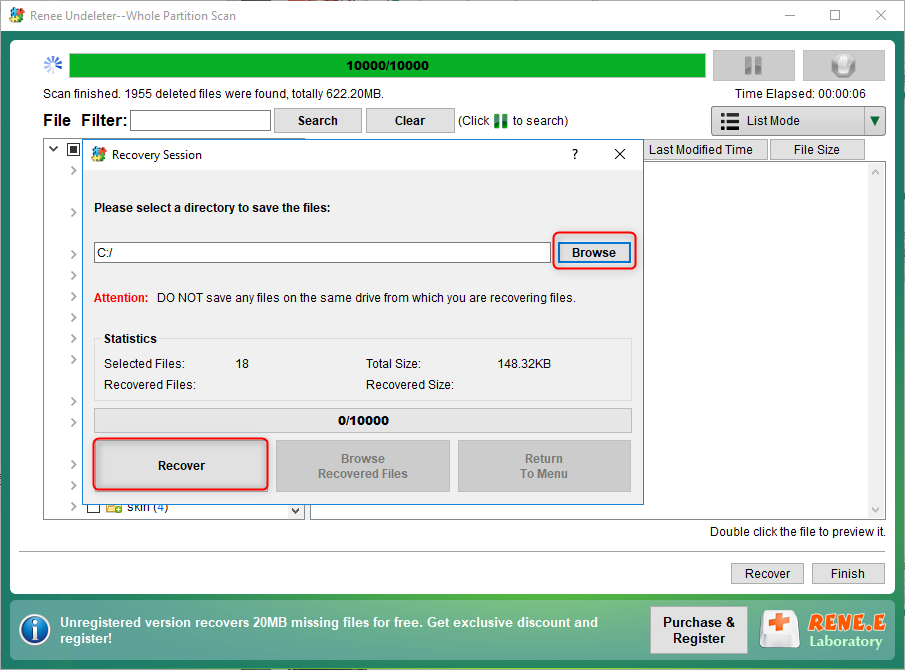
Step 4: Click the Browse button to select another hard disk partition to save the files, and then click the Recover button. Wait for the recovery to complete, click Browse recovered files to view the recovered files.
select the output folder for usb or sd card recovery session in renee undeleter