author avatar
    Senior Program Developer
 

Summary
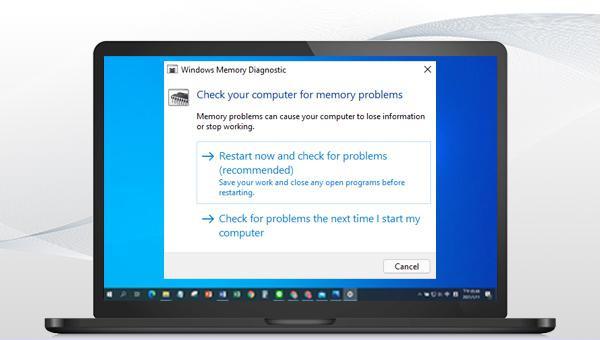
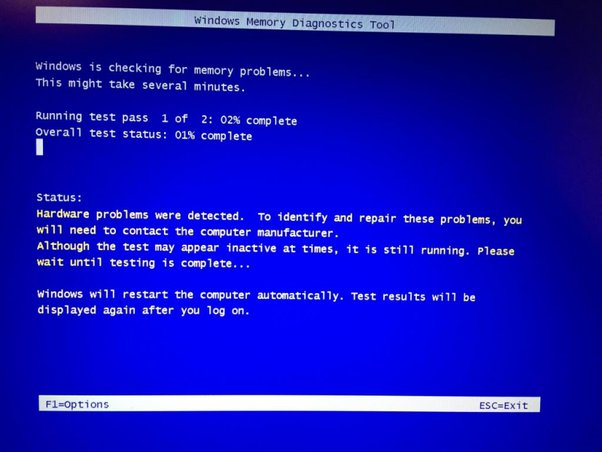
The Windows memory diagnostic tool sometimes appears stuck and unresponsive, this article will provide some practical fixes for this problem. If you also encounter this problem, you may wish to continue reading to learn more about it.


Windows memory diagnostic tool stuck and unresponsive

About the Windows Memory Diagnostic Tool

The Windows Memory Diagnostic Tool is a helpful program that can check your RAM for any potential issues. If you’re experiencing degraded system performance, frequent freezes, or blue screens, this tool can help you identify and fix any memory problems. It offers three different test modes: basic, standard, and extended. The extended mode may take anywhere from 15 minutes to 20 hours to complete, depending on the size of your RAM.
Several users have reported that the Windows memory diagnostic tool gets stuck at 1% or 21%, and may even remain unresponsive for more than 10 hours or an entire day. This issue could be a result of a system failure. To help you out, we have compiled a few practical solutions for you to consider.

Solutions to Windows Memory Diagnostic Tool Stuck and Unresponsive

1. Wait patiently for the memory diagnostic tool to run

The duration of the memory diagnostic tool’s operation is influenced by the amount of RAM, particularly in the extended mode. It may take up to 20 hours, so it is advisable to be patient. In case the Windows Memory Diagnostic Tool appears to be stuck on a specific stage for over a day, there are alternative solutions outlined in this article.

2. Enable memory diagnostic tool cache

Enabling caching has been reported by many users as a helpful way to ensure a smooth scanning process for the memory diagnostic tool. So why not give it a try? The following steps outline how to enable caching:
Step 1: In the memory diagnosis interface, press the (F1) key.
memory diagnostic tool
Step 2: Press the (Tab) key to go to the (Cache) section and select the (On) option. Press (F10) again to apply the setting.
Enable memory diagnostic tool cache

3. Perform a clean boot

If there is any third-party software in the system memory that is hindering the Windows memory diagnostic tool from completing its test, resulting in the diagnostic progress getting stuck, then running the tool in clean boot mode can be a solution. This is because in clean boot mode, Windows will only start with the essential drivers and startup programs, minimizing any potential interference.
Step 1: Run the computer, press (Windows+R) keys at the same time to open the run window. Next type (msconfig.exe) and press the (OK) button to open the system configuration window.
enter msconfig in run
Step 2: After opening the system configuration, switch to the (Services) option, check (Hide all Microsoft services), and click the (Disable all) button.
hide all microsoft services and disable all
Step 3: Switch to the (Startup) option and click the (Task Manager).
system configuration startup
Step 4: To disable all programs shown on the page, simply right-click on the application and choose the “Disable” option. Alternatively, you can select each program and click on the “Disable” button located in the lower right corner.

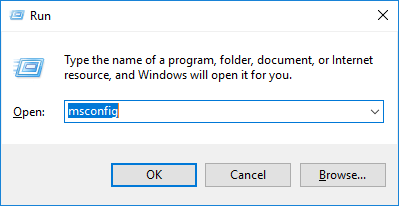
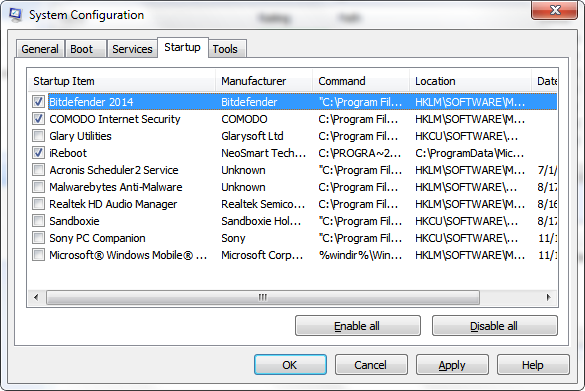
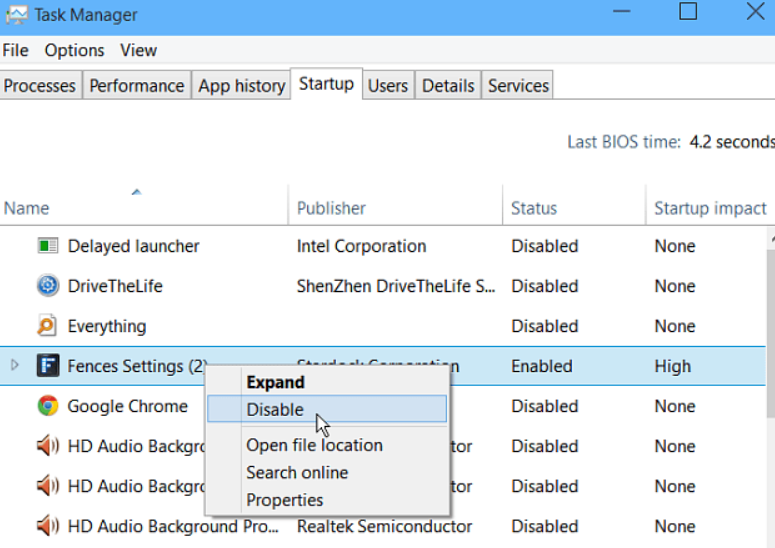
Once finished, close the task manager window and click “OK” on the system configuration page. A pop-up will appear, click on the “Restart” button. Afterward, run the Windows Memory Diagnostic Tool again to check if the issue has been resolved.

task manager disable app

4. Use MemTest86 to test

MemTest86 is a memory test software that is available for free. It can be booted from a USB flash drive and utilizes a comprehensive algorithm and test pattern to detect any faults in your computer’s RAM. This software is compatible with both 32-bit and 64-bit Windows systems, as well as Linux and Mac systems. The following are the specific steps for using it:
Step 1: Prepare a USB disk, and back up or transfer all the files in the USB drive. Then go to the MemTest86 official website to download the Windows MemTest86 USB image.
Click the download button
Step 2: After that, right-click the downloaded file and navigate to (Open with)- (Windows Explorer).
Step 3: Select all the files in it, and click the (Unzip All) button to extract all the items in the folder.
Please note that if a third-party decompression software is used to decompress, the resulting folder may only include the (Help) folder shown in the image below. This may limit the ability to proceed to the next step.
Step 4: Select a location to save the extracted file, then click (Extract).
Step 5: Connect the USB disk to the computer, and then run (imageUSB.exe) in the extracted folder.

Check the USB disk, select (Write image to USB drive), and then select the folder of the image file (memtest86-usb.img). Finally, click the (Write) button to start writing the image to the USB disk.

imageUSB
Step 6: To begin, connect the USB boot disk that you have created to your computer. After restarting your computer, keep an eye out for a prompt for the BIOS shortcut key when the brand logo appears. This could be any of the following keys: F1, F2, F10, ESC, or DEL, depending on the brand of your computer.

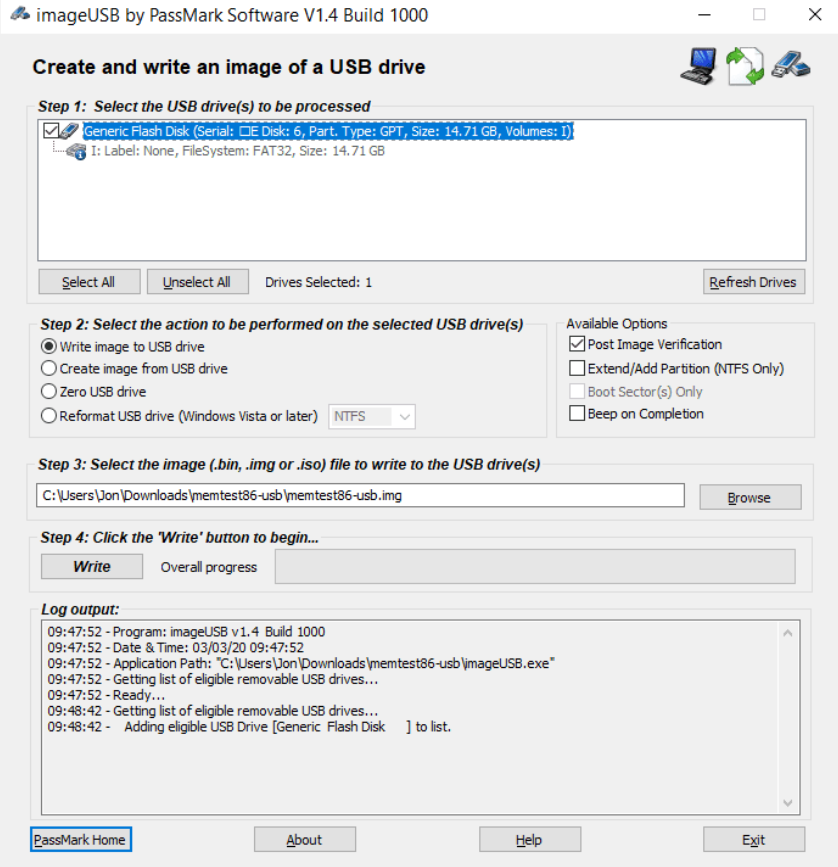
Continuously and quickly press the BIOS shortcut key to enter the BIOS setting interface. From there, set the USB boot disk as the first startup item and save the settings. This will ensure that your computer starts up from the USB boot disk.

Once this is done, you can proceed to test your RAM using MemTest86. This tool will help you determine whether the issue lies with your RAM or with the Windows Memory Diagnostic Tool. If the test is completed without any errors, you can also run the Windows Memory Diagnostic Tool again to confirm that the problem has been resolved.

The aforementioned solution addresses the issue with the unresponsive Windows Memory Diagnostic Tool. Moreover, for those who accidentally delete files during regular computer use, we recommend utilizing the following data recovery software for scanning and restoring those files.

(Extended information) Use Renee Undeleter to recover accidentally deleted data

1. What is Renee Undeleter?

Renee Undeleter is a professional data recovery software that supports recovery of documents, photos, videos, compression files and other types of data. In the event of accidentally deleting files, emptying the recycle bin, formatting the hard disk, deleting partitions by mistake, as long as the lost data has not been overwritten, this software has a chance to help you scan and recover files. The software has four functional modules: file recovery, format recovery, partition recovery and image creation, which can meet most data recovery needs.
Hot Topic - ADsRenee Undeleter – Simple & Powerful Software for Data Recovery

Easy to use Recover data by 3 steps;

Multiple scan modes Fast partition scan, whole partition scan and whole disk scan;

Supported file types Image, video, audio, text, email and so on;

Image creation Create a partition image to read and back up data;

Supported devices SD card, SDHC, SDXC, USB flash drive, hard disk and computer.

Easy to use Recover data by 3 steps;

Multiple scan modes Fast partition/whole partition/whole disk scan;

Supported devices SD card/USB/hard disk.

Free TrialFree TrialFree Trial 800 people have downloaded!
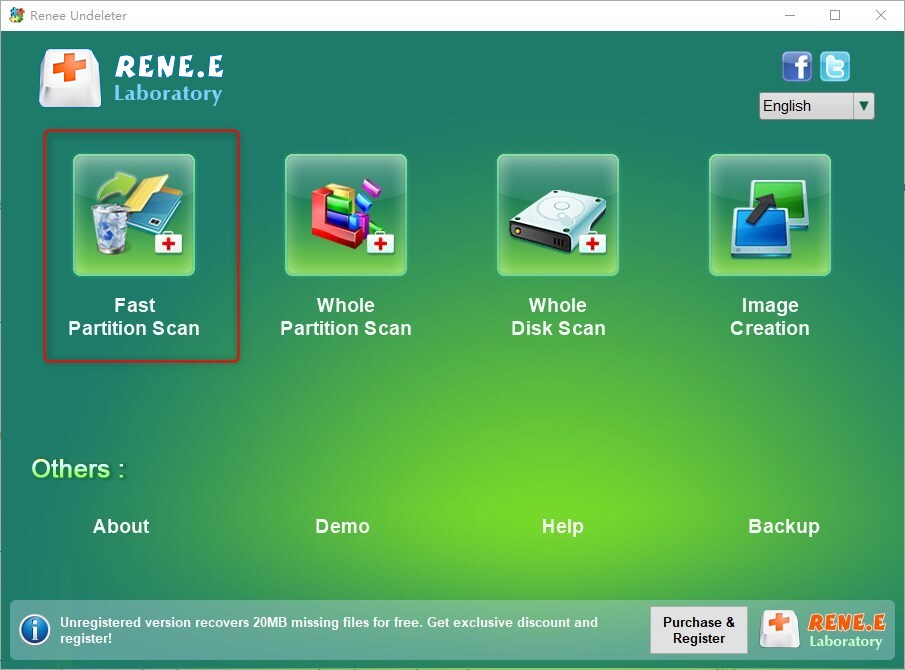
2. How to recover accidentally deleted files with Renee Undeleter?

The specific steps are as follows:
Step 1: Download, install, and run Renee Undeleter on a Windows computer. Select the (Fast Partition Scan) option on the main interface.
Tips: Please avoid installing the software on the disk that requires data restoration to prevent data overwriting. Furthermore, refrain from saving new data to the same partition where the lost file was located to avoid further damage or complete loss of the file.
fast partition scan with Renee Undeleter
Step 2: Next, select the partition where the lost data is located, and click (Next).
scan disk with Renee Undeleter
Step 3: Select the (Fast Scan) option and click the (Next) button to scan.
Tips: The Fast Scan mode only scans the first 30GB of the remaining space of the selected disk. If the desired file is not found after scanning, you can use the Deep Scan mode to scan the partition again. It will take more time, but more data can be scanned.
fast scan lost data
Step 4: Wait for the scan to complete, you can double-click the file to preview it, check the target files, and click the (Recover) button to restore the file to another disk.
recover files with Renee Undeleter