author avatar
    Technology Manager of Test Dept.
 

Summary
Learn how to solve the xlive.dll missing error on your computer with our practical methods. Follow our guide to fix the problem and get your computer back up and running smoothly.


xlive dll missing

I. About xlive.dll error

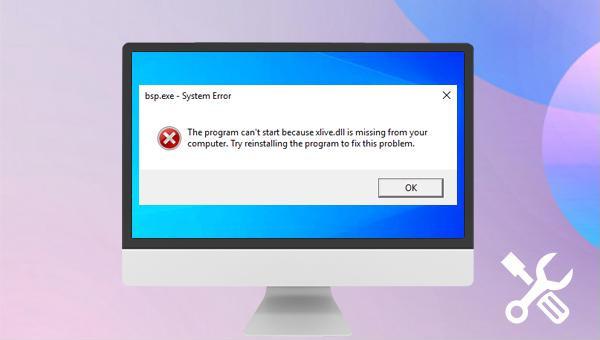
xlive.dll is part of Microsoft’s dynamic-link library (DLL). When it is deleted or corrupted, an error message appears saying that xlive.dll is missing or not found. xlive.dll errors can occur in any program or system that uses this file, including Windows 11, Windows 10, Windows 8, Windows 7, Windows Vista, Windows XP, and Windows 2000.
When installing or running a game program, starting or shutting down Windows, or encountering a missing xlive.dll error during Windows installation, check if the xlive.dll file has been accidentally deleted. Also, scan for viruses or malware that can delete or damage files without our knowledge. Additionally, try reinstalling the application, updating Windows, or performing a system restore to restore or add xlive.dll to the Windows system and resolve the file loss issue.
II. How to repair the lost xlive.dll of Windows computer?

1. Scan your computer with antivirus software

Viruses may delete some files or replace them with damaged ones. To fix xlive.dll is missing, you need to perform a virus scan. You can scan for viruses using Windows 10′s built-in antivirus software, Windows Defender, or third-party antivirus software. Let’s take Windows Defender as an example.
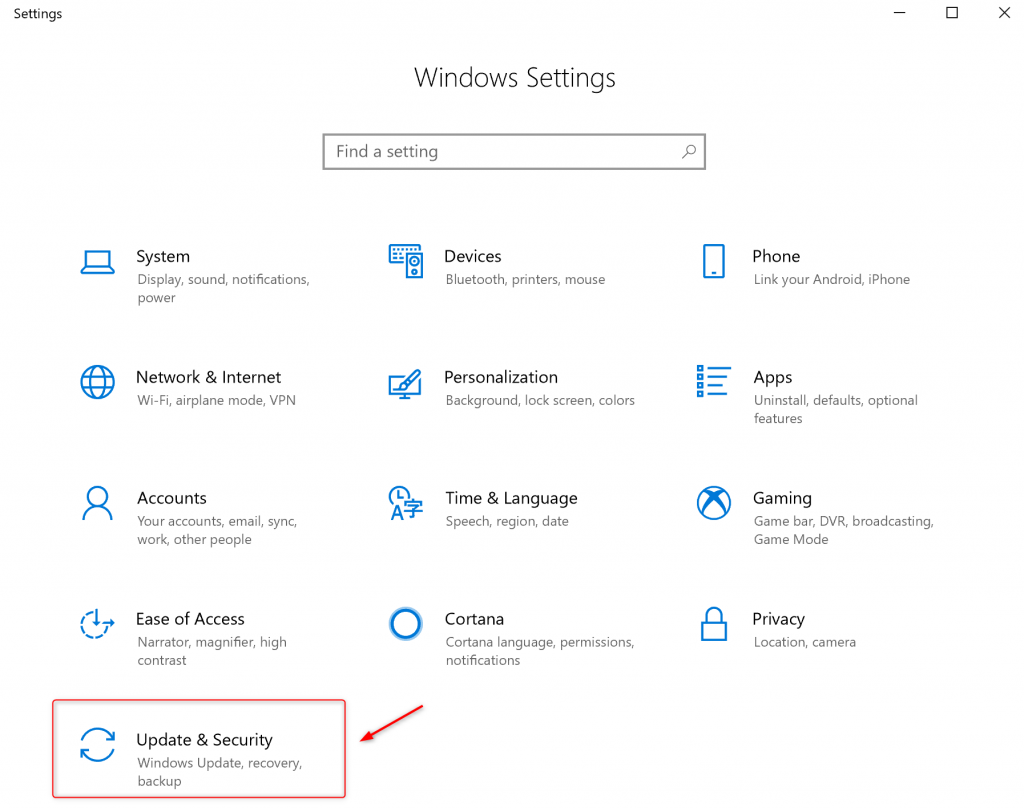
Step 1: Open (Settings) in (Start), and then click (Update & Security).
Windows update and security
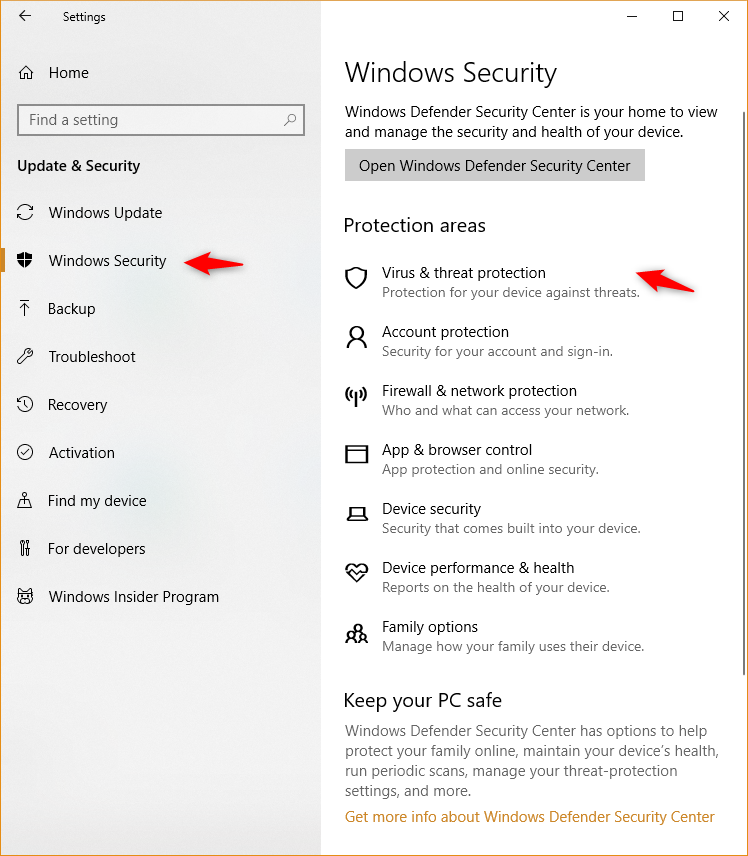
Step 2: Under the (Update & Security), click (Windows Security).
Step 3: Click (Virus & threat protection), and then click (Quick Scan) to start the scan.
Windows Security

2. Restore xlive.dll from the recycle bin

When we accidentally delete the xlive.dll file, we can try to restore it from the recycle bin.
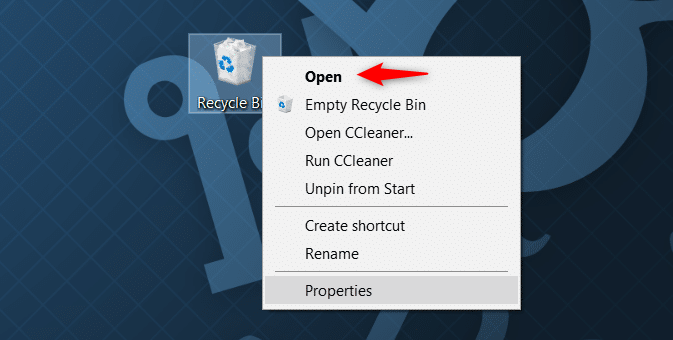
Step 1: Double-click the (Recycle Bin) icon on the desktop to open it
open recycle bin windows 10
Step 2: After opening the recycle bin, search for the xlive.dll file. Right-click the file and select Restore to restore it to its original location.

If the file is not found, try scanning the computer’s hard disk with professional data recovery software in the third part of this article. Multiple recovery modes are available, increasing the possibility of recovering the xlive.dll file.
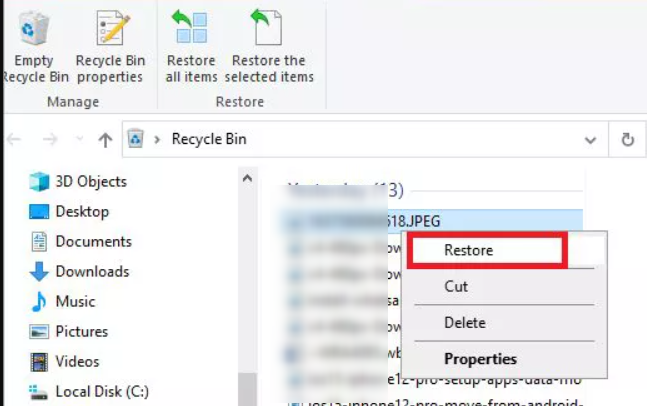
restore files from trash

3. Uninstall and reinstall the application

To resolve the problem of a missing xlive.dll file in a specific application, it is recommended to reinstall the application. Please follow these steps:
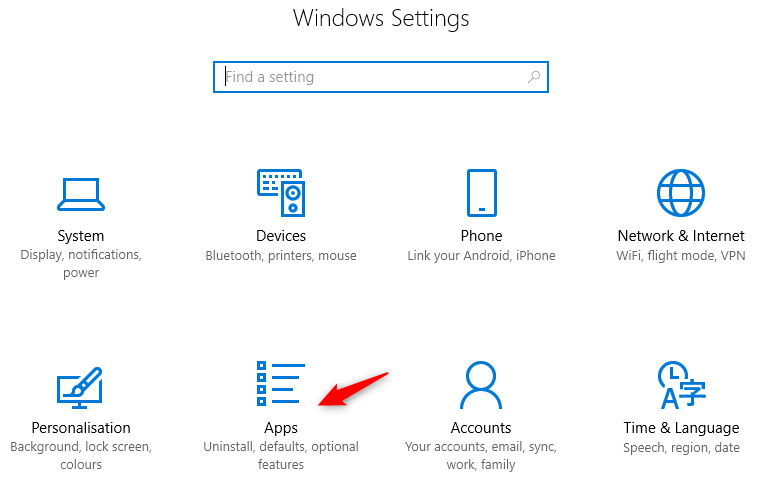
Step 1: Run the computer and simultaneously press the (Windows+I) key to open the settings interface. Then, click on the (Apps) option.
apps in windows settings
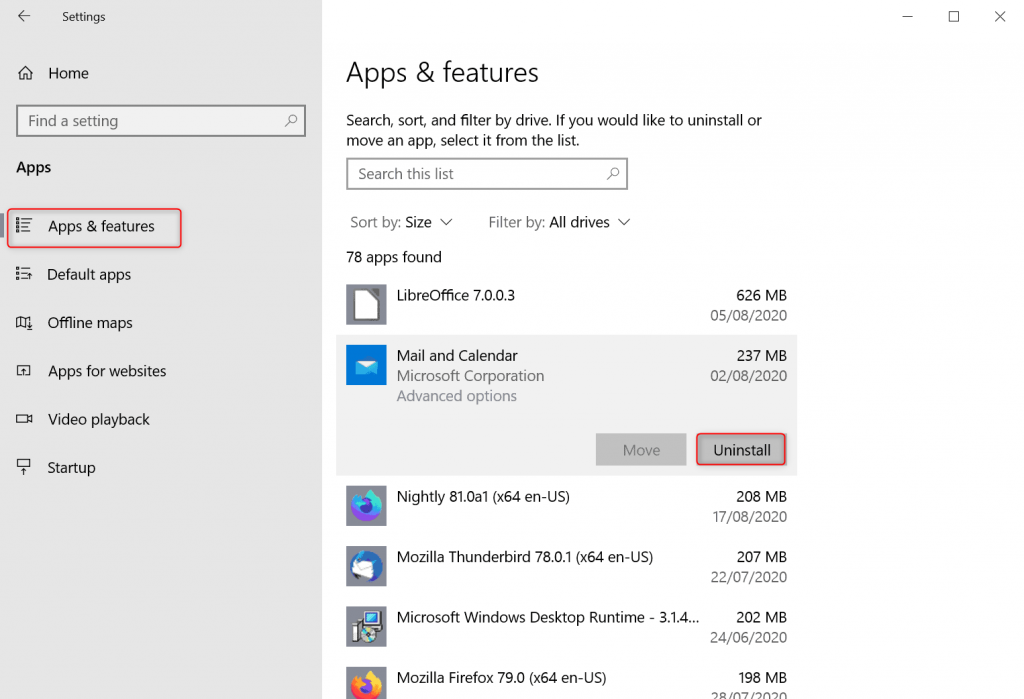
Step 2: Go to “Apps & features” on the left side. Locate the problematic application in the list on the right, click on its name, and click the “Uninstall” button. Then, visit the official website of the application to download and install it.
Windows 10 uninstall apps

4. Install Windows Updates

Microsoft will provide patches for some faults. Installing Windows updates may replace or supplement the xlive.dll file to the computer. The specific steps are as follows:
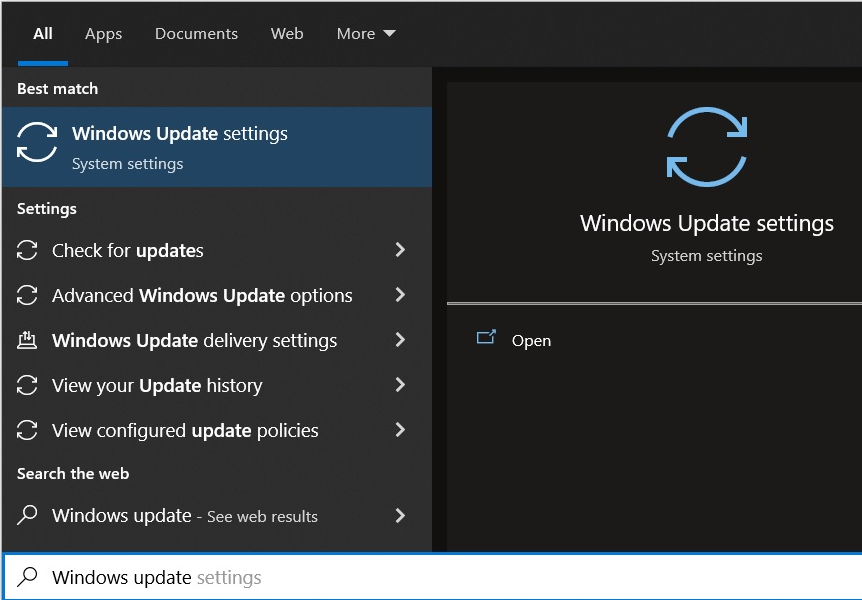
Step 1: Run the computer and search for “Windows Update Settings” in the lower left corner. Click to enter.
find Windows Update In Search
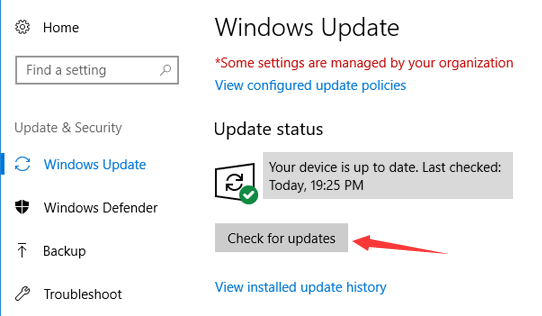
Step 2: In the Windows Settings interface, select (Windows Update) on the left and click (Check for updates) on the right. Follow the prompts to update and install any detected items, then restart the computer to check if the problem is resolved.
Windows Update Check

5. Perform System Restore

If you have created a Windows restore point prior to the xlive.dll missing issue, you can try to perform a system restore. Specific steps are as follows:
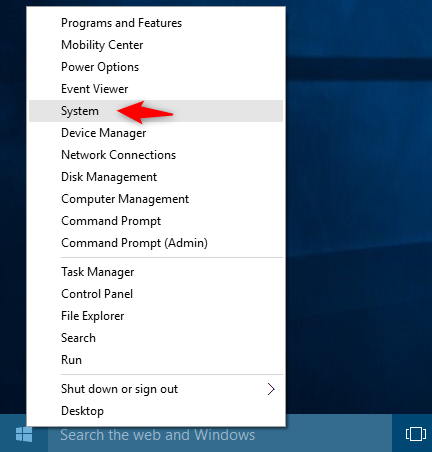
Step 1: Right-click (Start), and select (System).
open system
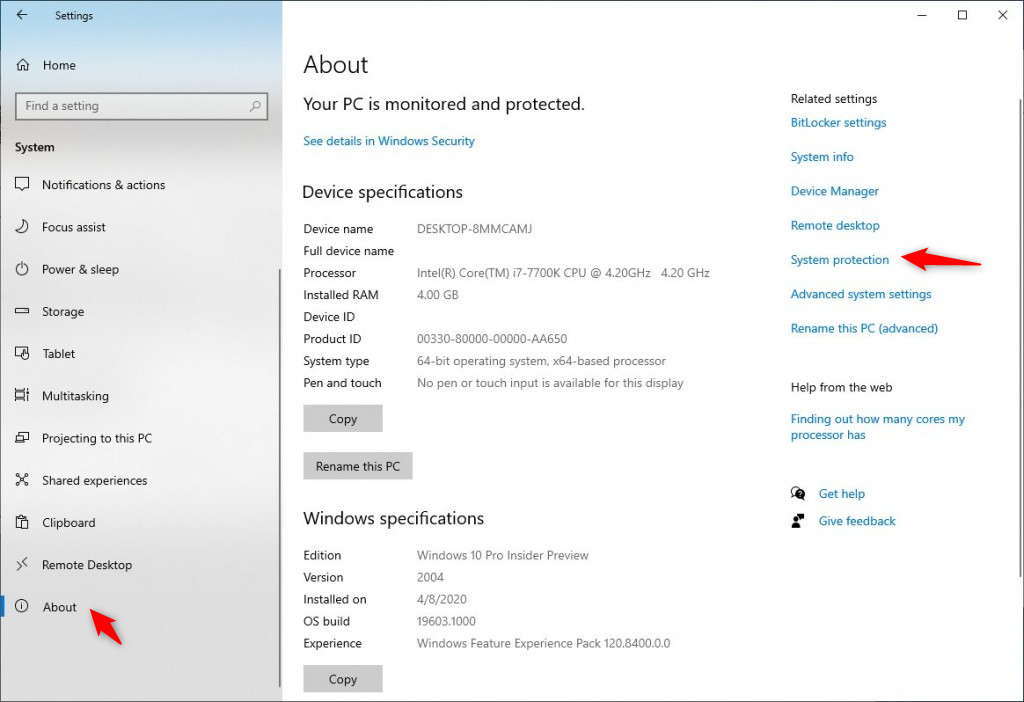
Step 2: In the (About) interface, click (System protection) on the right.
About page Windows
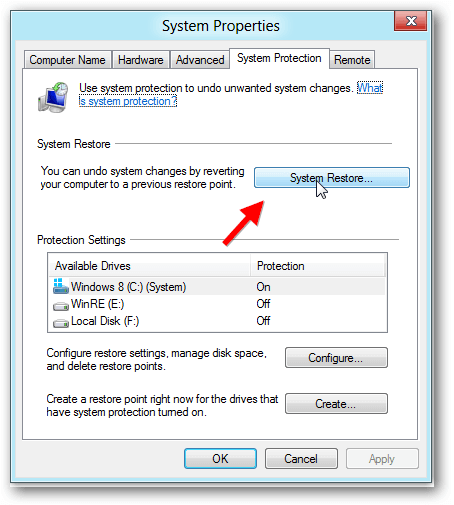
Step 3: Click the (System Restore) button under the (System Protection) tab, choose the last system restore point prior to the issue, and click (Next). Confirm the system restore operation by clicking the (OK) button in the subsequent interface, and execute the system restore command.
System Restore Point thumb
Sometimes, deleted files cannot be restored from the recycle bin. In such cases, using professional data recovery software like Renee Undeleter can increase the chances of successful file restoration. The following are the operation steps for Renee Undeleter.

III. (Extended information) Use Renee Undeleter to recover lost data

1. What is Renee Undeleter?

Renee Undeleter is professional data recovery software. It supports recovery of documents, photos, videos, and compressed files. Whether you accidentally delete files, empty the recycle bin, format the hard disk, or delete partitions by mistake, this software can help you scan and recover files as long as the lost data hasn’t been overwritten. It has four functional modules: file recovery, format recovery, partition recovery, and image creation, meeting most data recovery needs.
Hot Topic - ADsRenee Undeleter – Simple & Powerful Software for Data Recovery

Easy to use Recover data by 3 steps;

Multiple scan modes Fast partition scan, whole partition scan and whole disk scan;

Supported file types Image, video, audio, text, email and so on;

Image creation Create a partition image to read and back up data;

Supported devices SD card, SDHC, SDXC, USB flash drive, hard disk and computer.

Easy to use Recover data by 3 steps;

Multiple scan modes Fast partition/whole partition/whole disk scan;

Supported devices SD card/USB/hard disk.

Free TrialFree TrialFree Trial 800 people have downloaded!
2. How to recover lost files with Renee Undeleter?

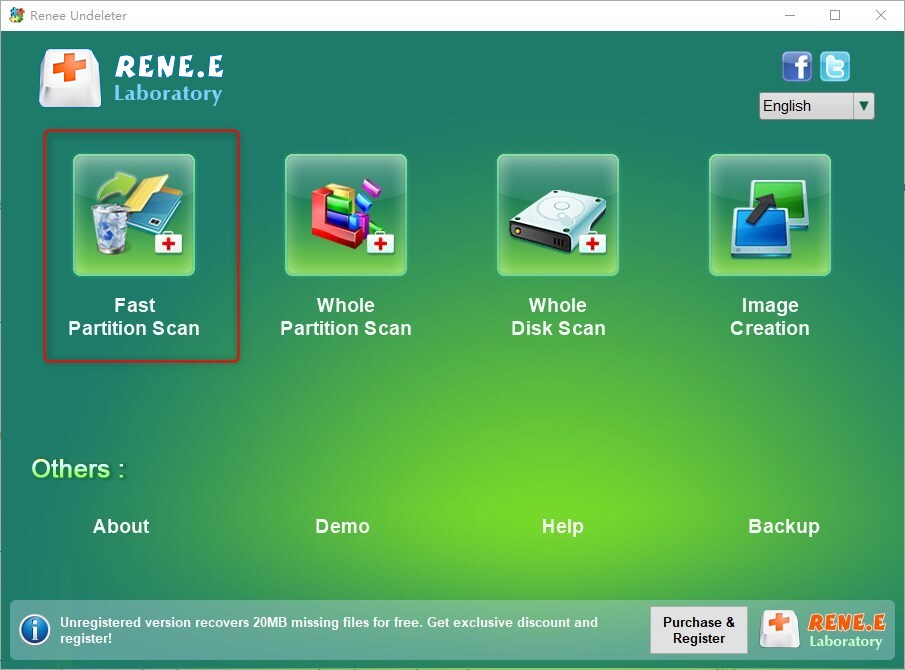
Step 1: Download, install, and run Renee Undeleter on a Windows computer. Select the “Fast Partition Scan” option on the main interface.
Note: Do not install the software on the disk with data to recover. Avoid data overwriting. Also, do not save new data to the same disk partition after file loss to prevent further damage or complete loss of the lost file.
fast partition scan with Renee Undeleter
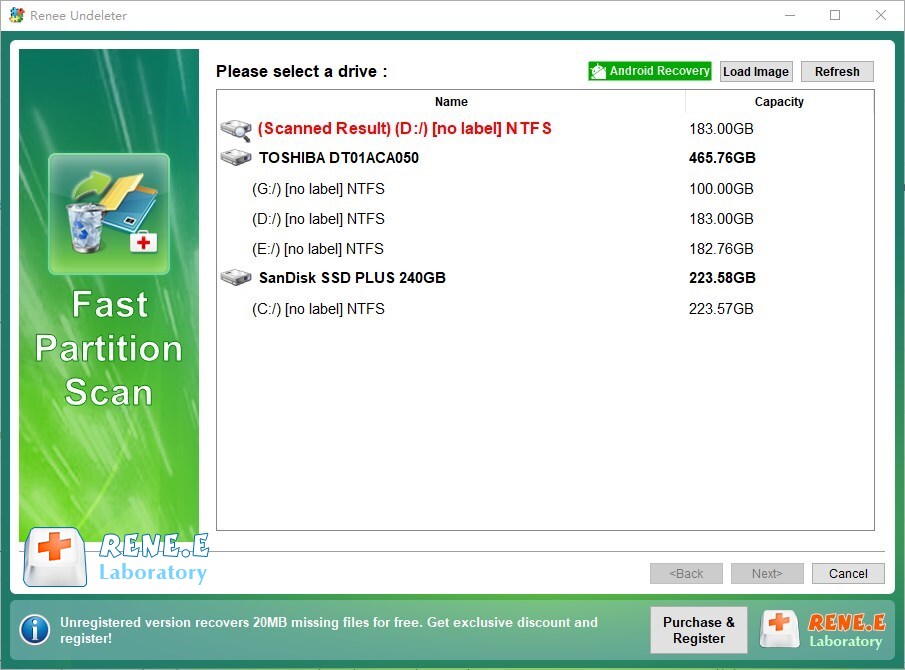
Step 2: Next, select the partition where the lost data is located and click on (Next).
scan disk with Renee Undeleter
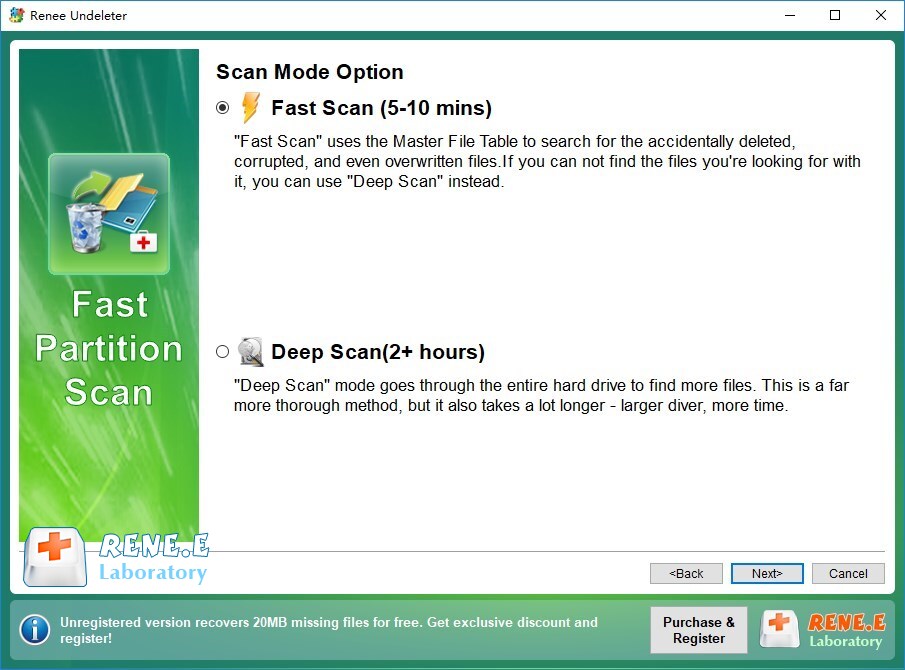
Step 3: Select the (Fast Scan) option and click the (Next) button to scan.
Tips: The Fast Scan mode only scans the first 30GB of the remaining space of the selected disk. If the desired file is not found after scanning, you can use the Deep Scan mode to try to scan the hard disk partition again. It will take more time, but more data can be scanned.
fast scan lost data
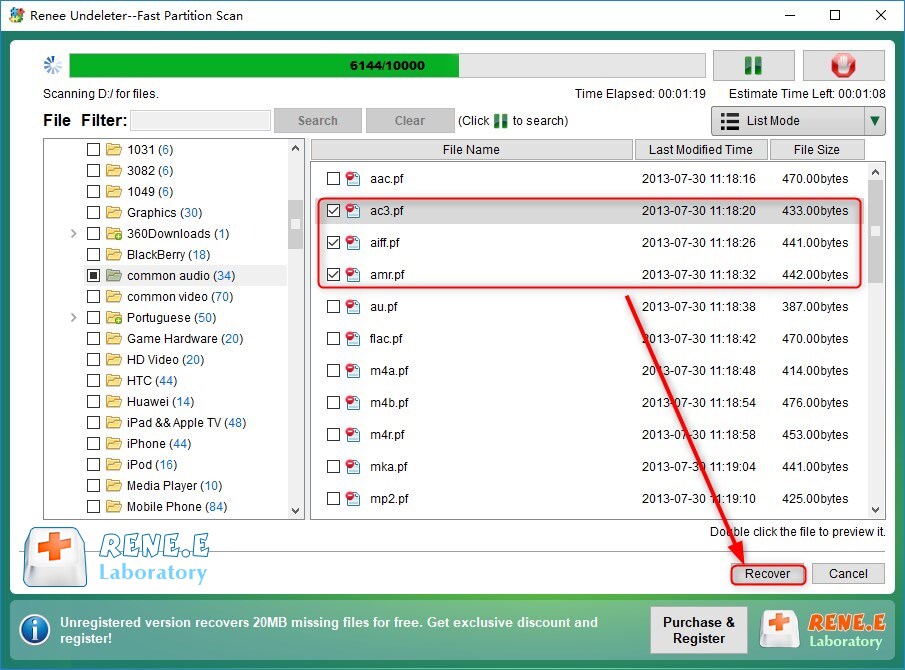
Step 4: Wait for the scan to finish. Double-click the file to preview. Select the file to recover. Click the (Recover) button to restore it to another disk.
recover files with Renee Undeleter