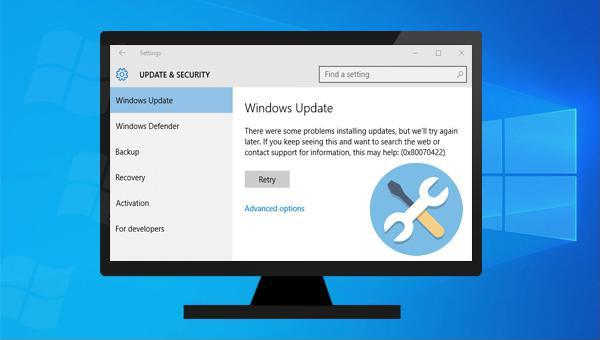
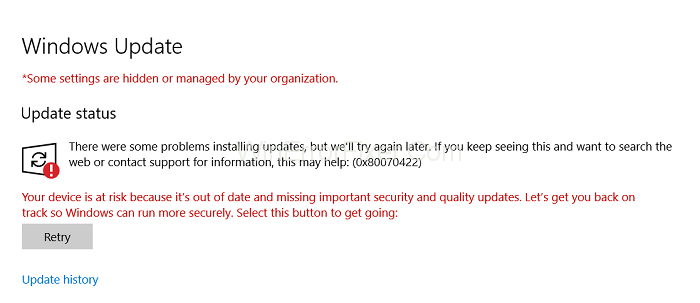
I. How to fix the 0x80070422 error on Windows 10?
When updating Windows, the error code 0×80070422 may occur due to a variety of reasons such as damaged system files, incorrect system configuration, disabled related services, or unknown system failures. Fortunately, there are several effective solutions to resolve this issue. Keep reading to learn more.
When restarting the computer, the system will automatically repair some detected problems, so we can try to restart the computer to fix the 0×80070422 error first.
Method 1: Click (Start) menu > (Power) > (Restart) to restart the computer.
Method 2: Press (Ctrl + Alt + Delete) at the same time, select (Power) in the lower right corner, and then select (Restart).
Method 3: Hold down the power button to manually shut down the computer, then press the power button again to restart the device. Please make sure everything is saved before doing in this way.
2. Run the Windows Update Troubleshooter
Windows Update Troubleshooter is a system update troubleshooting tool built into the Windows system, which can help users troubleshoot and fix most of the problems encountered during the system update process. Here are the detailed steps to run the Windows Update Troubleshooter:
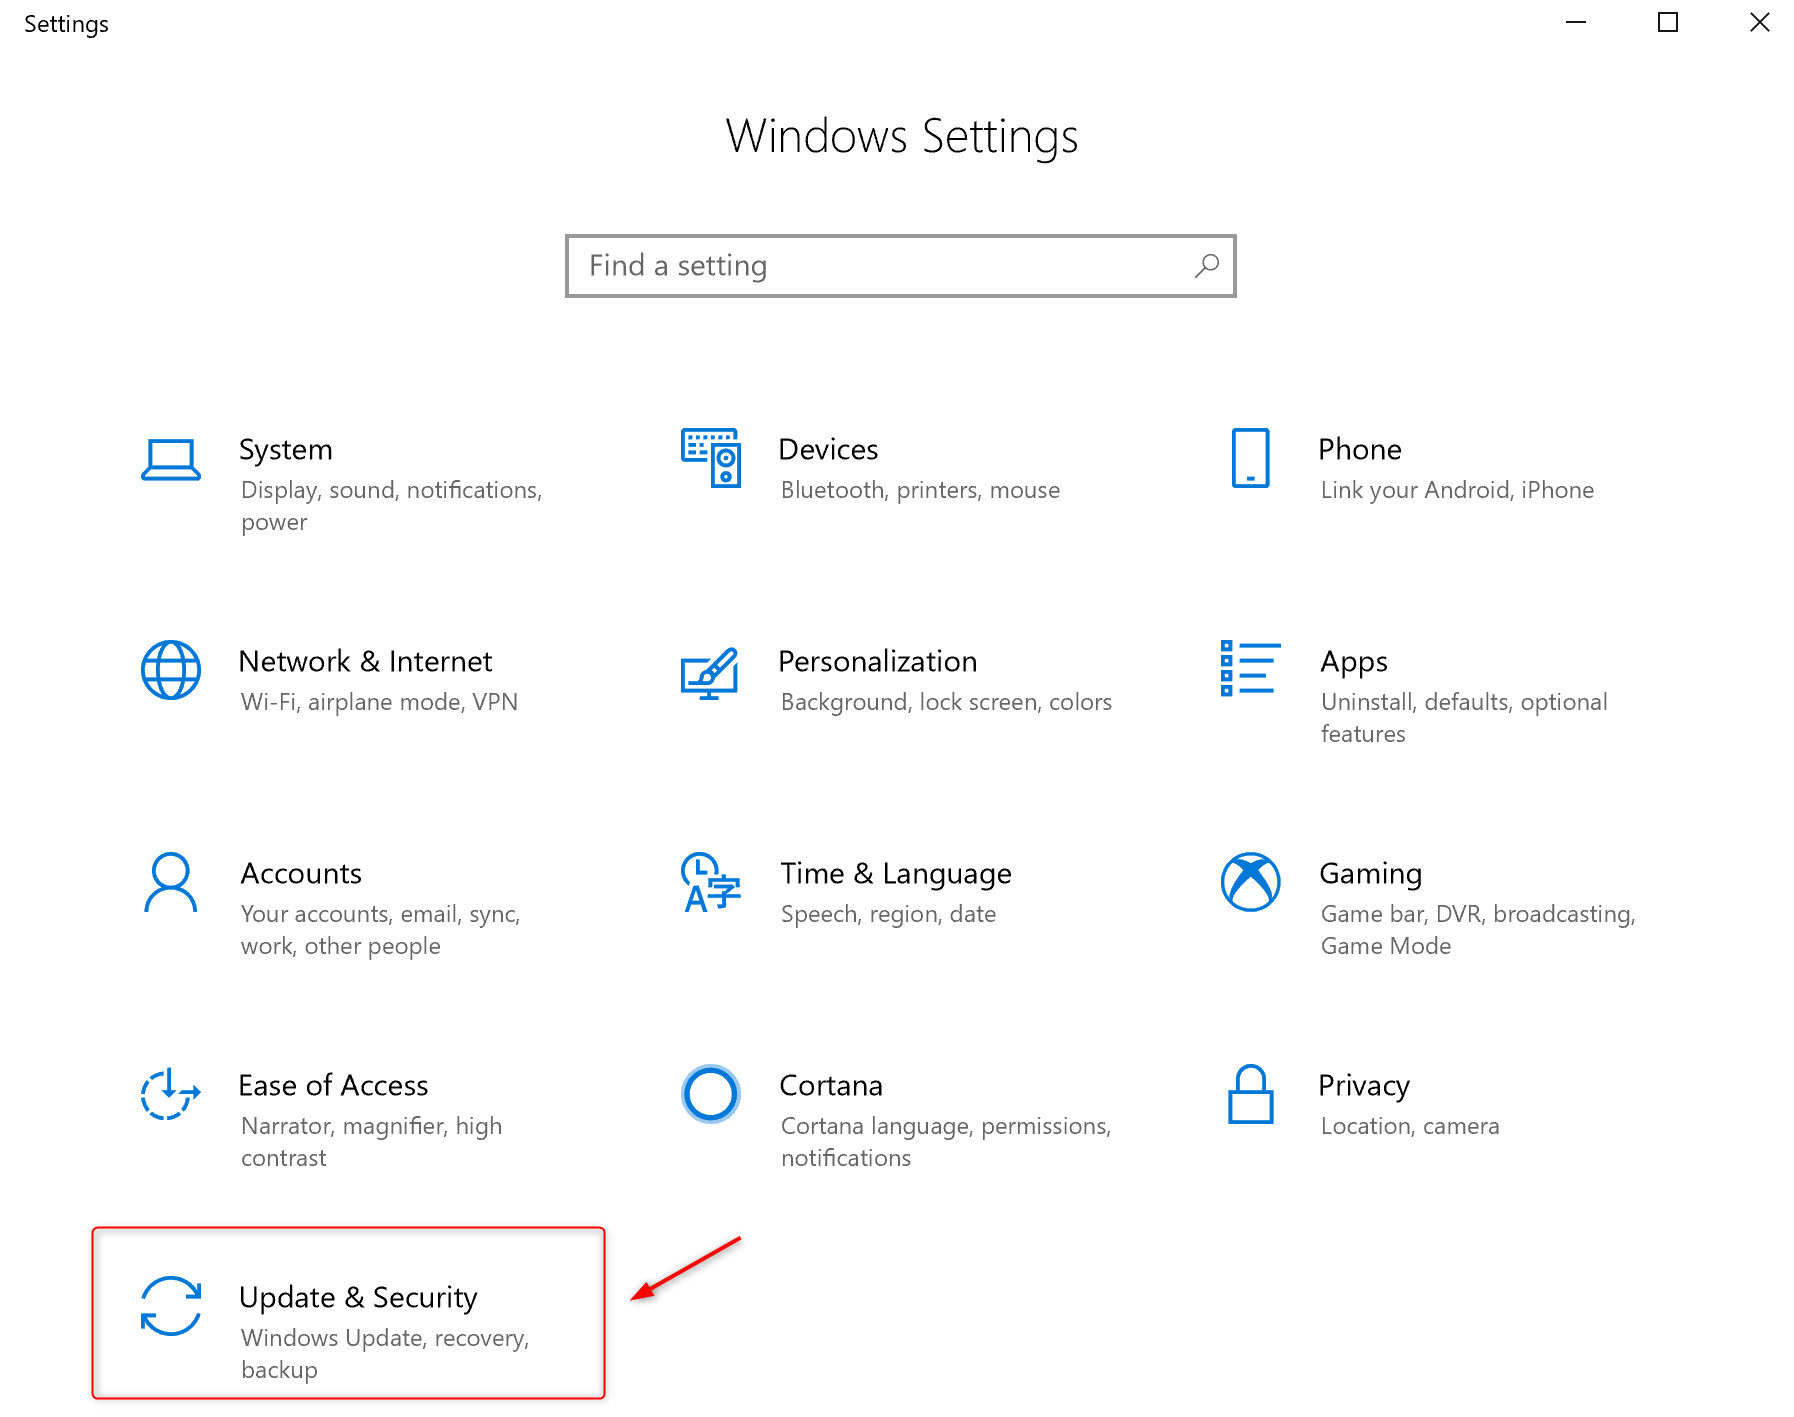
Step 1: Run the computer, and press the (Windows+I) key on the keyboard at the same time to open the settings interface. Then click on the (Update & Security) option.
Step 2: Find (Troubleshoot) on the left, select the (Windows Update) option on the right, and click the (Run the Troubleshooter) button.
3. Make sure Windows update and other related services are running
The Windows Update service is responsible for handling Windows updates and other processes related to it. If the update service stops, error code 0×80070422 will appear when installing Windows updates. Therefore, we need to ensure that related services such as Windows Update can run properly.
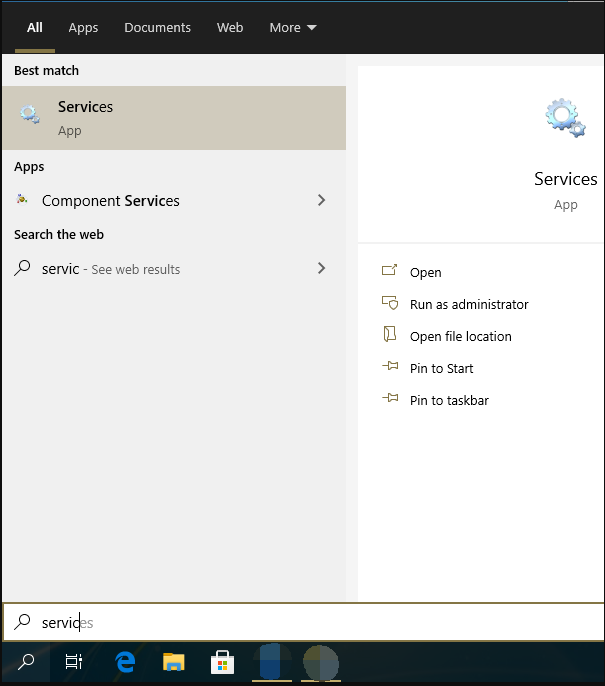
Step 1: Enter (service) in the search box on the left side of the taskbar and click the (service) application in the search results.
Step 2: Find the (Windows Update) option in the service list, double-click on it to open the “Windows Update Properties” interface. Next, change the startup type to (automatic), if the service status is (stopped), then click the (start) button. Finally, click (Apply) and (OK).
Step 3: Go back to the Services interface, right-click on (Windows Update) and select the (Restart) option.
Step 4: Then make sure that the following services are also running. Then try performing a Windows update again to see if the problem is resolved.
● BitLocker Drive Encryption Service
● DCOM Server Process Launcher
● Windows Defender Firewall
● Windows Event Collector
Windows update requires a stable and good network connection. When the 0×80070422 error message appears, you can try to disable IPv6. IPv6 is the successor of IPv4 protocol, but many devices are not compatible with IPv6. So if the above methods cannot solve the problem, please try to disable IPv6.
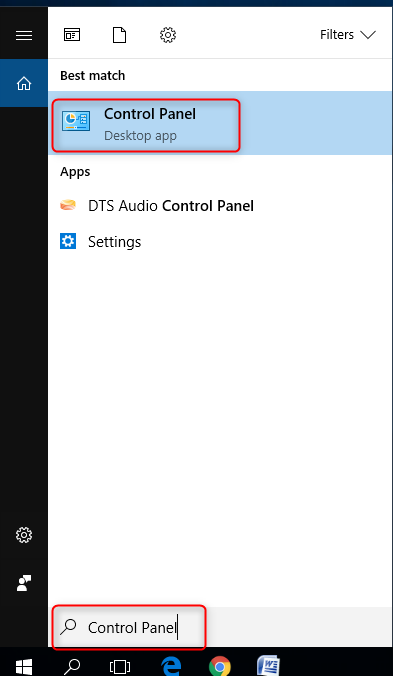
Step 1: Enter (Control Panel) in the search box on the left side of the taskbar, and click (Control Panel) in the search results.
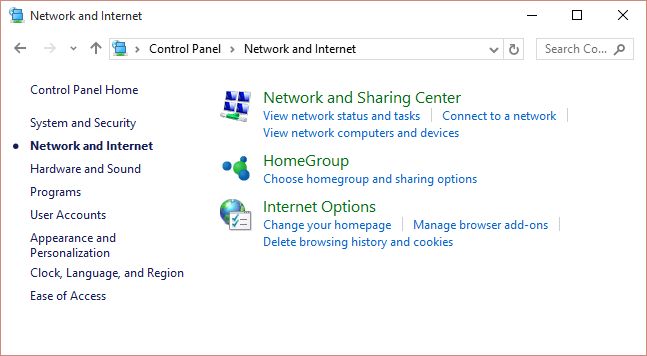
Step 2: In the opened interface, change the view mode to (small icon), find and open (Network and Sharing Center).
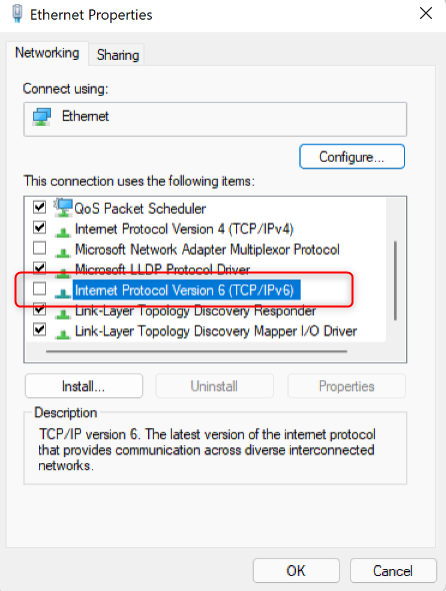
Step 3: Click the network connection on the right, then switch to (Networking) in the “Ethernet Status” window. From there, uncheck the “Internet Protocol Version 6 (TCP/IPv6)”, and then click (OK). Then run the Windows update again to check whether the problem is resolved.
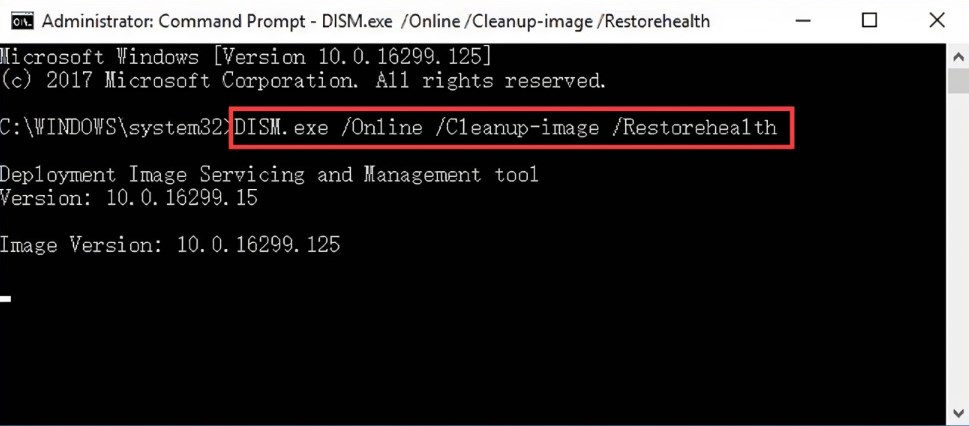
5. Run DISM and SFC commands
DISM, officially created by Microsoft, is an image tool commonly utilized for examining and fixing system image files, as well as identifying and eliminating registry items. Additionally, System File Checker (SFC) is capable of detecting and repairing damaged or missing system files within the system files directory. In the event that the 0×80070422 error is a result of system file corruption, attempting to run DISM and SFC commands to scan and repair may prove effective.
Step 1: Enter (cmd) in the search box, right-click the search result, and select (Run as administrator) to open the command prompt window.
Step 2: In the command prompt window that opens, paste the (DISM.exe /Online /Cleanup-image /Restorehealth) command into it and press (Enter). Then type (sfc /scannow) and press (Enter).
Step 3: The process will take some time, wait for it to complete. Re-run the Windows Update operation after the process is complete to check if the problem is resolved. If the prompt “Windows Resource Protection cannot perform the requested operation” appears after running (sfc /scannow), please click here to view the solution.
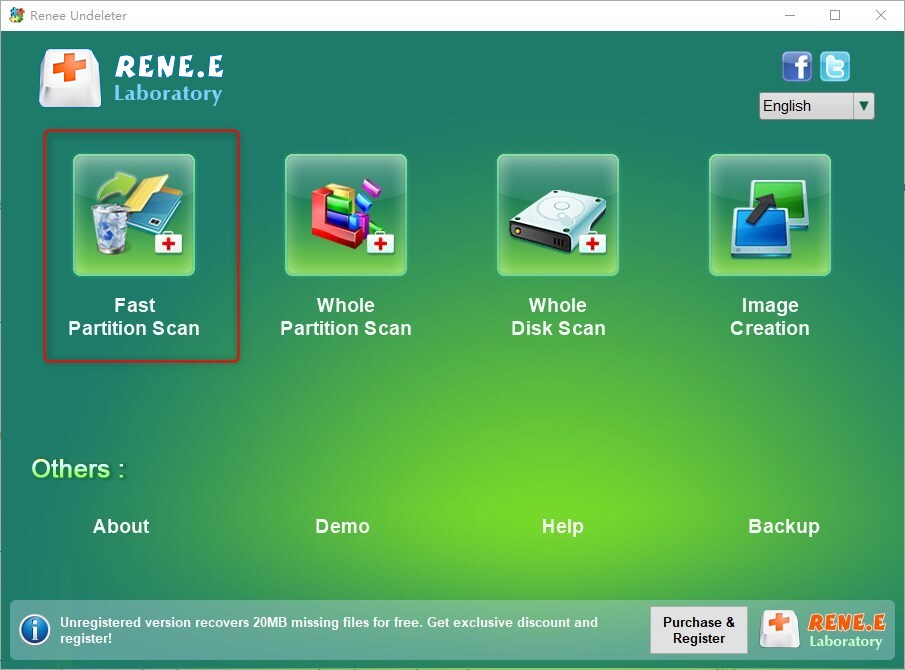
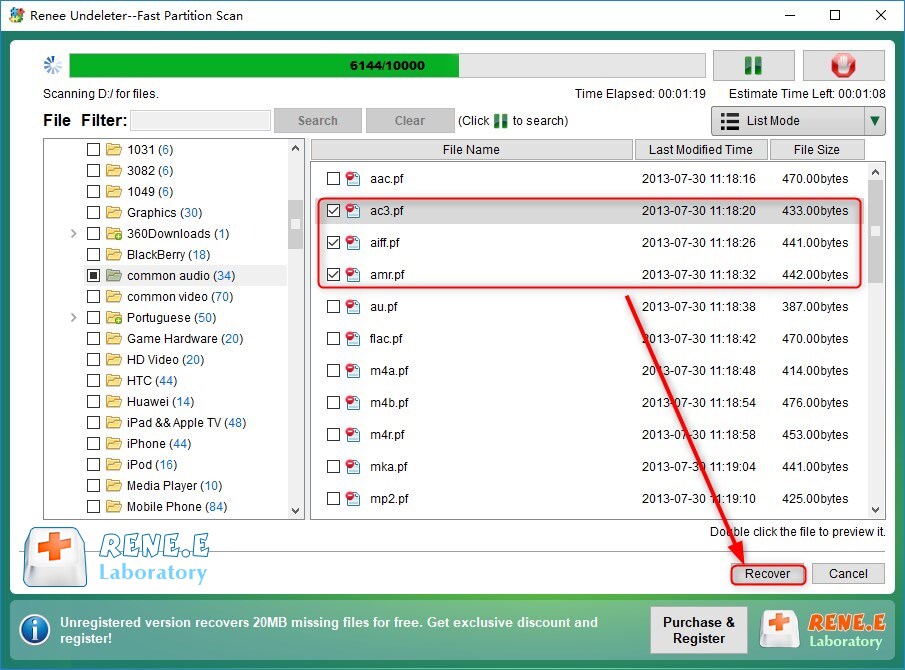
The above is the repair method for the 0×80070422 error. If you find that important data in the computer is lost after you fix the problem, you can continue to refer to the following methods for data recovery.