

Tips for the Error Code 0xC1900101 and for a Smooth Upgrade

Summary
Learn how to fix error code 0xC1900101 with our conventional repair solutions and recover lost data using the method in the third section.
Table of contents
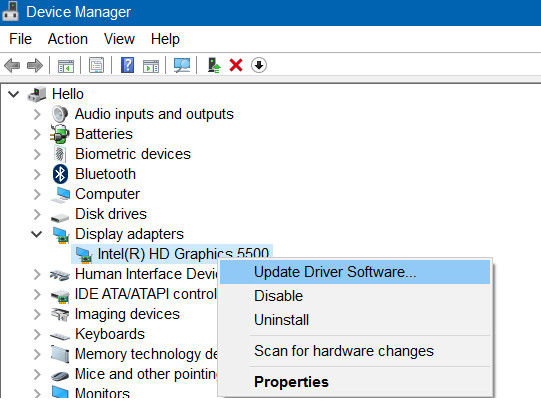
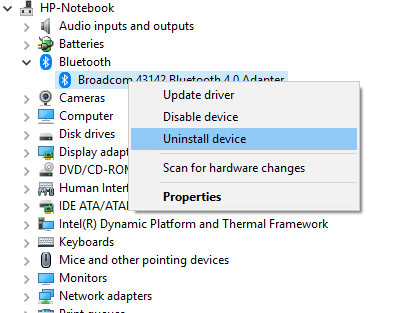
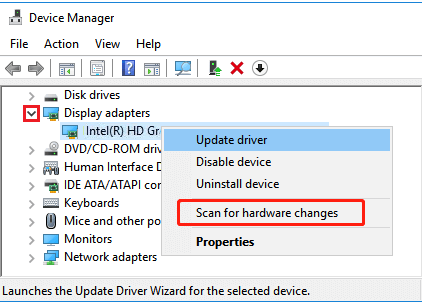
devmgmt.msc and click the OK button to access the Device Manager.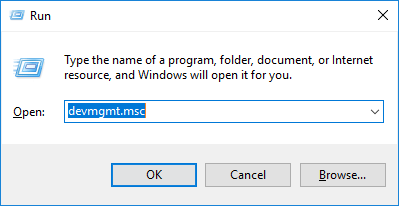

DISM.exe /Online /Cleanup-image /Restorehealth in the pop-up window and press the Enter key.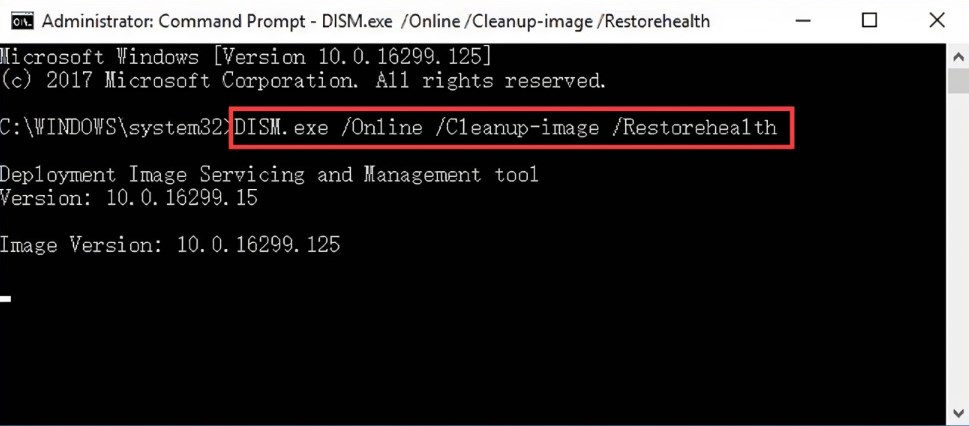
sfc /scannow and press Enter. This will initiate the System File Checker to repair system errors, which may take approximately 30 minutes. Once complete, restart your computer to see if the issue is resolved.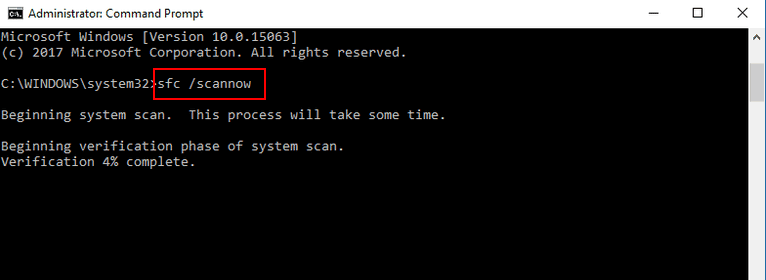

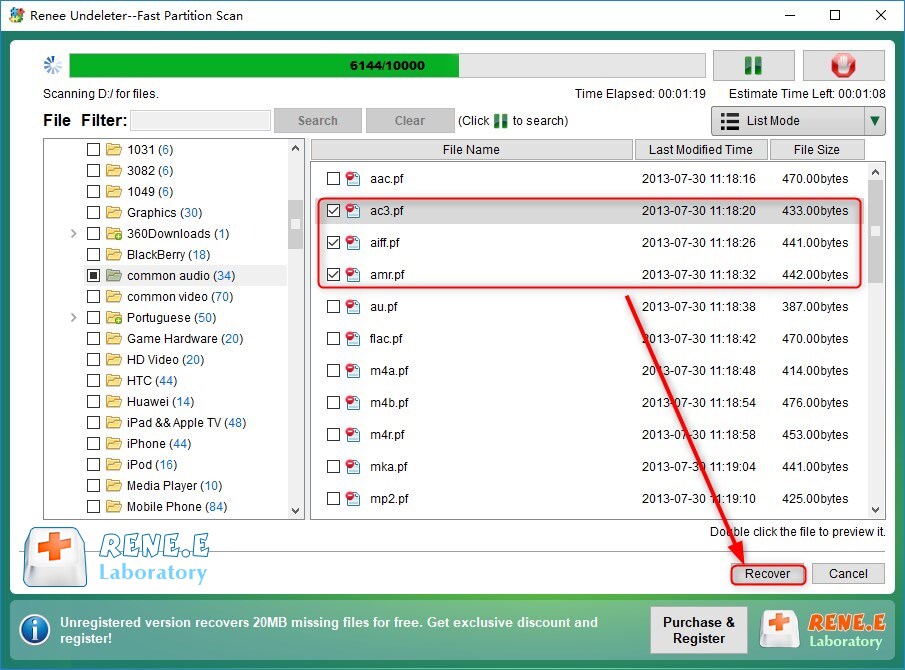
Easy to use Recover data by 3 steps;
Multiple scan modes Fast partition scan, whole partition scan and whole disk scan;
Supported file types Image, video, audio, text, email and so on;
Image creation Create a partition image to read and back up data;
Supported devices SD card, SDHC, SDXC, USB flash drive, hard disk and computer.
Easy to use Recover data by 3 steps;
Multiple scan modes Fast partition/whole partition/whole disk scan;
Supported devices SD card/USB/hard disk.
Free TrialFree TrialFree Trial 800 people have downloaded!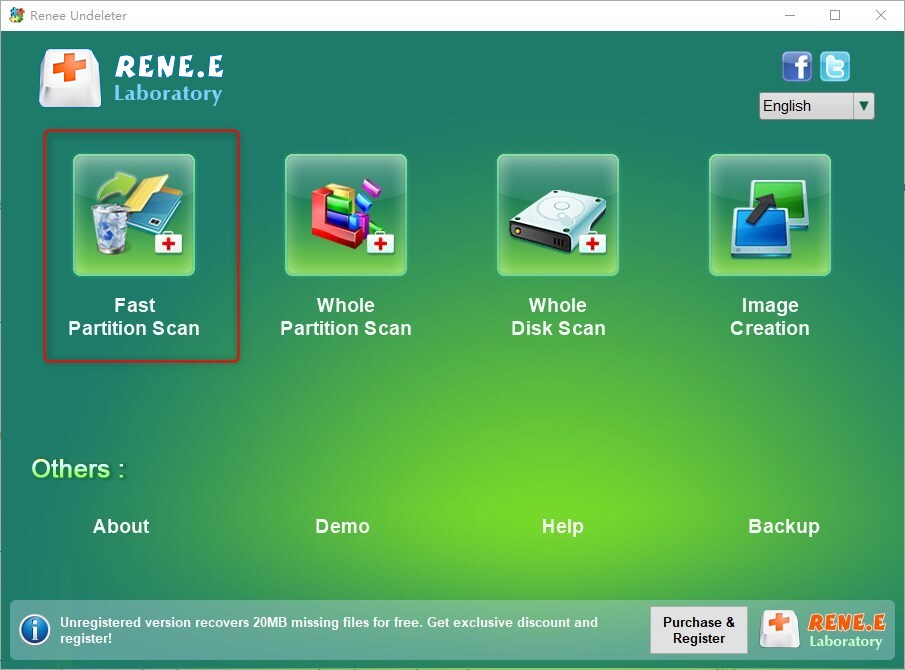
- Fast Partition Scan – Quickly retrieve files lost due to accidental deletion or emptying the recycle bin.
- Whole Partition Scan – Quickly recover files lost due to inaccessible or formatted partitions.
- Whole Disk Scan – Analyze and get partition information and perform a full scan of the entire partition.
- Image Creation – You can create a mirror image for a partition to back up the current partition state.


Relate Links :
Easy Solutions for Fixing HP Computer's SMART Hard Disk Error 301 Error

12-09-2023
Jennifer Thatcher : Learn how to solve the SMART hard disk error 301 prompt on HP computers with this comprehensive article...
Resolve 0x80070422 Error on Windows 10 with Easy Steps
10-01-2024
Jennifer Thatcher : Resolve Windows update error 0x80070422 by using these solutions. Also, learn a data recovery method to restore lost...
How to Fix Windows Error 0x80070490 with Easy Steps?

28-12-2023
John Weaver : If you meet the error 0x80070490, you can fix it with these solutions. Also, learn about data recovery...
Fix the Blue Screen Error Code Process1 Initialization Failed in Windows
12-09-2023
John Weaver : Learn how to solve the Windows blue screen error code "Process1 Initialization Failed" with practical solutions and data...

