

Master the Diskpart Command with Easy Instructions

Summary
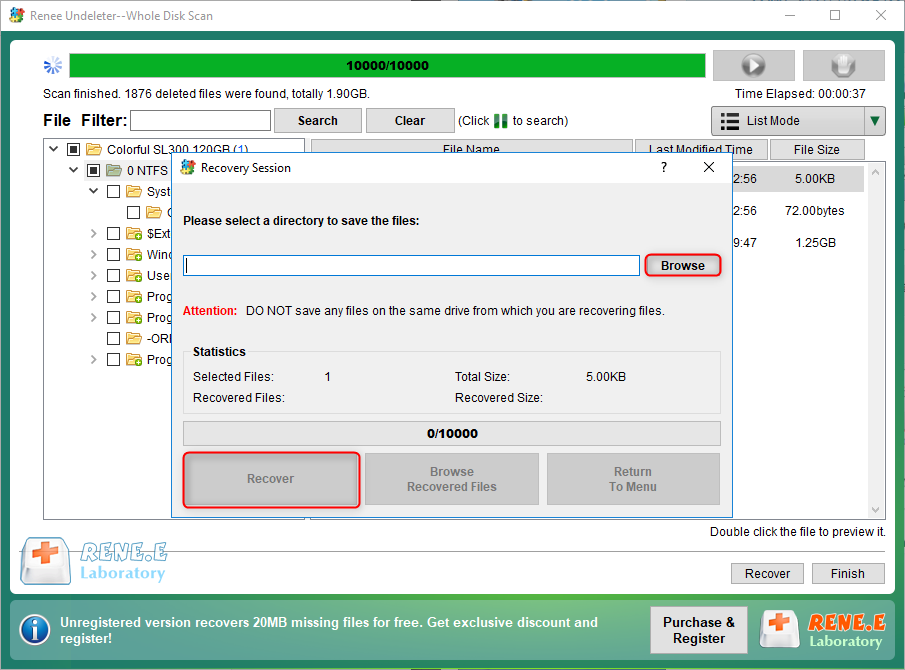
Explore Diskpart command for hard disk adjustments, and restore deleted files confidently with Renee Undeleter.
| parameter | illustrate |
| assign | Assign a drive letter or mount point to the selected volume. |
| attributes | Display, set, or clear disk or volume attributes. |
| active | Mark the disk partition that has focus as active. |
| create | Create a partition on a disk, a volume on one or more disks, or a VHD (virtual). |
| clean | Removes all partition or volume formats from the selected disk. |
| select | Move focus to a disk, partition, volume, or virtual hard disk (VHD). |
| convert | Converts the file allocation table of a FAT (FAT) FAT32 volume to the NTFS file system, leaving existing files and directories intact. |
| delete | Delete a partition or volume. |
| detail | Displays information about the selected disk, partition, volume or virtual hard disk (VHD). |
| exit | Exit the diskpart command interpreter. |
| extend | Extends the volume or partition with focus and its file system onto (frees up) space on the disk. |
| format | Format the disk to accept Windows files. |
| inactive | Marks the system partition or boot partition that has focus as basic primary (logging) activity in MBR disks. |
| list | Displays a list of disks, disk partitions, disk volumes, or VHD (virtual). |
cmd in the search box, right-click (command prompt), and select (Run as administrator).
"DISKPART" and press Enter to execute the command.(diskpart) in the text box and click the (OK) button, then enter the corresponding parameters behind (DISKPART>) and press (Enter) to execute the command.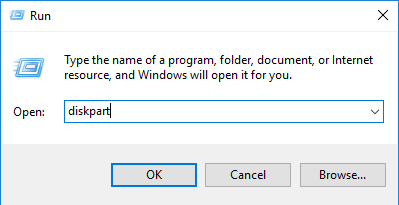
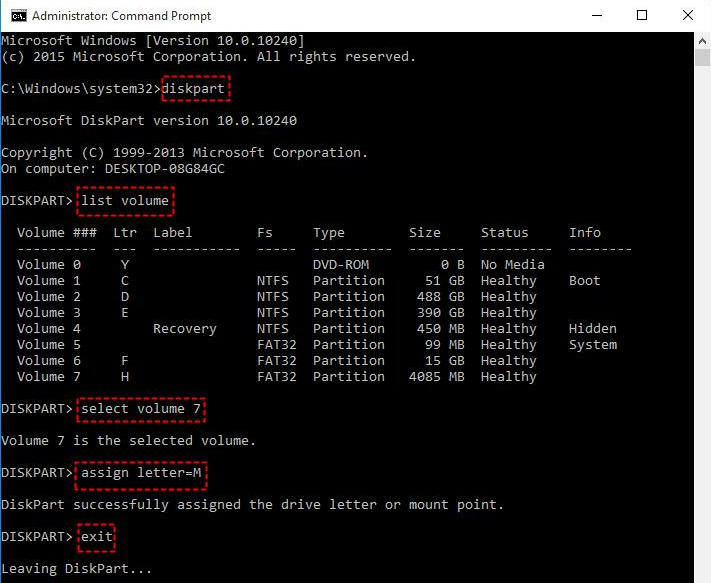
diskpart
list volume
Select volume 7
assign letter=M
exit
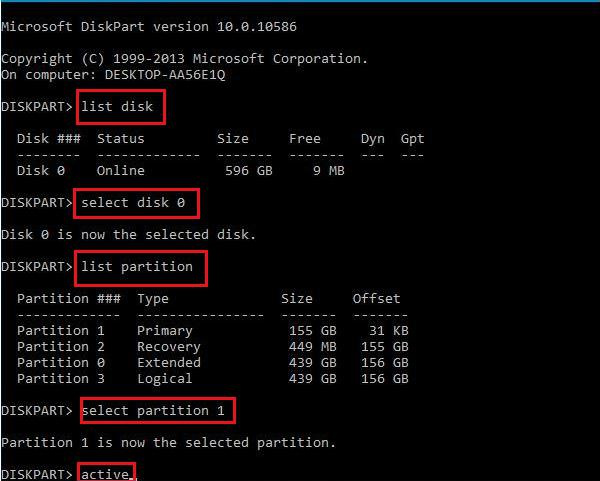
list disk
select disk 0
list partition
select partition 1
active
exit
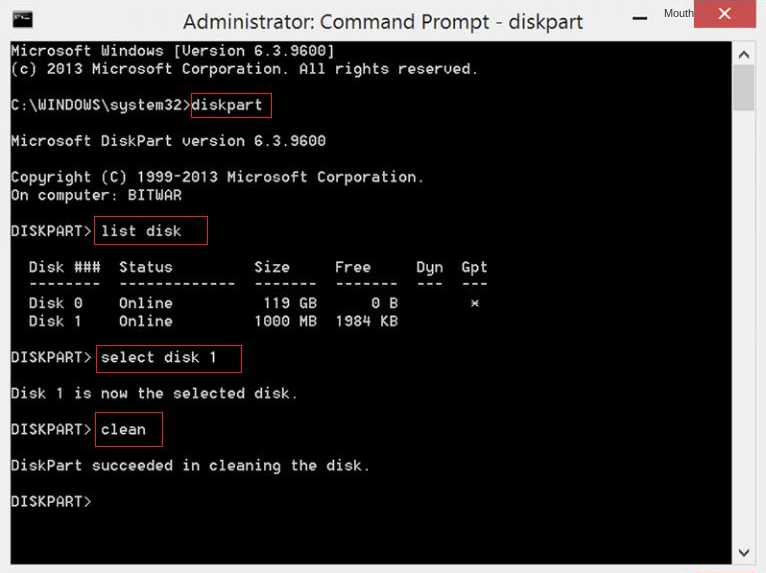
diskpart
list disk
select disk 1
clean
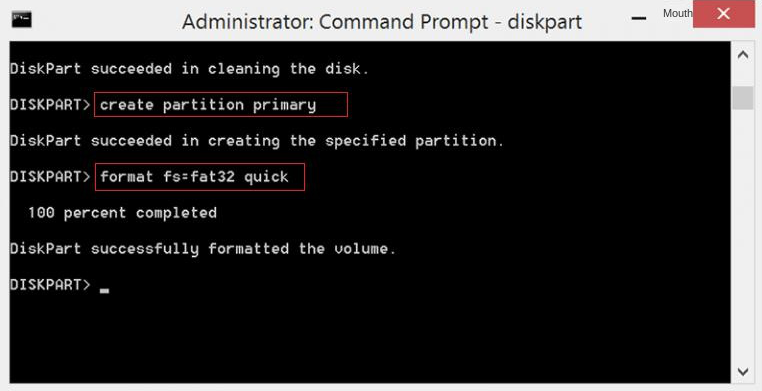
create partition primary
format fs=fat32 quick
exit
diskpart
list disk
select disk 2
detail disk
command and press (Enter) after each line.diskpart
list disk
select disk 0
list partition
select partition 2
detail partition
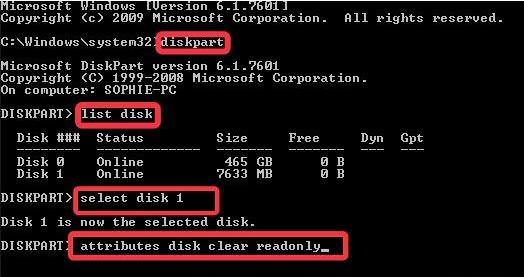
Diskpart command to resolve the issue.diskpart
list disk
select disk 1
attributes disk clear readonly
exit
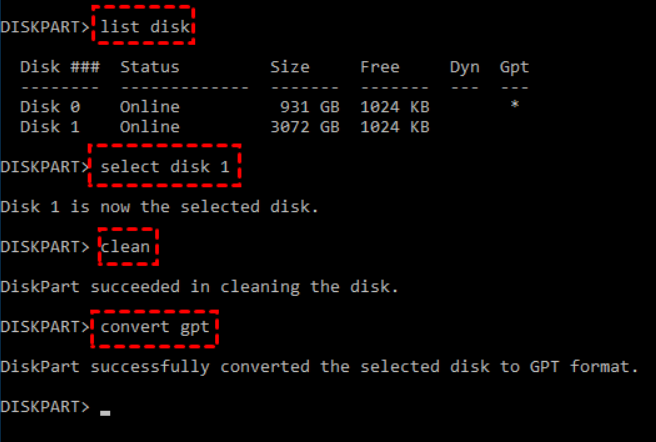
Diskpart command.diskpart
list disk
select disk 1
clean
convert gpt
exit

Easy to use Recover data by 3 steps;
Multiple scan modes Fast partition scan, whole partition scan and whole disk scan;
Supported file types Image, video, audio, text, email and so on;
Image creation Create a partition image to read and back up data;
Supported devices SD card, SDHC, SDXC, USB flash drive, hard disk and computer.
Easy to use Recover data by 3 steps;
Multiple scan modes Fast partition/whole partition/whole disk scan;
Supported devices SD card/USB/hard disk.
Free TrialFree TrialFree Trial 800 people have downloaded!
- Fast Partition Scan – Quickly retrieve files lost due to accidental deletion or emptying the recycle bin.
- Whole Partition Scan – Quickly recover files lost due to inaccessible or formatted partitions.
- Whole Disk Scan – Analyze and get partition information and perform a full scan of the entire partition.
- Image Creation – You can create a mirror image for a partition to back up the current partition state.

Relate Links :
How to boot from CD in Windows 10?

03-04-2024
Ashley S. Miller : Discover the straightforward process for booting directly from a CD in Windows 10, whether you're aiming to repair...
Easy Solutions for Fixing the error BOOTMGR is Compressed
01-03-2024
Jennifer Thatcher : Discover effective methods to resolve the "BOOTMGR is compressed" error on Windows PCs and retrieve inaccessible data without...
Fixing "Advapi32.dll Missing" Error on Windows System

09-12-2023
John Weaver : When you meet the error Advapi32.dll missing on your computer, you can fix it with the solutions presented...
Tips and Tricks for Solving KMODE_EXCEPTION_NOT_HANDLED on Blue Screen

03-04-2024
Amanda J. Brook : If you're facing the KMODE_EXCEPTION_NOT_HANDLED error on your Windows system, this guide offers a range of solutions to...

