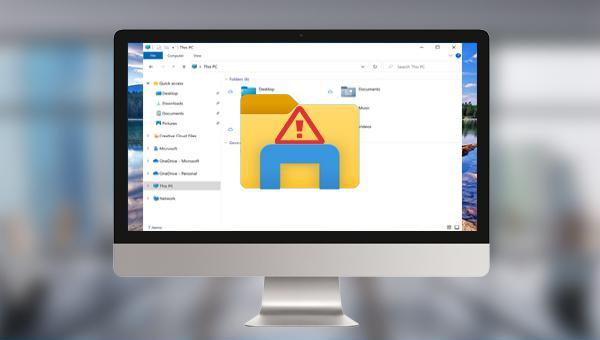
I. How to fix the file explorer that cannot be opened?
When the file explorer cannot be opened, we will not be able to normally access, modify, and edit files or folders stored in the hard disk. Let’s take a look at several repair methods for file explorer that cannot be opened.
1. Restart the resource manager through the task manager
Restarting the Windows Explorer (explorer.exe) process that controls the File Explorer application, taskbar, and (Start) menu may fix the Explorer won’t open error.
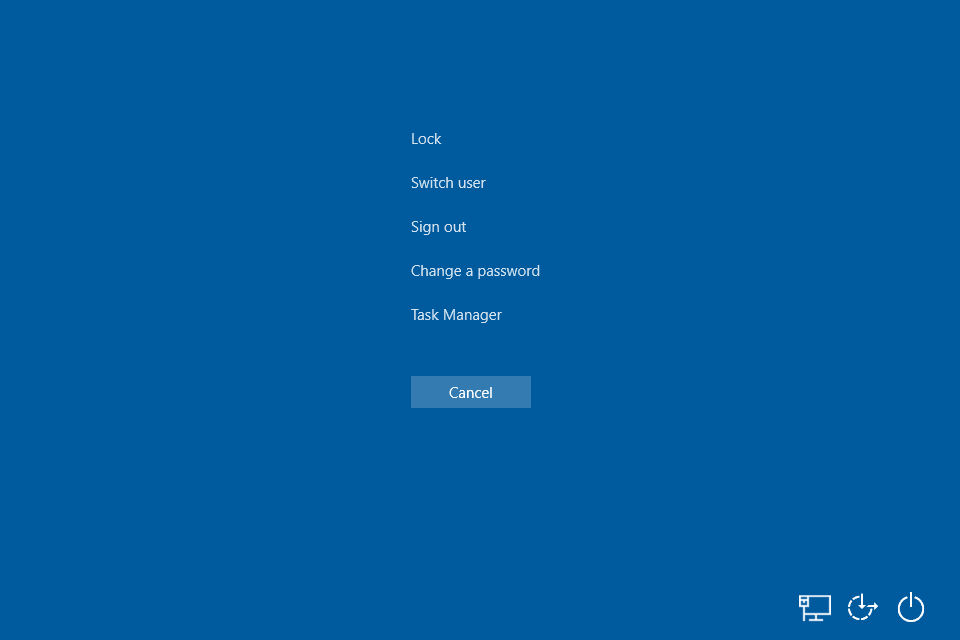
Step 1: Press (Ctrl + Shift + Esc), select (Task Manager) in the new interface.
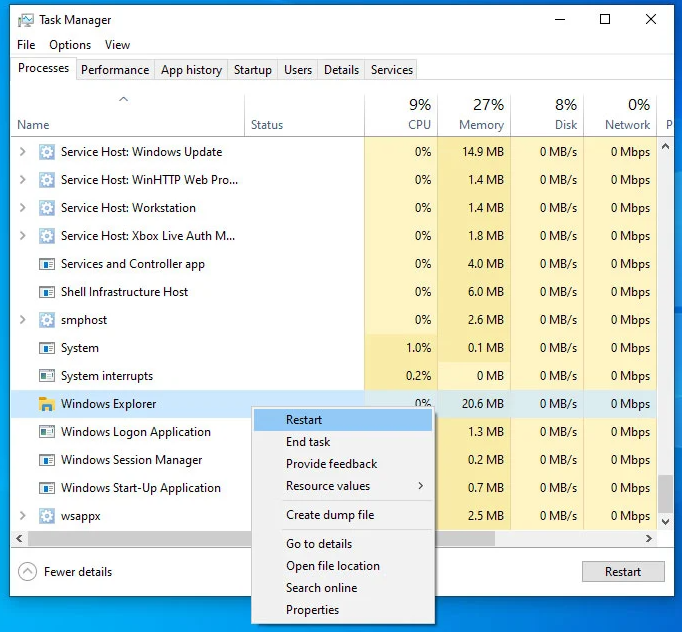
Step 2: Select the (Processes) tab. Right-click (Windows Explorer) and select (Restart). This process may take a few seconds, and the taskbar and (Start) menu may not be visible when Windows Explorer restarts. You can close Task Manager after the process is complete and open Explorer to see if the problem is resolved.
The resource manager cannot be opened may be due to some failures of the computer, and the system will automatically repair some detected problems when the computer is restarted.
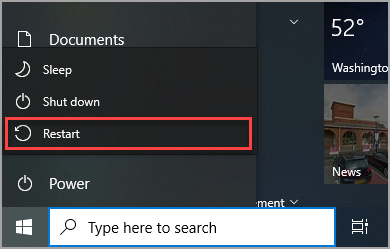
Method 1: Click (Start) menu > (Power) > (Restart) to restart the computer.
Method 2: Press (Ctrl + Alt + Delete) at the same time, select (Power) in the lower right corner, and then select (Restart).
Method 3: Press and hold the power button to manually shut down the computer, then press the power button again to restart the device. But closing in this way may lose unsaved data, so first make sure everything you’re working on is saved.
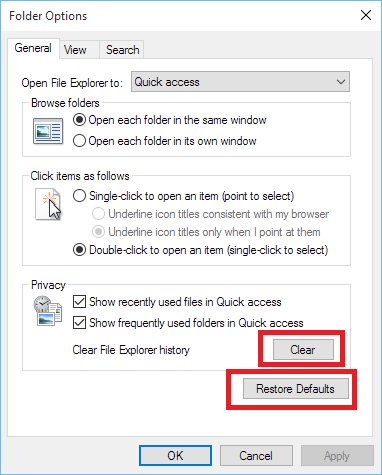
3. Restore file explorer defaults
Sometimes it may be that the program cannot be opened due to an error in the settings of the file explorer. We can try to restore the default settings of the explorer to solve it.
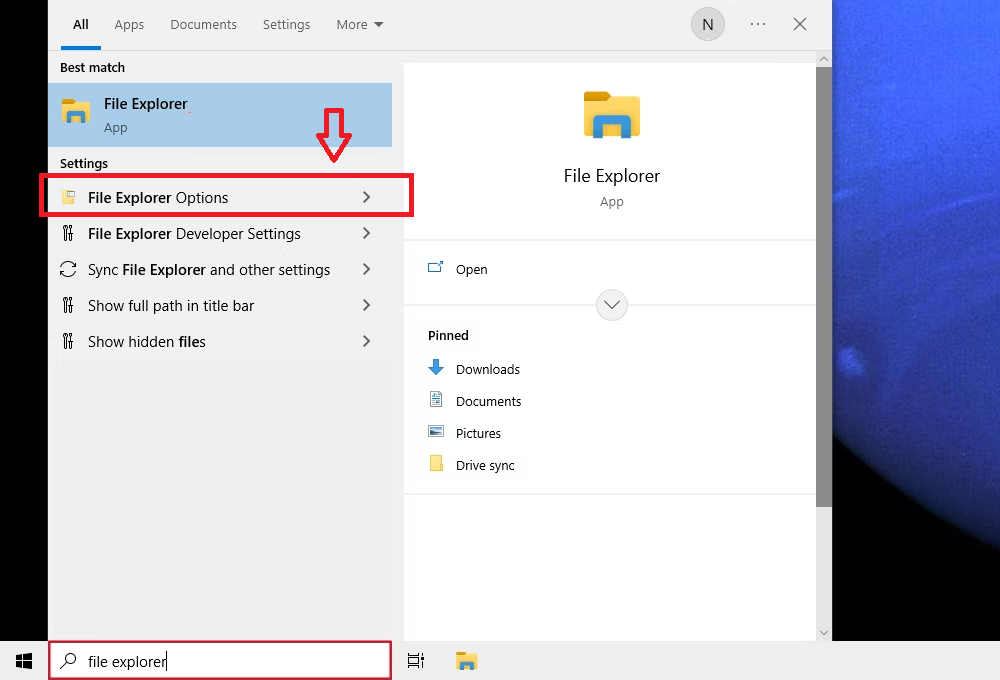
Step 1: Start the computer, enter (file explorer option) in the search box in the lower left corner and open it.
Step 2: In the (General) tab, find and click the (Clear) button in the (Privacy) area, click this button to clear the file explorer history, and then click (Restore Defaults). In the (View) tab, click (Reset Folder) and (Revert to Default). In the (Search) tab, click (Restore Defaults). Finally, click (Apply) and (OK), and then open the resource manager to check whether the problem is solved.
4. Create a new path for the explorer shortcut
If you originally clicked Explorer from the taskbar, you encountered a problem that it could not be opened. It is recommended to right-click on the File Explorer icon in the taskbar and select (Unpin from taskbar). Then follow the steps below to create a new path.
Step 1: Right-click anywhere on the desktop. From the menu that appears, select (New), then go to (Shortcuts) to create a shortcut.
Step 2: Paste (C:\Windows\explorer.exe) into the input box of the shortcut creation window. Click (Next Page).
Step 3: Give the shortcut a name, such as (Explorer). Click (Finish), and then you can click your newly created (Explorer) shortcut on the desktop to see if you can open File Explorer.
Clean boot refers to starting the system by using the least set of drivers and startup programs, that is, only starting the original components and services of the system without starting third-party software and plug-ins, which can facilitate users to find out the problem. reason. The specific operation steps are as follows:
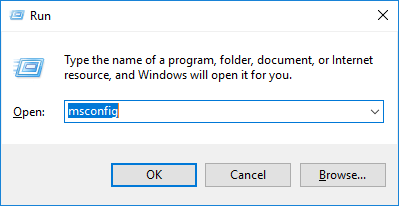
Step 1: Run the computer, press (Windows+R) keys at the same time to open the run window. Next type (msconfig.exe) and press the (OK) button to open the system configuration window.
Step 2: In the opened system configuration window, in the “Startup Selection” column of the (General) option bar, select the (Selective Startup) option, and uncheck the (Load Startup Items) option at the same time.
Step 3: Next, switch to the (Services) tab, check (Hide all Microsoft services) and press the (Disable all) button.
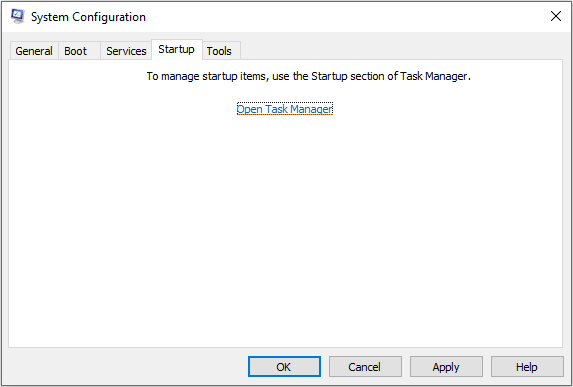
Step 4: Switch to the (Startup) option bar and click (Open Task Manager).
Step 5: You need to select (disable) the right mouse button to close all the programs displayed on the page, or select the current program and click the (disable) button in the lower right corner. After the operation is completed, close the task manager window, and click (OK) on the system configuration page. You will then see a pop-up window, click the (Restart) button to see if the problem persists after restarting. After troubleshooting the clean boot, you can disable or uninstall the service or application that prevents File Explorer from opening, and then enable the items disabled in the above steps to reset the computer to start normally.
Kind tipsIf the problem does not occur when the computer is in a clean boot environment, you can determine which startup application or service is causing the problem by systematically turning the startup application or service on or off and restarting the computer. While opening a single service or startup item and restarting each time will eventually find the problematic service or application, it is most effective to test half of them at a time each time the computer is restarted, thereby ruling out half of the items as potential causes of the problem . Then, the process can be repeated until the problem is identified.
6. Run the Run System File Checker (SFC command)
The inability to open the file explorer may also be related to the damage or loss of some system files. To check if this is the cause of the problem and repair system files, you can perform a system check with the System File Checker tool (SFC). To run SFC commands, you need to use Windows PowerShell or a command prompt. Here, Windows PowerShell is used as an example for introduction.
Step 1: Right-click on the Start menu and left-click on (Windows PowerShell (Admin)).
Step 2: When the PowerShell window opens, type (sfc /scannow) and press (Enter). By doing this, the SFC tool will scan your computer for system file errors. If it detects an error, Windows will repair and replace the file, which should fix the problem of File Explorer not opening.
7. Perform Windows Update
Outdated Windows OS can also cause file explorer not opening issue. You can try to update your Windows system to resolve the issue.
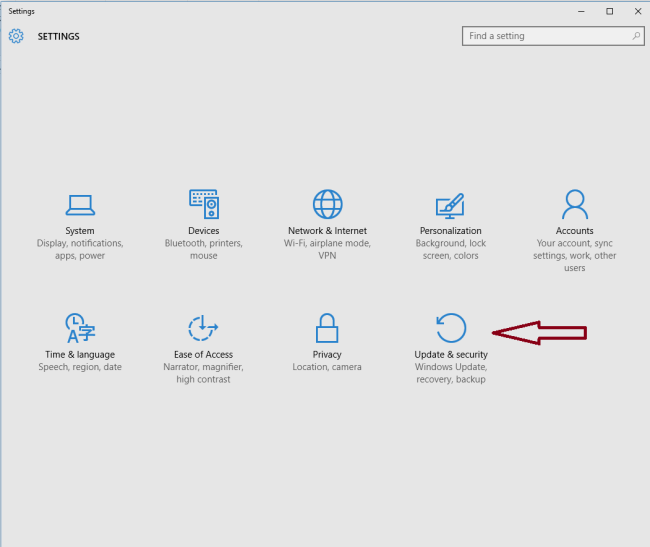
Step 1: Start your Windows computer, click (Start) > (Settings) > (Update and Security).
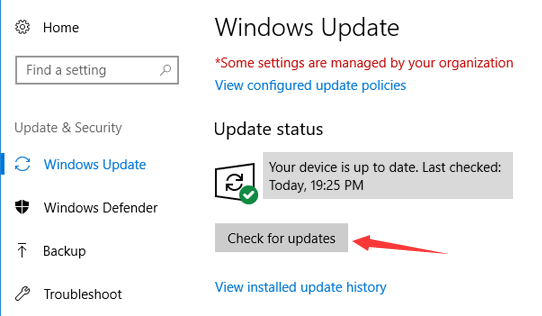
Step 2: Click the (Check for Updates) button in the (Windows Update) column, and if an update is found, Windows will start downloading the update. After downloading the update, click (Install Now), it may be necessary to restart several times during the installation of the update. After that, whether the problem of file explorer crashing and restarting has been solved.
The above is the solution to the problem that the file explorer cannot be opened. If you find that important data in the computer is lost after you fix the problem, you can continue to refer to the following methods for data recovery operations.