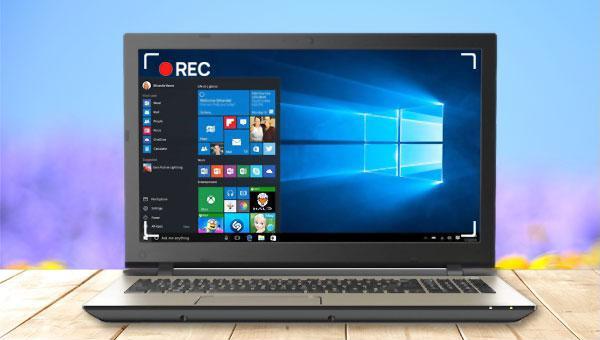
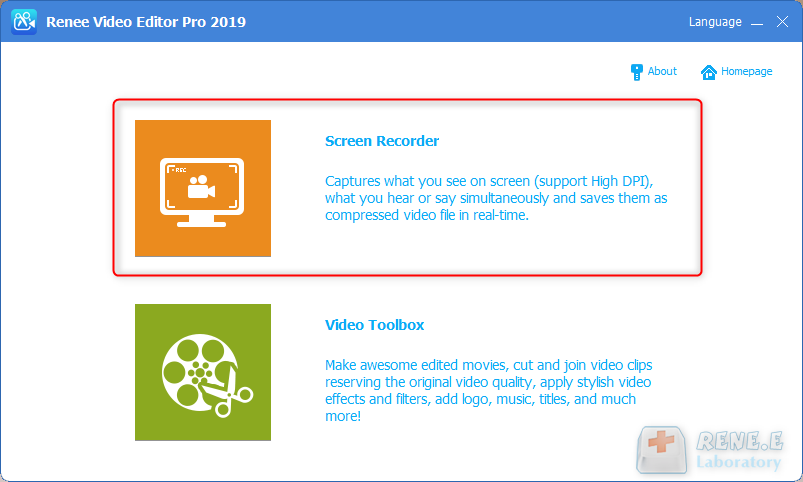
Renee Video Editor Pro is a video recording and editing tool that integrates screen recording, post-production, and format conversion. It allows you to set the recording area, screen size, watermark, cursor style, sound source, and save format. Whether recording online movies, conference videos, game screens, or software operations, it helps you record and save with one click.
The software enhances video content during post-production by editing or merging clips, cropping frames, rotating or flipping videos, adding opening/ending animations, transition effects, switching filter styles, dubbing, adding or removing music, and creating subtitles. After editing, you can convert the video to various formats. It supports most video and audio formats, including MXF, AVI, MKV, MP4, MOV, M2TS, M4V, AAC, AC3, and more, with free conversion between video and audio formats.
Renee Video Editor Pro– Multi-function Screen Recording Software
Easy to use Customize the recording window and finish the screen recording on one click.
Automatic recording plan Set the recording start time for not missing exciting content.
Special recording effects Recording rate switching, customizable watermarks, mouse special effects, screenshots during recording, etc.
Device Simultaneous Recording Record the screen and the camera at the same time.
Multifunction Edit the video and convert the video format.
Easy to use Customize the recording window and finish the screen recording on one click.
Automatic recording plan Set the recording start time for not missing exciting content.
Special recording effects Recording rate switching, customizable watermarks, mouse special effects, screenshots during recording, etc.
② How to record laptop screen with Renee Video Editor Pro?
Step 1: After running the software, click the (Screen Recorder) option on the main page.
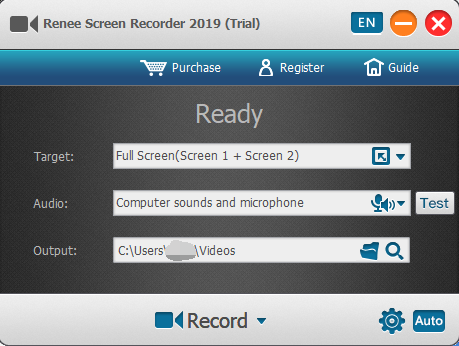
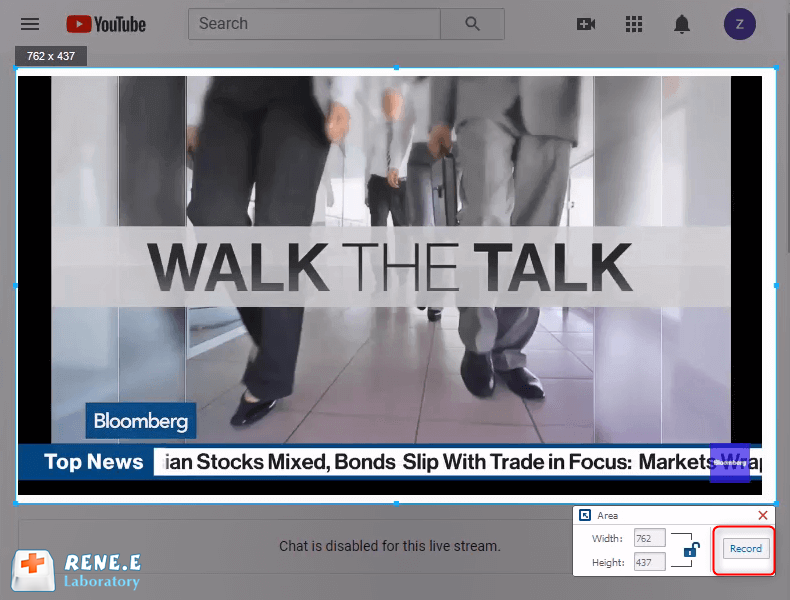
Step 2: In the “Ready” interface, personalize the recording target, recording options, and output directory. Select the “Custom” recording area and the option to record “Computer Sound and Microphone”.
Settings for recording:
Target: Supports full screen, custom area, and camera-captured images.
Audio: Includes computer sound, microphone sound, and non-recording sound.
Output: Choose where to store recordings.
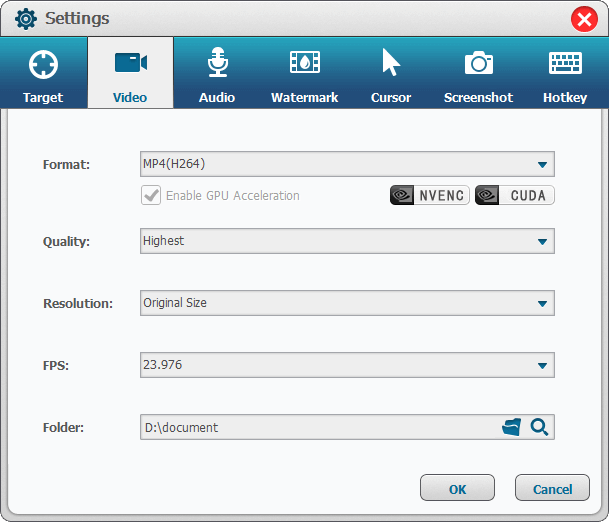
Step 3: In addition, click the (small gear) icon in the lower right corner, and you can also personalize parameters such as recording format, video quality, resolution, video frame rate, output directory, and watermark.
Step 4: Once all recording parameters are set, return to the “Ready” interface, click the Record button, select the area to record, and then click the Record button in the lower right corner to start recording the laptop screen.
Step 5: Pause or continue the recording at any time. Once finished, click the small square button in the recording option box in the lower right corner to save the video file to the preset path.
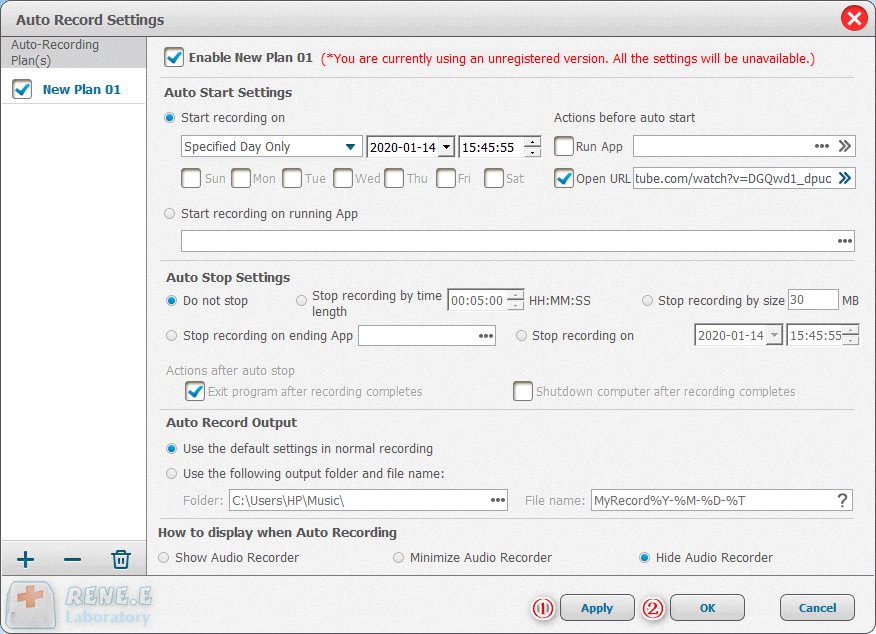
Renee Video Editor Pro features an easy-to-use automatic recording function. Click the Auto button in the lower right corner of the “Ready to Record” interface to access the automatic recording settings. Set the start and end time for the recording, and the software will automatically execute the recording command at the specified start time, making the process convenient and hassle-free.
2. Use Xbox Game Bar to record laptop screen (Windows system)
The Xbox Game Bar is a Screen Recorder built into Windows 10, allowing users to record game videos or other software screens. Before using this Screen Recorder, enable the recording function in Windows Settings. Steps are as follows:
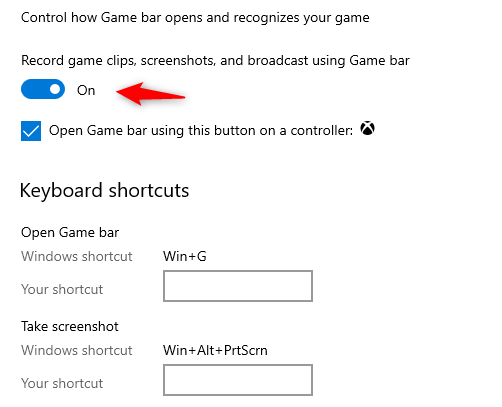
Step 1: Click the Settings button in the Windows Start menu, open Windows Settings, and click Games > Game Bar. Turn on the switch “Use the Game Bar to record game clips, screenshots, and broadcasts,” and confirm the shortcut key for “Open Game Bar” (Windows icon + G by default).
Step 2: Go to (Captures) settings, set the output folder of the recording file and other recording options, such as enabling background recording, the maximum recording time (up to 4 hours), etc.
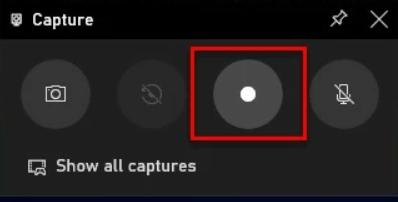
Step 3: After completing all settings, press the Windows icon + G keys simultaneously to open the game bar. Click the Start Recording button in the capture tool to record the laptop screen. Note that the recording function cannot record the Windows desktop or file explorer; it can record game screens, software operation videos, or browser screens.
Step 4: After finishing the recording, click the (Stop Recording) button, and the recorded video file will be saved to the preset location.
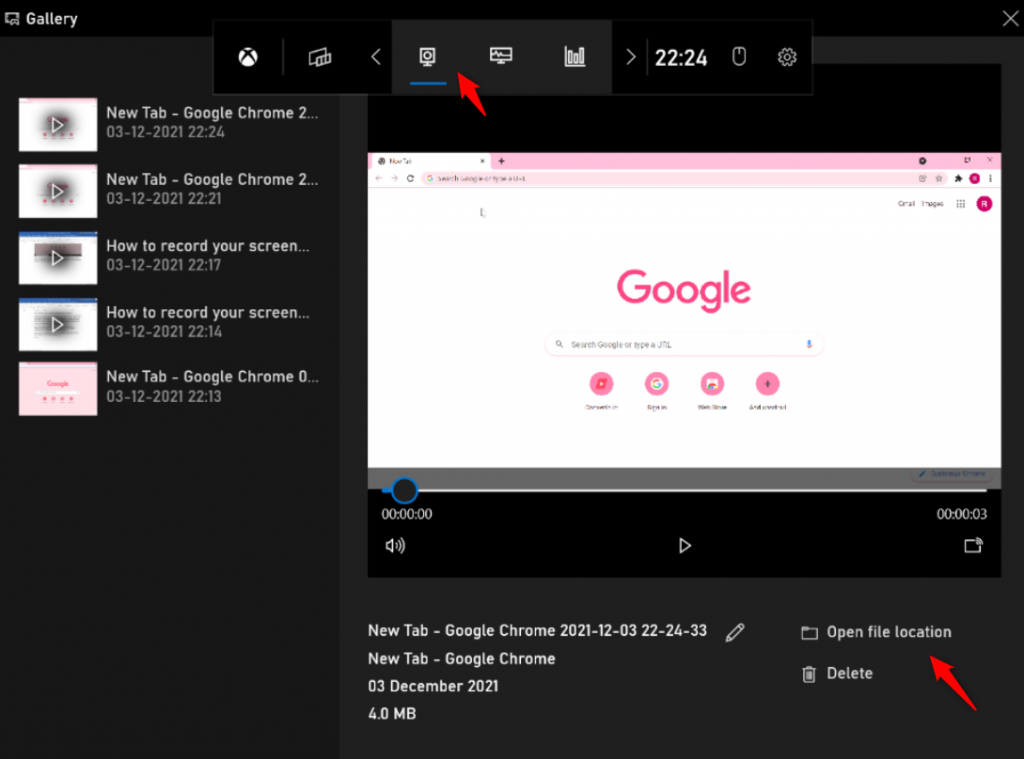
Press Windows icon + G to open the game bar, click Gallery to view recorded videos and screenshots, and click Open file location in the lower right corner to open the file in the file explorer.
3. Use QuickTime Player to record laptop screen (Mac system)
QuickTime Player software is a built-in player in the Mac system. In addition to playing video/audio, it can also record the laptop screen. Here are the specific steps to record screen with QuickTime Player:
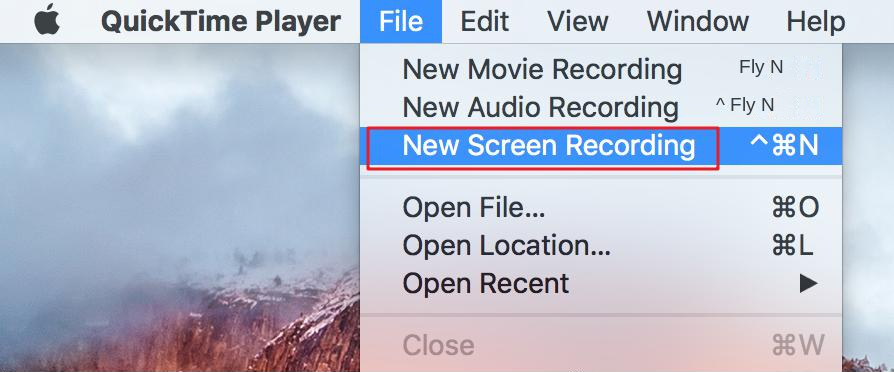
Step 1: Open Finder and open the QuickTime Player software in the Applications folder. After opening the software, click (File) > (New Screen Recording).
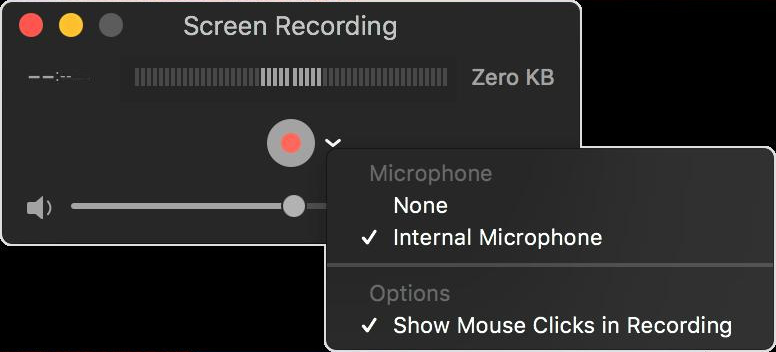
Step 2: Select the sound source from the drop-down menu next to the recording button. If you enable Show Mouse Clicks in Recording, a black circle will appear where the mouse clicks during recording. Click the red record button once settings are complete.
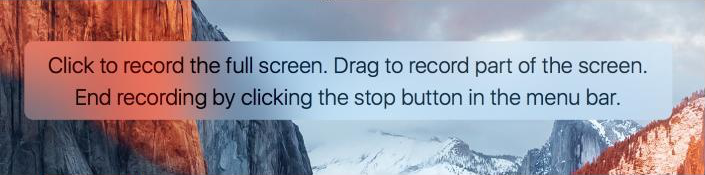
Step 3: After clicking the record button, a prompt will appear, and you can choose to record the full screen or a specific area of the screen according to the prompt.
● Click anywhere on the screen to start recording the entire screen.
● Drag to select the area to record, then click Start Recording in the area.
Step 4: Click the stop recording button in the menu bar to stop recording, QuickTime Player will automatically open the recorded video, you can play, edit or share, Save the recorded video.
II. Summary
The text introduces notebook screen recording tools for Windows and Mac systems: Renee Video Editor Pro, Xbox Game Bar, and QuickTime Player.
Renee Video Editor Pro and Xbox Game Bar are suitable for Windows users. The Xbox Game Bar doesn’t require additional software but cannot record the desktop and file explorer screens. Renee Video Editor Pro has no such limitations and allows further editing and format conversion after recording.
For Mac users, QuickTime Player is recommended as a practical recording tool and multimedia player.
Amanda J. Brook : Master storytelling with our tutorial on using speech bubble templates to create engaging comic-style videos that captivate audiences.