

Navigating USB Device Data Deletion: Where Do Deleted Files Go?

Summary
Learn the truth about where your deleted USB files actually go and how you can retrieve them with these helpful tips and methods.
Table of contents
When files are “deleted” on a USB flash drive, the files themselves aren’t immediately destroyed. Instead, the system simply erases the pointers to the file locations – much like removing entries from a table of contents without actually ripping out the pages from a book. The data remains on the storage medium until it is overwritten by new data. This is mostly due to the fact that external drives, like USB drives, do not have a Recycle Bin feature like internal HDDs or SSDs, where deleted files are temporarily stored. Thus, on USB drives, files are promptly set to be overwritten.
The way the USB drive’sFile Allocation Table (FAT) or New Technology File System (NTFS) handles deletion is by marking the space previously occupied by the file as free. The file’s data continues to exist until the system allocates that space to another file. It is similar to an index that no longer points to a specific book, even though the book remains on the shelf.


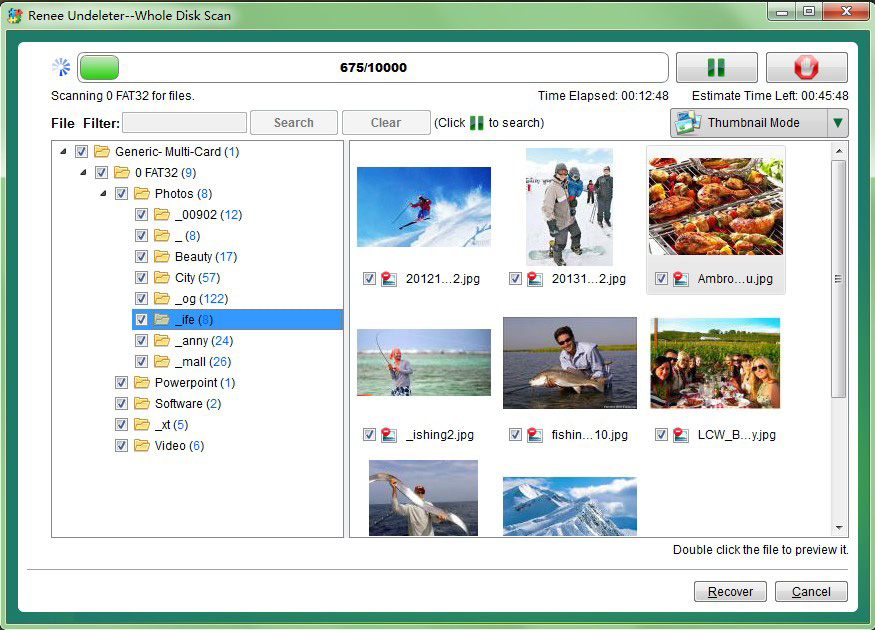
Easy to use Recover data by 3 steps;
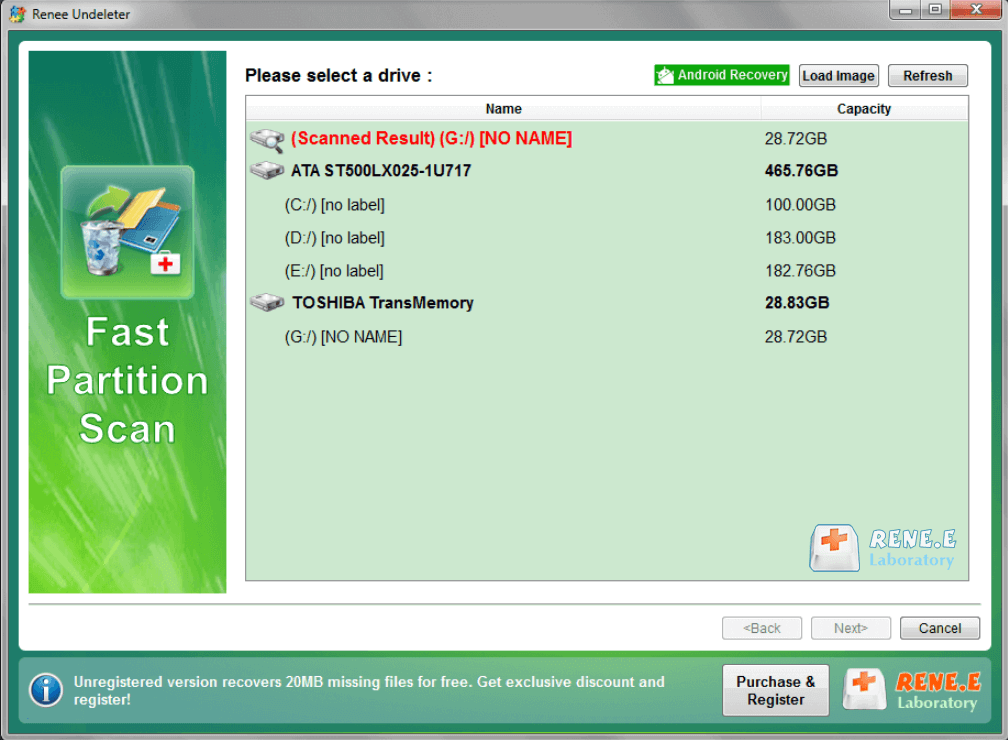
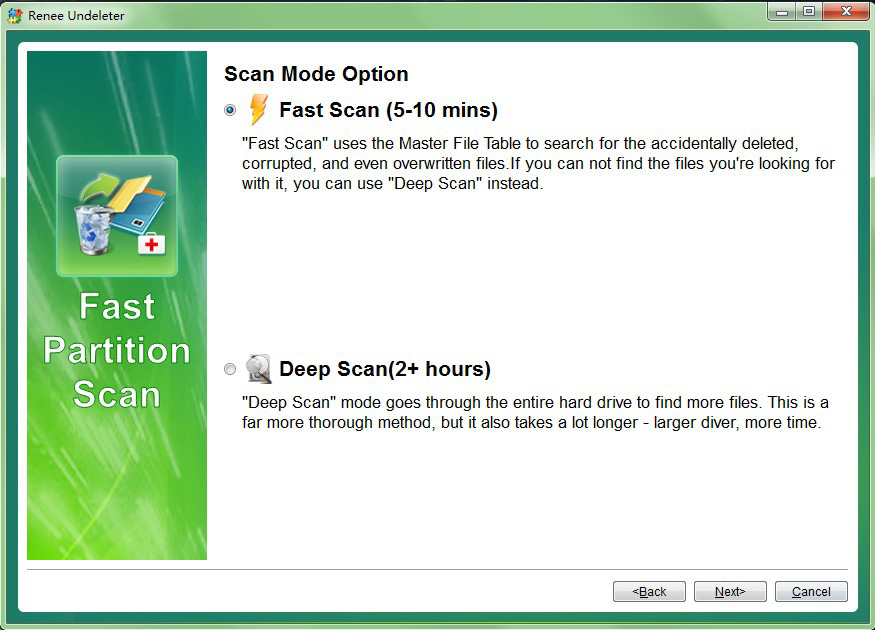
Multiple scan modes Fast partition scan, whole partition scan and whole disk scan;
Supported file types Image, video, audio, text, email and so on;
Image creation Create a partition image to read and back up data;
Supported devices SD card, SDHC, SDXC, USB flash drive, hard disk and computer.
Easy to use Recover data by 3 steps;
Multiple scan modes Fast partition/whole partition/whole disk scan;
Supported devices SD card/USB/hard disk.
Free TrialFree TrialFree Trial 800 people have downloaded!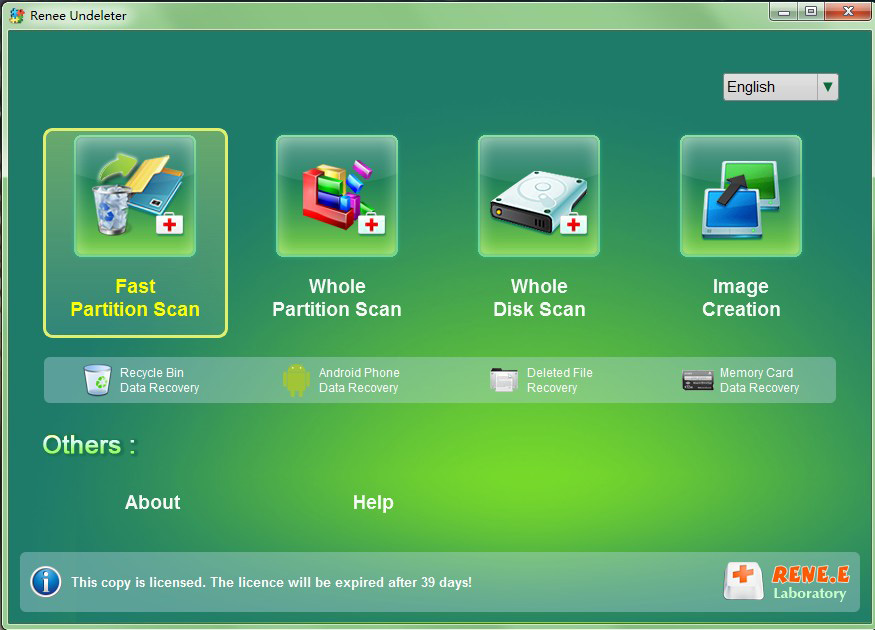
- Renee Undeleter is a user-friendly data recovery software that can be used by anyone, regardless of their technical knowledge.
- It has a high success rate in recovering lost or deleted files from various storage devices.
- It can recover all types of files, including documents, photos, videos, and more.
- If the deleted files have been overwritten by new data, they may not be recoverable.
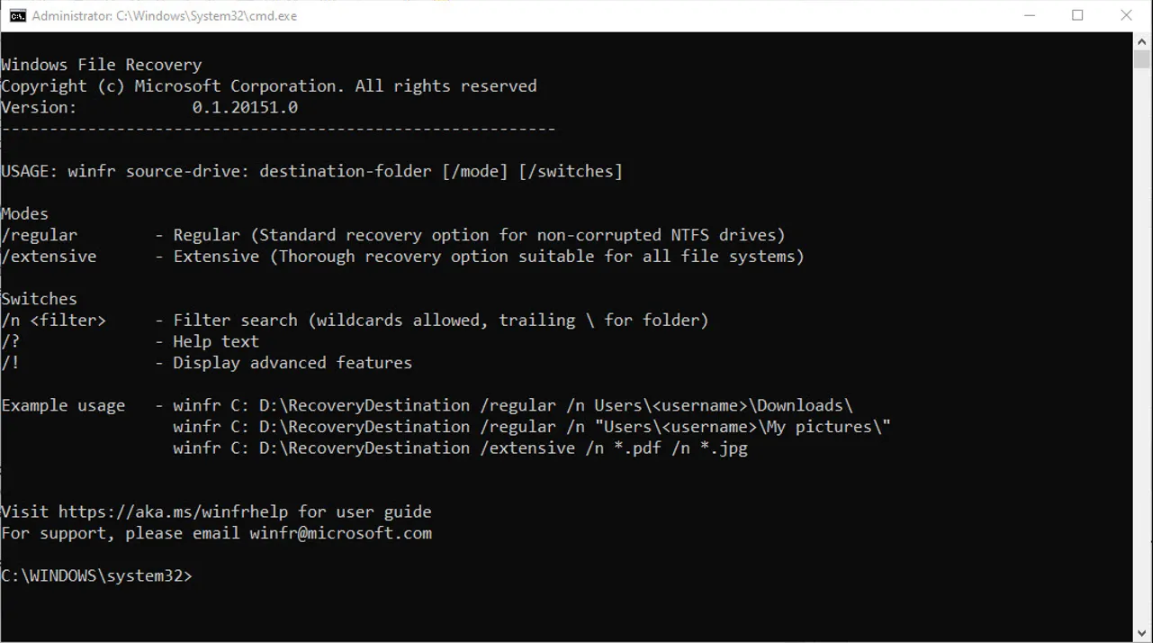
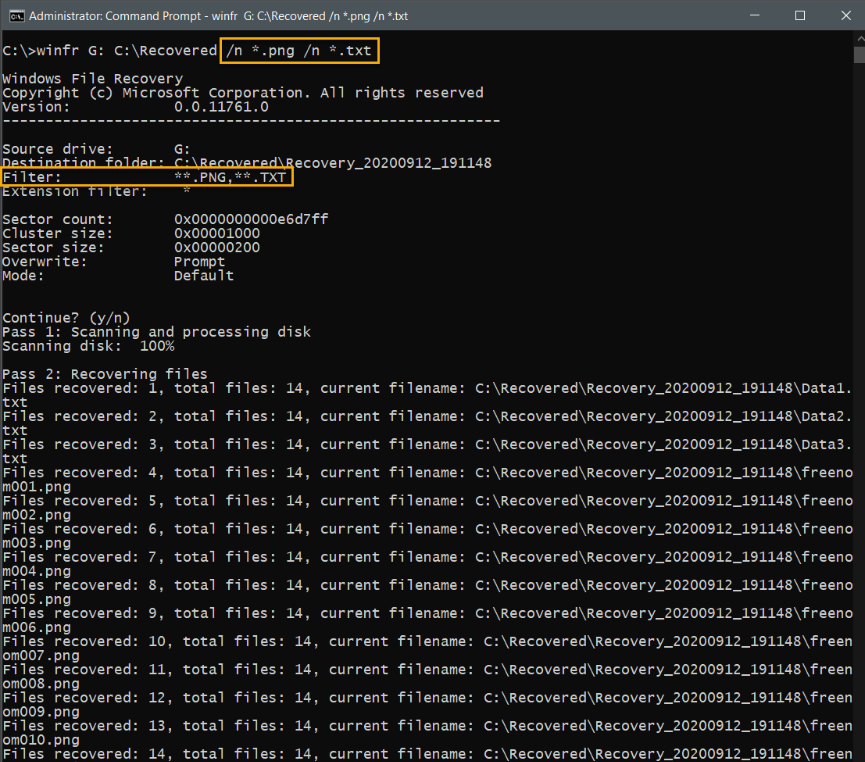
CMD
winfr G: D:/recovery_dest /regular

Quick Backup files at up to 3,000MB/min.
Fullfill different backup needs Supports system backup, disk / partition backup, file backup and disk clone.
Intelligent Automatically analyze the differences between source and backup data.
Convenient Support VSS, allowing to freely view webpages when backing up system.
Highly compatible Supports various files and storage devices.
Quick Backup files at up to 3,000MB/min.
Fullfill different backup needs Backup for disk, partition and system. Save disk space by backing up incremental /differential data.
Highly compatible Supports various files and storage devices.
- Regularly back up your files to protect against accidental deletions, drive failures, and viruses.
- Use USB drives properly by carefully inserting and removing them and using the “eject USB” option.
- Scan your USB drive for viruses and make sure your anti-virus software is up to date.
Relate Links :
Crack Your Way In: Unlocking Windows XP with These Password Bypass Methods

14-11-2023
Ashley S. Miller : Locked out of your Windows XP system due to a forgotten password? Don't worry, we've got you covered....
Ultimate Guide for Downloading Windows 11 Password Reset USB

13-11-2023
John Weaver : Learn how to create, use, and reset your Windows 11 password with a USB drive in this comprehensive...
Uncovering the Mystery: Where Do Deleted Files Go in Windows 10?
13-11-2023
John Weaver : Are you wondering where your deleted files go in Windows 10? This article will guide you through the...
Uncovering the Mystery: Where Do Deleted Photos Go?
13-11-2023
Ashley S. Miller : Uncover the mystery of where your deleted photos go and discover methods for recovering them on different operating...

