author avatar
    Specialist of Customer Service Dept.
 

Summary
Learn why disk partitions can cause your computer to slow down and how to fix it by extending the volume/partition successfully. Find solutions for expansion failures in this article.


Windows cannot extend the volume

I. What is the reason why Windows cannot expand the volume?

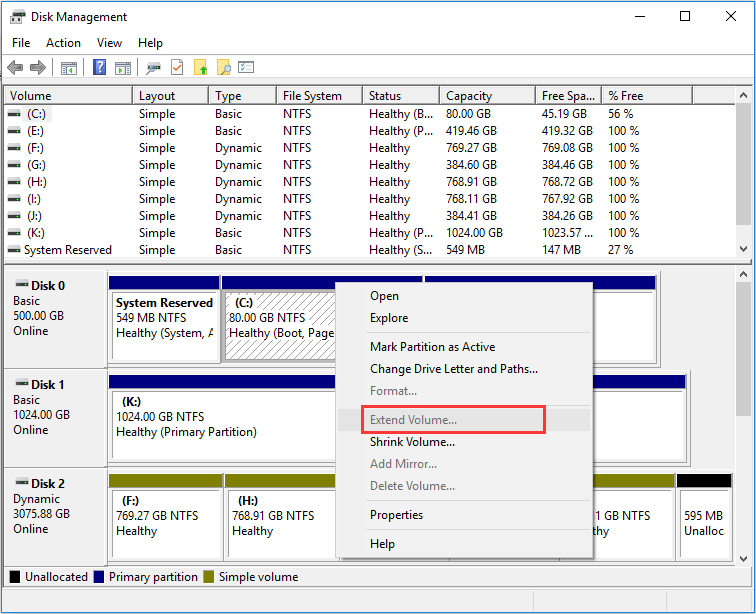
When you expand the volume in Disk Management, you find that the “Extend Volume” option is grayed out, and the volume cannot be successfully expanded. There are two possible reasons:
●There is no unallocated space on the hard disk drive.
●Windows cannot expand to FAT or other partitions. Because, the Extend Volume option in Disk Management is only available for RAW or NTFS partitions.
cant extend volume
After understanding the reasons why the volume cannot be expanded, how to solve the problem that the volume cannot be expanded? Let’s learn some common solutions below.

II. How to solve the problem that Windows cannot expand the volume?

1. Create unallocated space

You cannot expand a volume when you have no unallocated space on your hard drive. In this case, you must first delete an empty or useless partition, or shrink the partition to leave free/unallocated space next to the target volume. The specific operation steps are as follows:
Step 1: Run the computer, press the (Windows+X) keys at the same time, and select the (Disk Management) option.
disk management
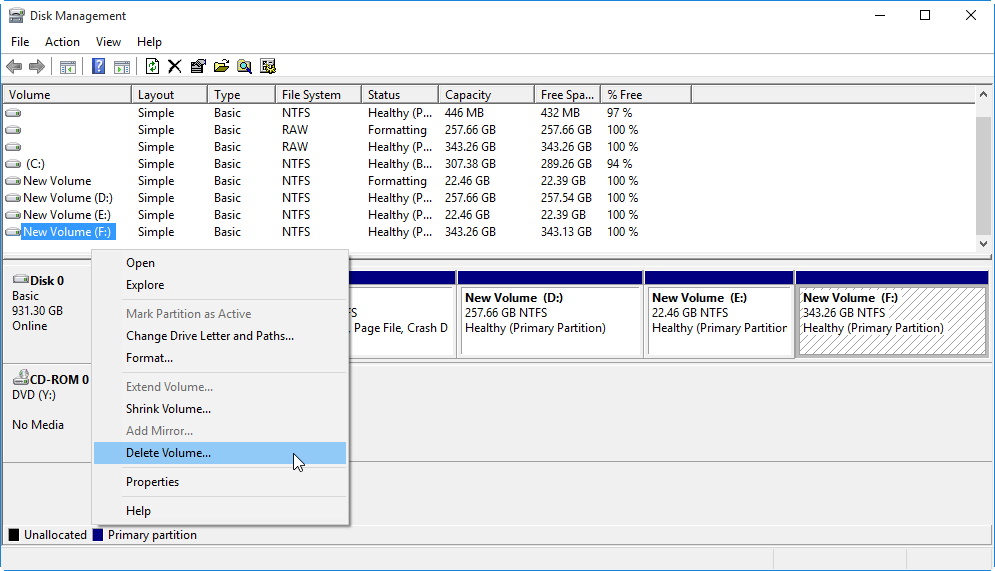
Step 2: Right-click the partition next to the target volume, and select the (Delete Volume) option, and then click the (OK) button.
delete volume
Note: Deleting the volume will clear all the data in it, so before performing the operation of deleting the volume, please back up the data in the partition to be deleted in advance to avoid data loss. If you do not back up in advance and cause data loss, please refer to the third part below Contents attempt to restore.
delete volume clear data
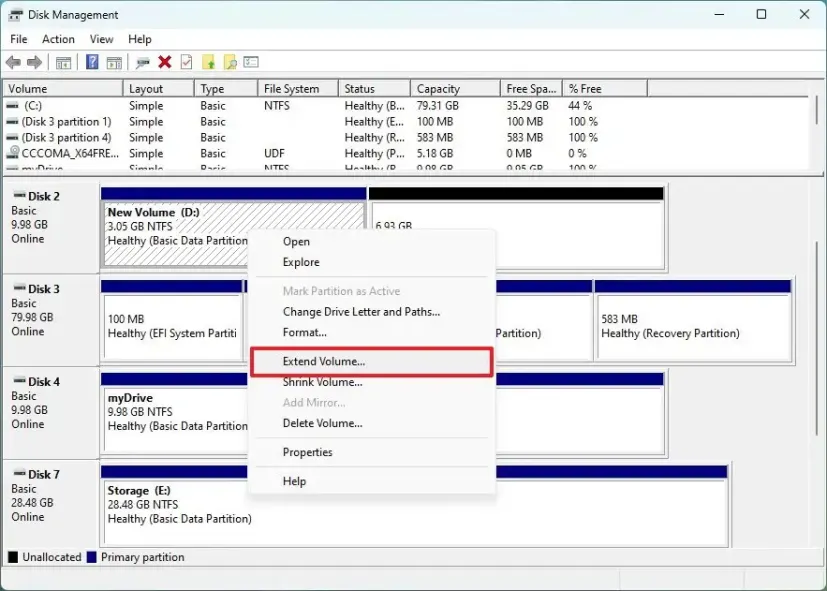
Step 3: After the volume is deleted, it will become “unallocated”. At this time, the volume expansion operation can be performed on the previous partition. Right-click the target partition you want to extend and select the (Extend Volume) option.
Right click on the partition and select Extend Volume
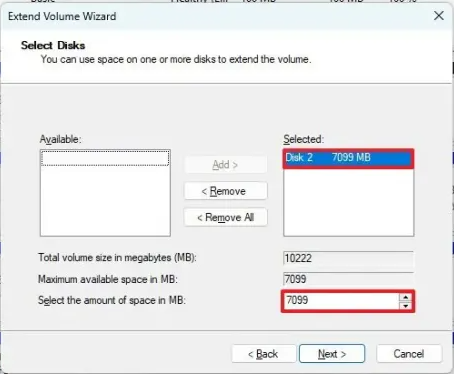
Then adjust the size of the target volume in the volume expansion wizard interface. Then click (Next) > (Finish) to successfully expand the partition.
Extend volume settings

2. Convert FAT partition to NTFS format

The extended volume function in disk management does not support the FAT file system. Even if there is unallocated space behind the target partition, the extended volume operation cannot be performed. From the figure below, it can be seen that the (extended volume) option of the FAT32 partition is gray, that is, the volume cannot be extended .
FAT32 extended volume gray
Therefore, you can convert the FAT partition to NTFS format by formatting, but please make a data backup before formatting. The specific operation steps are as follows:
Step 1: Press the (Windows+X) keys on the keyboard at the same time. Then in the pop-up list, select the (Disk Management) option.
Disk Management Options
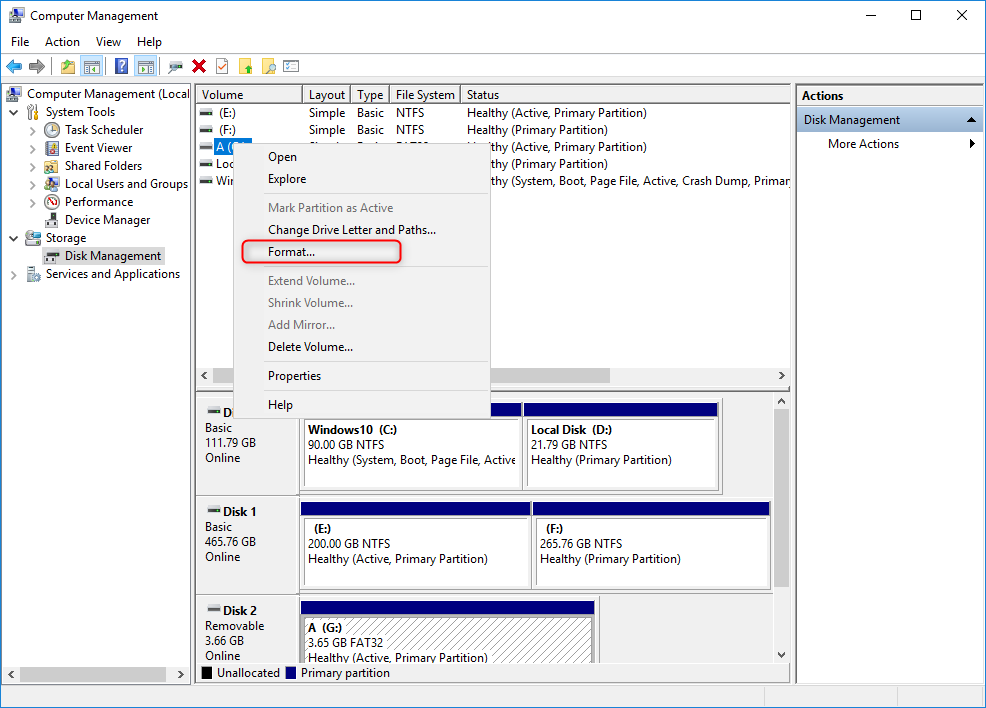
Step 2: Next, find the FAT partition whose file system needs to be converted, right-click on it and select the (Format) option.
formatting options
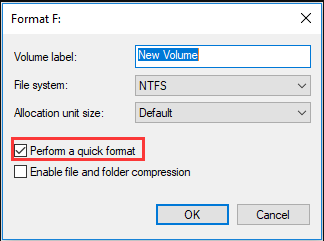
Step 3: Select the file system: NTFS. Then check the (Execute Quick Format) option, click (OK) and wait for the formatting to complete.
perform a quick format
After changing the partition to the NTFS file system, right-click it and select (Extend Volume), then follow the instructions to complete the follow-up operations to expand the volume.
NTFS Partition Extended Volume
The above are two conventional methods to solve the problem that Windows cannot expand the volume. Since the operation of deleting the volume or formatting the partition may cause data loss, if you have not made a data backup in advance, it is recommended that you use professional data recovery software. Get lost data back. Here I recommend you to use Renee Undeleter to operate. This software not only has comprehensive functions, but also is very easy to operate. Let’s learn more about the functions and usage steps of this software below.

III. Recover lost partition data with Renee Undeleter

1. What is Renee Undeleter?

Renee Undeleter It is a software specially used to restore various data files. When you accidentally delete important files, empty the recycle bin, or format the disk/storage, you can use this tool to retrieve the lost data. The software covers four functional modules, including file recovery, format recovery, partition recovery and image creation. Therefore, it can help you solve all possible data loss problems that may occur during system use in an all-round way, which is very convenient.
Hot Topic - ADsRenee Undeleter – Simple & Powerful Software for Data Recovery

Easy to use Recover data by 3 steps;

Multiple scan modes Fast partition scan, whole partition scan and whole disk scan;

Supported file types Image, video, audio, text, email and so on;

Image creation Create a partition image to read and back up data;

Supported devices SD card, SDHC, SDXC, USB flash drive, hard disk and computer.

Easy to use Recover data by 3 steps;

Multiple scan modes Fast partition/whole partition/whole disk scan;

Supported devices SD card/USB/hard disk.

Free TrialFree TrialFree Trial 800 people have downloaded!
2. How to recover lost partition data with Renee Undeleter?

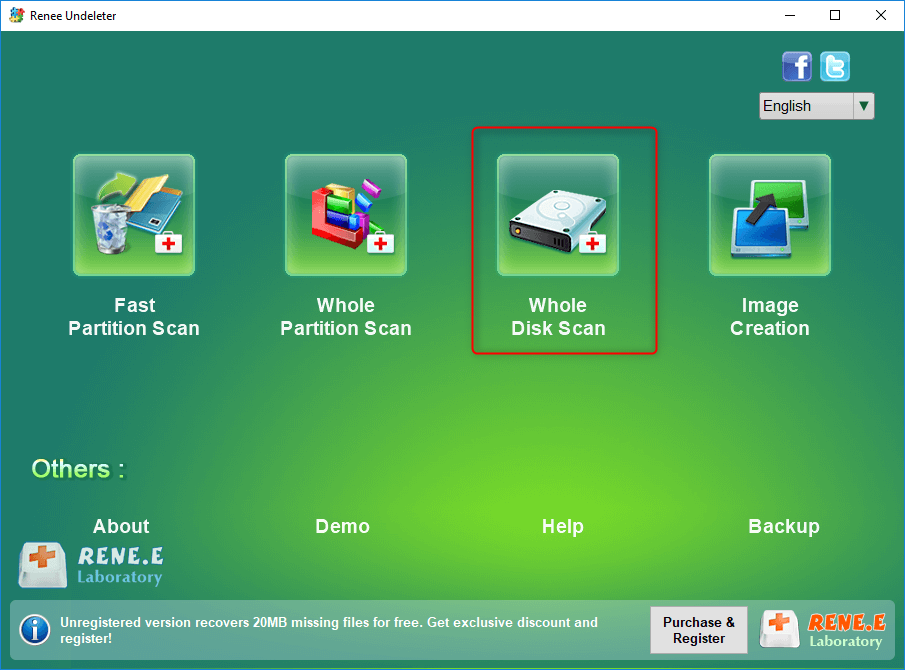
Step 1: Download, install and run Renee Undeleter, select the (Partition Recovery) option on the main interface. Note: Do not install on the disk that needs to restore data, so as not to cause data overwriting.
Select partition recovery option
Data recovery function introduction:
File recovery: Quickly retrieve files lost due to accidental deletion or emptying the recycle bin.
Format recovery: Quickly recover files lost due to inaccessible or formatted partitions.
Partition recovery: Partition information can be analyzed and obtained, and the entire partition can be fully scanned.
Create a mirror: A mirror can be created for a partition to back up the current partition state.

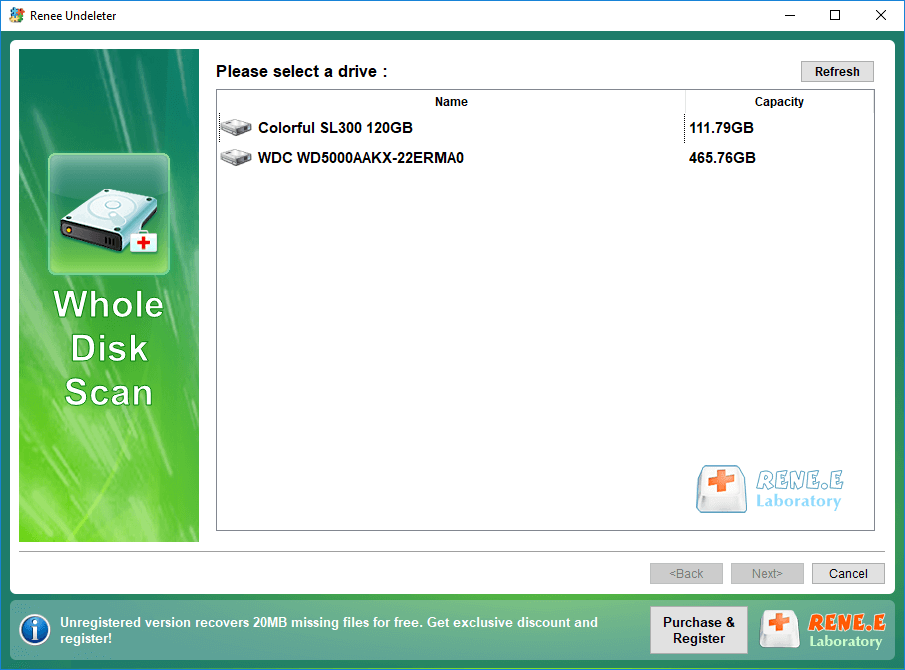
Step 2: Next, select the disk device to be scanned (that is, the disk where the deleted or formatted partition is located), and then click (Next). Select (default setting) on the advanced setting interface.
Select target device for partition recovery
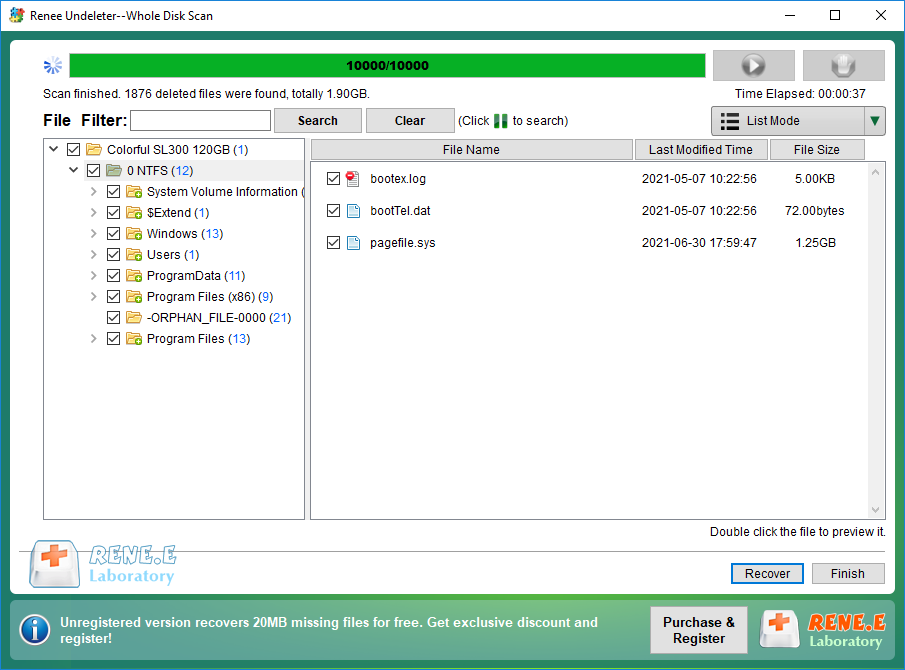
Step 3: After that, the software will analyze the disk device. After the analysis, a prompt window of “Select the partition you need to scan” will pop up. You can select the corresponding partition according to your needs. longer. After scanning, you can preview the files in the preview window on the right, then select the files you need to restore, and click the (Recover) button in the lower right corner to restore the selected files.
Partition recovery scan result presentation
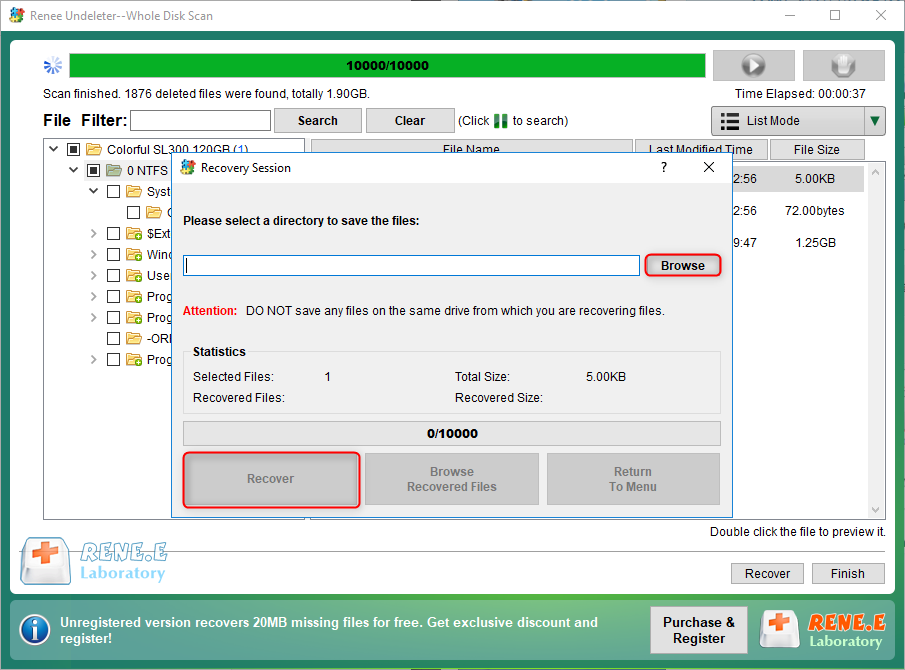
Step 4: Next, select the target folder, click (Browse) to select another disk to save the recovered files, and then click the (Recover) button to start the file recovery command, you just need to wait patiently.
Partition recovery data recovery interface