author avatar
    Senior Program Developer
 

Summary
Explore the intricacies of SATA hard drives, delving into their unique features and benefits, as well as potential drawbacks, and how they compare to their PATA counterparts. Gain insights into effective techniques for retrieving data that has become inaccessible or appears to be lost.


I. What is a SATA interface hard disk? How is it different from other interfaces?

sata hard drive
SATA stands for Serial Advanced Technology Attachment, a computer bus used for data transmission. It has replaced the previously widely used PATA (parallel ATA) due to its faster transmission rate, stronger error correction capability, and improved stability of hard disks.
Since the development of SATA, it has undergone several iterations including SATA1.0, SATA2.0, and SATA3.0. Additionally, related interfaces such as SATA-E, mSATA, and even the SAS interface are compatible with SATA.
Transmission rate
There are typically two expressions for transmission rate: Gbps and MB/s. Gbps refers to bandwidth. The SATA 1.0 interface has a transmission rate of 150MB/s, SATA 2.0 has 300MB/s, and SATA 3.0 has 600MB/s. SATA 3.0 is sometimes referred to as SATA 6Gbps.
To achieve faster transmission speed, consider opting for a hard disk with PCI-E or M.2 interface. The M.2 interface, in particular, offers the benefits of compact size and high speed, thereby reducing the potential growth of the SATA interface.

advantage:

  • The biggest advantage of the SATA interface is its mature development, high compatibility, and compatibility with different hardware and devices.
  • The price of the SATA interface hard disk is relatively cheap, and it will be cheaper than other hard disks with PCI-E and other interfaces.
  • SATA hard drives are more suitable for saving data, storing seldom-used files and saving backup files, and obtaining larger storage space at a lower price cost.
  • Generally, motherboards with SATA ports will have multiple SATA ports, so you can use multiple drives at the same time.

shortcoming:

  • The transmission speed of the SATA interface is slower than that of other popular hard disk interfaces. For example, data speeds on M.2 NvMe SSDs are around 16 GB/s, while data speeds on SATA SSDs are limited to 600 MB/s. Click here to  see more comparisons of hard drives with both interfaces.
  • SATA and its related devices are not suitable for scenarios that need to process large amounts of data.
SATA vs. PATA
PATA, which stands for Parallel Advanced Technology Attachment, is a bus interface connecting secondary storage devices like hard disks and optical drives. WD Western Digital and Compaq introduced it in 1986, and it was subsequently replaced by SATA.
SATAPATA
technologySerial Advanced Technology AccessoriesParallel Advanced Technology Attachment
transfer speedFaster, delivering data rates up to 600 MB/sSlow, providing speeds up to 133 MB/s
costlowervery high
cable sizeSmaller, only 18 inches longLarger, the cable can be 39.6 inches long
hot swapsupport. The system can easily identify added and removed hardware devices when the system is already workingnot support
PopularitySATA has completely replaced PATA and is currently being widely used.Hard drives with PATA interface are a thing of the past
Whether to support external interfacenoyes
SATA vs. PCI-E
PCI-E refers to PCI Express, and its ultimate design purpose is to replace the bus transmission interface inside the existing computer system, which not only includes the display interface, but also includes various application interfaces such as CPU, PCI, HDD, and Network.
SATAPCI-E
bandwidthmediumhigh
pricelowerhigher
capacityUp to 4TB or more capacityHigh-end hard drives are usually 2TB
HDD sizeSATA hard drives are available in 3.5-inch and 2.5-inch sizes, while SATA SSDs are only available in 2.5-inch sizesPCI-E slots can be of different sizes depending on the number of bi-directional lanes connected to it.
speedThe SATA 3.0 standard only provides 6.0 Gb/sSSDs connected via the PCIe 3.0 x16 interface can have a transfer speed of 16 Gb/s
compatibilityHigh compatibility, SATA interface can be connected with various devices.Compatibility is average, PCIe SSD may not be compatible with all systems.
The most suitable application scenarioPC usage, tablets and everyday backup storage usage across industriesA lot of data analysis, video editing, financial modeling, large-scale games, etc. are required

II. The method of recovering SATA hard disk data

Renee Undeleter is a software designed for data recovery. It can retrieve lost data from accidental file deletion, emptying the recycle bin, or disk/storage formatting. The software includes four modules: file recovery, format recovery, partition recovery, and image creation, providing comprehensive solutions for various data loss scenarios.
Hot Topic - ADsRenee Undeleter – Simple & Powerful Software for Data Recovery

Easy to use Recover data by 3 steps;

Multiple scan modes Fast partition scan, whole partition scan and whole disk scan;

Supported file types Image, video, audio, text, email and so on;

Image creation Create a partition image to read and back up data;

Supported devices SD card, SDHC, SDXC, USB flash drive, hard disk and computer.

Easy to use Recover data by 3 steps;

Multiple scan modes Fast partition/whole partition/whole disk scan;

Supported devices SD card/USB/hard disk.

Free TrialFree TrialFree Trial 800 people have downloaded!
Data recovery steps are as follows:
① Download, install and run Renee Undeleter , select the (Whole Disk Scan) option in the main interface.
Note: Do not install on the disk that needs to restore data, so as not to cause data overwriting.
select whole disk scan to scan disk in renee undeleter
Data recovery function introduction:
File recovery: Quickly retrieve files lost due to accidental deletion or emptying the recycle bin.
Format recovery: Quickly recover files lost due to inaccessible or formatted partitions.
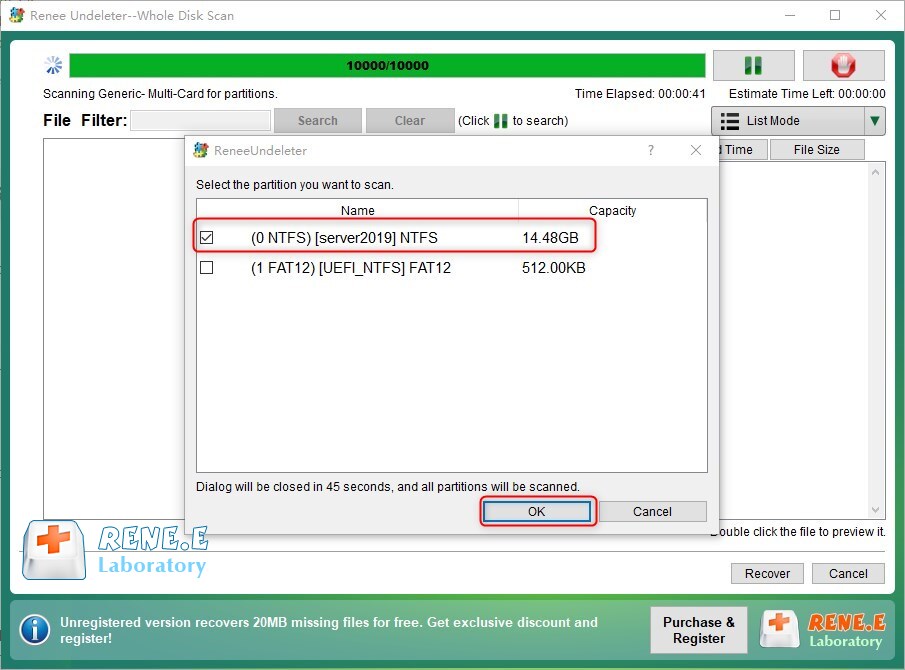
Partition recovery: Partition information can be analyzed and obtained, and the entire partition can be fully scanned.
Create a mirror: A mirror can be created for a partition to back up the current partition state, after which data can be restored from the mirror file. the
② Next, select the SATA hard disk device to be scanned, and then click (Next).
select a disk to recover in renee undeleter
③ Please wait patiently for the scan, this process will find out all the partitions that have existed in the hard disk, and then the “Select the partition you need to scan” window will pop up, and you can select a specific partition to scan. If not selected, all partitions will be scanned and it will take longer.
scanning the whole disk in renee undeleter
recover partition on SD card with Renee Undeleter
④ You can preview the files during the scanning process. If all the required files have been found, you can check the target files and click the (Restore) button to restore the hard disk data to other disks of the computer.
preview before recovery
In addition to the problem of data loss, you may also encounter that the computer cannot recognize the newly installed SATA hard disk during the use of the hard disk, or the inserted SATA mobile hard disk cannot be recognized/displayed normally. For these two situations, the corresponding solutions will be given below.

III. What should I do if the newly installed SATA hard disk cannot be recognized?

The reasons why the Windows computer cannot recognize the newly installed SATA hard disk are roughly as follows:
● Connection problem: If the hard disk is not properly connected to the computer, there will be an unrecognizable problem, or the power supply and cable equipment have failed.
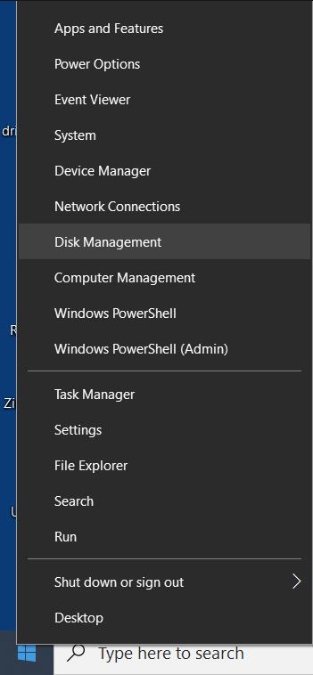
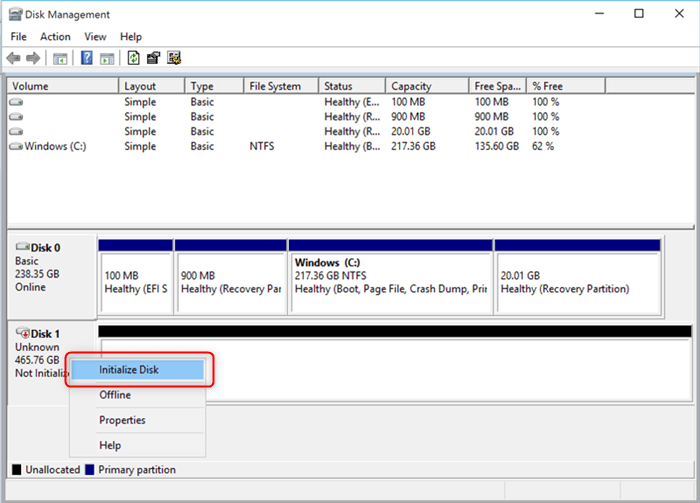
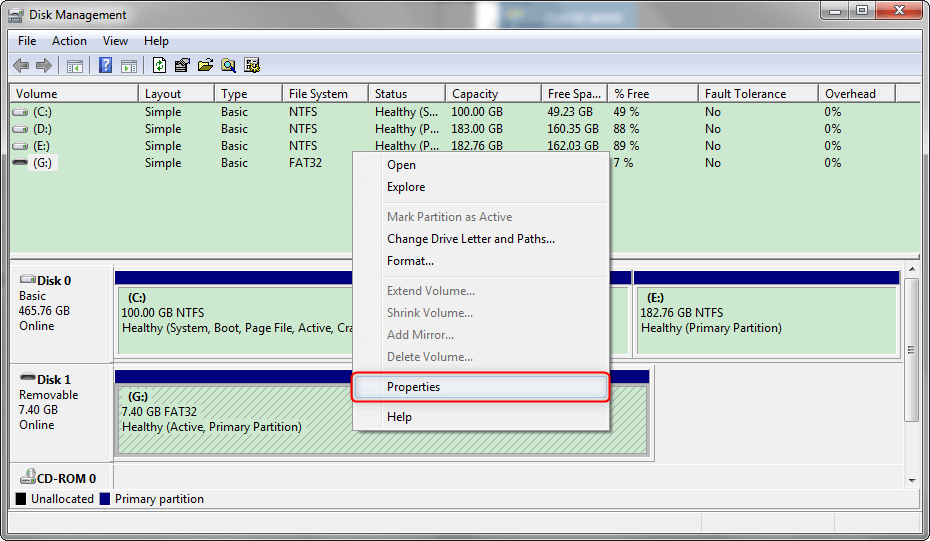
● The hard disk is not initialized: the new hard disk has not been initialized, and the hard disk cannot be recognized normally.
● Unpartitioned hard disk: A hard disk that has not been partitioned will not appear in Windows Explorer because the disk space has not been allocated.
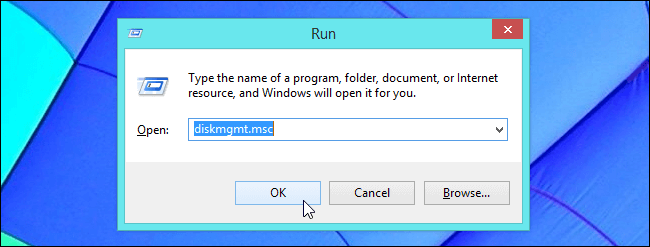
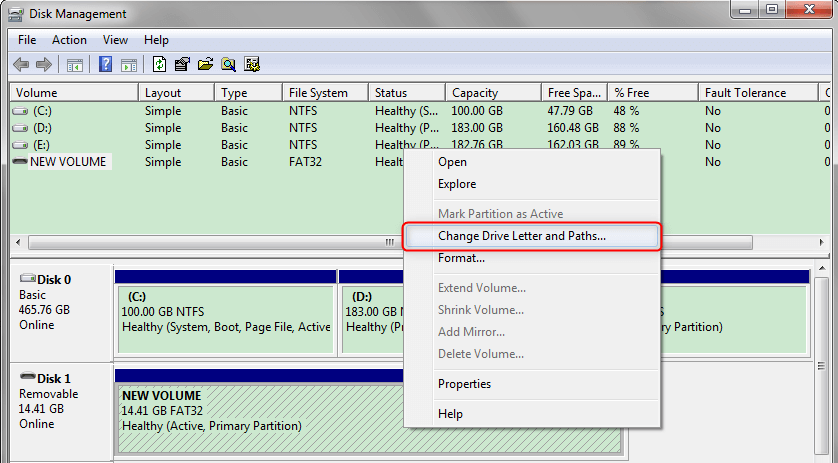
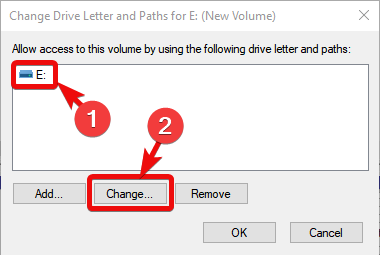
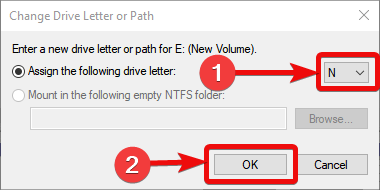
● No drive letter: If the hard disk partition does not have a drive letter, it cannot be found in Windows Explorer.
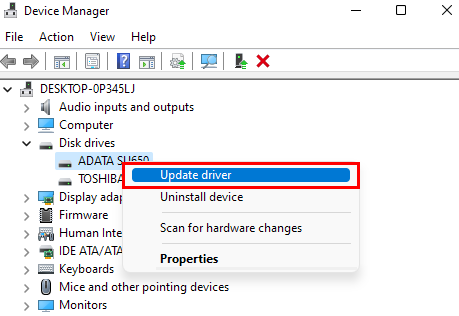
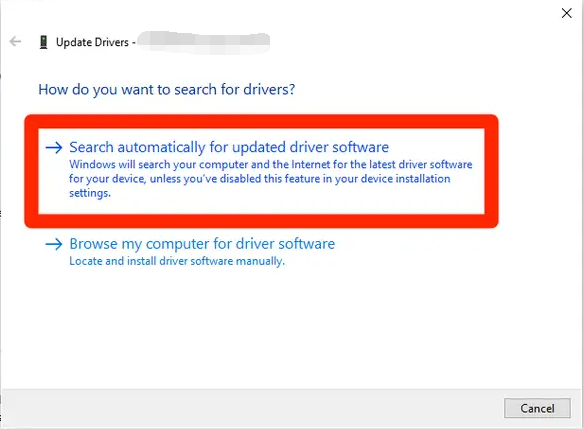
● Driver not updated: If the driver of the new hard disk is not updated in time, your computer cannot detect and recognize the device.
For the above common reasons, you can try to solve them one by one according to the methods introduced below.

Solution 1. Check whether the hard disk connection is normal

If your new hard disk is not recognized by Windows 10, check if the data cable and power cable are properly connected. Disconnect and reconnect them while the computer is shut down. Also, consider connecting the hard disk data cable to a different SATA interface on the motherboard or replacing the cable. If the issue persists, you can explore the following troubleshooting methods.

Solution 2. Initialize the hard disk and create a new partition

To ensure proper device recognition, you need to initialize the hard disk if no partition is present and then proceed to create one. Please follow these key steps:
① Connect the SATA hard disk to the computer, and then press the (Windows+X) keys on the keyboard at the same time. Then in the pop-up list, select the (Disk Management) option.
windows disk management right click start
② Right-click the hard disk whose status is “Not Initialized”, and select the (Initialize Disk) option.
how to initialize disk on windows
③ Select the partition style MBR or GPT, and click (OK). Choose GPT if your hard drive is 2TB or larger. Select MBR if the MBR is less than 2TB. also mayclick here Check out the detailed introduction of MBR and GPT.
④ After the HDD is initialized, the status of the device will change to “Online”. Right-click on the unallocated space, select (New Simple Volume), and proceed to the next step.
⑤ In the New Simple Volume Wizard, set the partition size and click (Next).
set the volume size in new simple volume wizard
⑥ Next, select the drive letter for the partition of the hard disk, and then click (Next).
⑦ Select the file system as NTFS, select the default value in “Allocation Unit Size”, and set the partition name in “Volume Label”. Then select the (Perform a quick format) option and click (Next). Finally, click (Finish) and that’s it.click here You can view the introduction of the NTFS file system.
format the volume with the settings

Solution 3. Check for driver updates

To prevent your Windows 10 computer from failing to recognize your SATA hard drive, it is crucial to ensure timely driver updates. Follow the steps below to upgrade the hard disk driver to the latest version:
① Run the Windows 10 computer, connect the hard disk, and press the (Windows+R) keys on the keyboard simultaneously to open the running window. Enter the command (devmgmt.msc) and click (OK) to access the Device Manager.
windows Key + R
open device manager
② Next, in the “Disk Drive”, right-click to select the new hard disk, and select the (Update Driver) option.
update driver-disk
③ Select the (Search automatically for updated driver software) option, and then follow the instructions to complete the update of the hard disk driver. After the driver update is complete, restart the computer to see if the problem is resolved.
update Driver Confirm

IV. The solution that the inserted SATA mobile hard disk cannot be recognized

Many users reported that after inserting the SATA mobile hard disk into the computer, they found that the hard disk could not be recognized or displayed. This issue can occur for a number of reasons, the most common being:
● Lack of necessary driver/hardware update, you can manually update the hard disk driver according to the introduction above.
● The computer’s USB port/hard disk data cable is faulty.
● The mobile hard disk is damaged.
● The hard drive is using an incorrect file system or a file system error.
● There is a partition problem on the hard drive.
● The hard disk is not plugged in safely or the power is suddenly cut off, which may cause the hard disk to fail to display normally.
If there is no problem with the connection of the mobile hard disk, but it still cannot be recognized by the computer, then you can follow the three methods described below to solve it.

Solution 1. Add a drive letter to the mobile hard disk in Disk Management

The specific operation steps are as follows:
① Run the computer, enter (disk management)
windows Key + R
launch disk management tool
② Next, click (Disk Management) on the left window. If you see a disk without a drive letter (such as D: / E: / F:), please confirm whether it is a newly inserted SATA mobile hard disk.
③ After confirmation is complete, right-click the disk without a drive letter and select the (Change Drive Letter and Path) option.
change drive letter and path
④ Next, click (Add) to add a drive letter to the SATA mobile hard disk.
disk Management Change Driver Letter 1
⑤ Then, check (Assign the following drive letter) and select a letter, then click (OK) to assign a drive letter to the mobile hard disk, and you should be able to view the hard disk device in the file explorer. If that doesn’t resolve the issue, please continue to try the other methods described below.
disk Management Change Driver Letter

Solution 2. Use the Windows disk error checking function

The specific operation steps are as follows:
① Connect the mobile hard disk to the computer, press (Windows icon + R key) on the keyboard, please enter (diskmgmt.msc) in the pop-up input box, and then click (OK) to enter the disk management.
enter diskmgmt.msc in run
② In Disk Management, right-click the failed hard disk partition, and then select (Properties) from the menu.
properties of disk
③ In the (Tools) column, select (Inspect).
check disk
If your system is Windows 7 or Windows 8, please check (Automatically repair file system errors) and (Scan and try to recover bad sectors), and Windows 10 automatically repairs all errors by default. Then wait for the inspection and repair to complete.

Solution 3. Use the CMD command to repair the faulty hard disk

If the file system of the SATA hard disk is damaged or has bad sectors, then you can try to use the CMD command to repair it.
The specific operation steps are as follows:
① Connect the mobile hard disk to the computer, and make sure the device can be found in “Disk Management”.
② Search for (cmd) directly in the search box in the lower left corner, and select (run as administrator) to open the command prompt tool.
run as administrator
③ In the opened command prompt window, enter the command (chkdsk F: /f /r /x) (F refers to the disk number of the hard disk; /f will try to repair all errors on the disk; /x refers to forcing the drive to be unmounted before starting the scan; /r refers to scanning and trying to recover bad sectors), and press (Enter) to repair errors. After the repair of the mobile hard disk is completed, check whether the device works normally.
chkdsk repair mobile hard disk
Through the various methods introduced above, I believe it can help you quickly fix the problem that the SATA mobile hard disk cannot be recognized. But it is recommended that before fixing the problem, make sureImportant files have been backed up . In case of data loss during the repair process, use Renee Undeleter to restore it.