

Expert tips for the reparation of Chkdsk stuck

Summary
Learn practical solutions for the common issue of Chkdsk getting stuck during disk repairs and find data recovery methods for lost files in this article.

SFC /scannow, and press Enter. After the scan finishes, reboot your PC. Press Esc to prevent Chkdsk from starting during boot if necessary.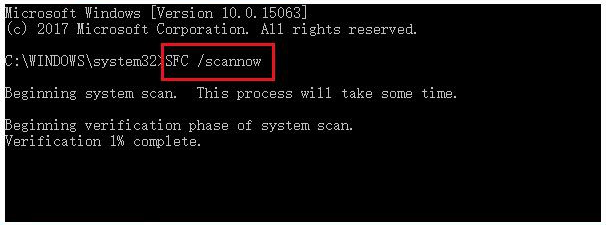
DISM /Online /Cleanup-Image /RestoreHealth and press Enter. After the command finishes, re-execute Chkdsk to verify if the scan concludes successfully.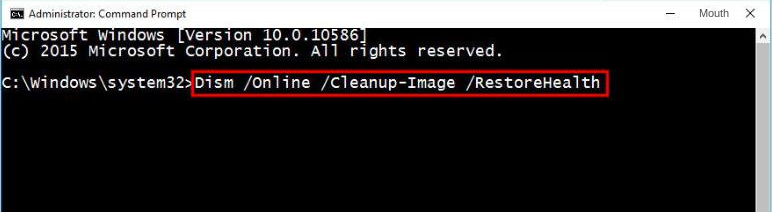

Easy to use Recover data by 3 steps;
Multiple scan modes Fast partition scan, whole partition scan and whole disk scan;
Supported file types Image, video, audio, text, email and so on;
Image creation Create a partition image to read and back up data;
Supported devices SD card, SDHC, SDXC, USB flash drive, hard disk and computer.
Easy to use Recover data by 3 steps;
Multiple scan modes Fast partition/whole partition/whole disk scan;
Supported devices SD card/USB/hard disk.
Free TrialFree TrialFree Trial 800 people have downloaded!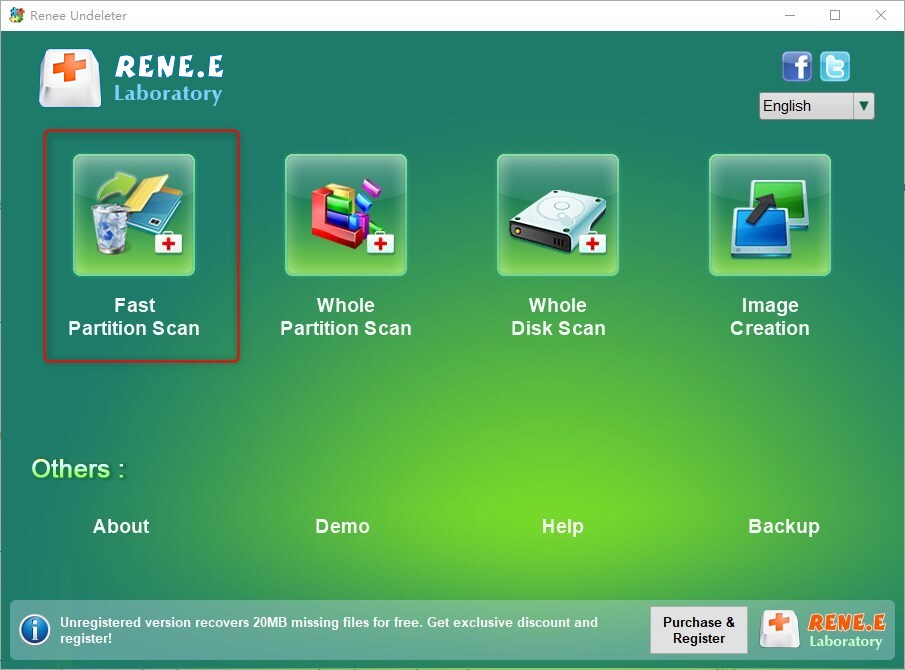
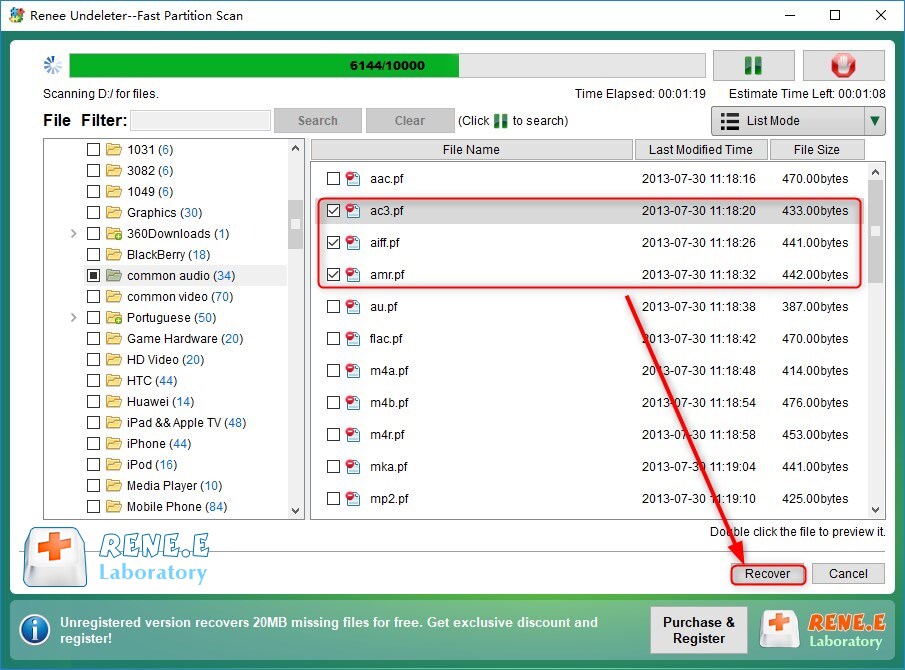
- Fast Partition Scan – Quickly retrieve files lost due to accidental deletion or emptying the recycle bin.
- Whole Partition Scan – Quickly recover files lost due to inaccessible or formatted partitions.
- Whole Disk Scan – Analyze and get partition information and perform a full scan of the entire partition.
- Image Creation – You can create a mirror image for a partition to back up the current partition state.


Relate Links :
Tips for the Error Code 0xC1900101 and for a Smooth Upgrade

13-03-2024
Amanda J. Brook : Learn how to fix error code 0xC1900101 with our conventional repair solutions and recover lost data using the...
What to do if File Explorer won't open?

03-04-2024
Ashley S. Miller : Learn how to fix the common issue that File Explorer won't open on your computer. Also, find tips...
Easy Solutions for Fixing HP Computer's SMART Hard Disk Error 301 Error

12-09-2023
Jennifer Thatcher : Learn how to solve the SMART hard disk error 301 prompt on HP computers with this comprehensive article...
Resolve 0x80070422 Error on Windows 10 with Easy Steps
10-01-2024
Jennifer Thatcher : Resolve Windows update error 0x80070422 by using these solutions. Also, learn a data recovery method to restore lost...

