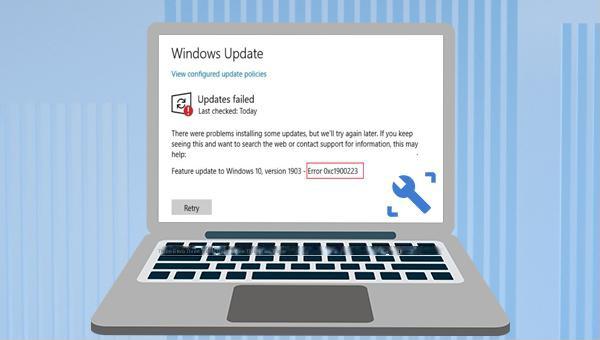
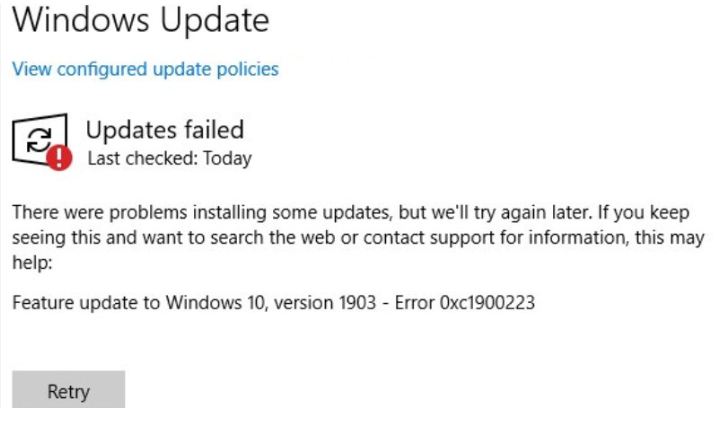
I. How to solve the error code 0xc1900223 in Windows 10 update?
The Windows 10 update error code 0xc1900223 may occur when installing the 1903 update or 21H2 update. This error may be related to some kind of update failure or system file corruption. The following will introduce several practical methods.
1. Reset Windows update components
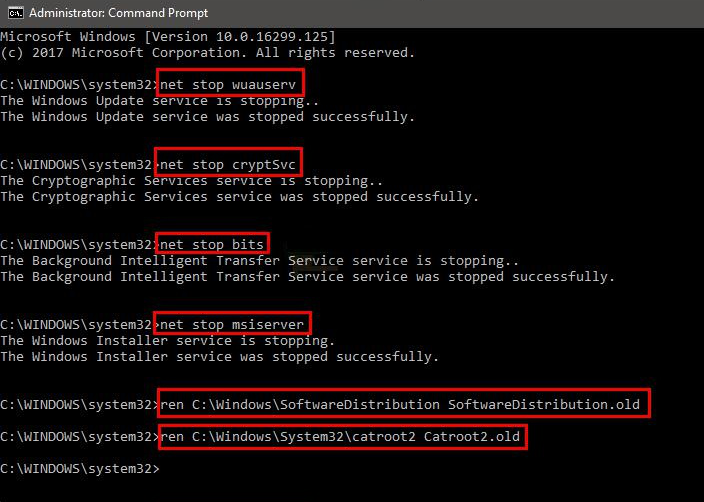
When Windows is updated, some services need to be enabled to ensure the smooth completion of the update process. If they are not enabled successfully, an update error message may appear. In addition, the error code 0xc1900223 may also be caused by corrupted files that Windows Update needs to use, so resetting the Windows Update components will restart Windows Update related services as well as rename the SoftwareDistribution and Catroot2 folders, which may be used when Windows Update is saved. Some system update files that need to be used. After renaming the folder, the system will recreate the new SoftwareDistribution and Catroot2 folders for use. The specific operation steps are as follows:
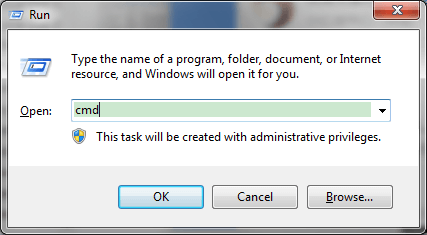
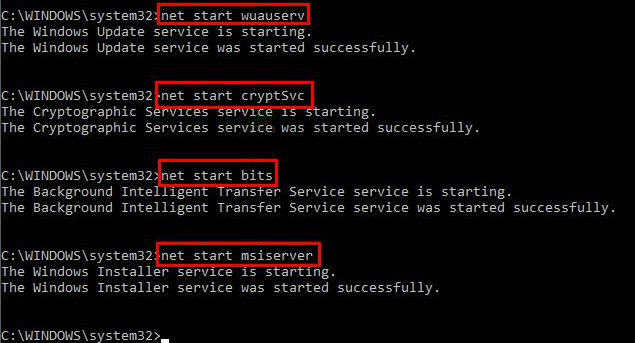
Step 1: Run the computer, press (Windows+R) keys at the same time to open the run window, then type (cmd) and click (OK) to open the command prompt window.
Step 2: Enter the following commands in order to close the Windows update service and rename the SoftwareDistribution and Catroot2 folders, and press the (Enter) key after each command.
ren C:\Windows\SoftwareDistribution SoftwareDistribution.old
ren C:\Windows\System32\catroot2Catroot2.old Step 3: Then enter the following commands to enable Windows update related services, please press the (Enter) key after each command.
Step 4: After all commands are executed, enter (Exit) and press (Enter) to exit, then restart the computer and perform Windows update again to check whether the current problem has been resolved.
2. Run the Windows Update Troubleshooter
Windows Update Troubleshooter is a system update troubleshooting tool built into the Windows system, which can help users troubleshoot and fix most of the problems encountered during the system update process. Therefore, when we encounter Windows update errors, we can try to run the Windows update troubleshooter to solve them. Proceed as follows:
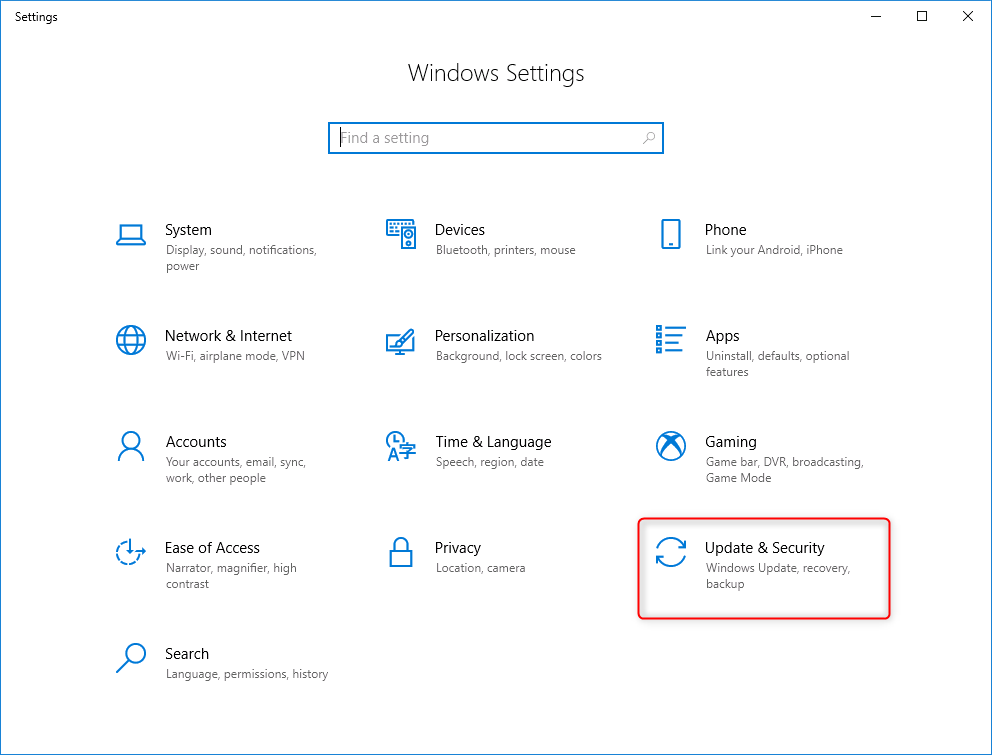
Step 1: Run the computer, press the (Windows+I) key on the keyboard at the same time to open the setting interface. Then click into the (Update and Security) option.
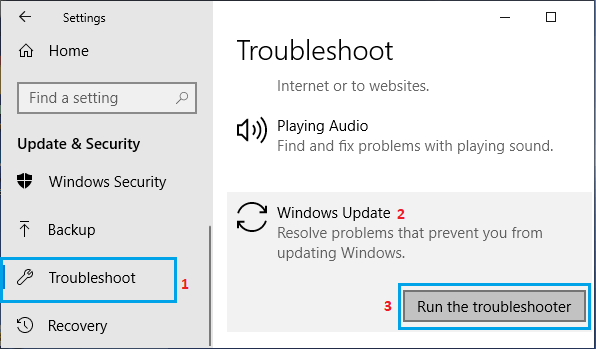
Step 2: Find (Troubleshoot) in the function bar on the left, then select the (Windows Update) option on the right, and click the (Run the troubleshooter) button. Wait a few moments after troubleshooting is complete to see if the problem is resolved. For some Windows system versions, after selecting (Troubleshoot), click (Other Troubleshoot) > (Windows Update), and then click the (Run the troubleshooter) button.
3. Use the Windows Media Creation Tool to update and upgrade the system
Windows Media Creation Tool (Media Creation Tool) is a software developed by Microsoft that can help users update the system, install the system and download the system image file (ISO file). So update upgrade via Windows Media Creation Tool to try to resolve Windows update error error 0xc1900223. But please do a good job of data backup in advance to avoid unnecessary losses.
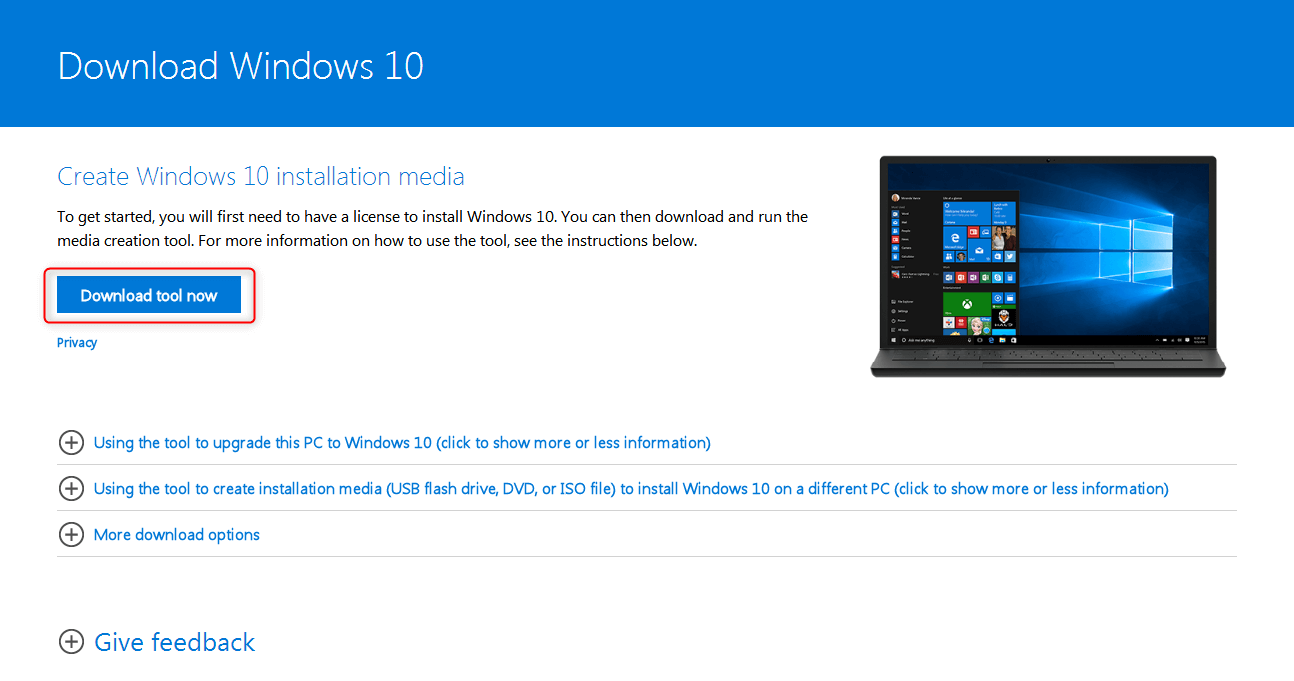
Step 1: Go to Microsoft’s official website to download the Media Creation Tool (Media Creation Tool), and then double-click to run it.
Step 2: Click (Accept) on the (Applicable notice and license terms) interface. Then select (Upgrade this PC now) > (Next). It will then start downloading the latest system ISO file, and once downloaded, it will automatically create the Windows 10 media, and then it will start checking for system updates.
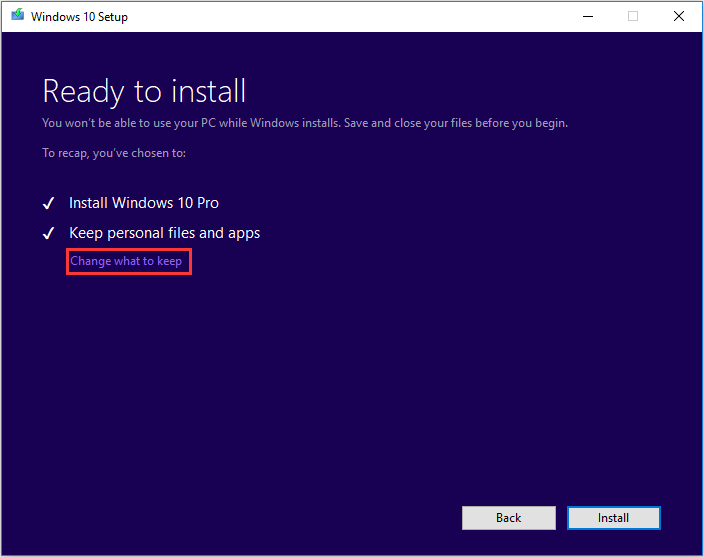
Step 3: If the (Applicable Notice and License Terms) screen appears again, click (Accept). After that, wait patiently for the program to run, and when the (Ready to install) interface appears, you can confirm whether to keep personal files and applications, and click (Change what to keep) to make changes.
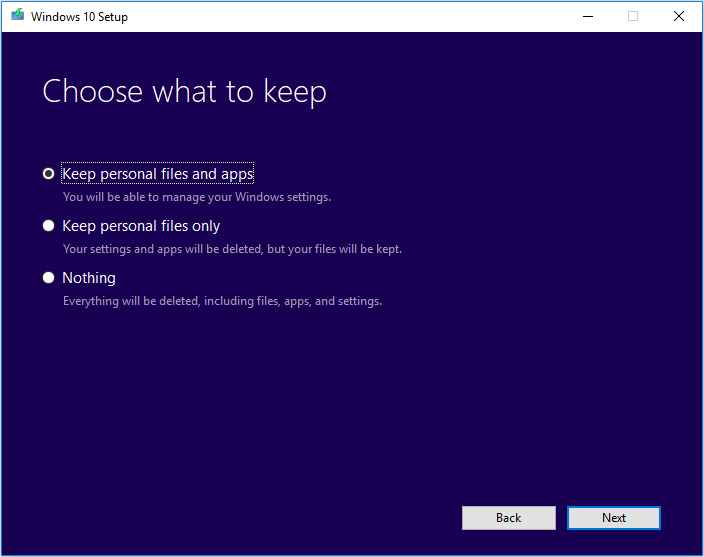
Step 4: In the (Choose what to keep) interface, please select (Keep personal files and apps), (Keep personal files only) or (Nothing) options according to your actual situation, and then click (Next) > (Install). After clicking (Install), the computer will restart several times, please wait patiently, and then check whether the error has been fixed.
4. Manually install the update
Manually download and install the update through the Microsoft update directory, you can bypass the problematic local files and install the update directly. The specific steps are as follows:
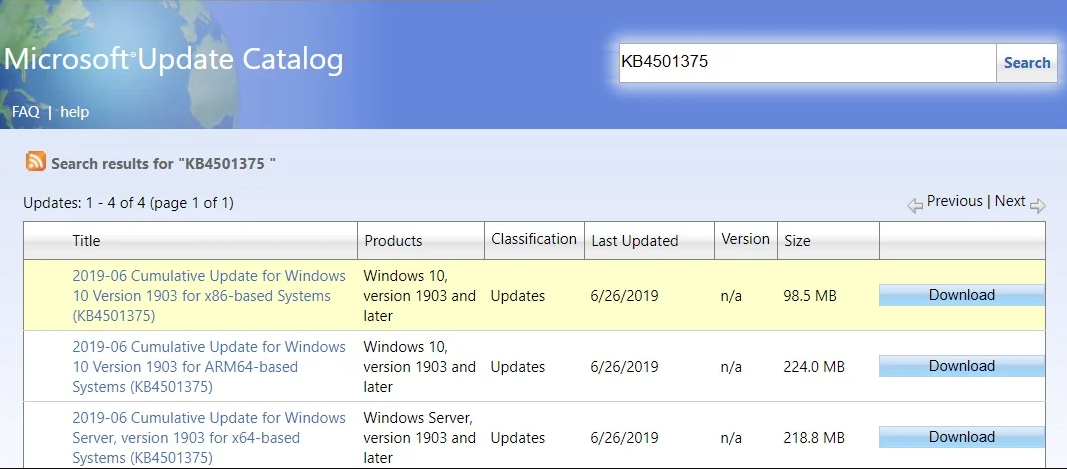
Step 1: Open the Microsoft update catalog site, and enter information about Windows updates in the search box. For example, if you have an error when installing the cumulative update of 21H2, you can enter (cumulative update 21H2) in the search box, and then click ( Search button. In addition, you can also search for update codes starting with KB, such as (KB5018410). It should be noted that before downloading, you must confirm whether the system is based on x64 (that is, 64-bit system) or x86 (that is, 32-bit system). Please right-click (Start), select (System)-(About), and view the system type information.
Step 2: Find the Windows Update option that matches your OS version and click the (Download) button.
Step 3: After downloading the update, run the installation file and follow the instructions to install it. After the operation is complete, restart the computer and check whether the problem is resolved.
5. Run SFC and DISM commands
The SFC (System File Checker) and DISM (Deployment Image Servicing and Management) tools are Windows built-in utilities that scan system files for errors and fix them automatically. If the error code 0xc1900223 is caused by corrupted system files, you can try this method.
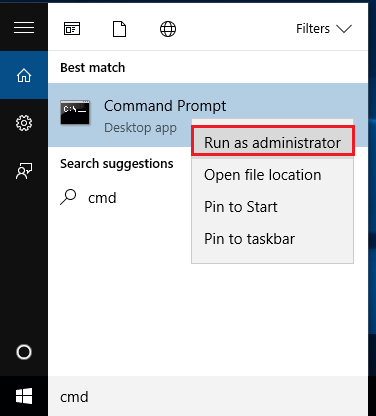
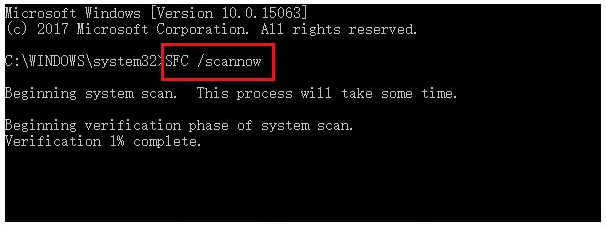
Step 1: Search (cmd) in the search box in the lower left corner, right-click (Command Prompt) and select (Run as Administrator) to open the Command Prompt tool.
Step 2: In the opened command prompt window, enter the command (SFC /scannow) and press the (Enter) key. Next, System File Checker will perform a system scan and fix problematic system files. If it prompts that SFC cannot repair the damaged file, please continue to the next step.
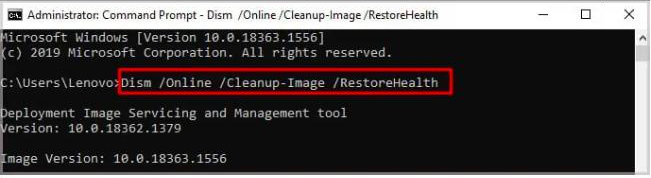
Step 3: Type (Dism /Online /Cleanup-image /RestoreHealth) in the opened Command Prompt window and press the (Enter) key to repair corrupted system files. After the command is executed, you can run it again (SFC /scannow), then restart the computer and re-update Windows to check whether the current problem is resolved.
The above are several methods to fix update error code 0xc1900223. If you find that files are missing after the repair is complete or during daily use of the computer, you can check the following methods to scan and restore them.