I. The reason why the external hard disk cannot be loaded on Mac
When a user connects a external hard drive to a Mac, it should appear on the desktop and in Finder for normal data access. If it doesn’t, the issue could be with the USB data cable, USB port, settings, improper formatting, damage, or faults with the hard drive. Improper operations, such as accidental ejection or directly unplugging the hard drive, can also prevent it from loading upon reconnection.
Here are some solutions to address the issues causing the external hard disk to fail to load, which may help resolve this problem.
II. How to solve the problem that the external hard disk cannot be mounted on Mac?
1. Replace the USB data cable or USB port and connect again
If the external hard disk cannot be loaded, first check the connection. Replace the USB data cable or port and reconnect to see if it loads. Note: Safely eject the hard disk. If the safe ejection option is not available, shut down the device before removing it.
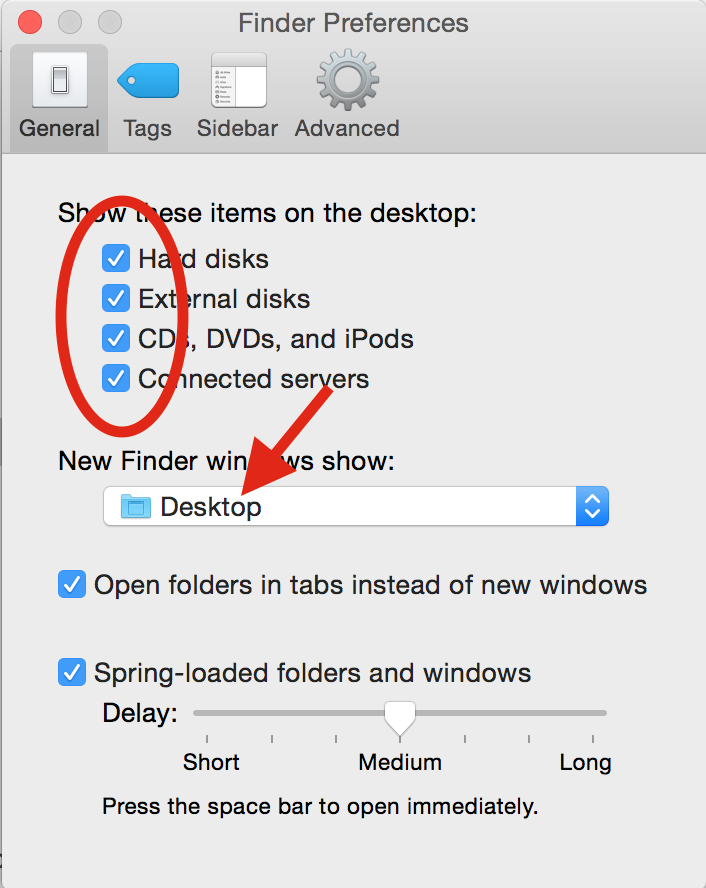
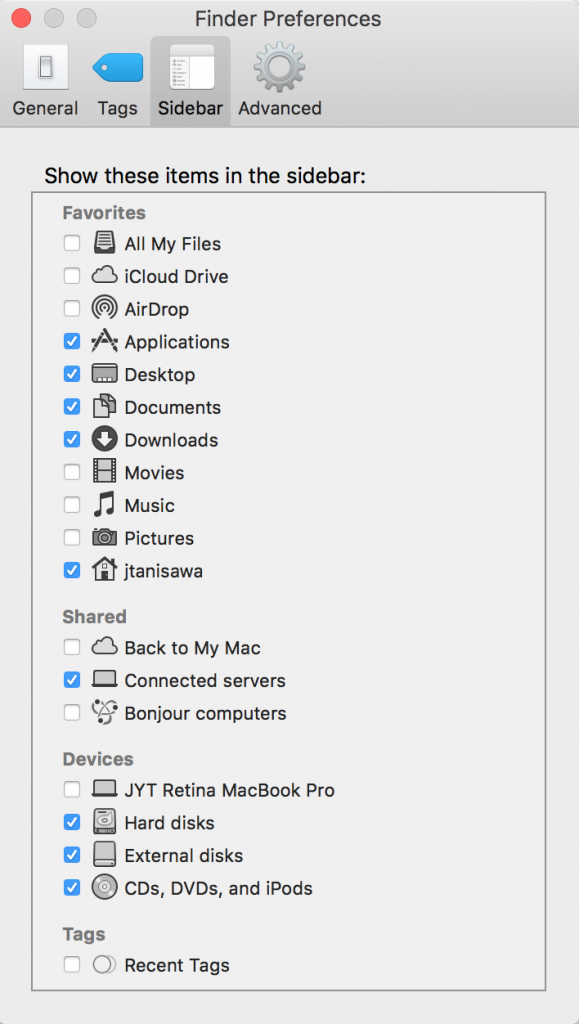
2. Change the Finder preferences
If the USB data cable and USB port are working, but the external hard disk is still not displayed on the desktop or in Finder, try the following settings:
Step 1: Open the “Finder”, and click (Finder) – (Preferences) on the top menu bar.
Step 2: Under the (General) tab, check (External Hard Drive) under “Show these items on the desktop”.
Step 3: In the sidebar menu, check “external disk”. If there are no issues, the external hard disk will appear on the desktop and in the Finder.
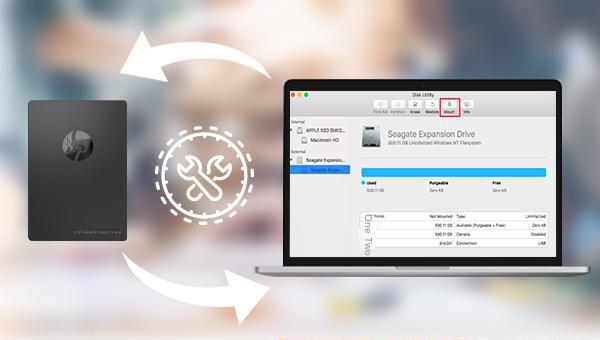
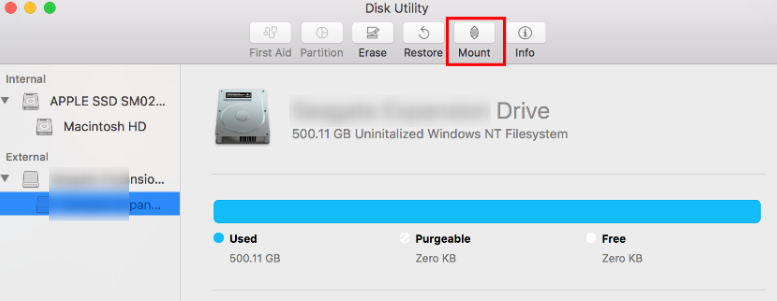
3. Mount the removable hard disk in Disk Utility
After troubleshooting connection and settings issues, open Disk Utility to check the external hard disk’s mounting status. If mounted, Uninstall will appear in the top menu; if not, Mount will be displayed.
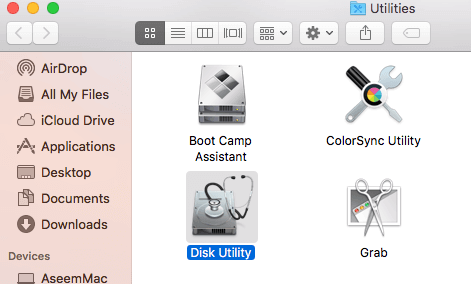
Step 1: Find and click (Disk Utility) in the launchpad; you can also click (Finder) > (Applications) > (Utilities) and open (Disk Utility).
Step 2: Select the target external hard disk in the left sidebar, click Mount, and wait for it to complete. If loading fails, try entering commands in the terminal.
4. Enter the command in the terminal to mount the external hard disk
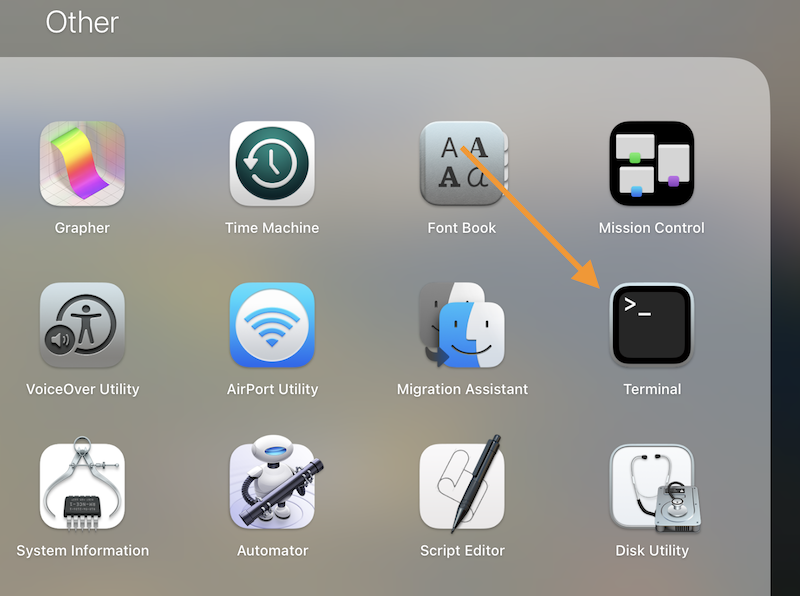
Step 1: Connect the external hard disk to the Mac computer, and open the (Terminal) app.
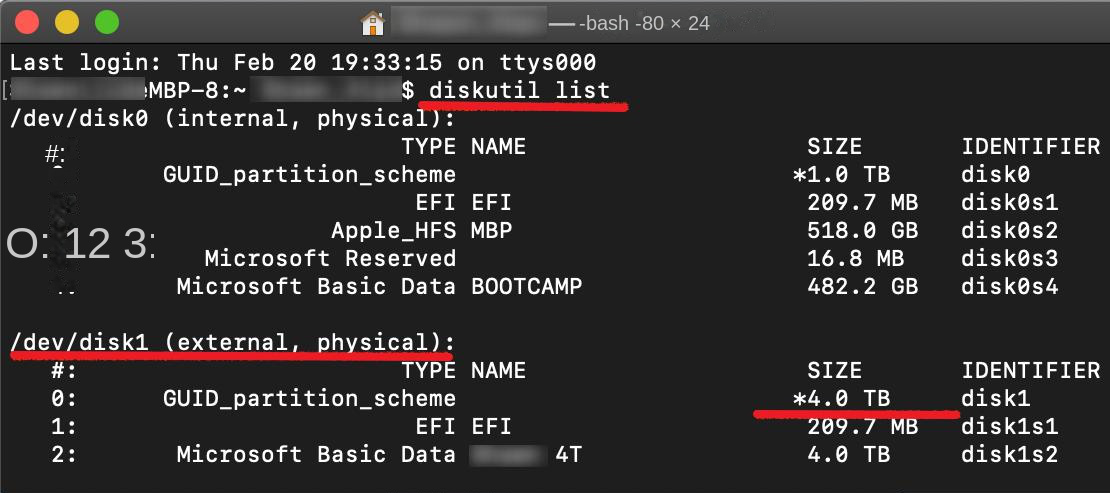
Step 2: Enter the following commands and press the (Enter) key each time you enter a command.
Enter diskutil list to list the disks and determine the disk number based on disk capacity or name.
Confirm the external hard disk number (/dev/disk1) and enter sudo diskutil mount /dev/disk1 to mount it. Adjust the disk number as needed.
If loading fails, enter ps aux | grep fsck to check for fsck processes. If present, enter sudo pkill -f fsck to kill them, then enter sudo diskutil mount /dev/disk1 or unplug and reconnect the hard disk for a successful mount.
This step usually resolves most issues with loading a external hard disk. If the problem persists, the hard disk may be damaged or improperly formatted. Use Disk Utility’s (First Aid) and (Erase) functions to address this. Note that these methods may damage or erase data on the disk. It is recommended to use data recovery software to retrieve the data before proceeding. If the hard disk can transfer data through another Mac or Windows computer, you can skip the recovery steps and directly use the (First Aid) and (Erase) functions of Disk Utility.
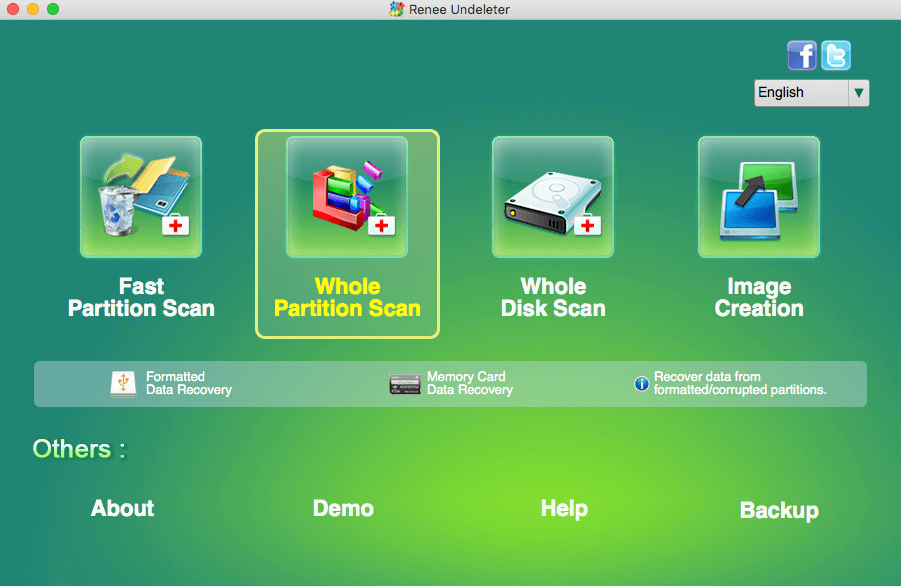
5. Use Renee Undeleter to restore/extract external hard disk data
Renee Undeleter is designed to restore various data files. Whether you accidentally delete important files, empty the recycle bin, or format the disk/storage, this tool can retrieve lost data. It includes four functional modules: Fast Partition Scan, Whole Partition Scan, Whole Disk Scan, and Image Creation, addressing all data loss problems comprehensively. Available for both Windows and Mac, the software can scan and recover data from a external hard disk connected to a Mac computer via Disk Utility.
Hot Topic Renee Undeleter – Simple & Powerful Software for Data Recovery
Easy to use Recover data by 3 steps;
Multiple scan modes Fast partition scan, whole partition scan and whole disk scan;
Supported file types Image, video, audio, text, email and so on;
Image creation Create a partition image to read and back up data;
Supported devices SD card, SDHC, SDXC, USB flash drive, hard disk and computer.
Easy to use Recover data by 3 steps;
Multiple scan modes Fast partition/whole partition/whole disk scan;
Step 1: Download, install, and run Renee Undeleter on a Mac. Select the “Whole Partition Scan” option on the main interface. (Alternatively, choose “Whole Disk Scan” to scan the entire hard disk partition.)
Note : In order to avoid data overwriting, it is not recommended to install Renee Undeleter on the disk with lost data.
Data Recovery Function:
Fast Partition Scan – Quickly retrieve files lost due to accidental deletion or emptying the recycle bin.
Whole Partition Scan – Recover files from inaccessible or formatted partitions.
Whole Disk Scan – Analyze partition information and fully scan the entire disk.
Image Creation – Create an image of a partition to back up its current state.
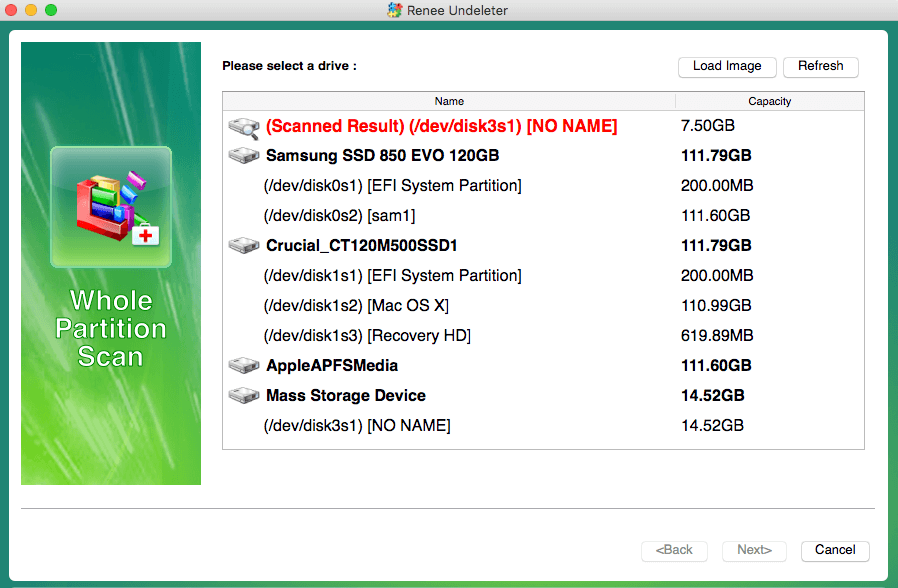
Step 2: Select the hard drive partition and click (Next).
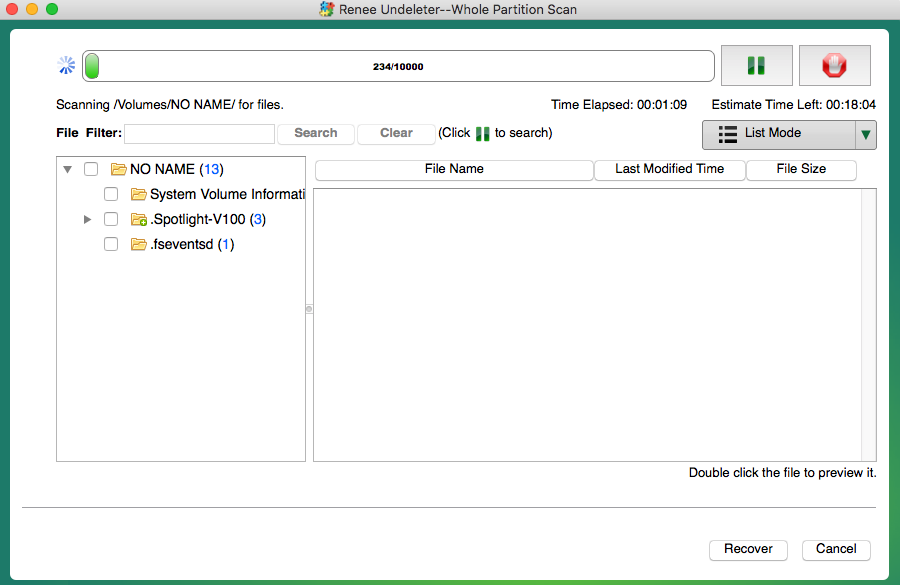
Step 3: Wait for the scan to complete, which may take some time depending on the size of the hard disk partition. During the scan, you can double-click to preview files. If you find the file you need to recover, check it and click Recover. The scan will terminate to recover the selected file. Alternatively, you can wait for the scan to finish, select the files from the results, and click Recover to save them to other disks.
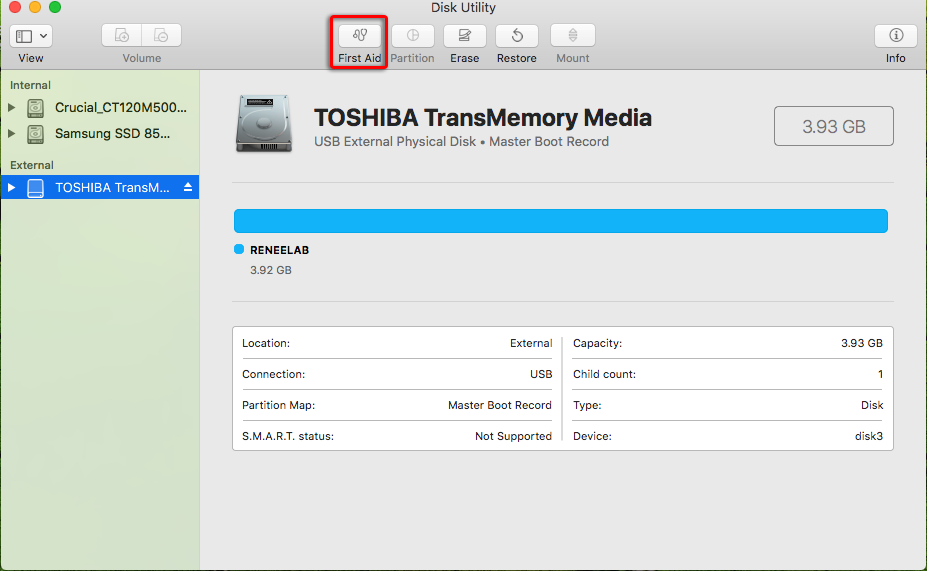
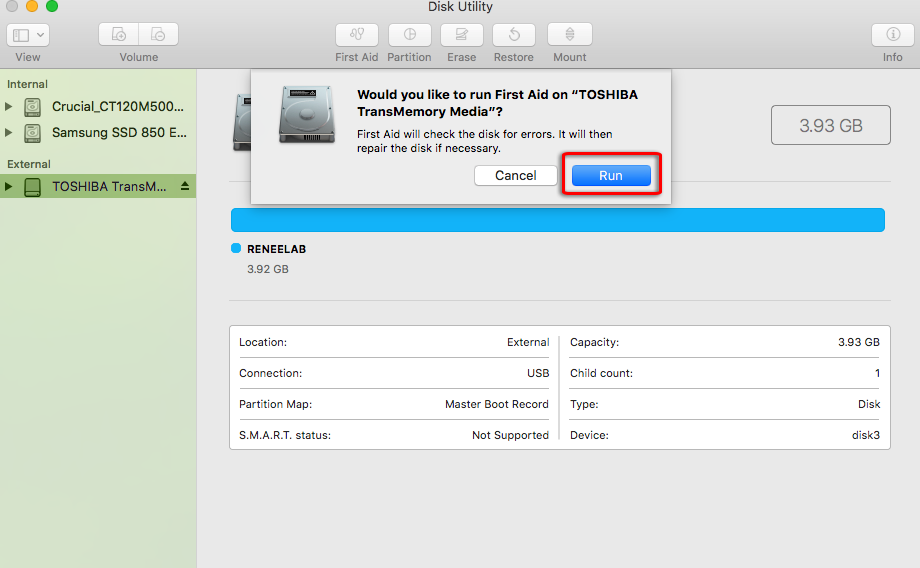
6. Use the First Aid function of Disk Utility to repair external hard disk errors
Step 1: Find and click (Disk Utility) in the launchpad; you can also click (Finder) > (Applications) > (Utilities) and open (Disk Utility).
Step 2: Select your hard disk in the list and then select the (First Aid) function.
Step 3: Click First Aid. A confirmation window will appear, explaining that “First Aid will check the disk for errors. It will then repair the disk if necessary.” Click Run to begin the process.
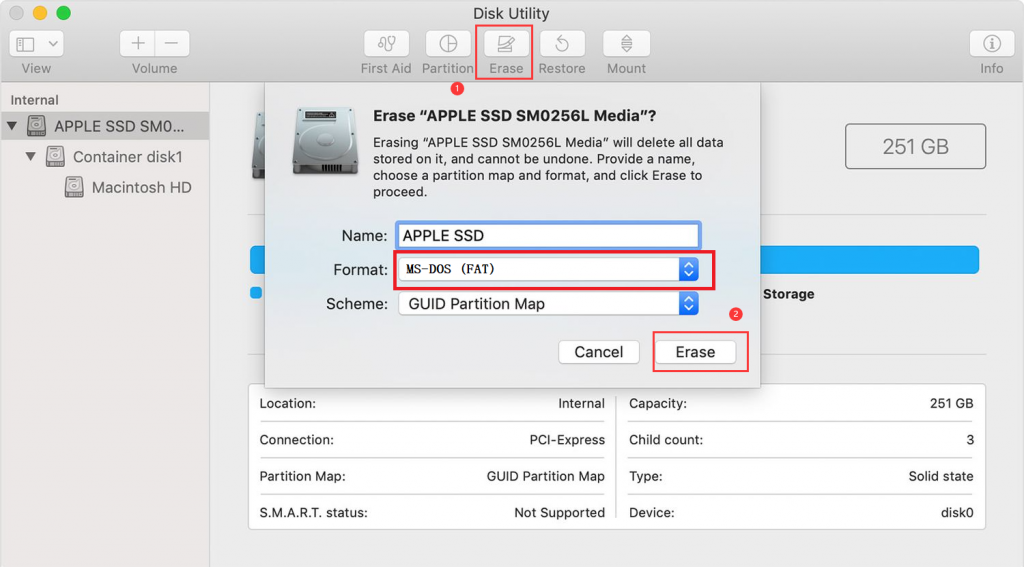
7. Erase the removable hard drive in Disk Utility
The erase function in Disk Utility is equivalent to the format function in Windows. It changes the hard disk’s file system to be recognized by the Mac system and clears all data on the disk, resolving some hard disk issues. Note: Connect the hard drive to another computer for data backup before proceeding.
Step 1: Find and click (Disk Utility) in the launchpad; you can also click (Finder) > (Applications) > (Utilities) and open (Disk Utility).
Step 2: Select the target external hard disk on the left, click “Erase” at the top, choose the file system format in the pop-up window, and then click “Erase.”
Tips
If the external hard disk is used for Time Machine backups or only for Mac systems, choose Mac OS Extended (Journaled).
If the external hard disk needs to store data for both Mac and Windows systems, choose ExFAT.
For older models that do not support ExFAT, select MS-DOS (FAT), equivalent to FAT32, but note that FAT cannot be used on hard disks larger than 32GB.
In High Sierra, Apple introduced Apple File System (APFS), optimized for flash memory and solid-state storage with features like copy-on-write and I/O coalescing to improve performance. Consider APFS options as well.
John Weaver : This guide covers technical approaches to clone hard drive with bad sectors, including pre-cloning diagnostics with chkdsk, intelligent...


 II. How to solve the problem that the external hard disk cannot be mounted on Mac?