

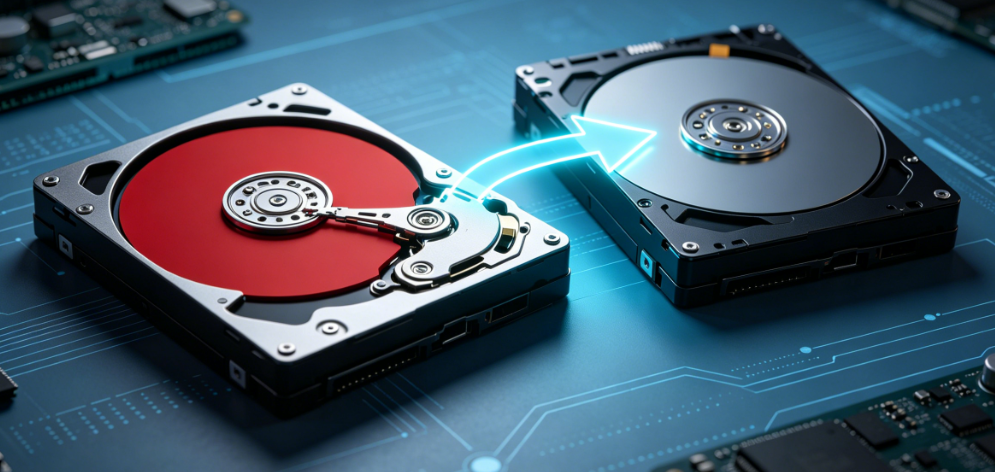
Clone a Hard Drive with Bad Sectors Like a Pro: Diagnosis, Safe Cloning, and Data Rescue

Summary
This guide covers technical approaches to clone hard drive with bad sectors, including pre-cloning diagnostics with chkdsk, intelligent error-handling tools like Renee Becca, and alternative methods for advanced users. It outlines step-by-step procedures, tool comparisons, and post-clone verification to maximize data recovery success while minimizing further drive stress.

| Aspect | Standard Clone | Bad-Sector Aware Clone |
|---|---|---|
Behavior on errors | Aborts on first bad sector | Continues with intelligent skipping or retry logic |
Data recovery potential | Low on damaged drives | Higher, focuses on readable data first |
Typical outcome | Incomplete clone | Usable copy with minimal loss |
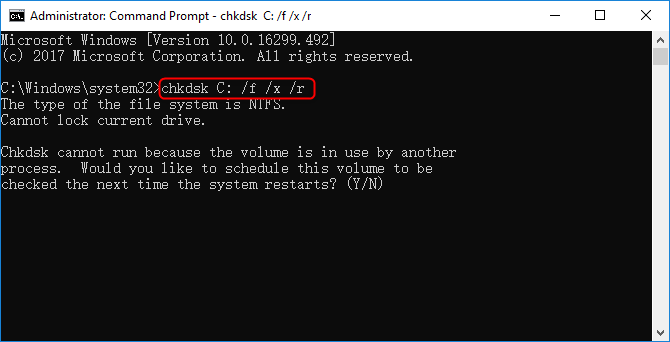
chkdsk C: /f /x /r

Automatic 4K alignment Improves SSD performance during system migration.
Support GPT and MBR Automatically adapt to the suitable partition format.
Support NTFS and FAT32 Redeploy various files in different file systems.
Back up quickly Back up files at up to 3,000MB/min.
Overall backup schedule Support system redeployment/system backup/partition backup/disk backup/disk clone.
Automatic 4K alignment Improve SSD performance
Support GPT and MBR Intelligently adapt to a partition format
Support NTFS and FAT32 Redeploy files in different file systems


- Free for basic use
- Familiar Windows interface
- Supports partition resize
- Good for healthy drives
Disadvantages:
- Often aborts on bad sectors
- Limited advanced error recovery
- May require multiple attempts
- Powerful error recovery
- Multi-pass capability
- Free and open source
- Can resume interrupted sessions
Disadvantages:
- Steep learning curve
- Command line only
- Risk of further damage if misused
- Requires Linux environment
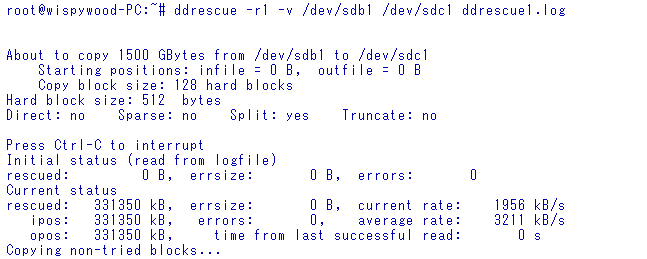
- Create a bootable Linux USB (Ubuntu or SystemRescue) using Rufus or Etcher.
- Boot from the USB and open a terminal window.
- Identify source and destination drives using lsblk or fdisk -l.
- Run ddrescue with the appropriate flags:ddrescue -f -d -r3 /dev/source /dev/destination logfile.log
- If needed, run additional passes with -r to retry bad sectors.
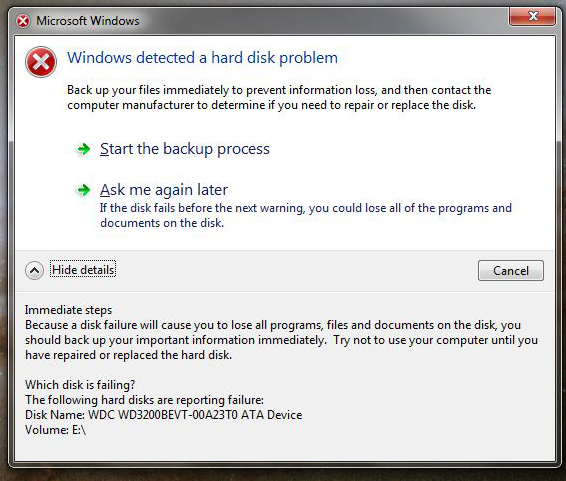
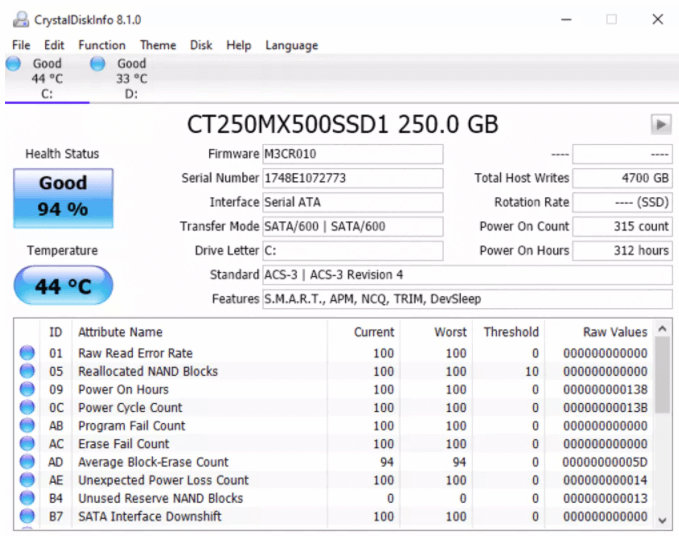
1. Run chkdsk on the cloned drive
2. Handling data that could not be cloned
3. Final health check and drive replacement
Can I clone a drive with bad sectors without running chkdsk first?
How long does cloning a failing 1TB drive usually take?
Will cloning a bad drive make it worse or cause more data loss?
Is sector-by-sector cloning always better for drives with bad sectors?
Automatic 4K alignment Improves SSD performance during system migration.
Support GPT and MBR Automatically adapt to the suitable partition format.
Support NTFS and FAT32 Redeploy various files in different file systems.
Back up quickly Back up files at up to 3,000MB/min.
Overall backup schedule Support system redeployment/system backup/partition backup/disk backup/disk clone.
Automatic 4K alignment Improve SSD performance
Support GPT and MBR Intelligently adapt to a partition format
Support NTFS and FAT32 Redeploy files in different file systems
Relate Links :
Clone a Hard Drive with Bad Sectors Like a Pro: Diagnosis, Safe Cloning, and Data Rescue

16-05-2026
John Weaver : This guide covers technical approaches to clone hard drive with bad sectors, including pre-cloning diagnostics with chkdsk, intelligent...
Samsung SSD Bad Sector Repair Tools and Methods: A Complete Guide 2026

18-12-2025
Ashley S. Miller : This guide walks you through the best Samsung SSD repair tools and proven techniques for fixing common issues,...
[2025] How to Clone Windows 10/11 to a Smaller SSD Without Reinstalling
28-08-2025
Ashley S. Miller : Learn how to clone Windows 10/11 to a smaller SSD step-by-step, keeping all your files and apps. This...
[2025] How to Clone Your SSD to a New One Without Reinstalling Windows
22-08-2025
Ashley S. Miller : Easily clone your entire system—Windows OS, files, and applications—to a new SSD without reinstalling or losing data. This...


User Comments
Leave a Comment