In the process of using Word, we often rely on its automatic saving function, but if you do not save it manually in time, you may lose a lot of important data when the system or program crashes. But don’t worry, a certain function of this software can help you solve this problem. Here are the detailed operation steps (the following methods are applicable to Word 2010, Word 2013 and Word 2016):
Method 1: Recover Unsaved Word Document from Temporary Files
You can directly find the location of the file by following the path: C:\Users\admin\AppData\Local\Microsoft\Office\UnsavedFiles, or you can follow the steps below.
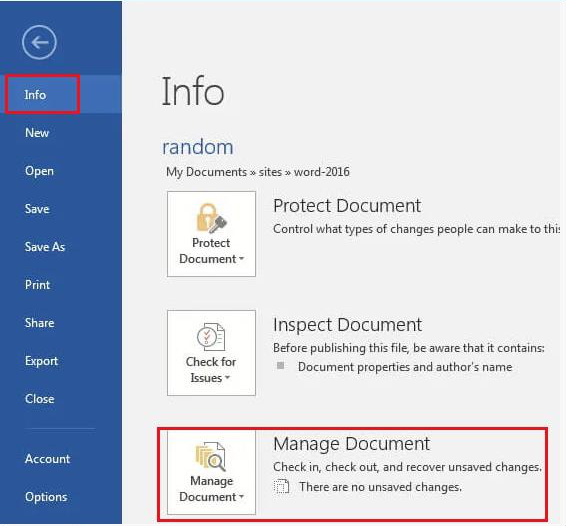
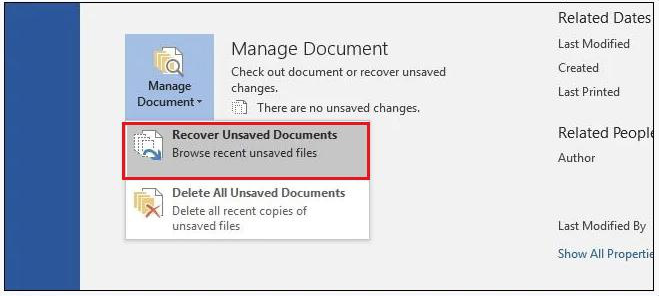
Step 1: Run the unsaved Word document, then click the top (File) tab, and then find the (Info)-(Manage Document) option. After that, select the (Recover Unsaved Documents) option in the drop-down menu.
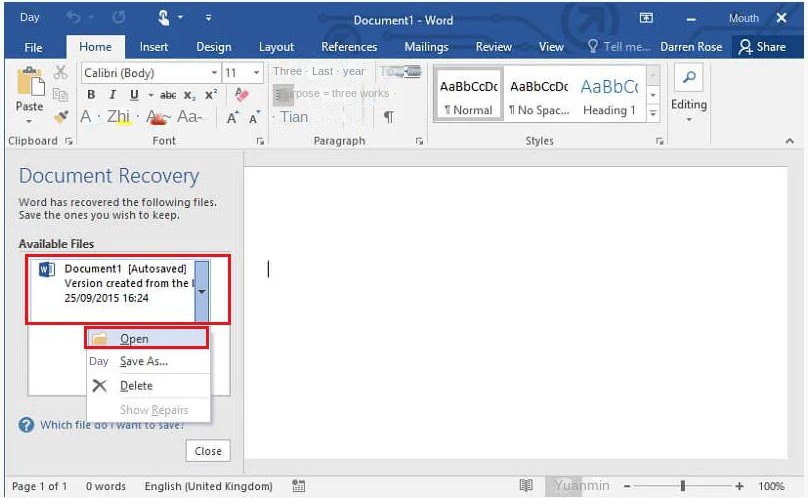
Step 2: Then you will see all unsaved files in this folder, select the Word document you want to recover, and click (Open).
Method 2: Automatically Recover Unsaved Word Documents Using Document Recovery
When the computer suddenly crashes, because the Word file was not saved in time, after trying to reopen Word, the unsaved Word file will automatically appear in the “Document Recovery” function bar on the left side of the Word program. At this time, you only need to double-click the Word file that needs to be saved recently, and click the (Open) button to retrieve the unsaved Word file.
2. How to recover deleted Word documents?
Normally, if you want to recover a deleted Word document, you just need to retrieve it from the recycle bin on the computer desktop and restore it. However, if you do not find your deleted Word file in the recycle bin, you can also use professional data recovery tools to retrieve the lost data. We recommend you to use Renee Undeleter , but the premise is that you have not saved the new data to the same disk, because once the data is overwritten, the deleted data cannot be retrieved smoothly. Let’s learn how to do it in detail.
what isRenee Undeleter?
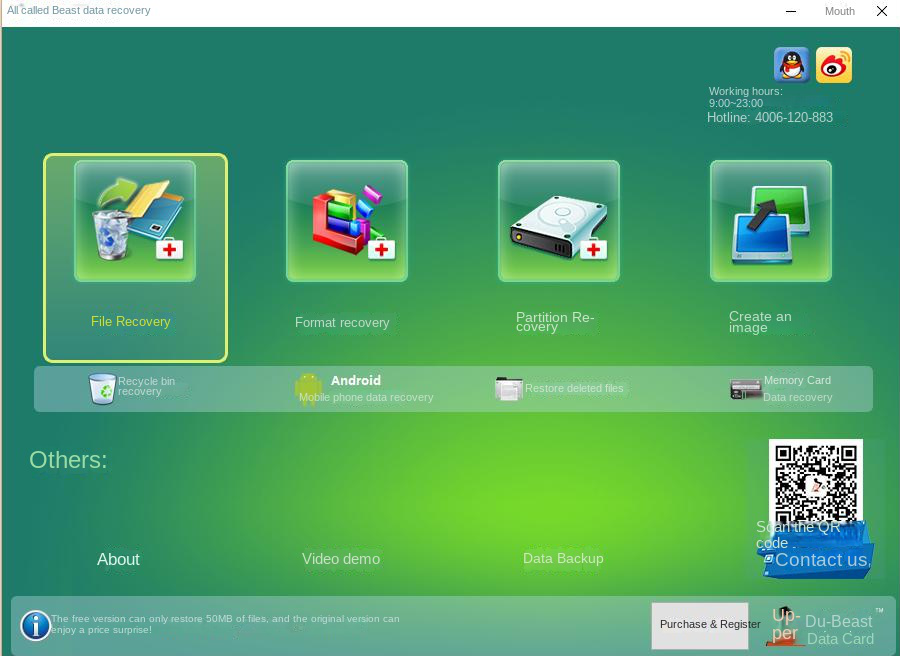
Renee Undeleter It is a software specially used to restore various data files. When you accidentally delete important files, empty the recycle bin, or format the disk/storage, you can use this tool to retrieve the lost data. The software covers four functional modules, including file recovery, format recovery, partition recovery and image creation. Therefore, it can help you solve all possible data loss problems that may occur during system use in an all-round way, which is very convenient.
Hot Topic - ADsRenee Undeleter – Simple & Powerful Software for Data Recovery
Easy to use Recover data by 3 steps;
Multiple scan modes Fast partition scan, whole partition scan and whole disk scan;
Supported file types Image, video, audio, text, email and so on;
Image creation Create a partition image to read and back up data;
Supported devices SD card, SDHC, SDXC, USB flash drive, hard disk and computer.
Easy to use Recover data by 3 steps;
Multiple scan modes Fast partition/whole partition/whole disk scan;
how to useRenee Undeleter recovers deleted Word documents?
Restoring data with Renee Undeleter is very simple, the specific steps are as follows:
Step 1: Download, install and run Renee Undeleter, select the (File Recovery) option in the main interface.
Note: Do not install on the disk that needs to restore data, so as not to cause data overwriting. If the file is deleted on the built-in disk, and the deletion time is not long, you can use (File Recovery) to operate; but if the file is lost due to formatting the disk, or the deletion time is long, or you want to restore the data of the external disk, you can use the (Format Recovery) or (Partition Recovery) function.
Data recovery function introduction: File recovery: Quickly retrieve files lost due to accidental deletion or emptying the recycle bin. Format recovery: Quickly recover files lost due to inaccessible or formatted partitions. Partition recovery: Partition information can be analyzed and obtained, and the entire partition can be fully scanned. Create a mirror: A mirror can be created for a partition to back up the current partition state.
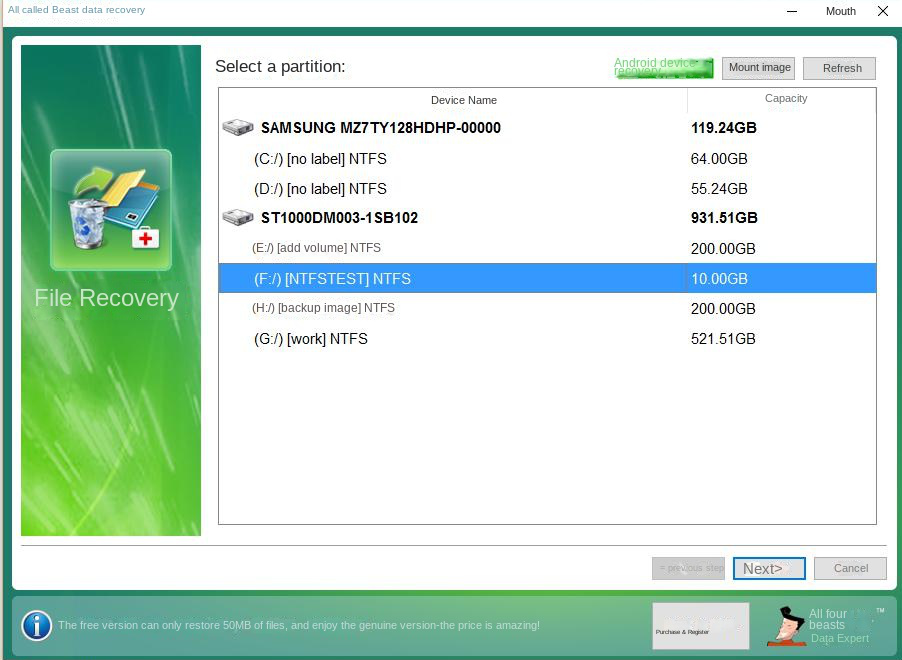
Step 2: Next, select the partition to be scanned, that is, the location where the Word document to be recovered was originally saved. Then click (Next).
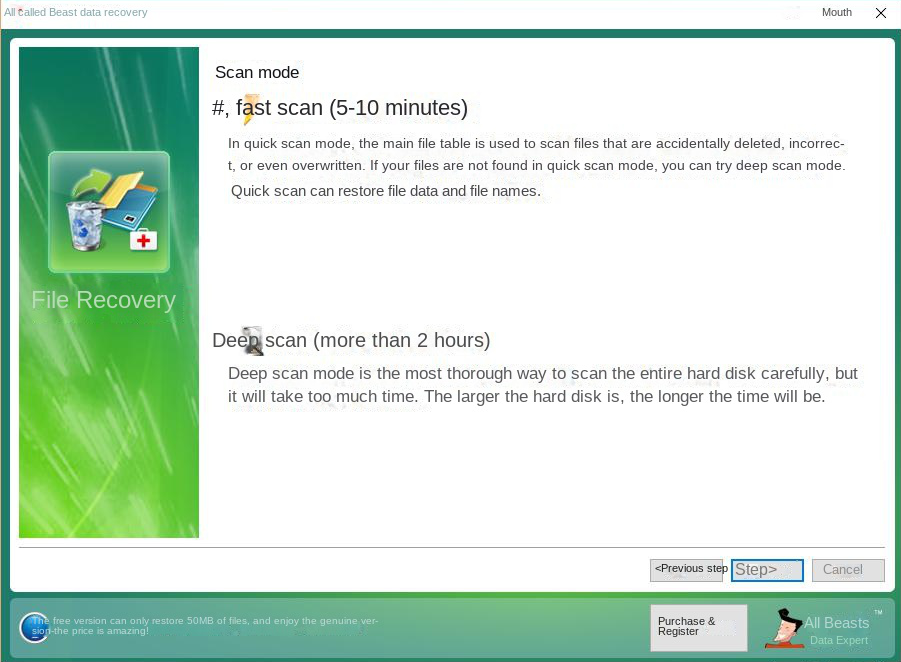
Step 3: Select the (Quick Scan) option and click the (Next) button to scan. It should be noted that “File Recovery – Quick Scan” only scans the first 30GB of the remaining space of the selected disk. If the desired file is not found after scanning, you can use “File Recovery – Deep Scan” to try to scan the hard disk partition again, but it will take more time.
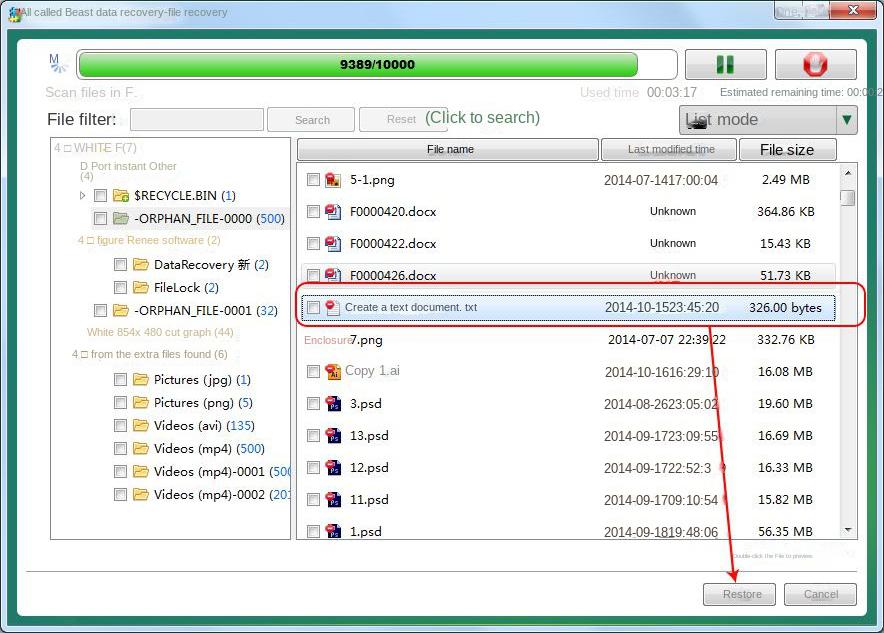
Step 4: Wait for the scan to complete, you can double-click the file to preview it, then select the Word document to be recovered, and click the (Recover) button to restore the deleted file to another disk.
The above content is the detailed operation method of recovering unsaved or deleted Word documents. In order to avoid similar things from happening, it is recommended that you set the time for automatic saving of documents in Word in advance. Let’s continue to learn.
II. (Extended reading) How to set the automatic saving time of Word documents?
The Word auto-save function can help users retrieve files that have not been manually saved after accidentally closing the Word program. The following is the method to set the automatic save time of Word documents.
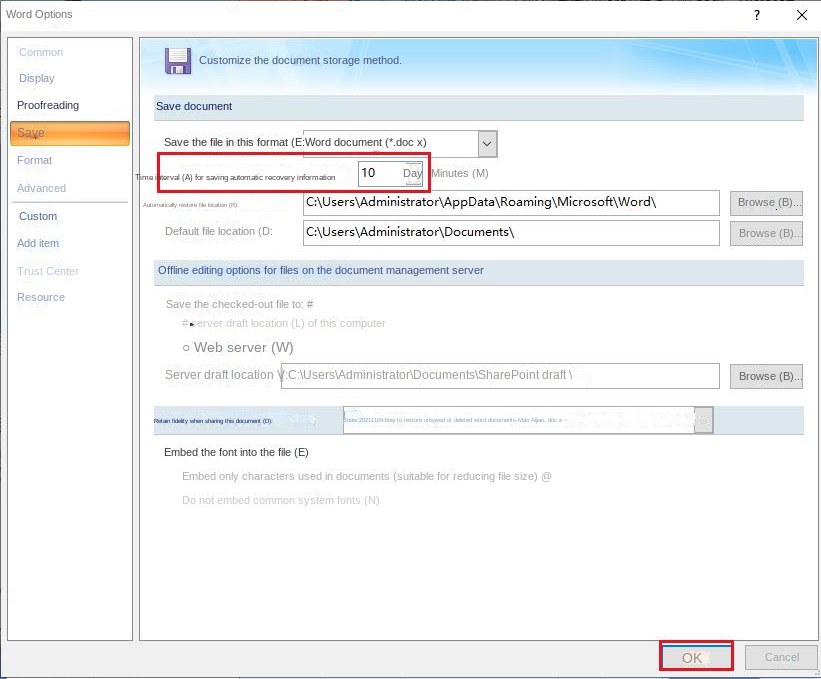
Step 1: Open the Word document, click the (Office) button in the upper left corner, then find and click (Word Options).
Step 2: Next, in the Word Options window that pops up, select the (Save) option, and then check the “Save auto-recovery information interval”, and set the specific auto-save time interval, the shorter the interval, the more data will be automatically saved, and you will not lose too much data in the event of a sudden power failure or system or software crash. Click (OK) after the operation is completed.
Kind tips In the updated version of Word program, you can set the automatic save time interval in (File)>(Options)>(Save). In addition, if you want to recover unsaved Excel documents, you can also check the article “Where is Excel auto-saved? How to recover unsaved files?”.