author avatar
    Specialist of Customer Service Dept.
 

Summary
Learn how to fix the error that please insert a disk into USB drive with this helpful article. Besides, you can recover the lost data with Renee Undeleter in just a few clicks.
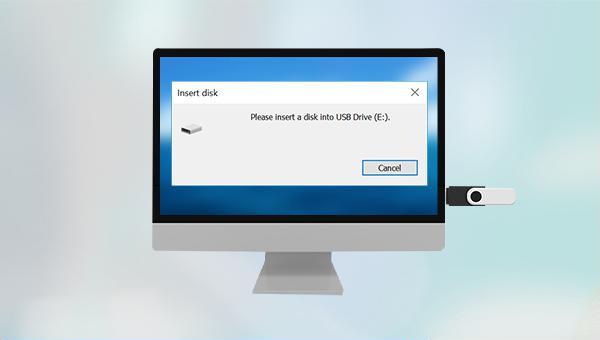

please insert a disk into USB drive

I. The solution to the U disk prompt Please insert the disk into the drive

When you are using a USB flash drive and the error message “Please insert a disk into removable disk” or “Please insert a disk into USB drive” appears, it is usually impossible to perform some normal operations on the USB flash drive, such as copying content, formatting operations, and so on. If you go to Disk Management to check the status of this U disk at this time, it will display “unallocated”. Don’t worry too much if you encounter this fault, you can try to solve it with the help of the following methods.
insert a disk into removable disk
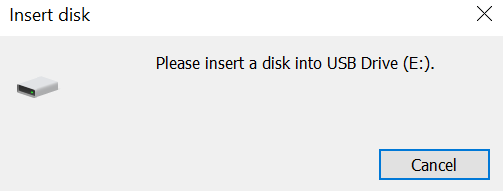
insert a disk into USB drive

1. Replace the USB interface

Sometimes, the failure of the U disk may be caused by the failure of the USB interface. At this time, you may wish to try to connect the U disk device to another USB port of the computer to try to solve the problem.

2. Change the drive letter of the U disk

When the drive letter of the USB flash drive conflicts with other partitions, it may cause the fault of “Please insert the disk into the drive” on the USB flash drive. At this time, you only need to reset the new drive letter through Disk Management to solve the problem. The specific operation steps are as follows:
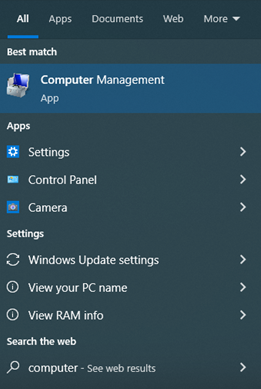
Step 1: Run the computer, type computer management in the search box in the lower left corner, and then click to enter the function option box.
computer management
Step 2: Next, click Disk Management on the left window, and find the U disk device whose drive letter needs to be re-modified.
disk management
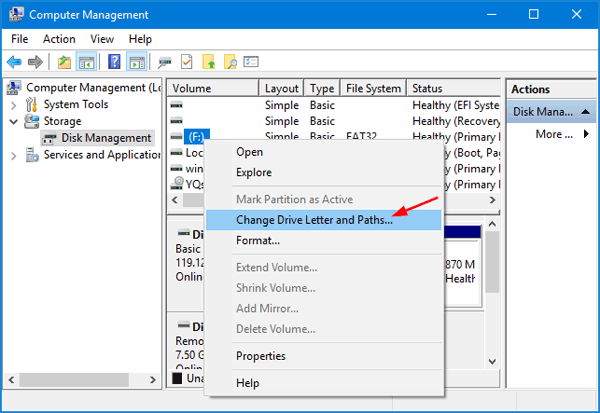
Step 3: After confirming the completion, right click on it and select the option Change Drive Letter and Paths.
change drive letter in disk management
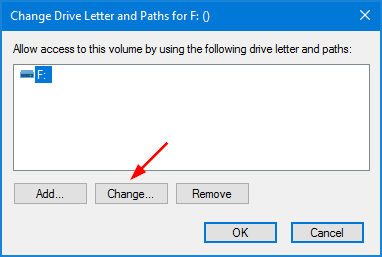
Step 4: Click the button Change to execute the command to change the drive letter.
click to change a letter for the disk
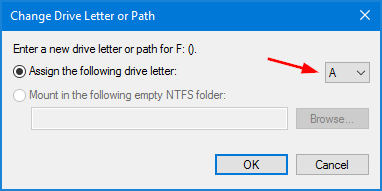
Step 5: Next, check Assign the following drive letter and choose a letter. Then click OK to change the drive letter.
assign a new drive letter for the disk

3. Create a new simple volume in Disk Management

When the U disk fails or other reasons make it unallocated, there will also be a failure prompt of “Please insert the disk into the drive”. At this time, you only need to create a new simple volume in Disk Management to solve it. It should be noted that if the USB flash drive contains important files, you can use a professional data recovery tool to perform a comprehensive scan on the USB flash drive before creating a simple volume, and try to recover the important files. For specific recovery steps, please refer to this articlethe second partcontent. The following are the specific steps to create a simple volume:
Step 1: Press the keys Windows and X on the keyboard at the same time. Then in the pop-up list, select the option Disk Management.
open windows disk management
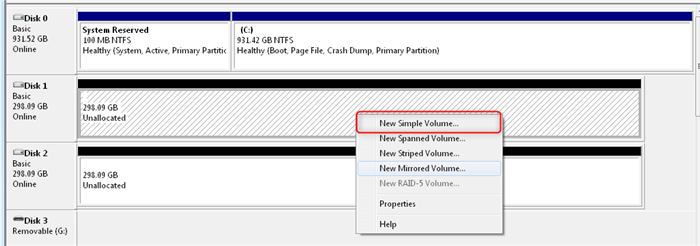
Step 2: After finding the target U disk, right-click the unallocated space on the U disk and select the option New Simple Volume.
create new volume
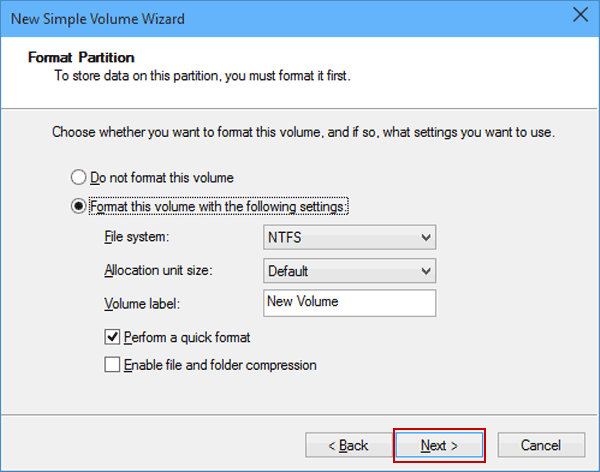
Step 3: Next, you can customize the partition size, drive letter, file system (NTFS, exFAT, FAT32, etc.) Also remember to check the option Perform a quick format. After the setting is complete, click the button Finish to complete the creation of the partition. Then you can use the target U disk normally.
format the volume with the settings
The above are several methods to effectively repair the prompt “Please insert the disk into the drive” in the U disk. When adopting the method of creating a new simple volume, because the operation of formatting may cause data loss, it is recommended to use professional data recovery software to scan and restore the U disk before creating a simple volume, such as the partition recovery of Renee Undeleter mode to scan the U disk data that has become “unallocated”. The following is a specific introduction.

II. Using Renee Undeleter to restore U disk data

1. What is Renee Undeleter?

Renee Undeleter is a software specially designed to restore various data files. When you accidentally delete important files, empty the recycle bin, or format the disk/storage, you can use this tool to find the lost data back. This software covers four functional modules, including file recovery, format recovery, partition recovery and image creation, so it can help you solve many data loss problems that may occur during system use in an all-round way, which is very convenient.
Renee Undeleter - User friendly & Helpful Formatted Data Recovery Software

Easy to use 3 steps to recover formatted data back.

Multi Recovery Modes File recovery, Whole partition recovery and Whole disk recover are available.

Support Different File Types Photos, videos, audios, files, emails, etc.

Image Creation Creat image for disk or parititon.

Compatible with Different Devices SD card, SDHC, SDXC, USB disk, computer, etc.

Easy to go 3 steps for whole recovery.

Multi Recovery Modes Files/partition/disk recovery modes.

Support Different Devices SD card/USB disk/hard disk, etc.
Free TrialFree TrialFree Trial 800 users have downloaded and found data back!

2. How to recover lost data in the USB flash drive with Renee Undeleter?

Recovering lost data with Renee Undeleter is very simple, the specific steps are as follows:
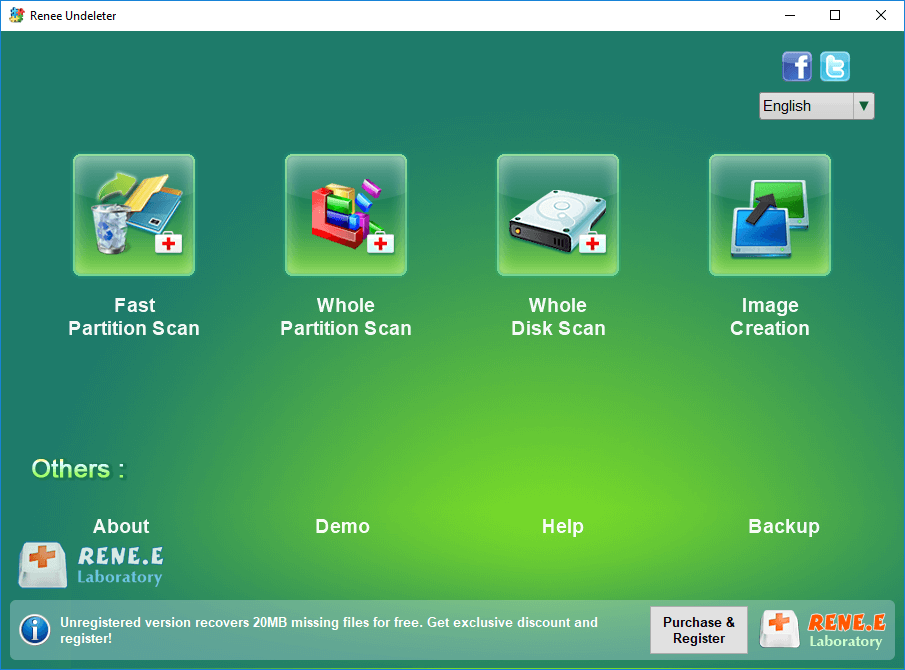
Step 1: Download, install and run Renee Undeleter, select the option Whole Disk Scan in the main interface. This option will scan the entire hard disk, so do not install the software to any partition of the hard disk that needs to be scanned. In the hard disk that does not need to be scanned, otherwise it will not be able to use Whole Disk Scan to scan. If the lost data is not much and the lost time is not long, you can also use Fast Partition Scan and Whole Partition Scan modes to save scanning time.
select whole disk scan in renee undeleter
Data recovery function introduction:

Fast Partition Scan: Quickly retrieve files lost due to accidental deletion or emptying the recycle bin.

Whole Partition Scan: Quickly recover files lost due to inaccessible or formatted partitions.

Whole Disk Scan: It can analyze and obtain partition information, and fully scan the entire partition.

Image Creation: You can create a mirror image for a partition to back up the current partition state.
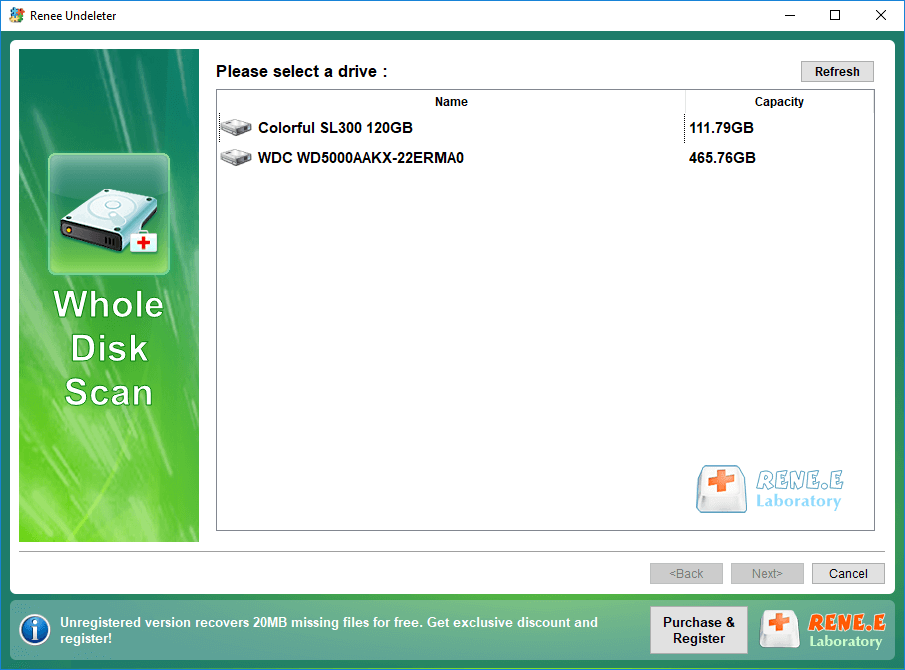
Step 2: Next, select the disk device to be scanned and then click Next. Select default setting on the advanced setting interface.
select a disk to recover in renee undeleter
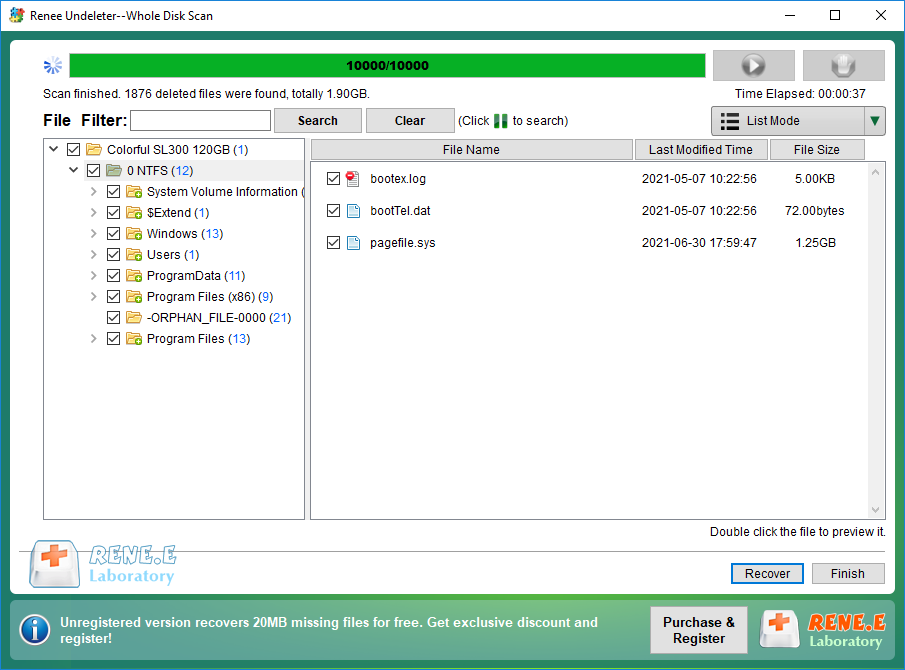
Step 3: After that, the software will analyze the disk device. After scanning, you can double-click the file in the preview window on the right to preview it, then select the file you want to restore, and click the Recover button in the lower right corner to restore the selected file.
select taget files to recover with renee undeleter
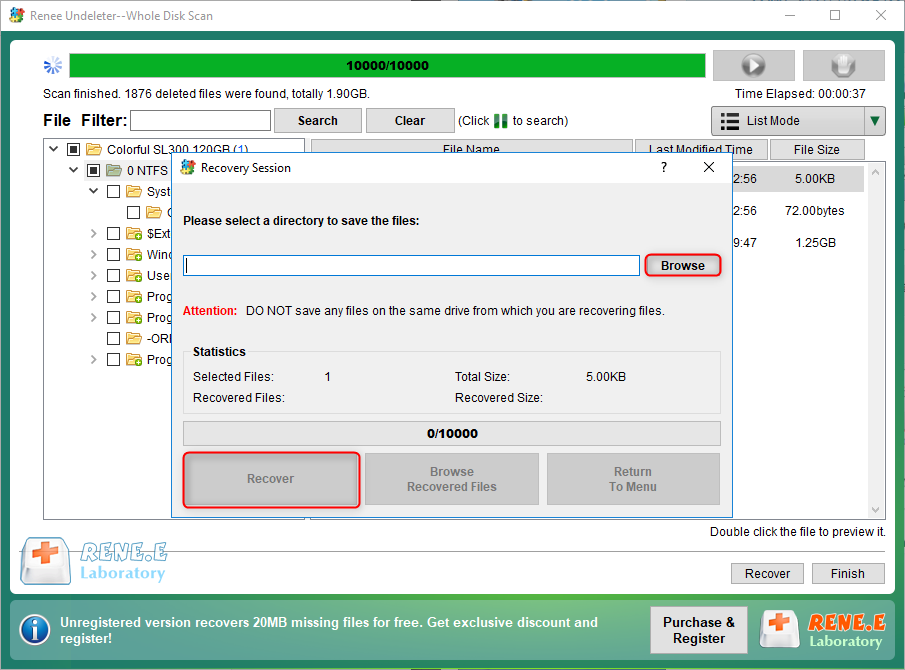
Step 4: Next, select the target folder, click Browse to select another disk to save the recovered files, and then click the Recover button to start the file recovery command, you just need to wait patiently.
recover files from whole disk scan with renee undeleter