author avatar
    Technology Manager of Test Dept.
 

Summary
Learn how to recover data and fix hard disk errors when facing issues like error messages, unrecognized or inaccessible hard disk. Keep reading for expert solutions.


recover data from dead hard drive

I. Symptoms of hard disk failure and causes of failure

Symptoms of a hard drive failure generally manifest as:
● The mechanical hard disk does not respond or makes abnormal noises. Please refer to the detection and repair method of abnormal hard disk noise.
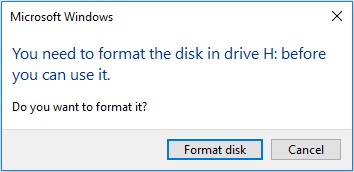
● The hard disk prompts that it needs to be formatted before use.
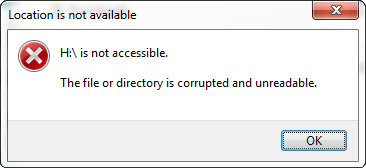
● The system prompts that the file or directory is damaged.
● The data in the hard disk is lost.
● The computer does not recognize the hard drive, or the file system becomes RAW. Please check the detection and repair method of RAW hard disk.
● The hard disk partition suddenly disappears and becomes unallocated.
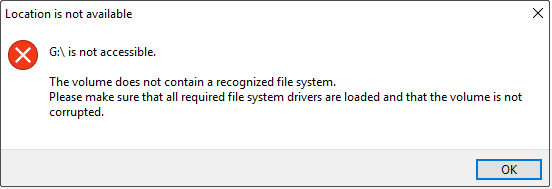
Does not contain a recognized file system
file or directory corrupted
There are many reasons for the above hard disk failure, which may be as follows:
● virus attack
● There are bad sectors in the hard disk
● Sudden system shutdown or crash
● Human error
● Power and overheating issues
Kind tipsWhen you connect the hard disk to the computer, Windows may prompt “The disc in the drive needs to be formatted before using it, do you want to format it”, please click (Cancel), do not select (Format Disk), because if Formatting a hard drive without a data recovery tool will result in permanent data loss. If you have selected (format disk), you can try the data recovery method described below to recover.
Prompt to format

II. How to restore data when the hard disk is broken?

When the hard disk cannot be accessed, prompts that it needs to be formatted, the file system is displayed as RAW, and the hard disk partition becomes unallocated space, etc., as long as the hard disk can be seen in the disk management (successfully connected), you can check the following content to fix it Scanning and file recovery. Let’s take Renee Undeleter as an example to introduce the hard disk data recovery method.

1. What is Renee Undeleter?

Rene.E Laboratory ™ data recovery software It is a software specially used to recover data files. When you accidentally delete important files (video, audio, documents, application files, etc.), empty the recycle bin, or format the disk/storage, you can Retrieve lost data with the help of this tool. The software covers four functional modules, including file recovery, format recovery, partition recovery and image creation, which can help you solve all data loss problems in an all-round way.
Hot Topic - ADsRenee Undeleter – Simple & Powerful Software for Data Recovery

Easy to use Recover data by 3 steps;

Multiple scan modes Fast partition scan, whole partition scan and whole disk scan;

Supported file types Image, video, audio, text, email and so on;

Image creation Create a partition image to read and back up data;

Supported devices SD card, SDHC, SDXC, USB flash drive, hard disk and computer.

Easy to use Recover data by 3 steps;

Multiple scan modes Fast partition/whole partition/whole disk scan;

Supported devices SD card/USB/hard disk.

Free TrialFree TrialFree Trial 800 people have downloaded!
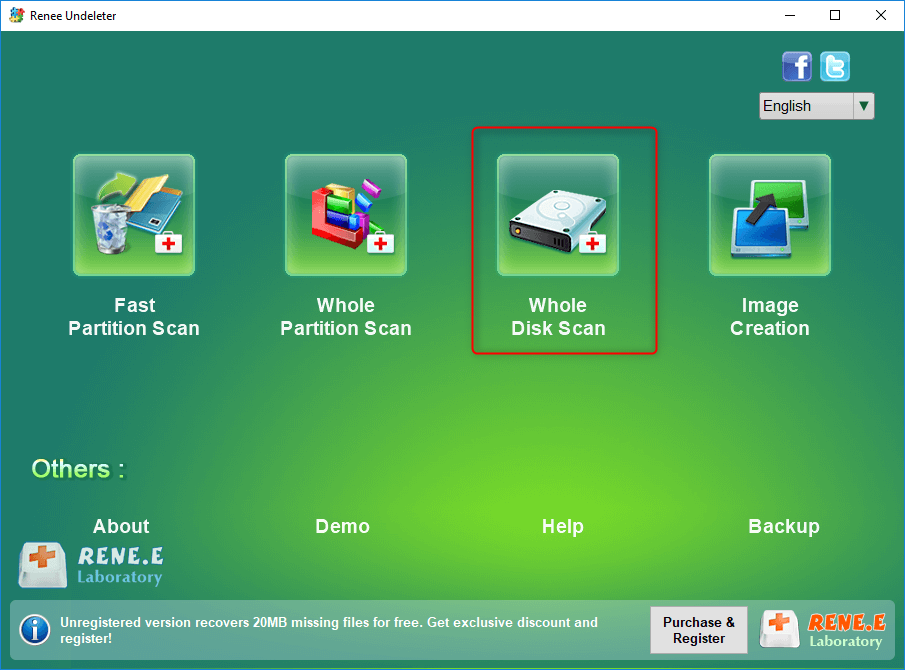
2. How to use Renee Undeleter to recover hard disk data?

Specific steps are as follows:
Step 1: Download, install and run Renee Undeleter on the computer, and select the (Partition Recovery) option on the main interface. If you need to restore the data of the mobile hard disk, please connect it to the computer.
Note: Do not install on the disk that needs to restore data, so as not to cause data overwriting.
Select partition recovery option
Data recovery function introduction:
File Recovery – Quickly retrieve files lost due to accidental deletion or emptying the recycle bin.
Formatted Recovery – Quickly recover files lost due to inaccessible or formatted partitions.
Partition Recovery – Analyze and get partition information and perform a full scan of the entire partition.
Create Mirror – You can create a mirror image for a partition to back up the current partition state.

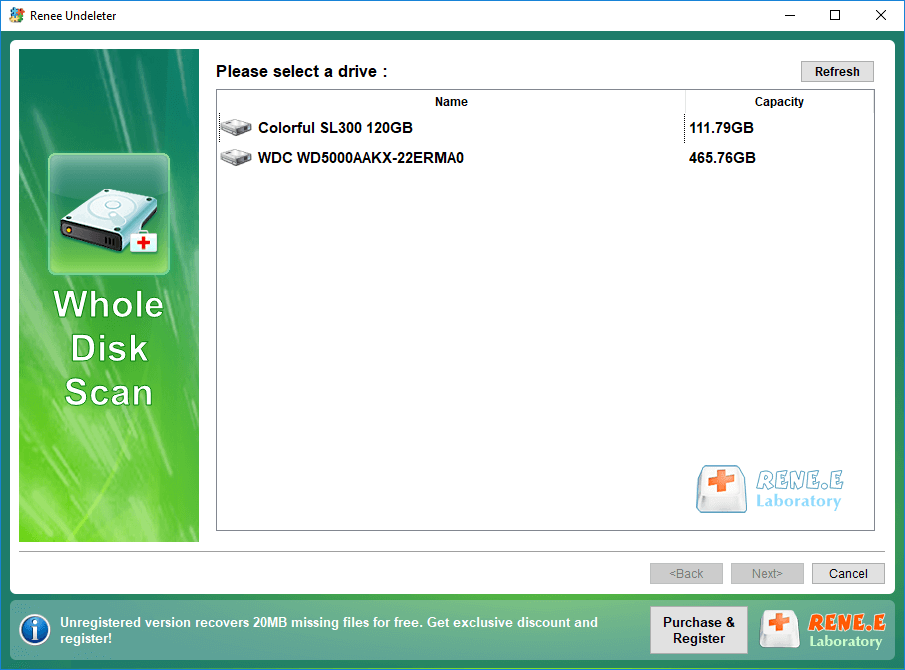
Step 2: Next select the hard drive that needs to recover data. After the selection is complete, click (Next).
Select target device for partition recovery
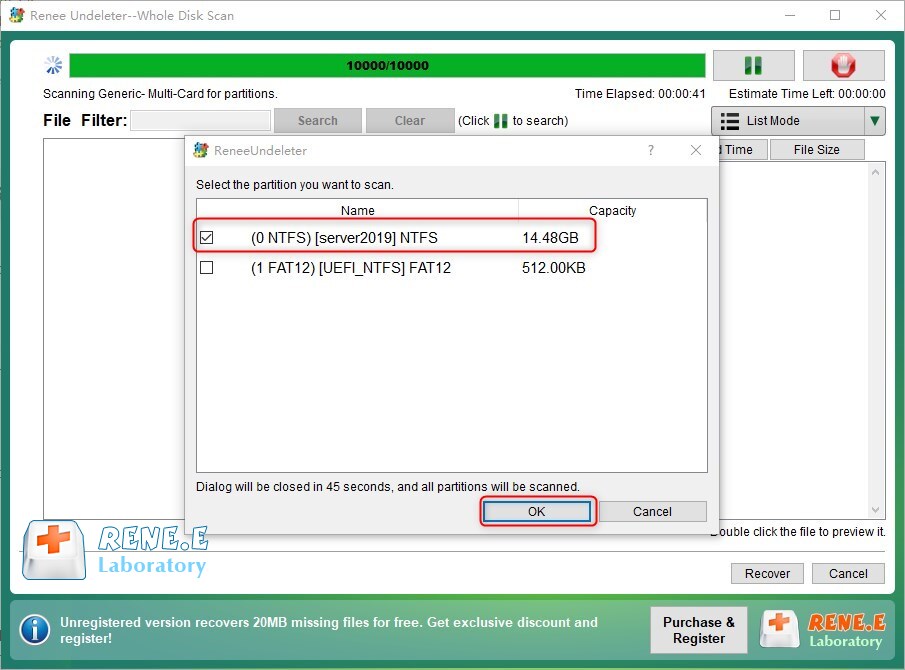
Step 3: Please wait patiently for the scan, this process will find out all the partitions that have existed on the hard disk, and then the “Select the partition you need to scan” window will pop up, you can select the partition that needs to recover data to scan. If not selected, all partitions will be scanned and it will take longer.
Select the appropriate partition to scan
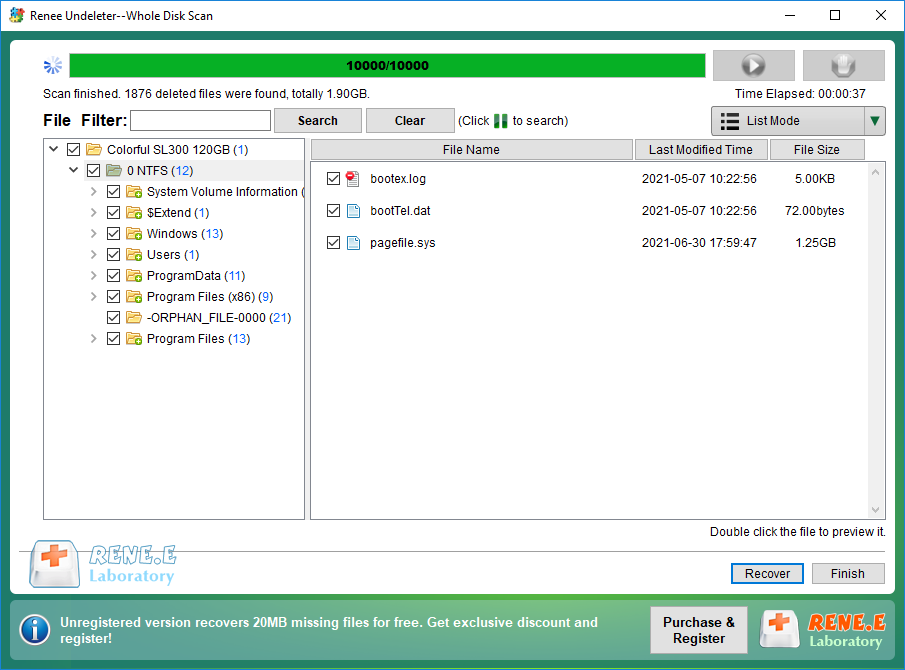
Step 4: During the scanning process, you can double-click to preview the file. If all the required files have been found, you can check the target file, and then click the (Restore) button to restore the data in the hard disk to other disks of the computer.
Partition recovery scan result presentation

III. How to fix hard disk errors?

Before starting the repair, it is recommended that you manually check the power supply and fans to make sure they are working properly, and then use the following hard drive repair solutions.

1. Run antivirus software

Sometimes viruses and malware can cause hard drive errors. Therefore, scanning and removing viruses with antivirus software may repair some corrupted hard drives and make the drive accessible. It is recommended to connect the hard drive to another Windows computer with anti-virus software installed, and use reliable anti-virus software to scan and remove viruses.

2. Use hard disk detection/repair software to repair hard disk errors

If the hard disk has bad sectors, you can use special hard disk detection/repair software to detect and repair hard disk errors.
Step 1: Download, install and run the Hard Disk Bad Sector Detection tool on your computer, the recommended free tool here is: HDD-SCAN, it is a free software for hard drive diagnostics (also supports RAID array servers, flash USB and SSD drives ). The program can test storage devices for errors (bad blocks and sectors), display SMART attributes and change some HDD parameters such as AAM, APM, etc.
Official website link: https://hddscan.com/
HDD-SCAN
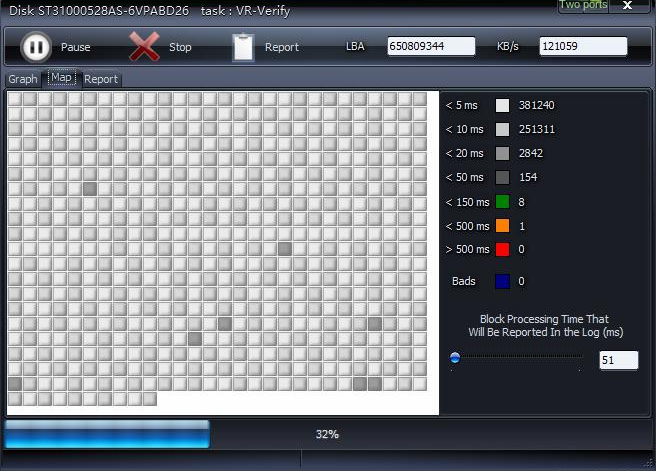
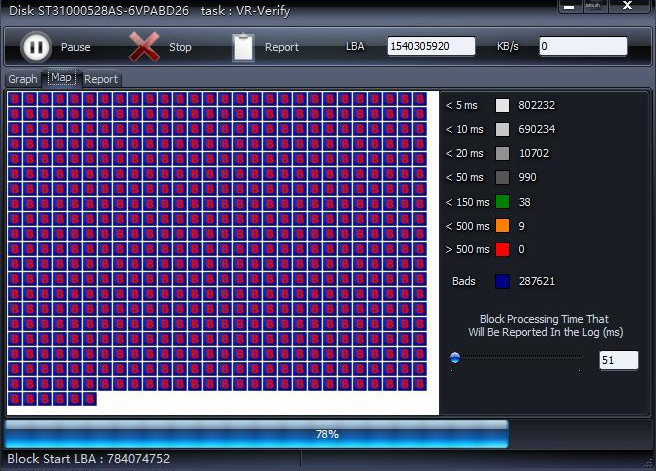
Step 2: HDD-SCAN can output the scanning status to the interface in a graphical way. When the disk detects about 78%, there are a lot of bad sectors B.
scanning situation
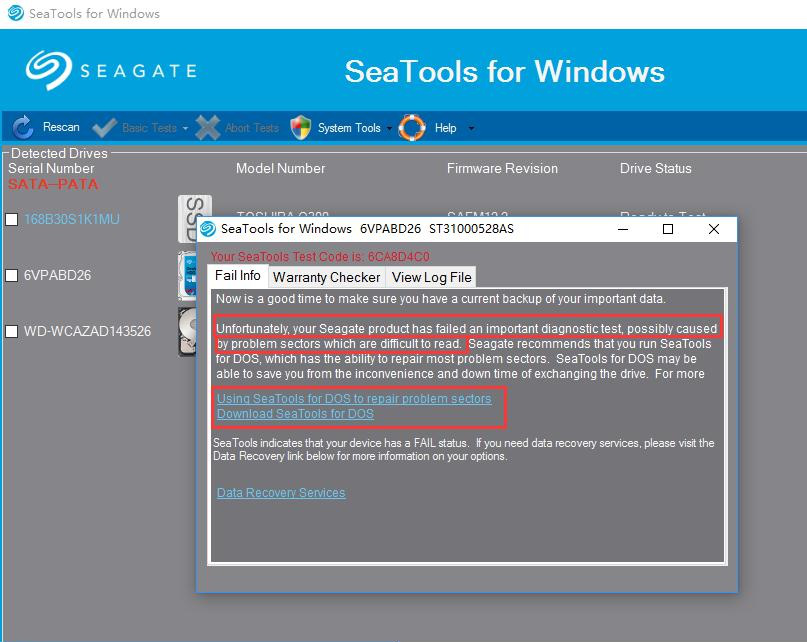
Step 3: HDD-Scan can also output scan logs, and the results are more detailed. After bad sectors are found, it is recommended to use the repair software provided by the hard disk brand to deal with them, such as SeaTools, Western Digital Data Lifeguard Diagnostic, etc. Please search the corresponding hard disk repair tools on the Internet according to the hard disk brand. Note: All data may be erased if repaired with repair software provided by the brand. If you don’t want to lose data, please back up your data first.
SeaToolsTools

3. Use Windows built-in tools to check and repair hard disk errors

You can try using Windows built-in tools to check and fix hard drive errors. Please do the following in Windows 10/8/7:
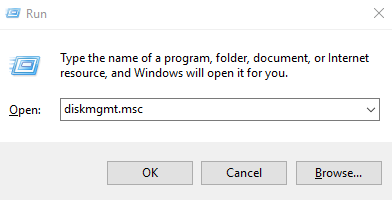
Step 1: Please press (Windows icon + R key) at the same time, enter (diskmgmt.msc) in the pop-up input box, and then click (OK) to enter Disk Management.
Run window input diskmgmt.msc
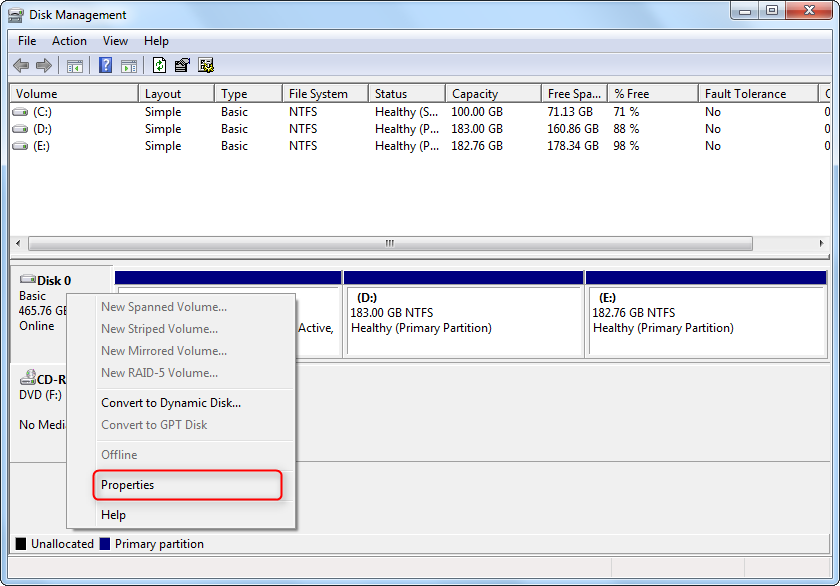
Step 2: In Disk Management, right-click on the failed hard disk partition and select (Properties) on the menu.
click properties
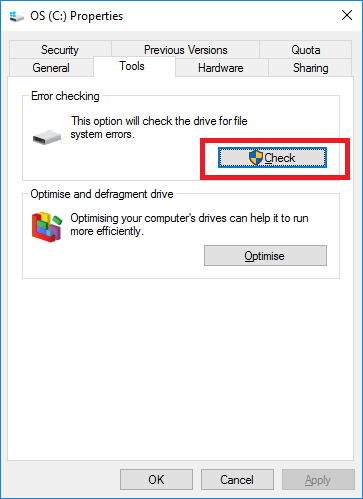
Step 3: In the (Tools) column, select (Inspect).
Toolbar selection check
Step 4: If your system is Windows 7 or Windows 8, please check (Automatically repair file system errors) and (Scan and try to recover bad sectors), and Windows 10 automatically repairs all errors by default. Then wait patiently for the scan and repair to complete.
Tick Automatically fix file system errors and Scan for and attempt recovery of bad sectors
The disk check function is mainly to mark the space where bad sectors appear as “unavailable” at the file system level, so as to prevent file data from being written into these unstable data storage spaces. If you use HDD-Scan to scan, these bad sectors will still be displayed. If you want to completely solve the problem, you can only perform low-level formatting (not necessarily repairable) or replace the hard disk.

IV. (Extended information) How to solve the problem that the new hard disk cannot be recognized?

If you encounter the situation that the computer cannot recognize the newly installed hard disk, the reason may be that the hard disk has not been partitioned and formatted before leaving the factory, which makes the computer unable to recognize it and needs to be handled by the user. The solution to this kind of problem is very simple. You can use the built-in disk management of Windows to initialize the hard disk. In Windows 2K/XP/Vista/7/8/8.1/10 operating systems, you can refer to the following steps. The specific operation steps are as follows:
Step 1: Please press (Windows + R) keys, enter (diskmgmt.msc) in the pop-up input box and click (OK) to enter Disk Management.
Enter diskmgmt.msc during operation
Step 2: Then you will see that the newly installed hard disk is in the status of “unknown, not initialized” and “unallocated”.
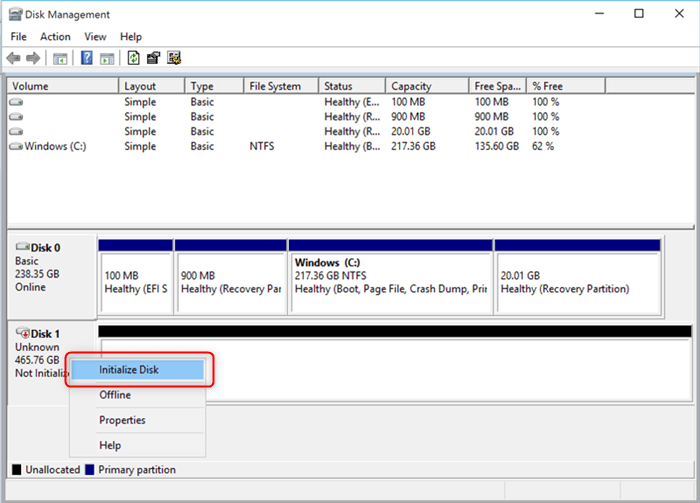
Step 3: Use the mouse to move to the “not initialized” disk, and right-click it, select (initialize disk) on the menu
Select Initialize Disk
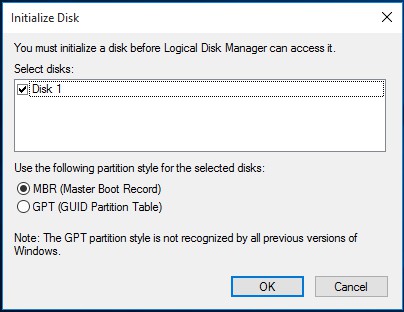
Step 4: Follow the default settings and click (OK). After clicking (OK), the logo of the disk will change to (Online). also mayclick here Understand the difference between MBR and GPT, the disk partition format.
click OK
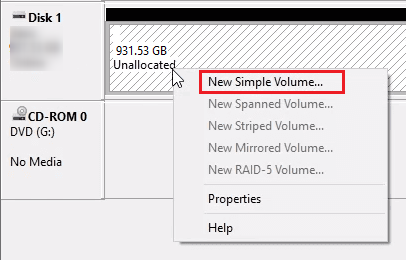
Step 5: Right-click on the unallocated area of the disk, and select (New Simple Volume).
Select New Simple Volume
Step 6: In the next wizard page, press (Next) continuously, and finally click (Finish), the hard disk partition can be created, and then open the file explorer/This computer, you can find the hard disk and it works normally use it up.
Complete the new simple volume