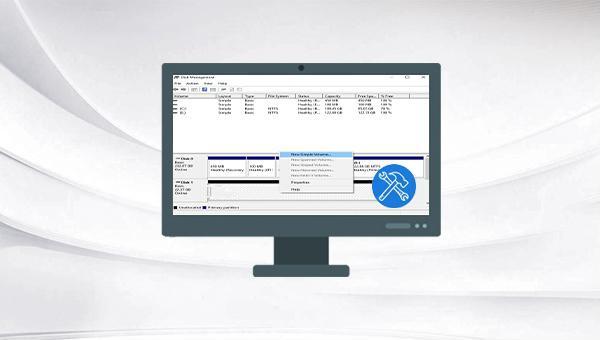
author avatar
    Specialist of Customer Service Dept.
 

Summary
Learn how to restore a missing or RAW disk partition with our detailed guide. Find solutions to recover data or make the partition visible in the file explorer.


restoring partition

I. Analysis of the disappearance or inaccessibility of disk partitions

A partition functions as a storage container for files. Without it, a hard drive cannot save data, rendering it inaccessible and invisible in the file explorer. If a normally visible partition vanishes from the ‘This PC’ > ‘Devices and Drives’ list upon accessing files via file explorer, several issues could be the cause.

1. The disk partition becomes unallocated

During a clean-up operation, we mistakenly deleted an entire volume or while attempting disk repairs using 
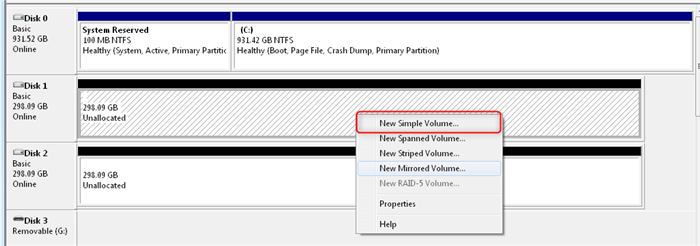
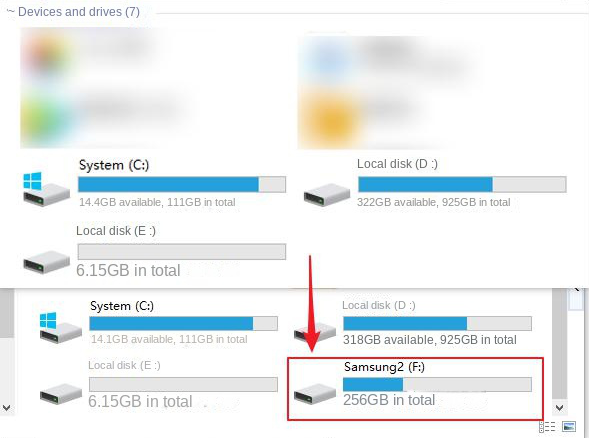
diskpart commands, resulting in all partitions being cleared. Additionally, virus attacks or hardware issues can lead to a disk partition becoming unallocated. To verify, right-click the start menu, select Disk Management, and look for an “unallocated” label on the target disk. If present, follow the steps under ‘Create a new simple volume‘ to recover the disk partition.
unallocated disk

2. The disk partition does not have a drive letter

If a disk partition lacks a drive letter, it won’t appear in File Explorer, typically due to its 
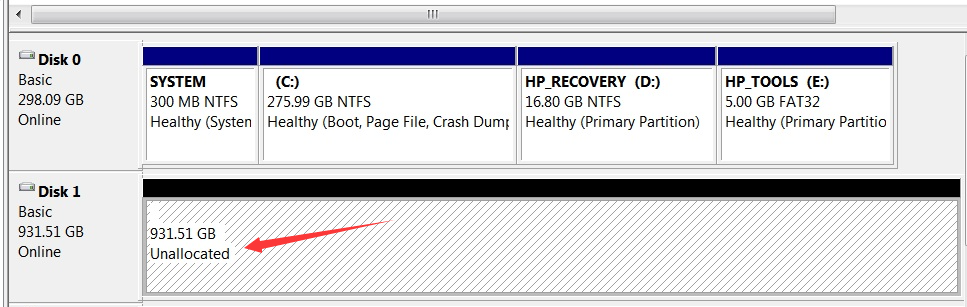
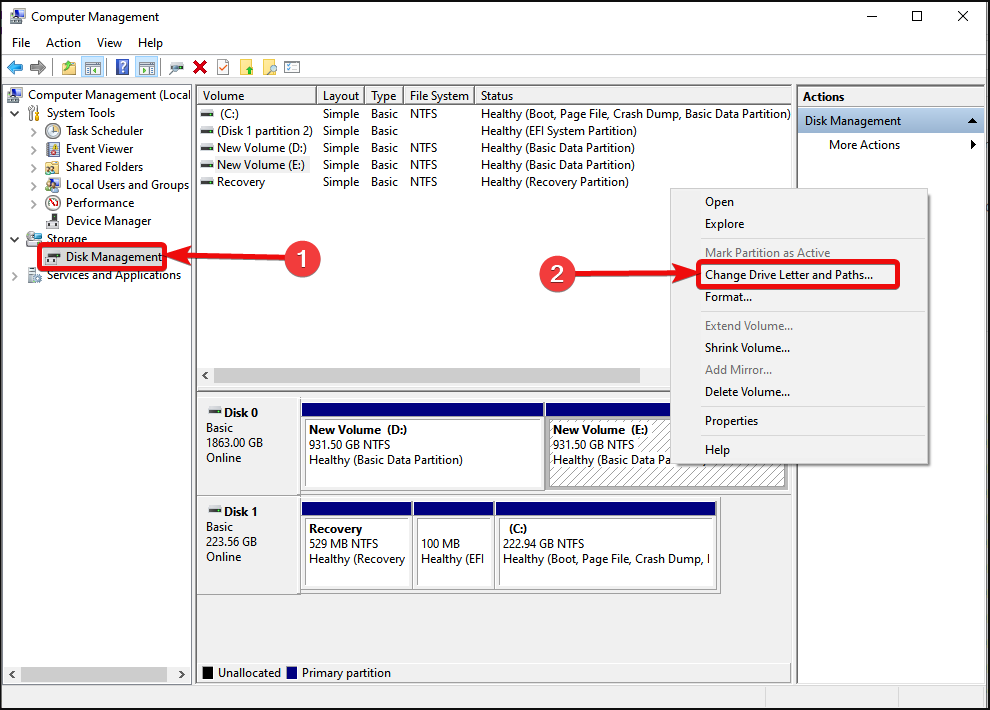
hidden or no default drive letter status, preventing automatic drive letter assignment by the system. To address this, use the method outlined in Assign a drive letter in Disk Management. Alternatively, click here for detailed instructions on removing the hidden or no default drive letter attribute, especially if the issue of the disk partition not having a drive letter persists.

3. The file system of the disk partition is not supported and displayed as RAW

If the disk partition’s file system is corrupted or incompatible with your operating system, causing it to appear as RAW in disk management, the partition will be inaccessible. To fix this issue, the partition must be formatted, and a new file system must be established. Follow the specific steps to format a RAW disk here to attempt resolution.

II. How to restore the data of the disk partition?

To protect important data on a vanished disk partition, avoid any unnecessary read/write activities, formatting, or rebuilding the partition table, as these actions could lead to irreversible data loss. Instead, promptly use a reliable data recovery tool like Renee Undeleter to scan the entire disk and recover the data. Follow the provided instructions for the specific features and recovery process.

1. What is Renee Undeleter?

Renee Undeleter is a specialized software designed to recover various data files. Whether you’ve unintentionally deleted crucial files, cleared the recycle bin, or formatted the disk/storage, this tool can help you recover your lost data. It includes four key functions: file recovery, format recovery, partition recovery, and image creation, providing a comprehensive solution to all data loss issues.
Hot Topic - ADsRenee Undeleter – Simple & Powerful Software for Data Recovery

Easy to use Recover data by 3 steps;

Multiple scan modes Fast partition scan, whole partition scan and whole disk scan;

Supported file types Image, video, audio, text, email and so on;

Image creation Create a partition image to read and back up data;

Supported devices SD card, SDHC, SDXC, USB flash drive, hard disk and computer.

Easy to use Recover data by 3 steps;

Multiple scan modes Fast partition/whole partition/whole disk scan;

Supported devices SD card/USB/hard disk.

Free TrialFree TrialFree Trial 800 people have downloaded!

2. How to use Renee Undeleter to recover disk partition data?

Step 1: Download, install and run Renee Undeleter on the computer, and select the (Whole Disk Scan) option on the main interface.
Notice : Do not install Renee Undeleter in the disk where data is lost to avoid data overwriting.
select whole disk scan to scan disk in renee undeleter
Data Recovery Features:

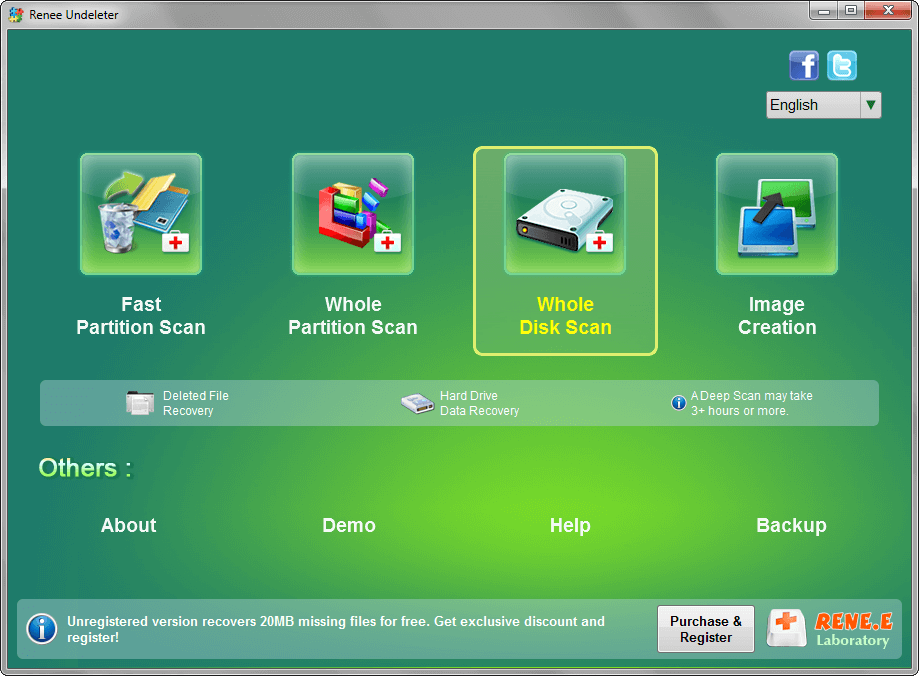
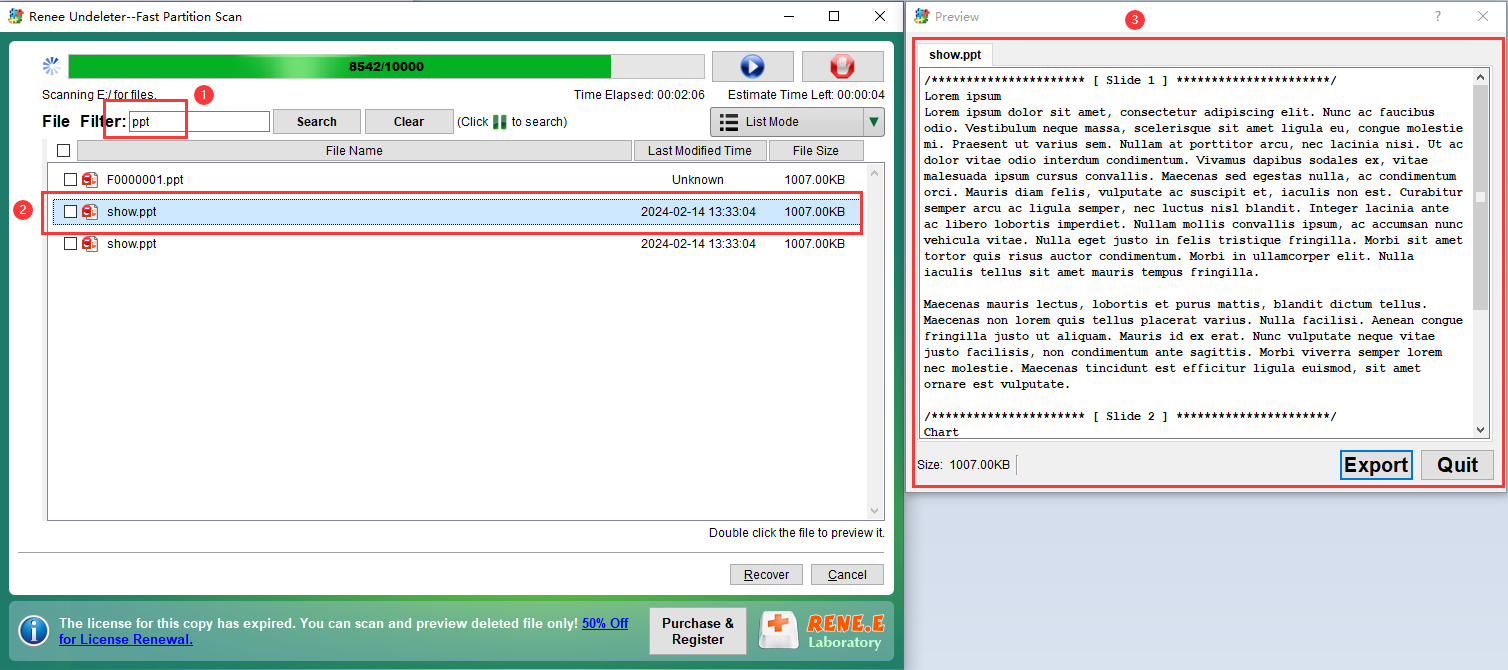
  • Fast Partition Scan: Quickly recovers files after they have been deleted or removed from the recycle bin.
  • Whole Partition Scan: Retrieves files from partitions that have been formatted or are otherwise inaccessible.
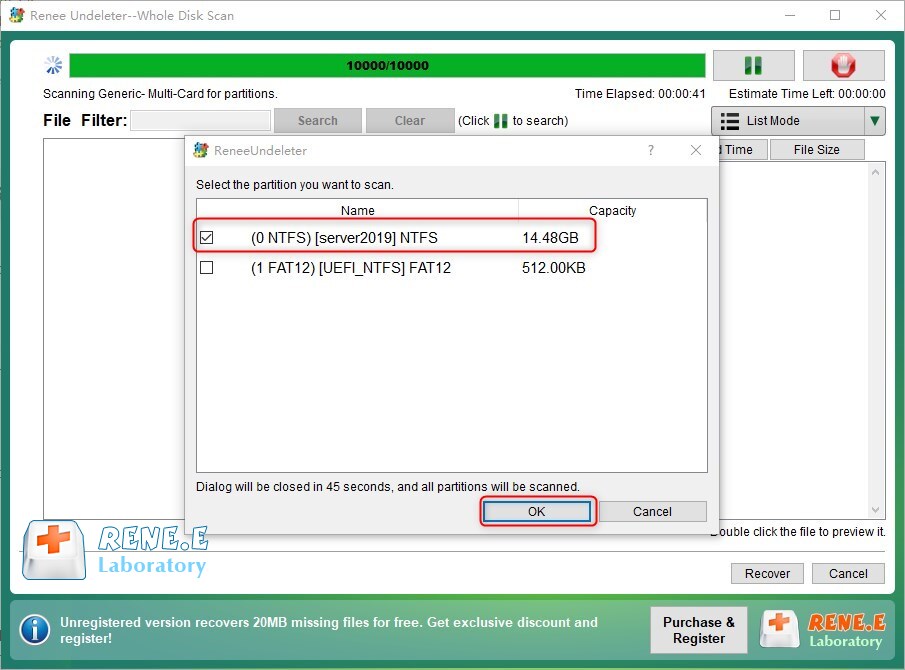
  • Whole Disk Scan: Conducts an in-depth analysis of partition structures and executes a thorough scan of the entire disk.
  • Image Creation: Creates a binary image of the partition to safeguard its current state for future recovery operations.
Step 2: Next, select the corresponding disk according to the disk capacity. After the selection is complete, click (Next).
select a disk to recover in renee undeleter
Step 3: Wait for the scan to complete. It will detect all previous partitions on the disk. Once the “Select the partition you need to scan” window appears, choose the missing partition for scanning. If none is selected, the scan will include all partitions, which requires more time but potentially recovers more data.
recover partition on SD card with Renee Undeleter
Step 4: Preview files in the disk partition during the scan process. After identifying all essential files, select them and click Recover to restore the data to a different disk on your computer.
preview before recovery
undeleter preview ppt

III. How to restore the disk partition to an accessible state

After successfully restoring the disk partition data, choose the most suitable method to regain access to the partition. This will enable the partition to be visible and accessible within the file explorer, tailored to the unique situation at hand.

1. Create a new simple volume in Disk Management

Step 1: Press the (Windows+X) keys on the keyboard at the same time. Then in the pop-up list, select the (Disk Management) option.
Step 2: Then right-click on the unallocated space on the disk and select the (New Simple Volume) option.
create new volume
Step 3: Customize the partition size, drive letter, and file system (NTFS, exFAT, FAT32). Consult Features and differences of 
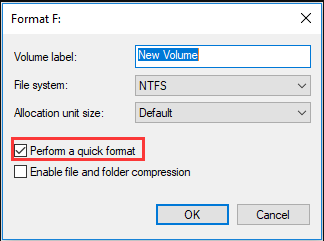
NTFS, exFAT, FAT32 to select the right file system. Once settings are configured, click the Finish button to create the partition. You can then access it in file explorer and restore the original data using data recovery software.
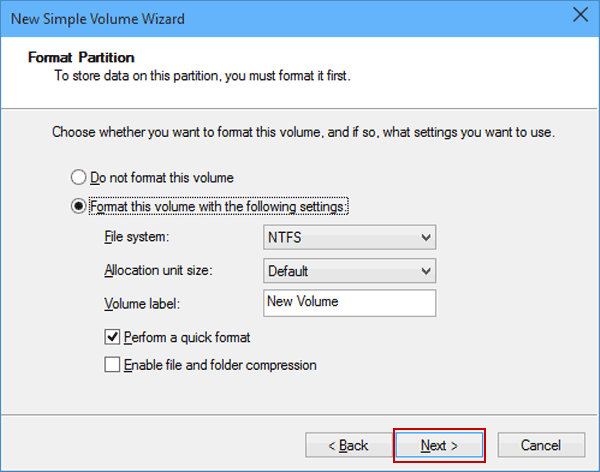
format the volume with the settings

2. Assign a drive letter in Disk Management

Disk Management can not only create a new simple volume, but also assign a drive letter. If you find that the disk partition does not have a drive letter in Disk Management, you can follow the steps below.
Step 1: Press the Windows icon + X key at the same time, select (Disk Management) in the menu, right-click the target disk, and select (Change drive letter and path).
disk Management Change Driver Letter
Step 2: Click (Add), assign a drive letter to the hard disk, and then click (OK).
Step 3: Then open “My Computer/This Computer” on the desktop, and you can see the hard disk partition that had disappeared, which means that the disk partition has been restored and can be accessed normally.
File Explorer showing partitions

3. Format the RAW disk in Disk Management

The format operation can reset the Windows-recognizable file system for the hard disk, and the steps are as follows:
Step 1: Right-click the Start menu and click (Disk Management).
Step 2: Right-click the disk whose file system is RAW and select (Format).
format drive
Step 3: Select the file system, check (Execute quick format), and click (OK). If the hard disk is used on a Windows system, it is recommended to select the NTFS file system.
quick Format
Step 4: The formatting operation will prompt you to clear all the data in the hard disk, click (OK), and then wait for the formatting to complete. After the formatting operation is completed, the problem that the hard disk becomes RAW and cannot be accessed normally can be solved.