author avatar
    Technology Manager of Test Dept.
 

Summary
Learn how to quickly recover photos from your SD card using software such as Windows File Recovery, Renee Undeleter, and Memory Card File Rescue. Don't forget to regularly backup your data for added security.


In today’s digital era, with more and more electronic devices used in people’s lives, the need to store data has become greater and greater. And SD card, as one of the commonly used storage media, is widely used in cameras, cell phones, tablets and other devices. However, in the process of using SD card to store photos, we sometimes lose data due to various reasons. At this time, it becomes crucial to recover photos from SD card.
SD card photo recovery
Below we will introduce the reasons for SD card data loss and various methods to recover photos from SD card.

Reasons for SD card data loss

In order to better protect our data, it is crucial to understand the causes of SD card data loss. Below we will explain some common SD card data loss situations, so that we can try to avoid similar situations from happening.

Physical damage

Physical damage to the SD card can be a major cause of data loss. If we accidentally bend or twist the SD card, or accidentally drop it during use, the SD card’s memory chip or circuit board may be damaged, resulting in unreadable data. In addition, excessively high or low temperatures may damage the SD card, resulting in data loss. It should be noted that if the SD card is physically damaged, it will be difficult to recover the data in it through data recovery software and other methods.

Misuse

Misoperation is also one of the common data loss situations. When we use an SD card, if we accidentally delete important photos or files, or format the SD card, the data in it will be lost. At this time, data recovery software will become the user’s savior, it can help users retrieve accidentally deleted or formatted data.

Virus or malware

Viruses or malware can also cause damage to data on the SD card. When we insert the SD card into an infected computer or device, viruses may invade the SD card and destroy the data in it. In this case, you can first use virus scanning software to remove the virus , and then use data recovery software to recover the data deleted by the virus . It should be noted that if the virus clears the SD card data by continuously writing new data to overwrite the old data, then the chance of successful recovery of the cleared photos or files will be relatively small.
After understanding the above reasons for SD card data loss, we can better avoid similar situations in the future so as to protect the photos or other files in the SD card.
There are various ways to recover photos from SD card, but choosing a reliable and efficient method will ensure that the photos can be recovered completely. Some software can help us easily perform SD card photo recovery, providing a convenient interface and comprehensive recovery features while maintaining the original quality of the pictures. With these software, we can easily retrieve photos deleted by mistake, so that we no longer have to worry about data loss. Here is the specific introduction of several data recovery software.

Method 1: Recover SD card photos using Windows File Recovery

Using Windows File Recovery software to retrieve deleted photos and files from SD card can be divided into the following steps. Please note that Windows File Recovery software is only available for Windows 10 and above.
Windows File Recovery
Step 1: Preparation
Before you start, make sure you do the following:
(1) Make sure your SD card is inserted into your computer’s SD card slot or connected to your computer via a card reader.
(2) Make sure you have administrator privileges to be able to run Windows File Recovery.
Step 2: Download and install Windows File Recovery
If you haven’t installed Windows File Recovery software, you can download and install it from Microsoft Store. Here is how to install it:
(1) Open the Microsoft Store app.
(2) Type “Windows File Recovery” in the search bar.
(3) Click on the “Windows File Recovery” application in the search results.
(4) Click the “Get” button to install the application.
Step 3: Run Windows File Recovery
Once the installation is complete, you can follow the steps below to run Windows File Recovery:
(1) Press the Win + S key combination to open Windows Search.
(2) Type “Windows File Recovery” and press Enter.
(3) Click “Windows File Recovery” to run the application.
Step 4: Retrieve files using Windows File Recovery
Now you can use Windows File Recovery to retrieve deleted files:
1) Open the Windows File Recovery application.
2) Make sure you have read and agree to the license agreement and click “Accept”.
3) In the app, you will see three recovery modes:
“General”: for recovering files from a local drive or external storage device.
“Online”: for recovering files from OneDrive cloud storage.
“Lost Files”: Used to retrieve recently deleted files from a local drive or external storage device.
Select “General” mode (if your files are stored on the SD card).
4) Enter the command in the following format:

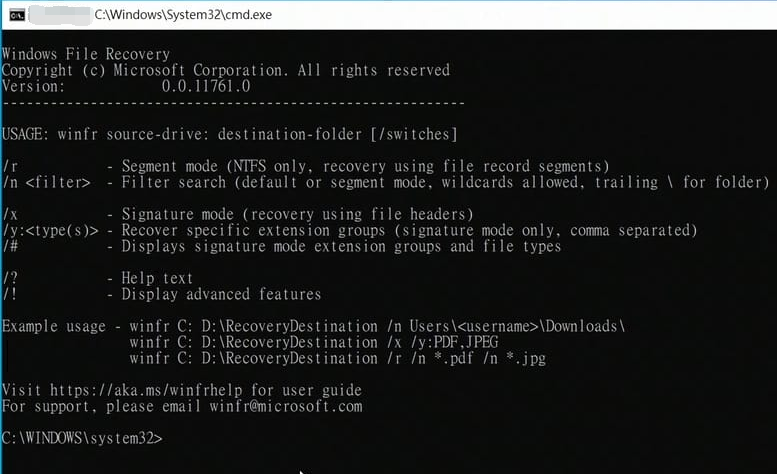
winfr source-drive: destination-drive: /regular

Replace “source-drive” with the drive letter of your SD card and “destination-drive” with the drive letter where you wish to save the recovered files. For example, if you want to restore the data on drive E to drive F, you can enter:

winfr E: F: /regular

enter the command and press Enter, Windows File Recovery will start scanning the SD card and retrieve deleted files. If you wish to recover specific files in the SD card, please check Microsoft’s official detailed instructions for this command.
5) After the scanning is completed, you will see the list of recovered files. Select the files you want to recover and click “Copy to” to save them to a destination folder of your choice.
Step 5: Save recovered files
Finally, save the recovered files to your computer or other storage device. Please note that it is better to save them to a different place than the SD card in order to ensure the integrity of the files.
These are the steps to retrieve deleted photos and files from SD card using Windows File Recovery software. Make sure you follow all the tips and warnings during the recovery process to prevent further file corruption.
Pros:
  • Supports file recovery from multiple storage devices.
  • Three recovery modes are available.

Drawbacks:

  • Only available for Windows 10 and above.
  • Requires administrator privileges.
  • Difficult to operate for users who have not been exposed to the command line.

Method 2: Recover SD card photos using Renee Undeleter

Renee Undeleter is a powerful data recovery software with wide compatibility, supporting many different brands and types of SD cards . In addition, it also supports data recovery from various storage devices, including hard drives, SSDs, and USB drives. , mobile phones, cameras, etc. It can recover a variety of file types , including photos, videos, audios, documents, compressed files, etc., meeting the various data recovery needs of different users.
In addition, the software has a high recovery rate and can quickly retrieve lost data. Its intuitive interface and simple operation allow users to recover data easily. Suitable for Windows and macOS operating systems, users can easily use it on different operating systems.
Here are the steps to recover SD card photos using Renee Undeleter.
Step 1: Download, install and run Renee Undeleter on your Windows computer and select (Fast Partition Scan) option in the main interface.
TipsPlease select a disk other than the one you need to recover data from when installing the software so as not to overwrite the original data. In addition, if you do not find the files you need using the Quick Scan mode, it is recommended to try to use the Deep Scan mode for a full scan.
Selecting File Recovery Options
Step 2: Next, select the partition where the lost data is located and click (Next).
File Recovery Select Target Device
Step 3: Select the (Fast Scan) option and click the (Next) button to scan. The (Fast Scan) mode just scans the first 30GB of the remaining space on the selected disk. if you don’t find the files you want after scanning, you can use the (Deep Scan) mode to try to do a full scan of the hard disk partitions again, which will take more time, but will scan more data.
File Recovery Quick Scan Option
Step 4: Wait for the scanning to complete, you can double-click the files to preview them, then check the files you need to recover and click the (Recover) button to recover the files to other disks.
File Recovery Selecting Files to be Recovered
Pros:
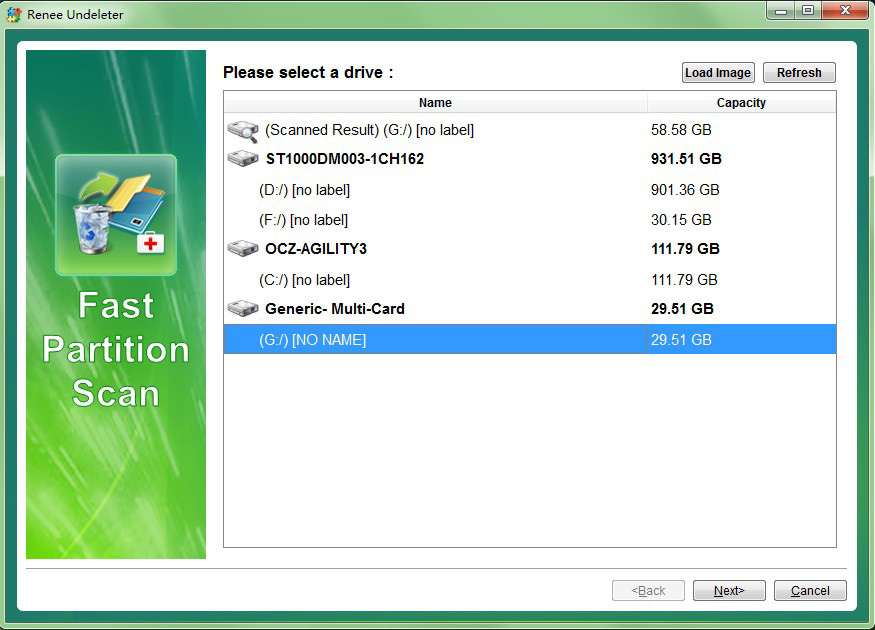
  • Supports recovery of many types of files from multiple storage devices.
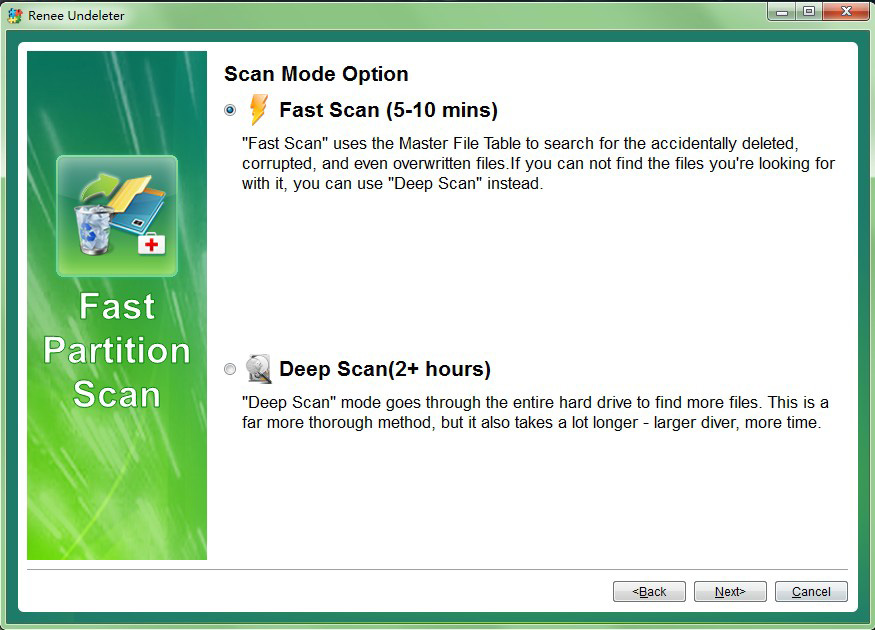
  • Provides quick scan and deep scan modes.
  • Can preview files.
  • Free trial version available.

Drawbacks:If you need to recover a large number of files, you will need to purchase a license.

Method 3: Recover photos from SD card using Memory Card File Rescue

Using Memory Card File Rescue software to retrieve deleted photos and files from your SD card usually involves following these steps.
Please note that Memory Card File Rescue is usually supplied with a Sony SD card, so you will need to make sure that you have a Sony SD card and have installed Memory Card File Rescue on your computer.
Memory Card File Rescue Sony
Step 1: Preparation
Before you start, make sure you do the following:
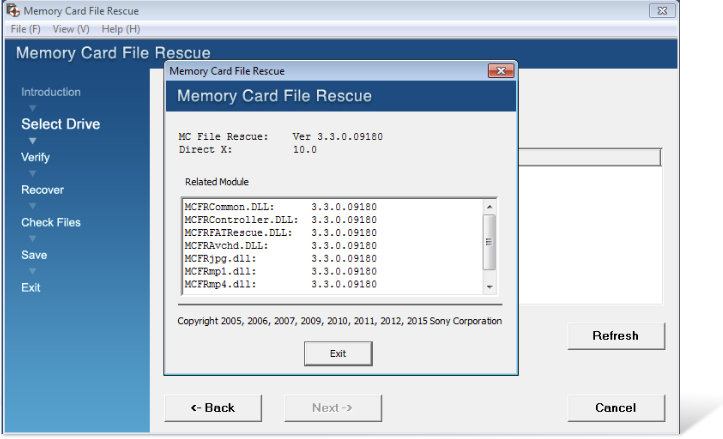
  • Make sure your Sony SD card is inserted into your computer’s SD card slot or connected to your computer via a card reader.
  • Make sure you have installed the File Rescue software correctly. If you don’t have it installed, use the installation guide that came with your Sony SD card to complete the installation process.
Step 2: Run Memory Card File Rescue
Once your SD card is ready, you can follow the steps below to run File Rescue:
  1. Open the File Rescue software on your computer. You can find it in the Start menu or on the desktop, depending on how you installed it.
  2. Verify that you are logged in to an administrator account so that you have sufficient permissions to run the software.
Step 3: Select file recovery mode
File Rescue typically offers two recovery modes:
  • “Quick Recovery”: Used to quickly retrieve recently deleted files.
  • “Advanced Recovery”: Used to deeply scan the SD card to retrieve older or more difficult-to-retrieve files.

Choose a recovery mode based on your needs. If you have recently deleted files, you can try “Quick Recovery”.

Step 4: Select SD Card
In File Rescue, you will see a list showing all available storage devices on your computer, including SD cards. Select the SD card from which you want to retrieve files and click on it to select it.
Step 5: Start scanning
Once you have selected the SD card, you can click “Start Scan” or a similar button to start scanning the SD card for deleted files. The length of the scan depends on the capacity of the SD card and the scan mode.
Step 6: Recover files
Once the scan is complete, Memory Card File Rescue will display a list of recovered files. You can browse the list and select the files you want to recover. Usually, you can select multiple files using check boxes.
Finally, click “Recover” or a similar button to save the selected files to a new location on your computer. Please note that it is better not to save the files to the same location as the original SD card to avoid overwriting the unrecovered files.
Step 7: Complete
Once the files have been successfully recovered, Memory Card File Rescue will display a recovery success message. You can now close Memory Card File Rescue and access the recovered files on your computer.
These are the general steps to retrieve deleted photos and files from your SD card using Memory Card File Rescue software. Please follow the instructions and make sure you follow all warnings and recommendations when recovering files to ensure successful retrieval of your data.
Pros:
  • Can retrieve deleted photos and files.
  • Provides two modes of quick recovery and advanced recovery.

Drawbacks:A Sony SD card and the Memory Card File Rescue software are required.

The above recommended freeware programs have excellent performance in SD card photo recovery. Whether they are personal users or professional users, they can rely on these software to retrieve deleted photos and files from SD card.
In addition, it is recommended that when you use the SD card to store photos and files, you should back up the data in the SD card in time to prevent accidents from happening.

The Importance of Backing Up SD Card Data

In today’s society, with the continuous advancement of technology and the popularization of smartphones, SD cards have become one of the main ways for people to store photos and other data. However, many people tend to ignore the importance of backing up SD card data. In fact, backup is one of the best ways to protect your precious personal data.
Why is it so important to back up SD card data? First, an SD card is a removable storage device, which may be at risk of accidental damage, loss or theft . If you don’t back up your data, you will lose all the photos, videos and other important files stored on your SD card if something unexpected happens. Additionally, SD cards can be infected by viruses or malware, which can lead to data corruption or complete loss.
There are many ways to backup SD card data. An easy way is to copy the data to a computer disk or an external hard drive. You can also use professional backup software to back up your SD card regularly , which supports automatic backup and is quick and easy to operate.
Hot Topic - ADsRenee Becca – Professional, Reliable Tools for Data Backup and Recovery

Quick Back up files at up to 3,000MB/min.

Overall Support system backup, disk/partition backup, file backup and disk clone.

Intelligent Automatically analyze the data differences between the source files and the backup files and save disk space by backing up incremental/differential data.

Convenient Support VSS, allowing to freely view web pages during the backup of the operating system.

Highly compatible Support various files and storage devices.

Quick Back up at up to 3,000MB/min

Overall System/partition/disk backup

Incremental/differential technology Save disk space

Free TrialFree TrialNow 2000 people have downloaded!
In conclusion, backing up your SD card data is the best way to protect your precious data. By backing up, you can avoid the risk of data loss and ensure that your photos and other files are always safe and secure. It is highly recommended that you make backing up your SD card data a habit for daily use.

Conclusion

With the above steps, you should be able to successfully recover photos from your SD card. Whether you have lost your photos due to accidental deletion, formatting or any other reasons, you now have a simple and effective way to solve the problem. Remember, try not to use your SD card before proceeding with the recovery so as not to overwrite the data that has been lost. It is also very important to back up your photos regularly so that even if something unexpected happens, you can still protect your precious memories. We hope this article has been helpful and that you are able to successfully recover your photos! If you have any other questions, feel free to ask the professional technical support staff. Good luck!