

Recovering Data from Toshiba Hard Drives: A Step-by-Step Guide

Summary
This article provides a structured overview of toshiba hard drive recovery methods for both logical and physical data loss scenarios. It explains how recovery software addresses issues such as accidental deletion, formatting, and partition corruption. Hardware-related failures and their typical recovery approaches are also outlined, including when professional services are required. The content compares recovery tools, command-line utilities, and service options to clarify appropriate use cases.


- Completely free
- Quick to perform
- No software required
- Safe with no risk to data
- Helps diagnose problem type accurately
Disadvantages:
- Only resolves connection issues
- Cannot recover deleted files
- Ineffective for logical or physical damage
- Limited if drive is completely undetected
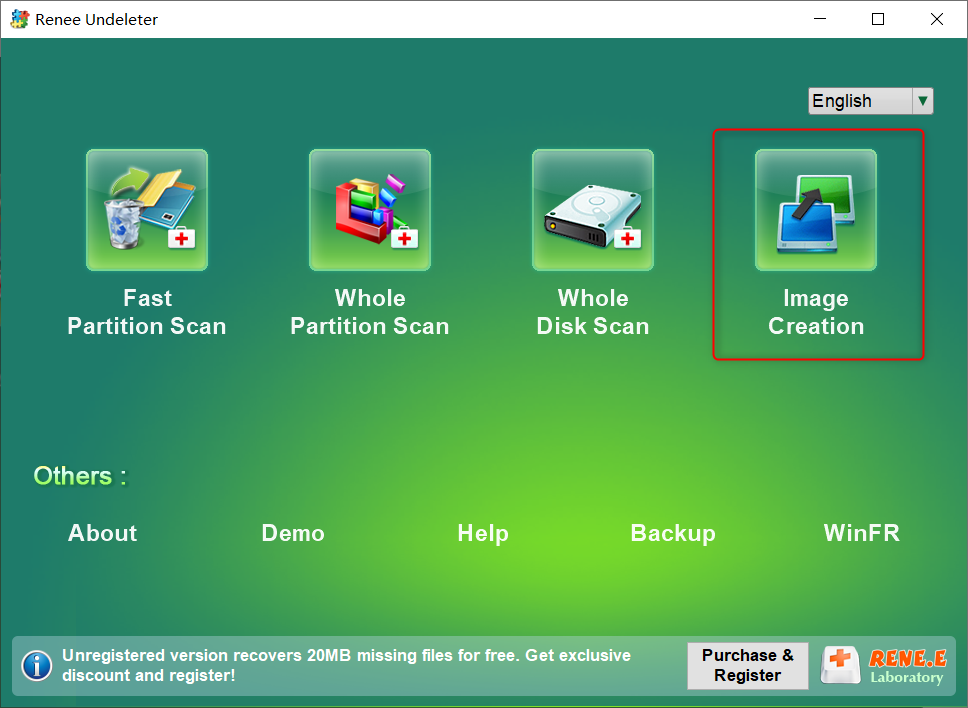
Step-by-step instructions

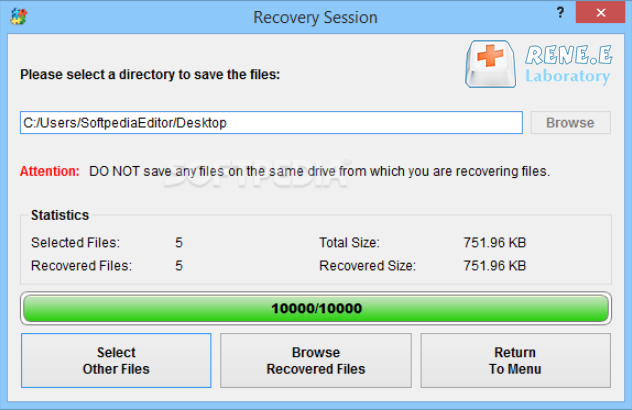
Easy to use Only simple steps to recover data from storage devices.
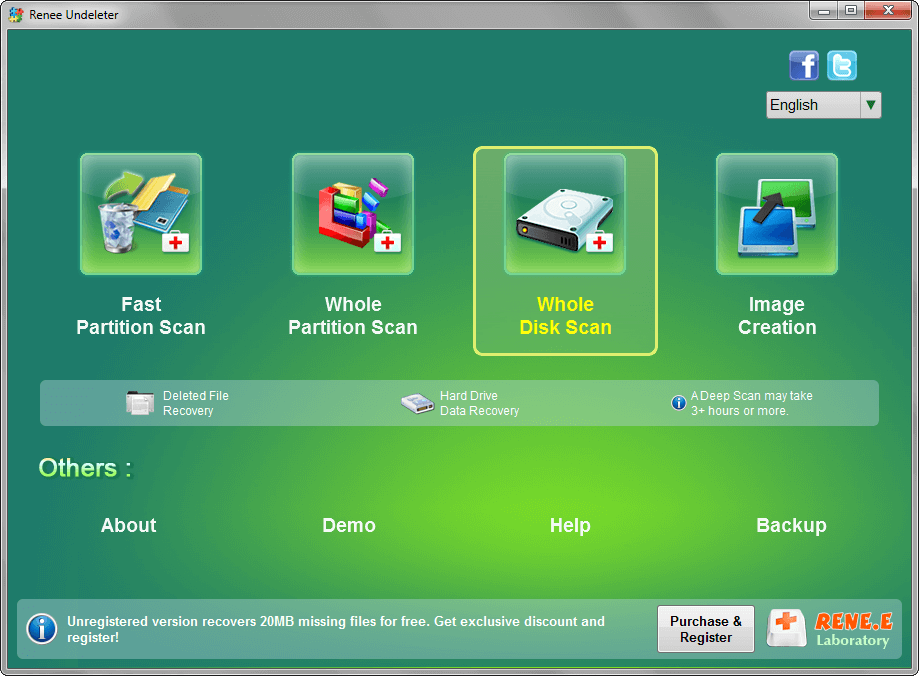
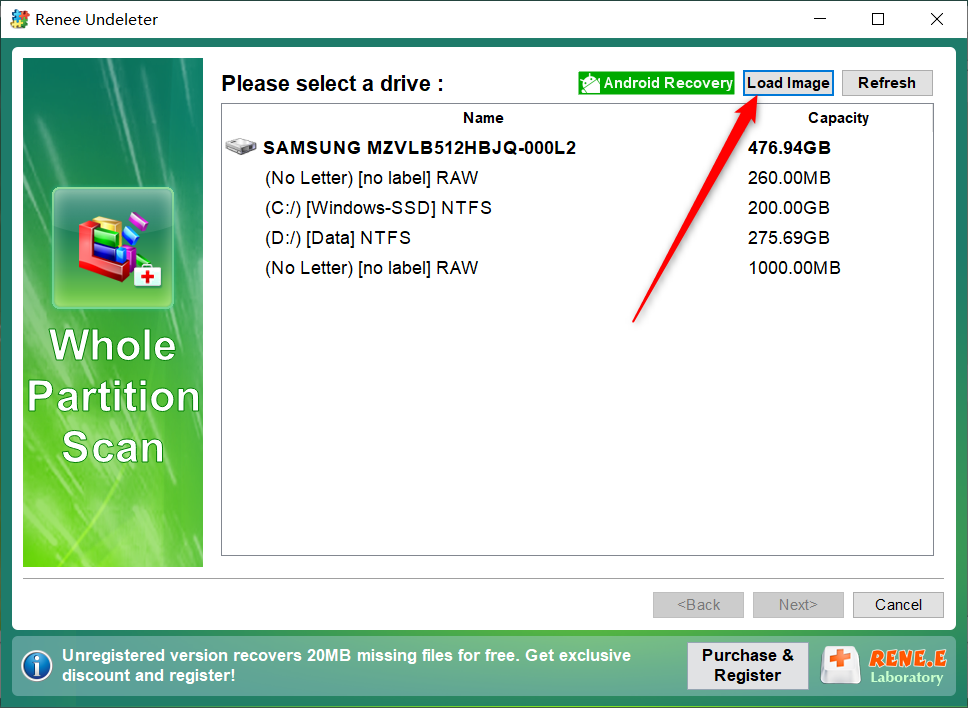
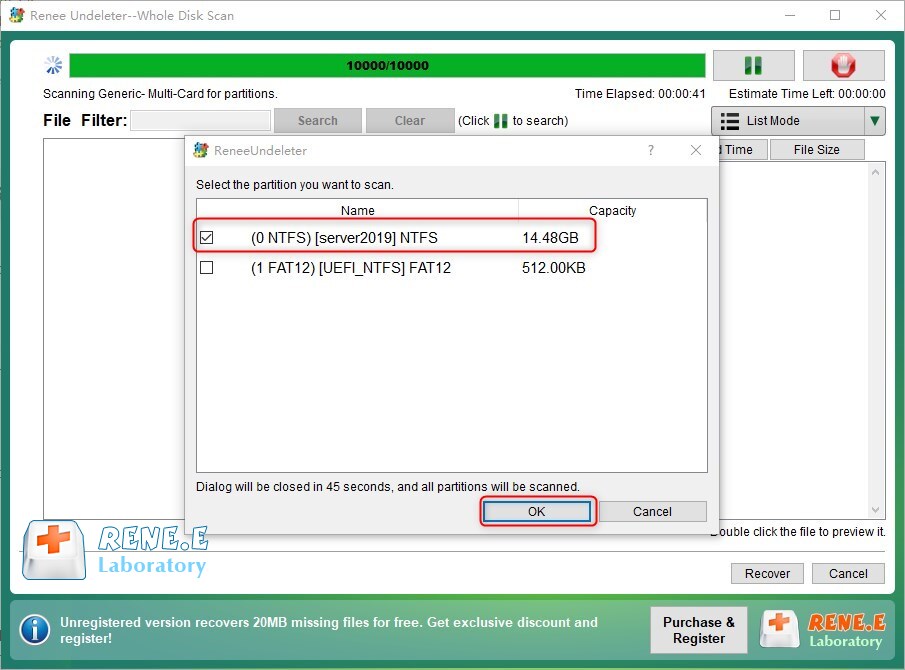
Multiple scan modes Fast partition scan, whole partition scan and whole disk scan for different recovery needs.
File types Support to recover pictures, videos, audios, documents, mails, etc.
Supported storage devices Recover data from recycle bin, SD card, external disk, etc.
Supported systems Windows 11,10, 8.1, 8, 7, Vista, XP, 2000 and Mac OS X10.6, 10.7, 10.8+.
Easy to use Only simple steps to recover data from storage devices.
Multiple scan modes - 3 scan modes for different recovery needs.
Supported storage devices Recover data from recycle bin, SD card, external disk, etc.
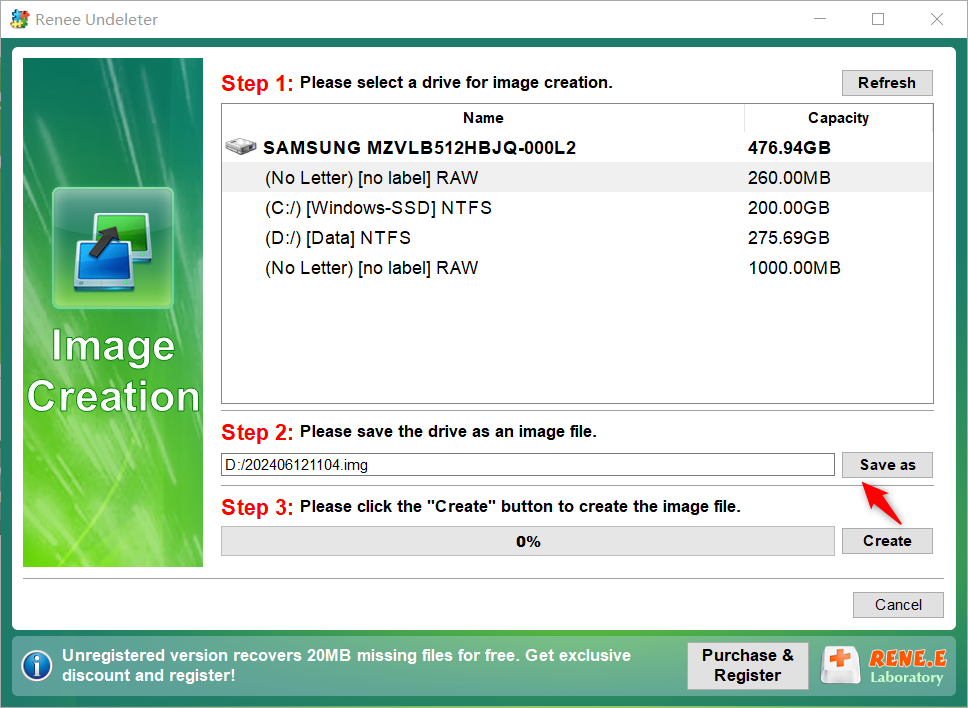
Recover Toshiba hard drive data with Renee Undeleter (with backup)

| Feature | Renee Undeleter | Recuva (Free) | EaseUS Data Recovery Wizard Free |
|---|---|---|---|
Recovery Success Rate | High, especially with backup image | Moderate for simple deletions | Good for basic cases |
Ease of Use | Very beginner-friendly interface | Simple but limited preview | Clean interface |
File Preview | Full preview support | Basic preview | Good preview |
Limitations | Paid for full features | Limited scan depth, no image creation | 2GB recovery limit |
Best For | Comprehensive Toshiba recovery | Quick free tries | Budget users needing preview |
- Built-in and free
- No installation needed
- Can fix file system errors
- Recovers drive readability in minor cases
Disadvantages:
- Risk of data loss in severe corruption
- Requires command-line comfort
- Time-consuming on large drives
- Ineffective for deletions or physical issues
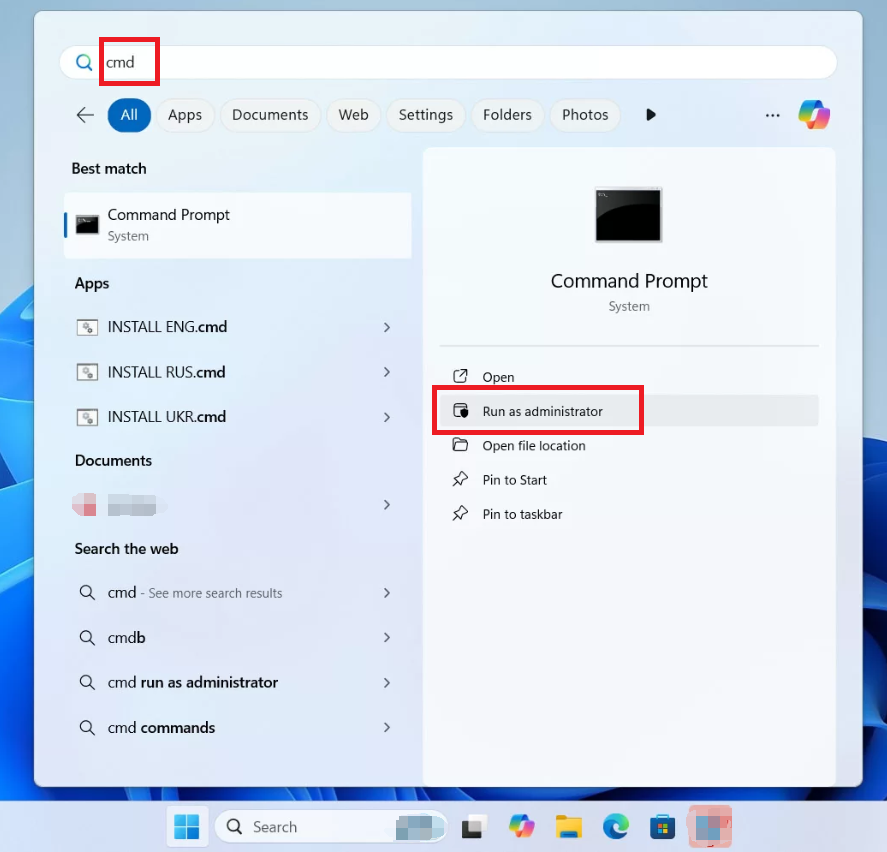
Step-by-step instructions
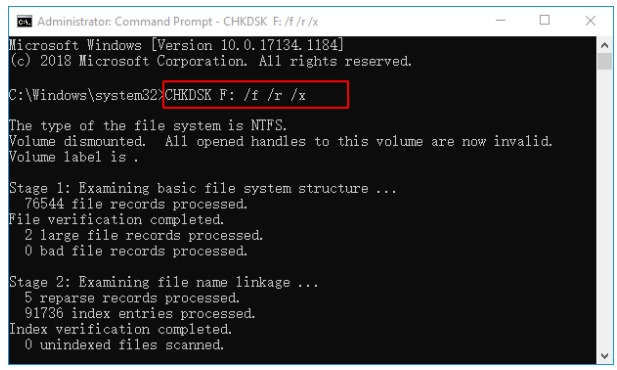
chkdsk X: /f (replace X with drive letter) to fix errors.
chkdsk X: /f /r (this takes longer).- Let it complete and restart if needed.
| Symptom | Likely Cause | Common Error / Indicator | Recommended Action |
|---|---|---|---|
Clicking or grinding noises | Read/write head crash or platter surface damage | SMART failure warning; read errors (e.g., Error Code 0x72) | Stop using the drive immediately; professional cleanroom recovery required |
Drive does not spin or power on | Motor failure or PCB (controller board) damage | Drive not detected; Error Code 0201 (drive detection failure) | Do not attempt repeated power cycles; professional recovery only |
Burning smell or excessive heat | PCB short circuit or electronic component failure | Sudden power loss; SMART failure alerts | Disconnect immediately; do not power on again; professional service required |
Drive detected but unreadable | Severe firmware corruption or partial mechanical damage | Error Code 0x80; file system read failures | Attempt software recovery only if no physical symptoms; otherwise seek professionals |
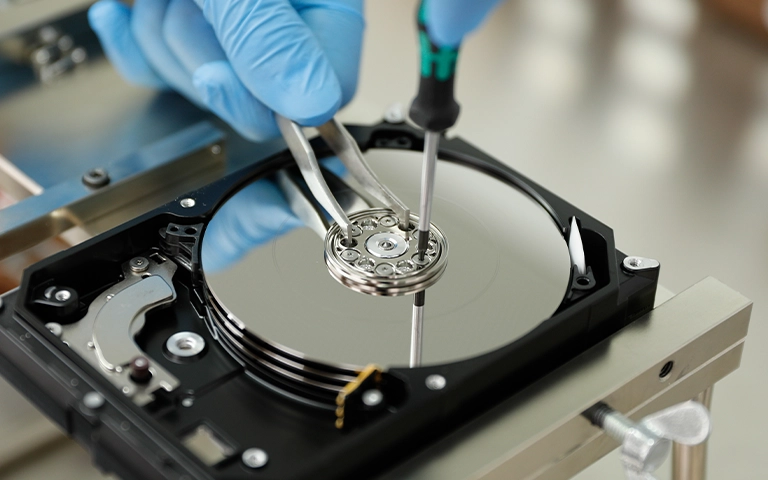
Toshiba‑Authorized Data Recovery Services by Region
| Continent / Region | Authorized Provider | Coverage Area | Contact / Access |
|---|---|---|---|
North America | Ontrack Data Recovery | United States, Canada | https://www.ontrack.com/en-us/partners/toshiba |
Europe | Ontrack Data Recovery | EU & UK | https://www.ontrack.com/en-gb/partners/toshiba |
Asia | Toshiba‑Authorized Third‑Party Providers | India, Southeast Asia, East Asia | https://www.toshiba-storage.asia/data-recovery/ |
Australia & Oceania | Toshiba‑Authorized Partners | Australia, New Zealand | https://www.toshiba-storage.asia/data-recovery/ |
Global (Enterprise & Consumer) | Toshiba Authorized Service Network | Worldwide | https://storage.toshiba.com/consumer-hdd/support/data-recovery |
- Highest success rate
- Handles physical damage
- Cleanroom facilities
- Data confidentiality guaranteed
Disadvantages:
- High cost
- Long turnaround time
- Requires shipping the drive
- No full recovery guarantee
Step-by-step instructions
- Potentially low cost
- No shipping required
Disadvantages:
- Extremely high risk of permanent loss
- Requires rare expertise and parts
- Contamination likely
- Almost always worsens the problem
Can I recover data from a Toshiba hard drive that makes clicking noises?
Is it safe to use free recovery software on my Toshiba external drive?
How long does recovering data from a Toshiba drive take with software?
Will CHKDSK delete my files on a Toshiba drive?
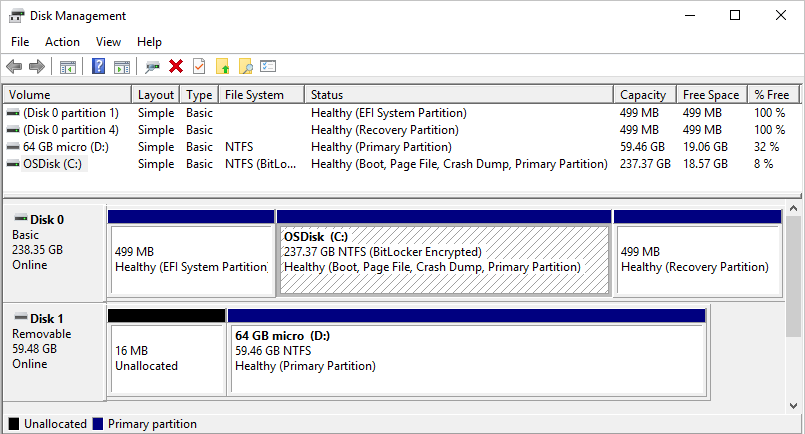
What should I do if my Toshiba drive shows as 'unallocated'?
Easy to use Only simple steps to recover data from storage devices.
Multiple scan modes Fast partition scan, whole partition scan and whole disk scan for different recovery needs.
File types Support to recover pictures, videos, audios, documents, mails, etc.
Supported storage devices Recover data from recycle bin, SD card, external disk, etc.
Supported systems Windows 11,10, 8.1, 8, 7, Vista, XP, 2000 and Mac OS X10.6, 10.7, 10.8+.
Easy to use Only simple steps to recover data from storage devices.
Multiple scan modes - 3 scan modes for different recovery needs.
Supported storage devices Recover data from recycle bin, SD card, external disk, etc.
Relate Links :
Toshiba Hard Drive Recovery: Expert Tips

18-01-2024
Ashley S. Miller : Learn how to quickly recover data from your Toshiba hard disk and discover practical data recovery software solutions....
How to transfer Hard Drive to SSD for Windows and MacOS

28-11-2023
John Weaver : Upgrade your computer's performance by transitioning from Mechanical HDD to SSD. This article will guide you through the...
Toshiba Laptop Password Reset: Unlocking Your Device
28-11-2023
Ashley S. Miller : Forgot your Toshiba laptop password and don't have a Windows build-in reset disk? Or Forgot BIOS password? Don't...
Accessing HP Recovery: Factory Resetting Without Password on Windows 7
29-11-2023
Ashley S. Miller : Lost your password and need to reset your HP laptop? Don't worry, this article will guide you through...


User Comments
Leave a Comment