II. How to solve the problem that the U disk is not displayed in Windows 10?
1. Update the U disk driver
Specific steps are as follows:
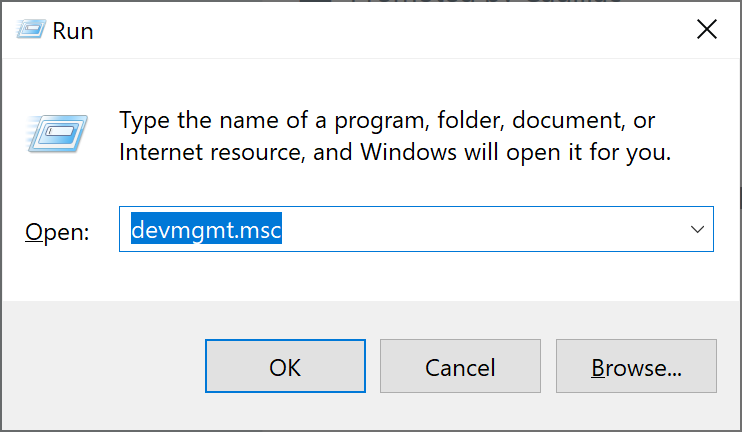
Step 1: Run the Windows 10 computer, connect the U disk to the computer, and then press (Windows+R) on the keyboard at the same time to open the running window. After entering the command (devmgmt.msc), click the (OK) button to enter the Device Manager.
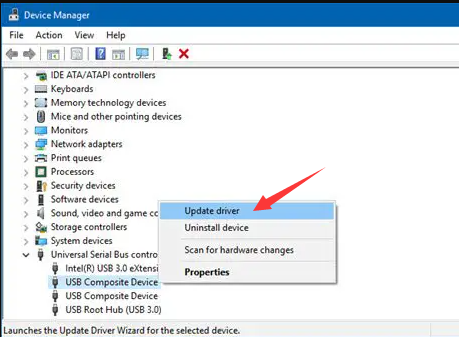
Step 2: Next, in the “Disk Drive”, right-click the USB flash drive you want to update the drive, and select the (Update Driver) option.
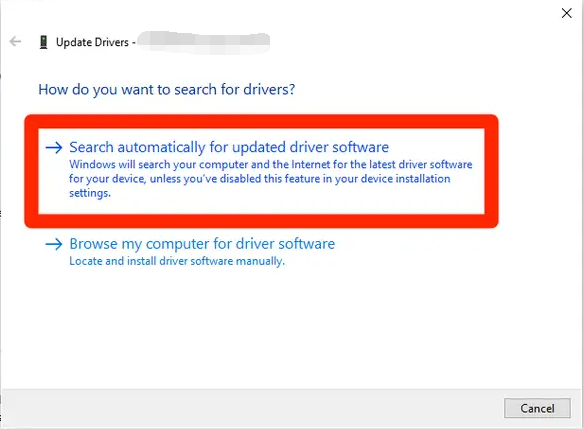
Step 3: Next, select the (Automatically search for updated driver software) option, and then follow the instructions to complete the update of the U disk driver.
2. Reinstall the U disk drive
If you want to reinstall the U disk driver, you need to uninstall the driver and reconnect the U disk. The specific steps are as follows:
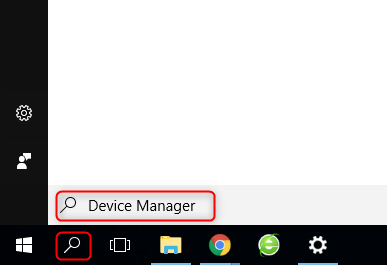
Step 1: Run the Windows 10 computer, enter (device manager) in the “search box” in the lower left corner and open it.
Step 2: Next, in (Disk Drives), select the USB flash drive that cannot be displayed in File Explorer and select the (Uninstall Device) option. After the operation is complete, safely pull out the USB flash drive and try to connect again to see if the problem is resolved.
3. Create a new partition
If after updating or reinstalling the driver, the USB flash drive shows as unallocated space in the disk management, which will also cause the USB flash drive to fail to show in the file explorer, it is recommended that you create a new partition for data storage Prepare.
Step 1: Press the (Windows+X) keys on the keyboard at the same time. Then in the pop-up list, select the (Disk Management) option.
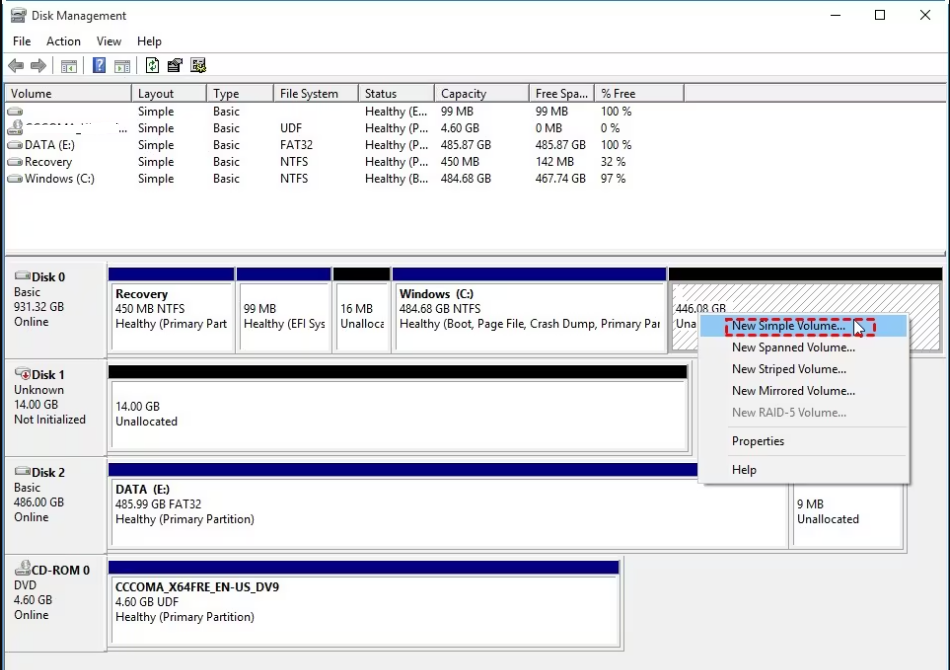
Step 2: Then right-click the unallocated space on the U disk and select the (New Simple Volume) option.
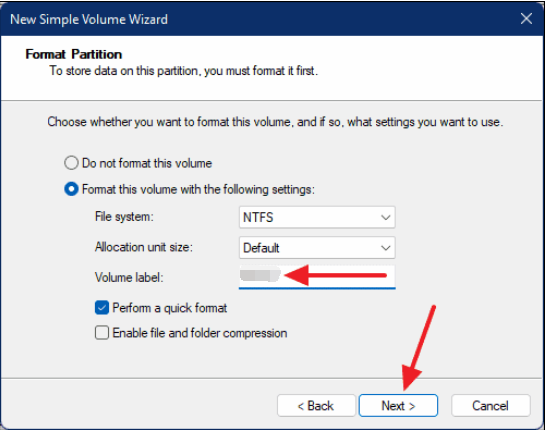
Step 3: Next, you can customize the partition size, drive letter, file system (NTFS, exFAT, FAT32, etc.) and other parameters, and then wait for the operation of creating a new simple volume to complete. Then you can open the file explorer or this computer to see if the USB flash drive is displayed.
4. Add or change drive letter
When your USB flash drive cannot be displayed, it may be because the device does not have a drive letter or the drive letter conflicts with other drives. You can add or change the drive letter in the following way. The specific steps are as follows:
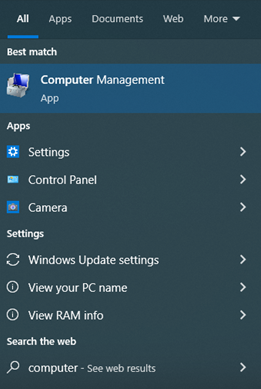
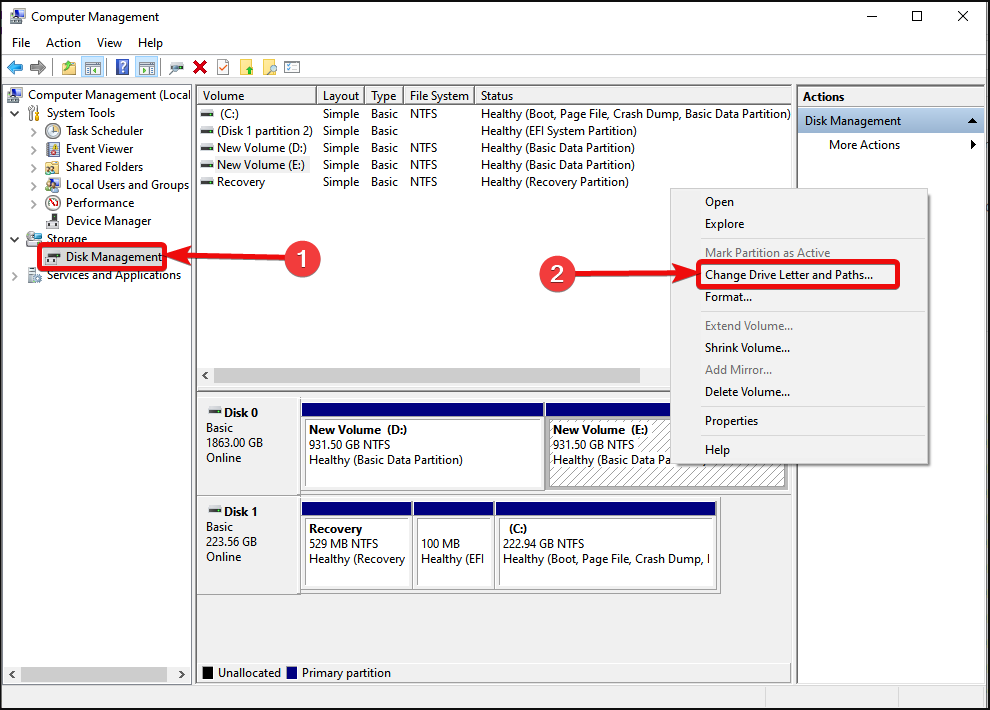
Step 1: Run the computer, type (computer management) in the “search box” in the lower left corner, and then click to enter the computer management interface.
Step 2: Next, click (Disk Management) on the left window, if you see a drive without letters, please check whether it is a USB flash drive that cannot be displayed.
Step 3: After confirming the completion, right-click and select the (Change Drive Letter and Paths) option.
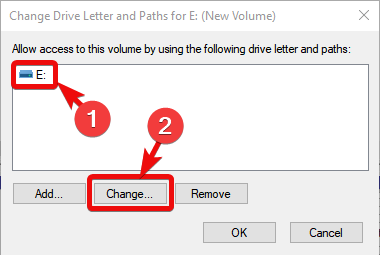
Step 4: Next click (Add) to add a drive letter to the U disk.
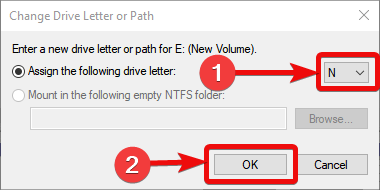
Step 5: Next, check (Assign the following drive letter) and select a letter, then click (OK) to add the drive letter.
5. Fix file system errors
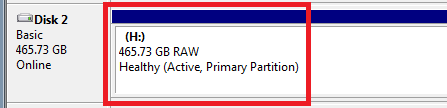
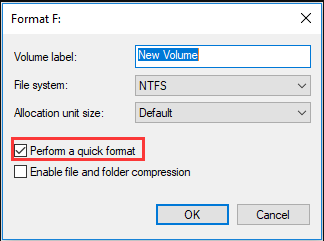
If your USB drive has a file system error, it will appear as RAW and cannot be displayed and accessed in File Explorer. Here, the file system error means that the file system is not supported by the Windows 10 system or the file system is damaged due to misoperation or other failures. To fix file system errors, you need to format the drive, that is, convert RAW to a file system supported by Windows 10, such as NTFS or FAT32. The specific operation steps are as follows:
Step 1: Connect the U disk to the computer, and press the (Windows+X) keys on the keyboard at the same time. Then in the pop-up list, select the (Disk Management) option.
Step 2: Next, find the RAW drive that needs to be formatted (i.e. the USB drive that is not displayed), right-click on it and select the (Format) option.
Step 3: Select the file system, check (Perform quick format), click (OK), and follow the instructions to complete the formatting process. After the formatting operation is completed, the above problem can be solved. Please check: Features and differences of FAT32, NTFS, exFAT.
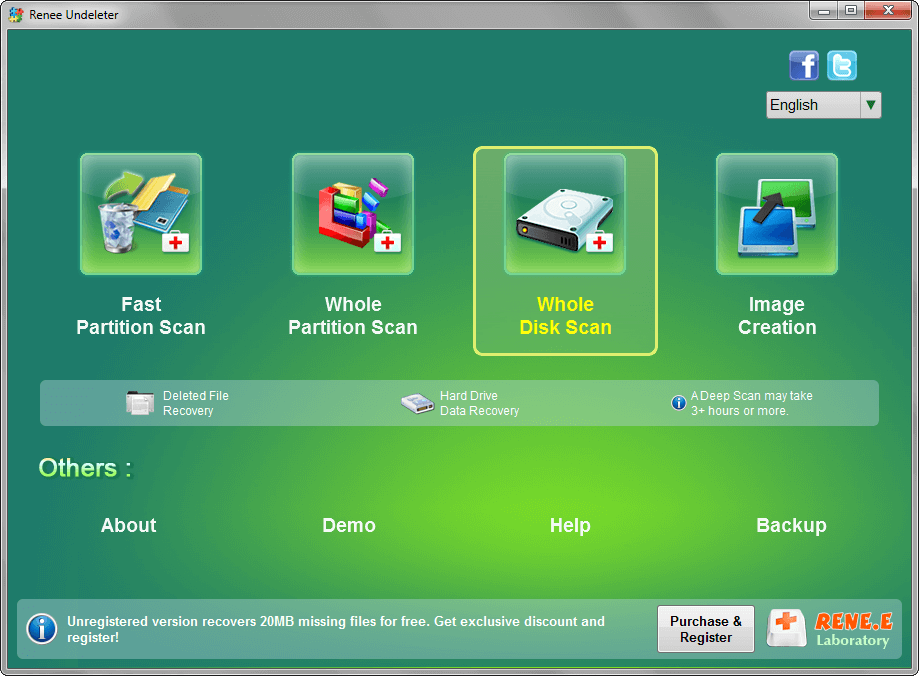
The above are some common solutions that the U disk does not display. If there is important data in the U disk, you can use
Renee Undeleter to scan and restore the data in the U disk, no matter when the partition becomes unallocated space or the disk file system This software can be used when the disk is RAW or after the disk is formatted.