I. How to Fix Windows Error Code 0x80080005?
Installing Windows updates can sometimes present challenges, such as encountering error code 0×80080005 during the process. This issue can be caused by various factors, such as antivirus software or firewall blocking the updates, or damaged system files. Fortunately, there are some effective solutions that you can implement to resolve this problem. Keep reading to learn more.
1. Turn off the third-party anti-virus software or firewall
If you have installed a third-party antivirus program, it is recommended to close it and attempt Windows Update once more. If you do not have any third-party antivirus software installed, you can also try disabling your firewall, as it may sometimes hinder the installation of certain programs. The following are the specific steps to follow:
Step 1: Search for (Control Panel) in the taskbar search box in the lower left corner of the Windows desktop, open it, set the viewing method to (small icons), and then click (Windows Defender Firewall).
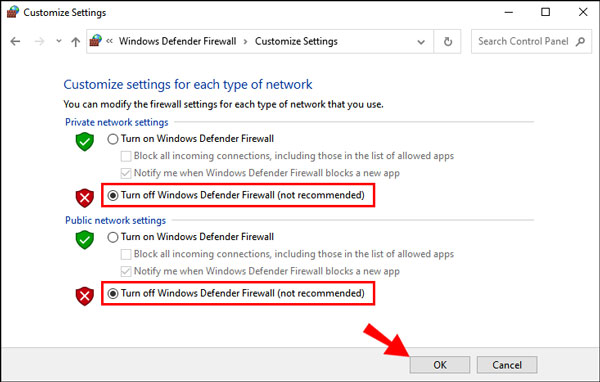
Step 2: Select (Turn Windows Defender Firewall On or Off) on the left side of the new interface. Then select the (Turn Off Windows Defender Firewall) option and click (OK).
2. Run the Windows Update Troubleshooter
Windows Update Troubleshooter is a system update troubleshooting tool built into the Windows system, which can help users troubleshoot and fix most of the problems encountered during the system update process. Here are the detailed steps to run the Windows Update Troubleshooter:
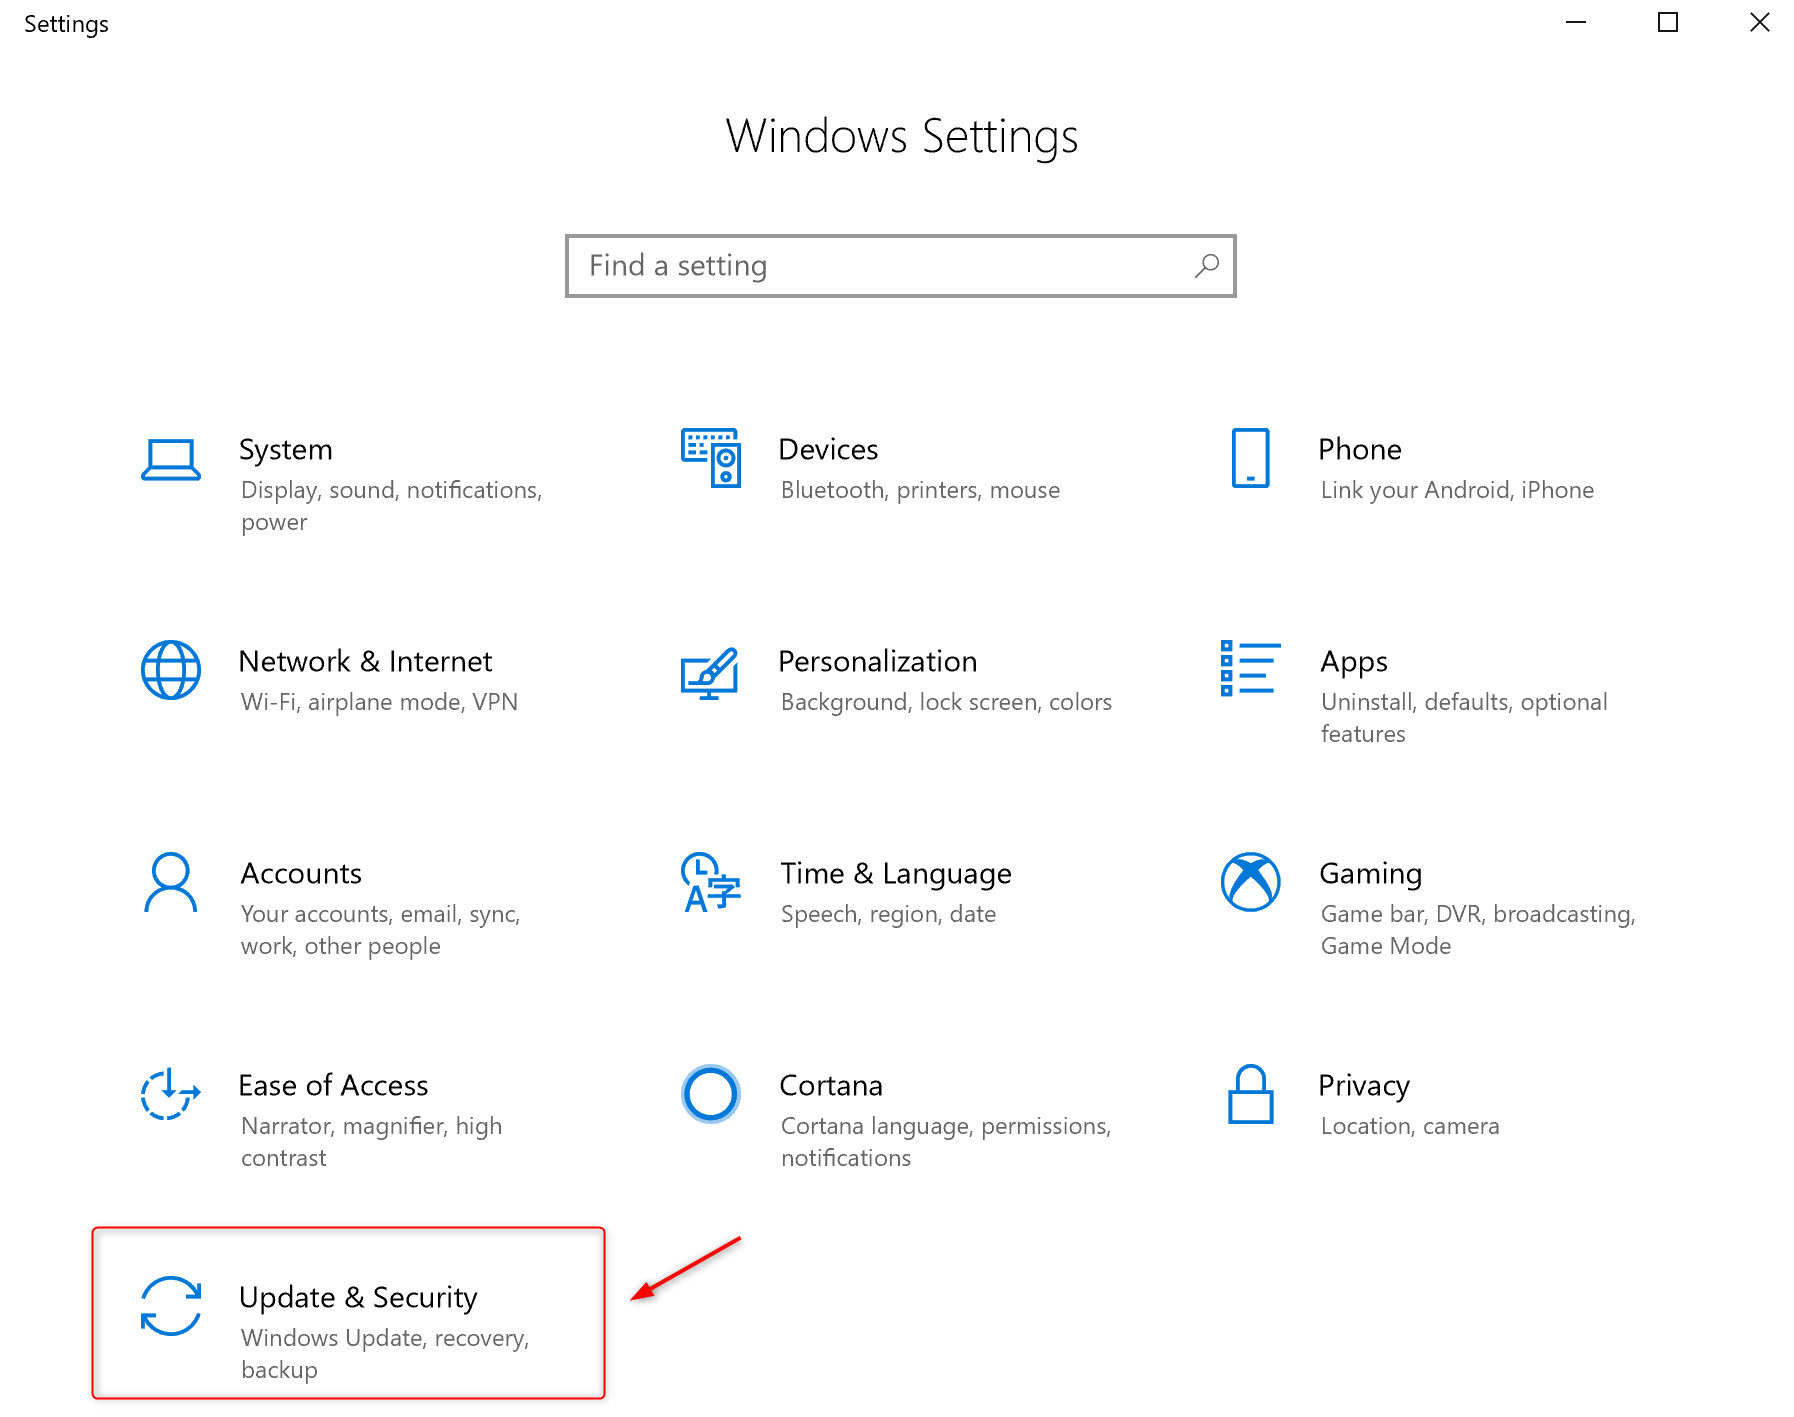
Step 1: Run the computer, and press the (Windows+I) key on the keyboard at the same time to open the settings interface. Then click on the (Update & security) option.
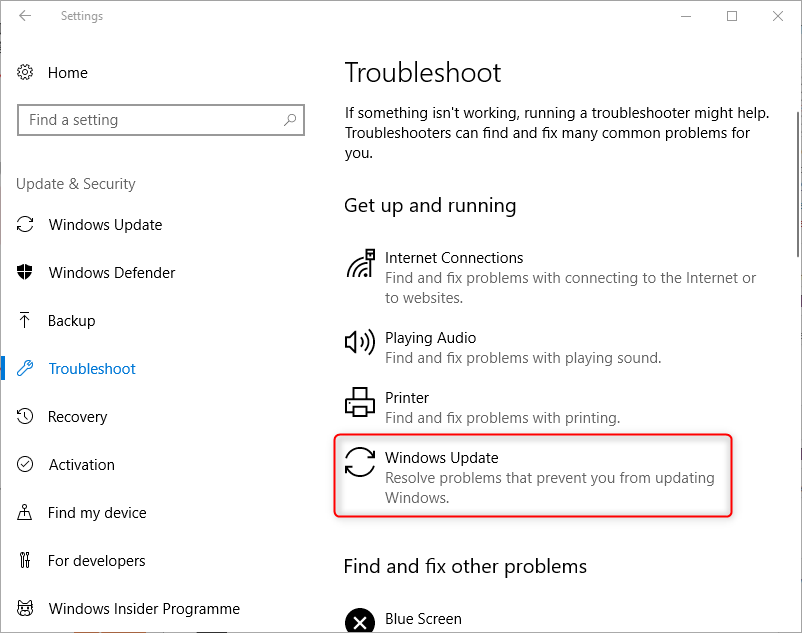
Step 2: Find (Troubleshoot) on the left, then select the (Windows Update) option on the right, and click the (Run the Troubleshooter) button. Wait a few moments after troubleshooting and see if the problem is resolved.
3. Run DISM and SFC commands
DISM is an image tool officially produced by Microsoft. It is usually used to check and repair system image files, and detect and clean registry items. And System File Checker (SFC) can find and repair corrupt or missing system files in the system files directory. If the 0×80080005 error is related to system file corruption, you can try to run DISM and SFC commands to scan and repair.
Step 1: Enter (cmd) in the search box, right-click the search result, and select (Run as administrator) to open the command prompt window.
Step 2: In the command prompt window that opens, paste the (DISM.exe /Online /Cleanup-image /Restorehealth) command into it and press (Enter). Then type (sfc /scannow) and press (Enter).
Step 3: The process will take some time, wait for it to complete. Re-run the Windows Update operation after the process is complete and check if the problem is resolved.
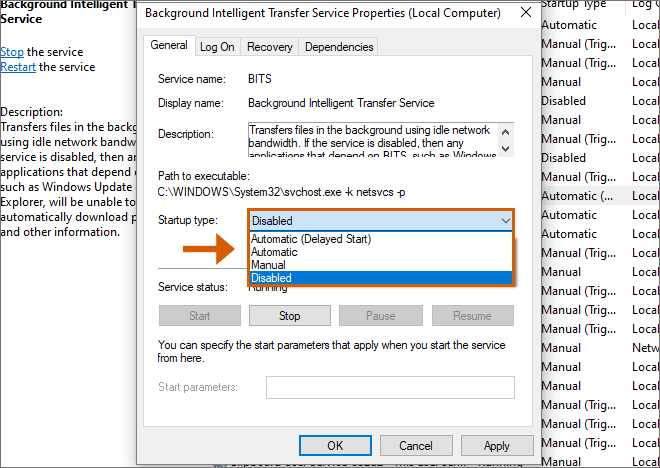
4. Set the BITS startup type to automatic
BITS is also known as Background Intelligent Transfer Service. When there is a problem with Windows 10 update, it may be because the BITS service is not enabled. At this time, you can start the service to try to solve this kind of problem.
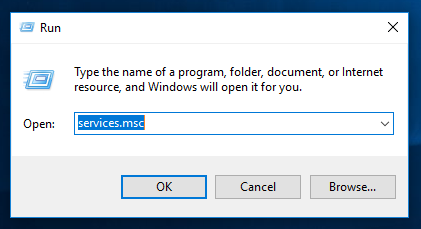
Step 1: Run Windows computer, press (Windows+R) key at the same time, search and run (services.msc).
Step 2: Then find the (Background Intelligent Transfer Service) option. Right-click on it and select (Properties).
Step 3: After that, in the (General) tab, select the (Automatic (Delayed Start)) option from (Startup Type). If the service status is displayed as (Stopped), please click the (Start) button from the “Service status” and then click the (OK) button. Afterward, please try to update Windows again to see if the problem is resolved.
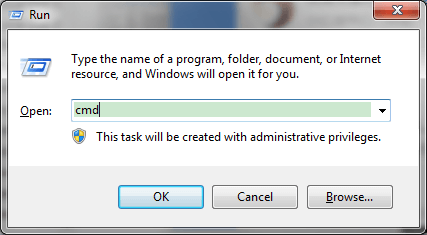
5. Reset Windows update components
If none of the above methods work, you can also reset the Windows update components to solve the current problem. The specific steps are as follows:
Step 1: Run the computer, press (Windows+R) keys at the same time to open the run window, then type (cmd) and click (OK) to open the command prompt window.
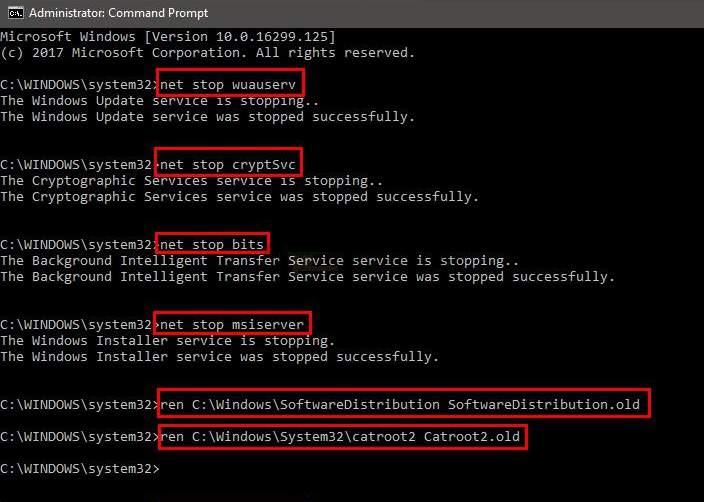
Step 2: Enter the following commands to close the Windows Update component. Rename the SoftwareDistribution and Catroot2 folders, and press the (Enter) key after each command.
ren C:\Windows\SoftwareDistribution SoftwareDistribution.old
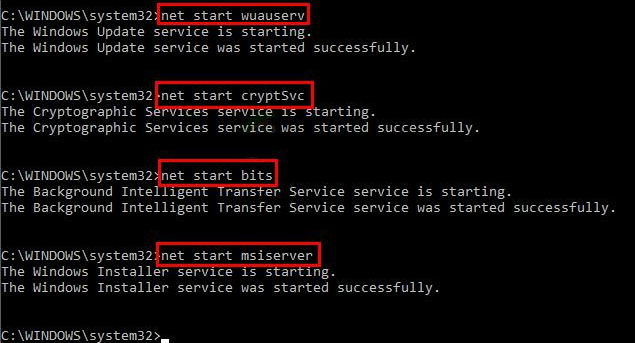
ren C:\Windows\System32\catroot2Catroot2.old Step 3: Enter the following commands to enable Windows Update again, and press the (Enter) key after you input each command.
Step 4: After all commands are executed, enter (Exit) and press (Enter) to exit the current page, then restart the computer and check Windows updates again to see if the current problem has been resolved.
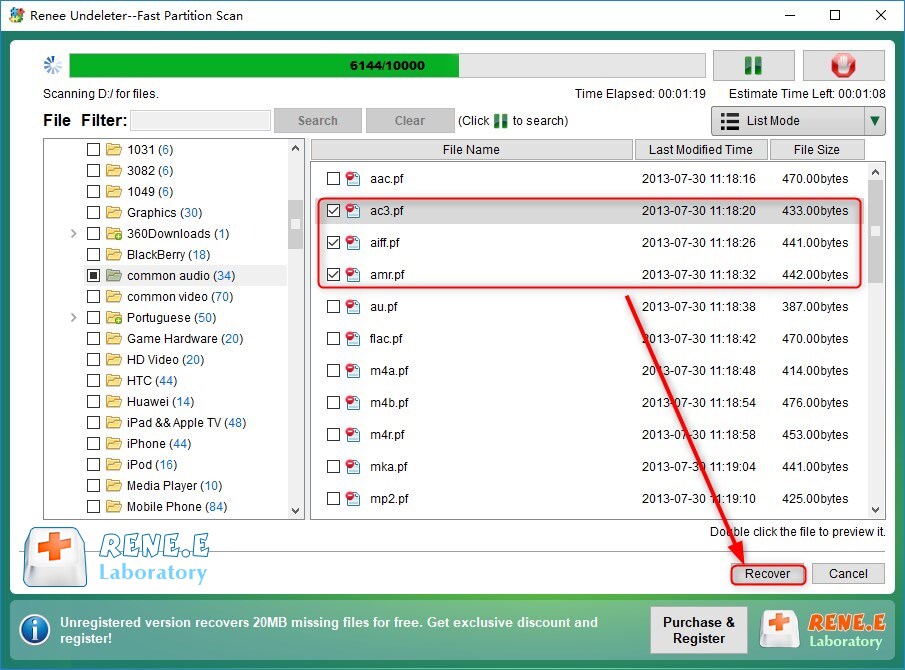
The above is the method for repairing the 0×80080005 error. If you realize that vital data on your computer has been lost after fixing this issue, you can refer to the following methods for data recovery: