

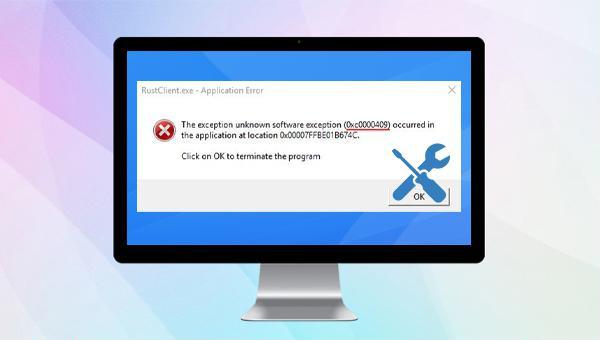
Fix Windows Error 0xc0000409 in Minutes

Summary
Discover the ultimate solution to error 0xc0000409! Opening applications has never been easier with our expertly crafted tips and tricks. Don't let this pesky error hold you back any longer. Read on for a comprehensive guide on how to solve this common issue.
Table of contents

SFC /scannow, and press Enter. The System File Checker will scan and repair corrupt system files. Once complete, reboot your computer to check if the issue is resolved.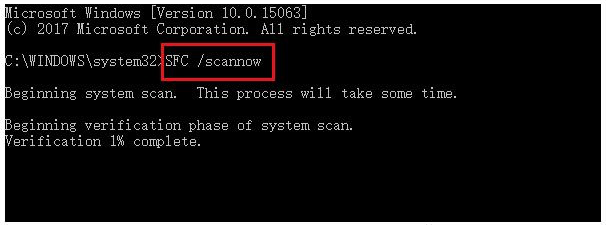
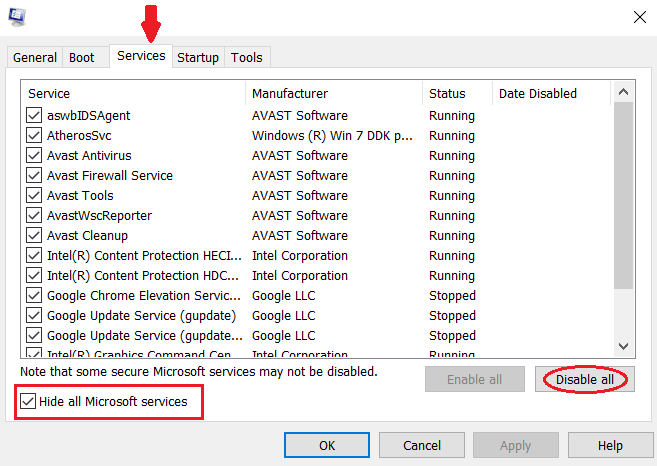
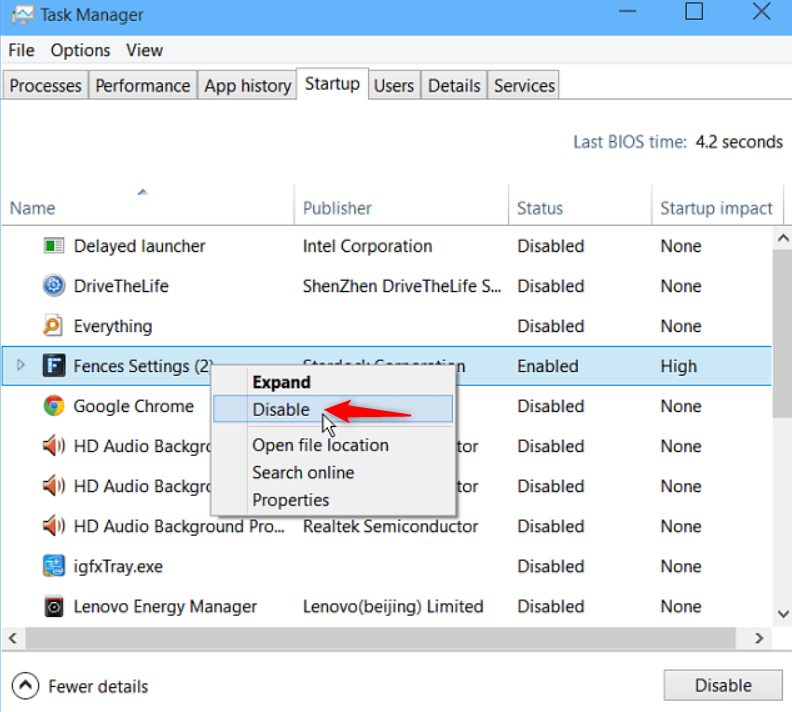
msconfig and click OK to access the System Configuration utility.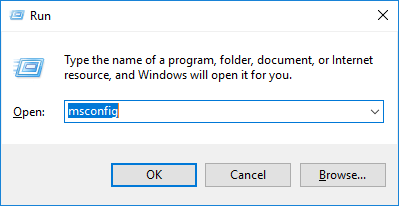


Easy to use Recover data by 3 steps;
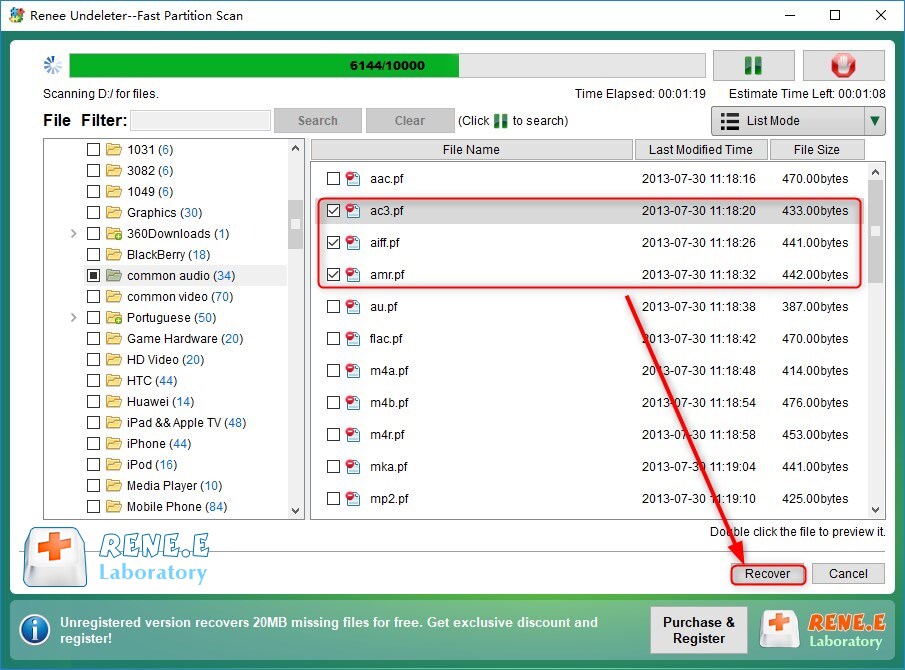
Multiple scan modes Fast partition scan, whole partition scan and whole disk scan;
Supported file types Image, video, audio, text, email and so on;
Image creation Create a partition image to read and back up data;
Supported devices SD card, SDHC, SDXC, USB flash drive, hard disk and computer.
Easy to use Recover data by 3 steps;
Multiple scan modes Fast partition/whole partition/whole disk scan;
Supported devices SD card/USB/hard disk.
Free TrialFree TrialFree Trial 800 people have downloaded!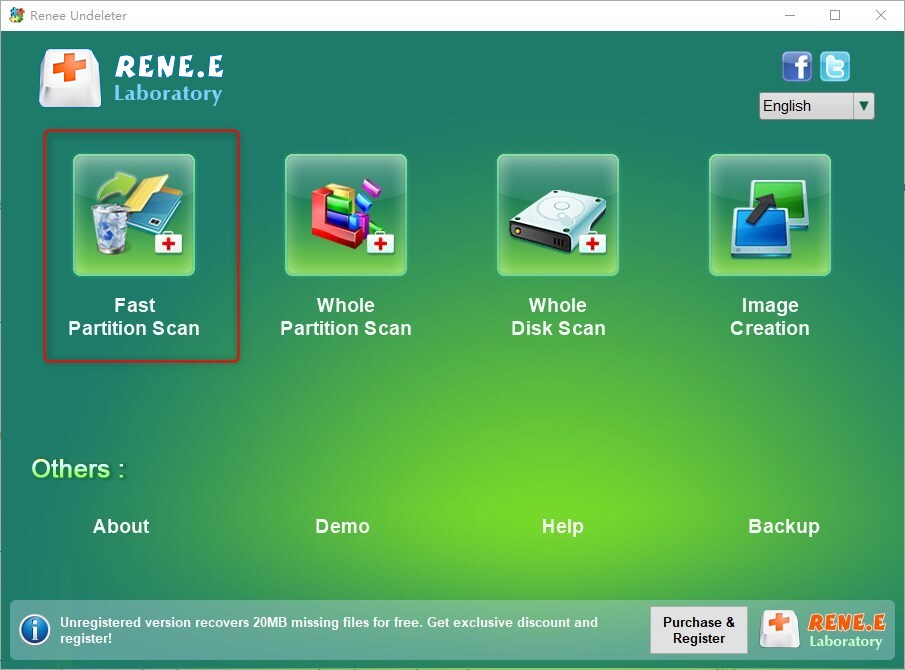
- Fast Partition Scan: Retrieves files lost from accidental deletions or recycle bin clearance.
- Whole Partition Scan: Recovers files from inaccessible or formatted partitions efficiently.
- Whole Disk Scan: Analyzes partition information and thoroughly scans all partitions.
- Image Creation: Generates a partition mirror image to preserve its current state.

Note that “Fast Scan” only examines the first 30GB of the selected disk’s unused space. Should the desired file not appear, opt for a Deep Scan to perform an exhaustive search. This process is lengthier—patience is advised.

Relate Links :
Resolve Windows 10 PAGE FAULT IN NONPAGED AREA Blue Screen Error

09-05-2024
John Weaver : Learn to resolve the PAGE FAULT IN NONPAGED AREA error with our definitive guide, detailing symptoms, causes, and...
Fix the "Unknown Hard Error" on Windows 10 - Easy Solutions!!

22-01-2024
Amanda J. Brook : Unknown Hard Error is one of the most frustrating system errors that Windows users encounter. This error can...
Solutions to fix Windows 10 Blue Screen: Stop Code Memory Management
09-05-2024
Ashley S. Miller : Resolve Windows stop code memory management errors quickly with our expert solutions and safeguard your data with our...
How to fix Wdf01000.sys Blue Screen Error on Windows 10?

31-07-2023
Jennifer Thatcher : Discover the ultimate guide to solve the Wdf01000.sys blue screen error on your Windows 10 computer! Say goodbye...

