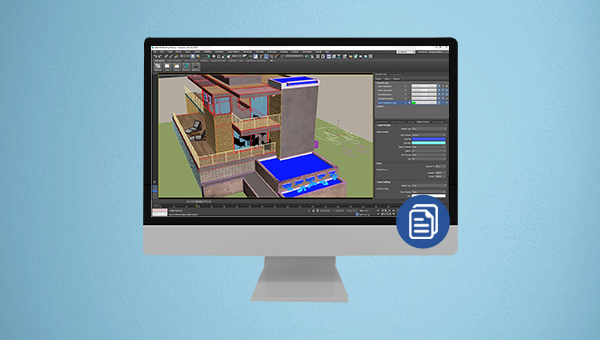
author avatar
    Specialist of Customer Service Dept.
 

Summary
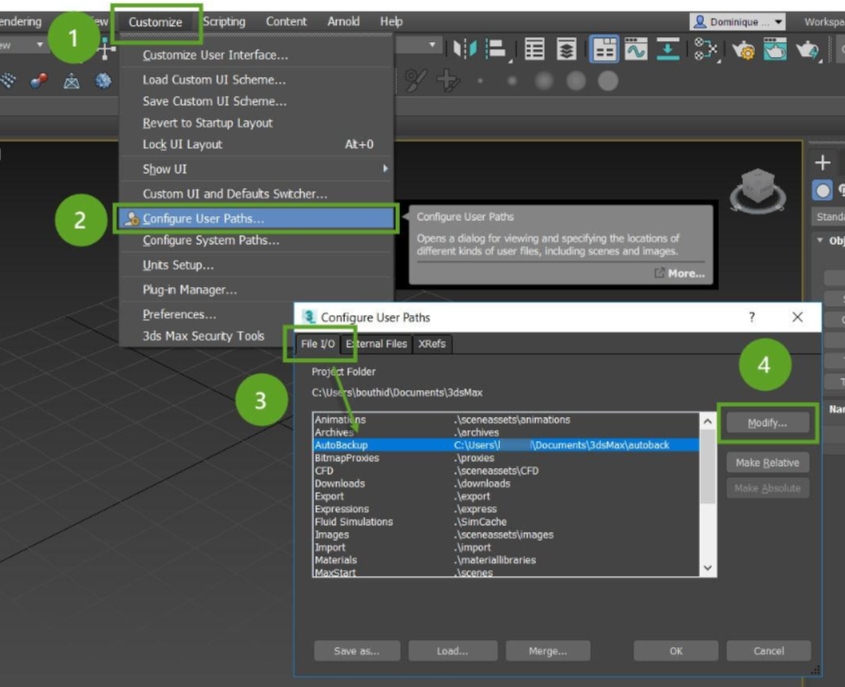
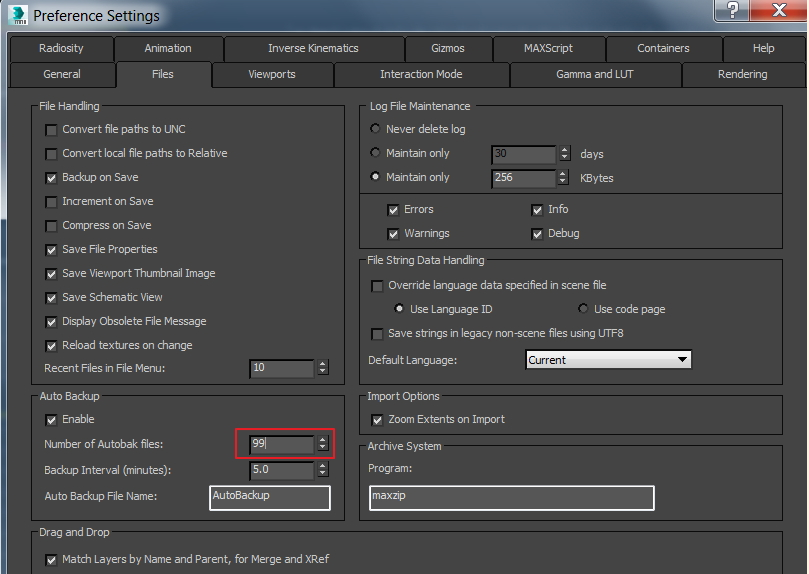
Learn about the automatic file saving path in 3ds Max to prevent data loss. Discover recovery methods in case of unexpected software errors.


3ds max autosave

I. About 3D Max

1. What is 3D Max?

3D Max stands for 3D Studio Max, also known as 3ds Max, which is a PC-based 3D animation rendering and production software developed by Discreet. Its predecessor is 3D Studio series software based on DOS operating system. Before the appearance of Windows NT, industrial-grade CG production was monopolized by SGI graphics workstations. The emergence of the combination of 3D Studio Max + Windows NT suddenly lowered the threshold of CG production. First, it began to be used in the animation production of computer games, and then further began to participate in the special effects production of film and television films, such as “X-Men 2″, “The Last The Samurai” and so on. After Discreet 3Ds max 7, it was officially renamed Autodesk 3ds Max, and its latest version is 3ds Max 2021.
The software has a wide range of applications, mainly in advertising, film and television, industrial design, architectural design, 3D animation, multimedia production, games, and engineering visualization and other fields.

2. How to modify the position and time interval of 3ds Max automatic saving?

If you want to modify the position and time interval of automatic saving of 3ds Max software, you can do it through the following steps.
a , view and modify the location where 3ds Max is automatically saved
Step 1: Run the 3ds Max software, then find the (Customize) option in the top function menu bar, and select (Configure User Paths).
Step 2: Next, switch to the (File I/O) option in the (Configure User Paths) window, where (AutoBackup) is the location where 3ds Max automatically saves. If you need to modify, you can select (AutoBackup) and then click the (Modify) button on the right to modify the location of the automatically saved file. Click the (Use Path) button and click (OK) after the modification is complete.
3ds Max-auto backup
b , Modify the time for 3ds Max to automatically save files
It is also relatively simple to modify the time steps of 3ds Max to automatically save files. The specific operation steps are as follows:
Step 1: Run the 3ds Max software, then find the (Customize) option in the top function menu bar and open it.
Step 2: After that, find the (File) option in the pop-up (Preferences Settings) window.
Step 3: Next, find the (Auto Backup) feature and tick (Enable). In (backup interval (minutes)), you can customize the time interval for automatic saving, and click the (OK) button after the setting is complete.
3ds Max-auto backup
The above are the detailed operation steps about finding and setting the 3ds Max automatic save path and time interval. Although these operations can improve the security of files, if your files are still infected by viruses, computer system and hard disk failures, or human misuse accidental loss due to other reasons, it is recommended that you immediately use professional data recovery software for file recovery. Renee Undeleter is recommended here, it can easily retrieve accidentally lost data, the following are the software functions and detailed usage methods, let’s continue to learn.

II. Use Renee Undeleter to Recover Accidentally Lost Files

1. What is Renee Undeleter?

Renee Undeleter is a software specially designed to restore various data files. When you accidentally delete important files, empty the recycle bin, or format the disk/storage, you can use this tool to find the lost data back. This software covers four functional modules, including file recovery, format recovery, partition recovery and image creation, so it can help you solve many data loss problems that may occur during system use in an all-round way, which is very convenient.
Hot Topic - ADsRenee Undeleter – Simple & Powerful Software for Data Recovery

Easy to use Recover data by 3 steps;

Multiple scan modes Fast partition scan, whole partition scan and whole disk scan;

Supported file types Image, video, audio, text, email and so on;

Image creation Create a partition image to read and back up data;

Supported devices SD card, SDHC, SDXC, USB flash drive, hard disk and computer.

Easy to use Recover data by 3 steps;

Multiple scan modes Fast partition/whole partition/whole disk scan;

Supported devices SD card/USB/hard disk.

Free TrialFree TrialFree Trial 800 people have downloaded!

2. How to recover accidentally lost files with Renee Undeleter?

Restoring data with Renee Undeleter is very simple, the specific steps are as follows:
Step 1: Download, install and run Renee Undeleter on a Windows computer, and select Fast Partition Scan on the main interface.
Note: Do not install the software on the disk that needs to recover data, so as not to cause data overwriting. In addition, after the file is lost, please do not save new data to the same disk partition, so as not to damage or completely lose the lost file.
how to recover photos from sd card select the function fast partition scan in renee undeleter
Data recovery function introduction:

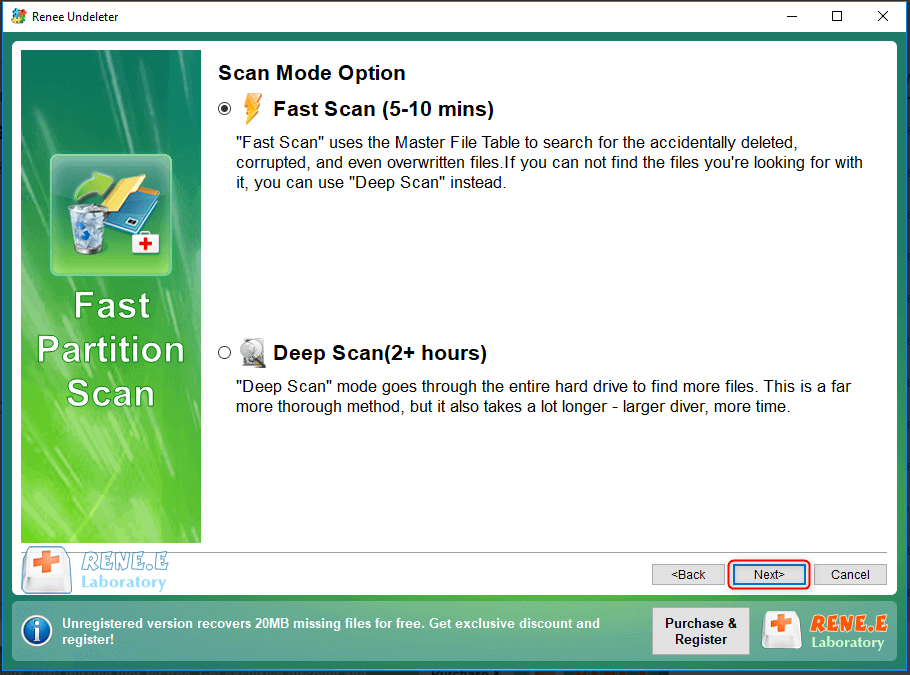
Fast Partition Scan: Quickly retrieve files lost due to accidental deletion or emptying the recycle bin.

Whole Partition Scan: Quickly recover files lost due to inaccessible or formatted partitions.

Whole Disk Scan: It can analyze and obtain partition information, and fully scan the entire partition.

Image Creation: You can create a mirror image for a partition to back up the current partition state.

Step 2: Next, select the partition where the lost data is located and click on Next.
scan disk with Renee Undeleter
Step 3: Select the Fast Scan option and click the Next button to scan.
Tips: The quick scan mode only scans the first 30GB of the remaining space of the selected disk. If the desired file is not found after scanning, you can use the deep scan mode to try to scan the hard disk partition again. It will take more time, but more data can be scanned.
select fast scan mode in renee undeleter
Step 4: Wait for the scan to complete, you can double-click the file to preview, then check the file to be recovered, click the Recover button to restore the file to another disk.
select the target files to recover in fast partition scan