Dell Backup and Recovery: A Simple Guide for Windows 10
31 August 2023Jennifer Thatcher Technology Manager of Test Dept.
Last update by William Davis at 5 June 2024
Summary Learn the specific steps to back up important files on a Dell computer using Dell Backup and Recovery software and other practical Windows 10 backup tools.
Dell, the world’s leading computer systems company, is a premier provider of computer products and services. Its computers once dominated the personal computer market, highlighting the brand’s popularity among users.
As computers become integral to daily life, file security is increasingly important. Timely backups can prevent data loss due to emergencies. Here are two methods to back up and restore files on a Dell computer running Windows 10. Regular backups are recommended to minimize the risk of data loss. Let’s explore the options.
II. How to backup and restore Dell computer files in Windows 10?
1. Use Renee Becca to backup Dell computer files
Renee Becca is a tool designed for system and hard disk data backup and restoration. It helps you back up and restore important data on your computer, including programs, system configurations, emails, photos, videos, documents, and bookmarks. Utilizing leading incremental and differential backup technology, it saves time and disk space. It supports system, partition, hard disk, file backup, and disk cloning to meet your needs.
Renee Becca - Reliable Data Backup & Restore Software
Quick Backup files at up to 3,000MB/min.
Fullfill different backup needs Supports system backup, disk / partition backup, file backup and disk clone.
Intelligent Automatically analyze the differences between source and backup data.
Convenient Support VSS, allowing to freely view webpages when backing up system.
Highly compatible Supports various files and storage devices.
Quick Backup files at up to 3,000MB/min.
Fullfill different backup needs Backup for disk, partition and system. Save disk space by backing up incremental /differential data.
Highly compatible Supports various files and storage devices.
How to Backup and Restore Dell Computer Files with Renee Becca?
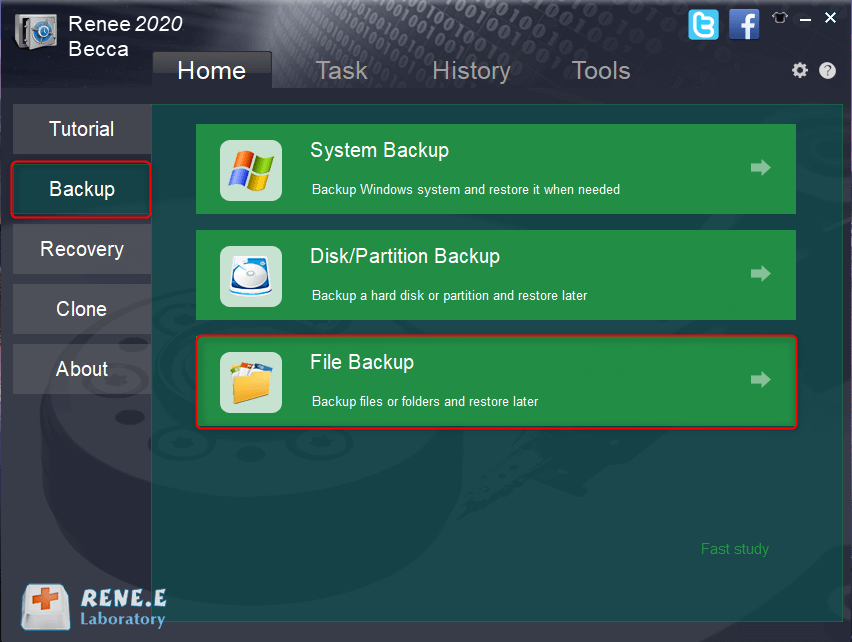
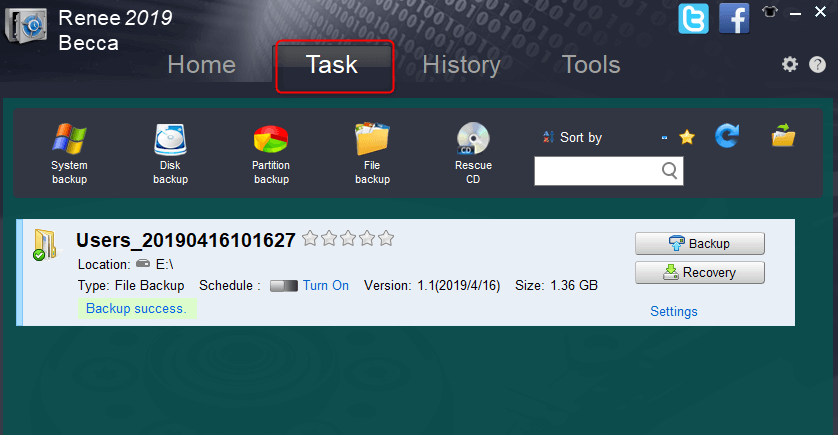
Step 1: Download, install, and run Renee Becca on the Dell computer. Select the File Backup option. To back up the system, choose the System Backup function.
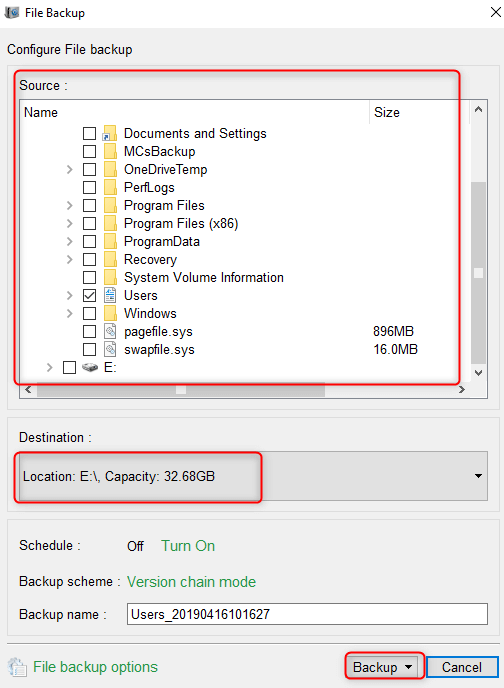
Step 2: Select all the files that need to be backed up in (source), and select the hard disk partition to store the backup in (destination).
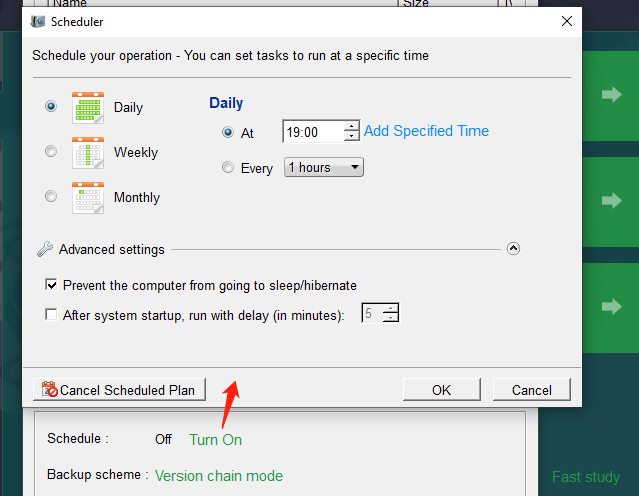
In addition, using Scheduler, you can make a daily/weekly/monthly automatic backup plan and click (OK) to enable the automatic backup.
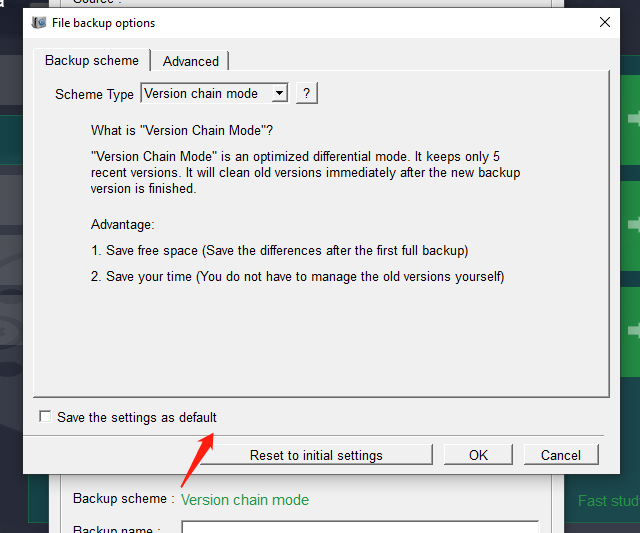
In Backup Scheme – Scheme Type, select a suitable backup mode based on your needs. Renee Becca offers 5 schemes: version chain mode, single version mode, full mode, incremental mode, and differential mode.
Renee Becca offers 5 backup plans:
Version Chain Mode: Keeps the latest 5 versions, automatically deleting older ones after backup.
Single Version Mode: Retains only the most recent version, deleting the previous one after backup.
Full Mode: Creates a full backup.
Incremental Mode: After an initial full backup, only incremental backups are made.
Differential Mode: Only differential backups are made after an initial full backup.
Step 3: Click the Backup button to start the file backup according to your settings. Monitor the progress on the taskbar. After completion, click the Recovery button to restore files to the specified hard disk.
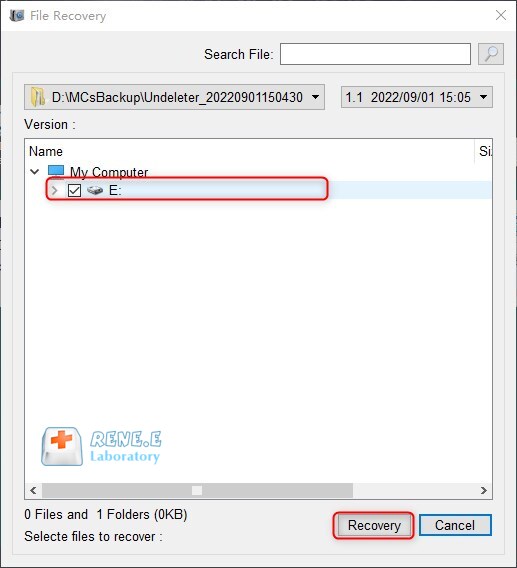
Step 4: Select the folder to save the backup and click the (Recovery) button.
2. Use Dell Backup and Recovery to backup and restore Dell computer data
Dell Backup and Recovery, a built-in tool for Dell computers, supports backing up the entire system or important files. It can restore Windows system files if the computer encounters a virus attack, accidental file deletion, operating system/software damage, or hardware failure.
This tool is pre-installed in Windows 7/8/8.1. If upgrading to Windows 10, Dell Backup and Recovery will appear on the Control Panel. Follow the prompts for the recommended update. If the Dell computer comes with Windows 10, it will not have Dell Backup and Recovery pre-installed, so choose other backup methods.
When using Dell Backup and Recovery for the first time, create a recovery medium (system image) to restore the computer to its factory state in case of system or hardware failure. The steps are:
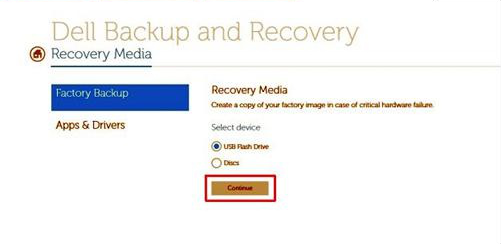
Step 1: Prepare an external storage device (USB stick or CD) of at least 8GB. Turn on the Dell computer, run Dell Backup and Recovery software, and select the Recovery Media option.
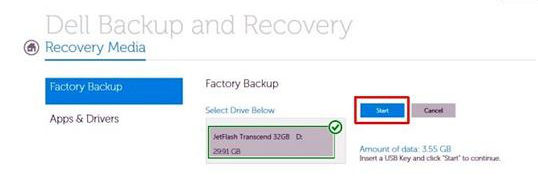
Step 2: Insert the external storage device into the computer. In the recovery media interface, select the inserted USB Flash Drive and click Continue.
After confirming the drive information, click the (Start) button to create a system image.
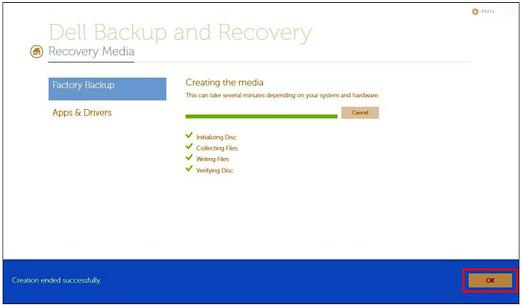
Step 3: Click the (OK) button to complete the creation of the system image.
How to restore a system image using an external storage device?
Step 1: Connect the external storage device with the system image to the Dell computer. Start the computer, press F12 twice at the Dell Logo to enter the Boot Menu, and select CD/DVD drive or USB Storage Device. When prompted to boot from CD/DVD, press any key to start booting.
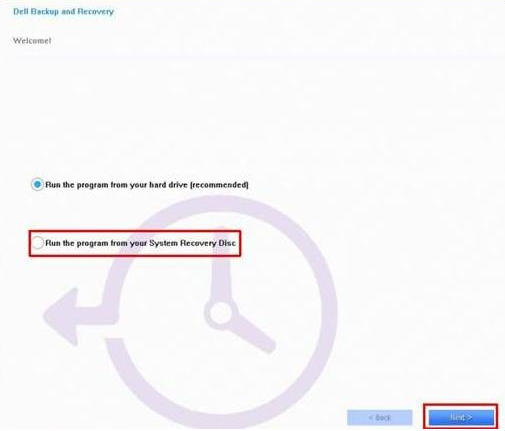
Step 2: Choose to run from (Run the program from your System Recovery Disc) and then click (Next).
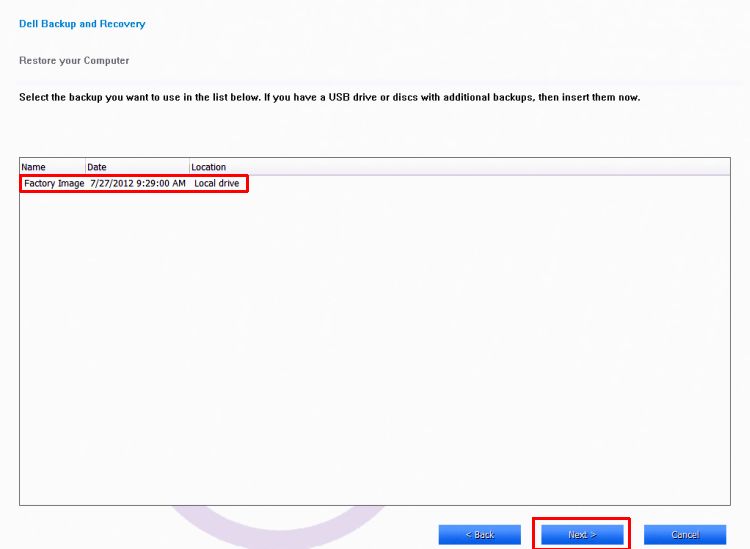
Step 3: Click Next twice, select the factory image file, check the required system image, and click Next.
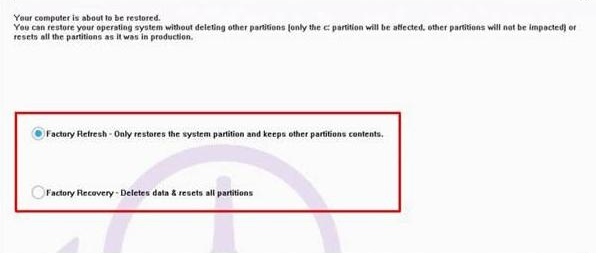
Step 4: Choose one of the following options: Factory Refresh (Only restores the system partition and keeps other partitions contents) or Factory Recovery (Deletes data and resets all partitions). Usually, choose the first option and click Next.
Step 5: The system will prompt you to back up your files. If needed, select Yes, backup my personal files and ensure an external hard drive is connected. If no backup is needed, select No, erase my personal files. Click Next and wait for the system to restore.