author avatar
    Specialist of Customer Service Dept.
 

Summary
C disk is exactly important for it is the default startup hard disk. Each time we launch the computer, some trash files will generate. Plus, many applications, and the related updates and patches are installed in the C disk by default. When the C disk is running out of space, the computer performance will slow down. Therefore, we will talk about how to free up C disk space in this essay.
how to free up disk space on windows

Part 1: How to Free up C Disk Space?

How to free up the C disk space when it is running out of space? You can follow these methods to solve the problem.

1. Remove Temporary Files

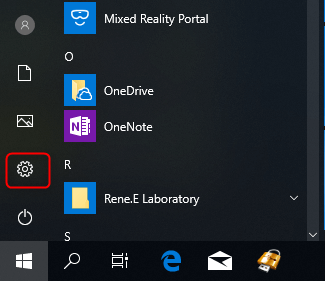
Step 1: Expand the Start menu and click at the Settings icon.
go to settings in start menu
Step 2: Open [Windows Settings] and then select [System].
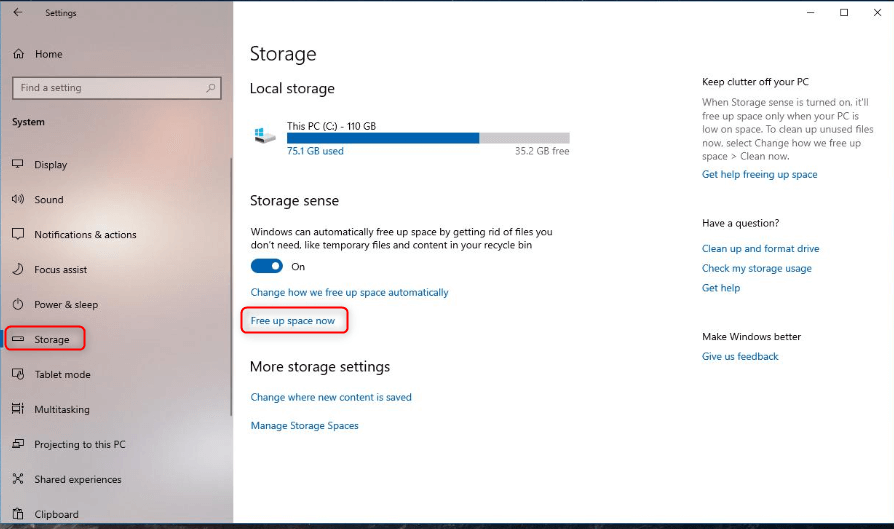
Step 3: In the tab [Storage], select [Free up space now] at the right pane.
how to free up disk space now
Step 4: Wait for a while and then check the option [Temporary Internet Files]. Next, click on [Remove files] to free up space.

2. Launch Disk Clean-up

Step 1: Go to [This PC] and right click at the C disk icon. Then, select [Properties].
Step 2: Next, click on [Disk Clean-up] to execute disk cleanup. All files in the disk will be scanned during the process.
Step 3: After that, select the files that are to be cleaned/removed. Check the options next to the file names. Click on [OK] and wait for a while.

3. Run Command Line to Delete Temporary Files

Step 1: Press the keys [Win + R] to turn on Command Prompt. Then, type [%TEMP%] and click on [OK].
Step 2: Then, open the Temp folder and see the temporary files. Select the target temporary files, or press the keys [Ctrl + A] to select all files.
Step 3: Right click at these files and select [Delete]. Or, press the key [Delete].
Step 4: The file cannot be deleted when it is opened. Click on [Skip] or [Cancel] if you see such a notification.
Step 5: Return to the desktop and get into Recycle Bin. Empty all files in the bin.
These are the 3 methods about how to free up the C disk space. How if you remove the important files when you delete the temporary files? Next, we will tell you how to retrieve the deleted files after freeing up the C disk space.

Part 2: Recover Date with Renee Undeleter

1. What is Renee Undeleter?

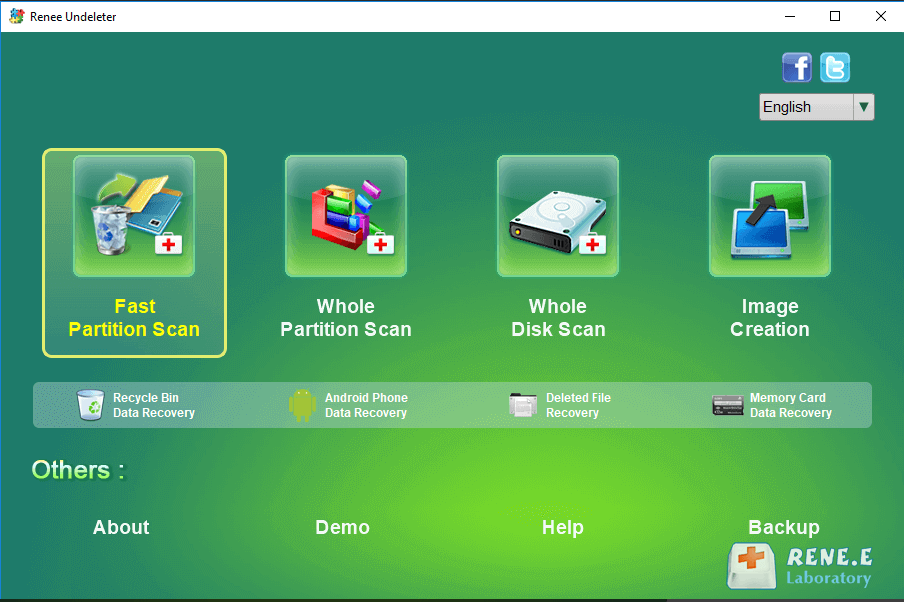
Renee Undeleter is the data recovery software. When the users accidentally delete the important files, empty Recycle Bin, or format the disk/drive, the software can retrieve the deleted data. It contains 4 options, namely fast partition scan, whole partition scan, whole disk scan and image creation. These functions can help the users easily recover the lost data.
Renee Undeleter - Powerful Data Recovery SoftwareRenee Undeleter data Recovery software

Easy to use Only simple steps to recover data from storage devices.

Multiple scan modes Fast partition scan, whole partition scan and whole disk scan for different recovery needs.

File types Support to recover pictures, videos, audios, documents, mails, etc.

Supported storage devices Recover data from recycle bin, SD card, external disk, etc.

Supported systems Windows 10, 8.1, 8, 7, Vista, XP, 2000 and Mac OS X10.6, 10.7, 10.8.

Easy to use Only simple steps to recover data from storage devices.

Multiple scan modes - 3 scan modes for different recovery needs.

Supported storage devices Recover data from recycle bin, SD card, external disk, etc.
Free TrialFree TrialFree Trial

3000 users have downloaded Renee Undeleter and found data back!

2. How to Use Renee Undeleter

You can follow these steps to recover the lost data with Renee Undeleter.
Step 1: Download and install Renee Undeleter. Open the software and select [Fast Partition Scan].
Note: Don’t install Renee Undeleter in the disk that is to be recovered in case that the disk data is overwritten.
data recovery in renee undeleter
Introduction of the 4 functions:

Fast Partition Scan: Recover the files after emptying Recycle Bin or deleted by mistake without data backup.
Whole Partition Scan: Scan the whole partition and list all files, especially for the formatted partition or inaccessible issue.
Whole Disk Scan: Scan the entire disk to find out all partitions’ information and simulate the partition table.
Image Creation: Clone a partition image which can be used in case that reading partition is slow or need a backup.
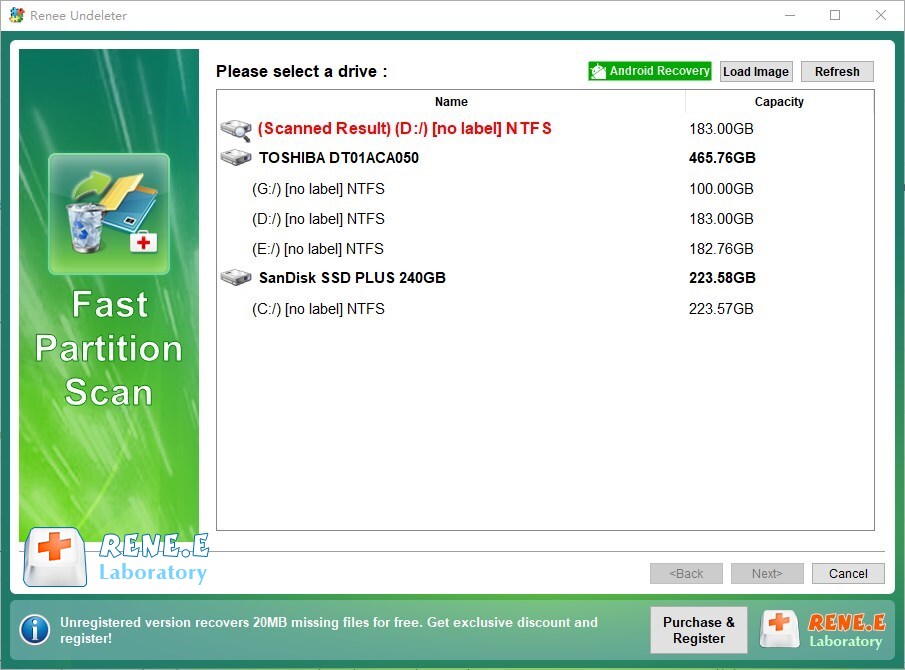
Step 2: Next, select the disk to scan and click on [Next] to go on.
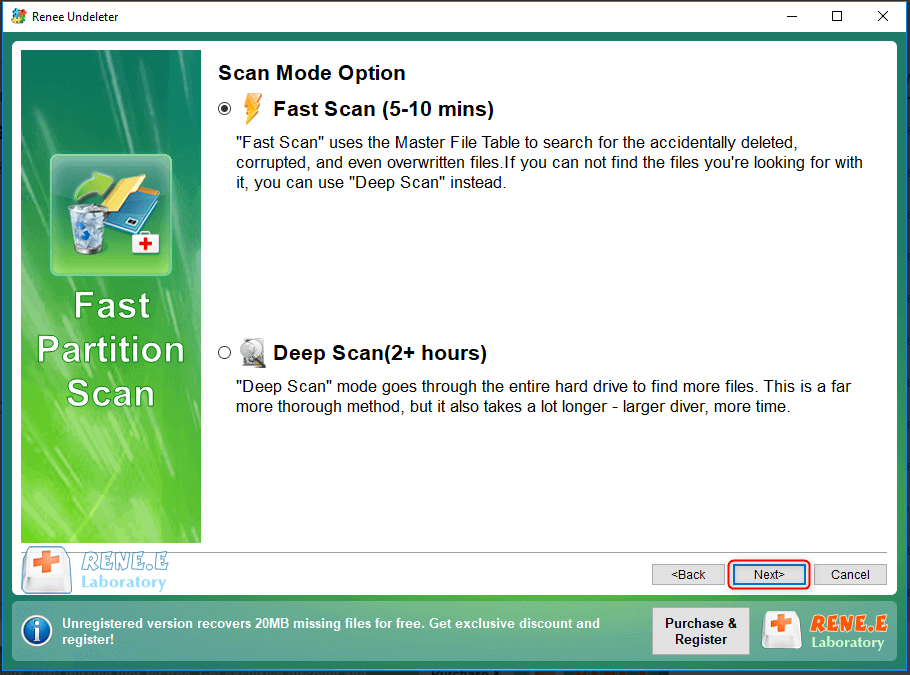
Step 3: After that, select [Fast scan] – [Next]. If you cannot find out your target files among the scan results, please select [Deep scan]. But this mode is time-consuming.
select fast scan mode in renee undeleter
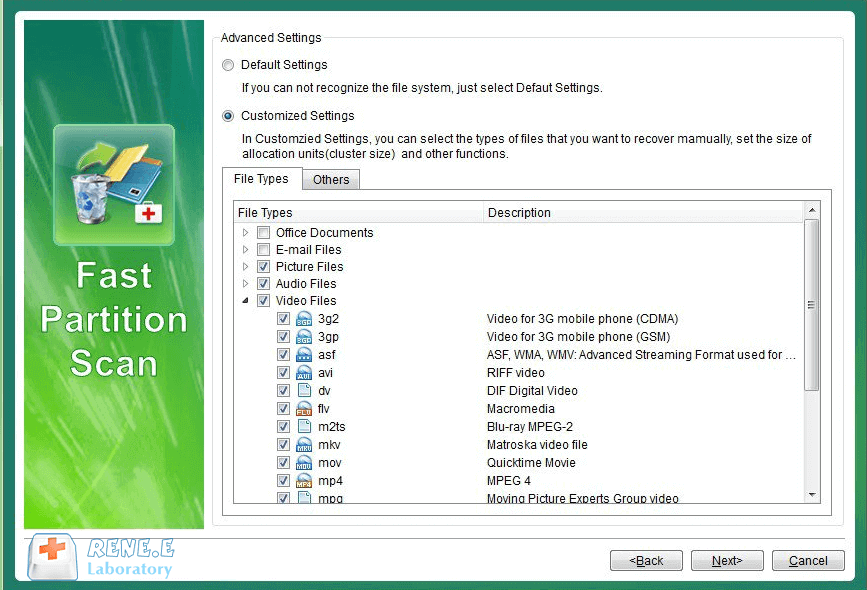
Step 4: Check the options of the file types and click on [Next].
select file types to recover
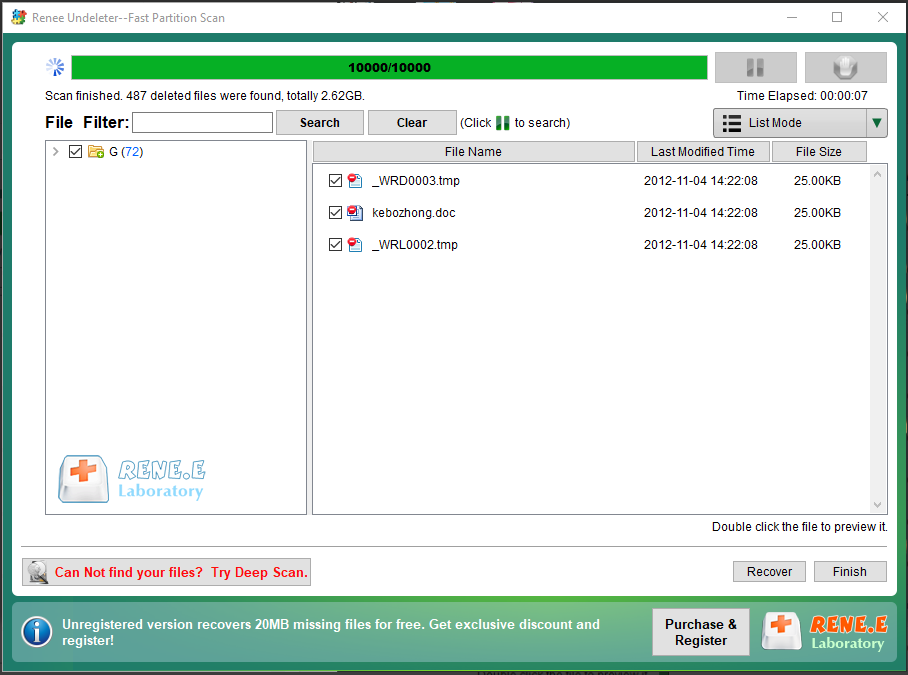
Step 5: Next, check the target files among the scan results and click on [Recover] to recover the deleted data.
Note: Please save the recovered data in the other partitions or disks, not in the disk where the deleted data was saved. That can avoid that the original data is overwritten by the recovered data.
select the target files to recover in fast partition scan