author avatar
    Technology Manager of Test Dept.
 

Summary
Learn how to recover data from failed SSD and fix hard disk failures in this comprehensive article. Restore lost data and repair your SSD effortlessly.


recover data from failed ssd

I. What are the common causes of SSD failure?

There are countless reasons for the failure of SSDs, but they can be summed up in the following points:
Physical damage: Some inferior solid-state hard drive parts are of poor quality, which are easy to cause damage during use, which in turn affects the performance of the device.
Virus infection or malware attack: When a solid-state drive is attacked by a virus or malware, the internal data may be lost.
External Impact or Water Intrusion: Dropping a solid-state drive (SSD) from a significant height or subjecting it to strong impacts can damage its internal components, leading to malfunctions. Similarly, liquid entering the device can cause the SSD to fail.
Device Short-Circuited: Solid-state drives (SSDs) are comprised of sensitive electronic components that may short-circuit and corrupt data as a result of power supply irregularities, such as sudden power outages or fluctuating electrical currents.
Drive Firmware Upgrade Caution: Elevating the firmware of a solid-state drive (SSD) can significantly improve its functionality and lifespan. Nevertheless, it’s crucial to ensure that the upgrade process is not disrupted, as any interruptions or malfunctions could potentially harm the drive.
We’ve discovered that certain issues can cause solid-state drives to fail, potentially leading to data loss. Can data be recovered from a broken solid-state drive?

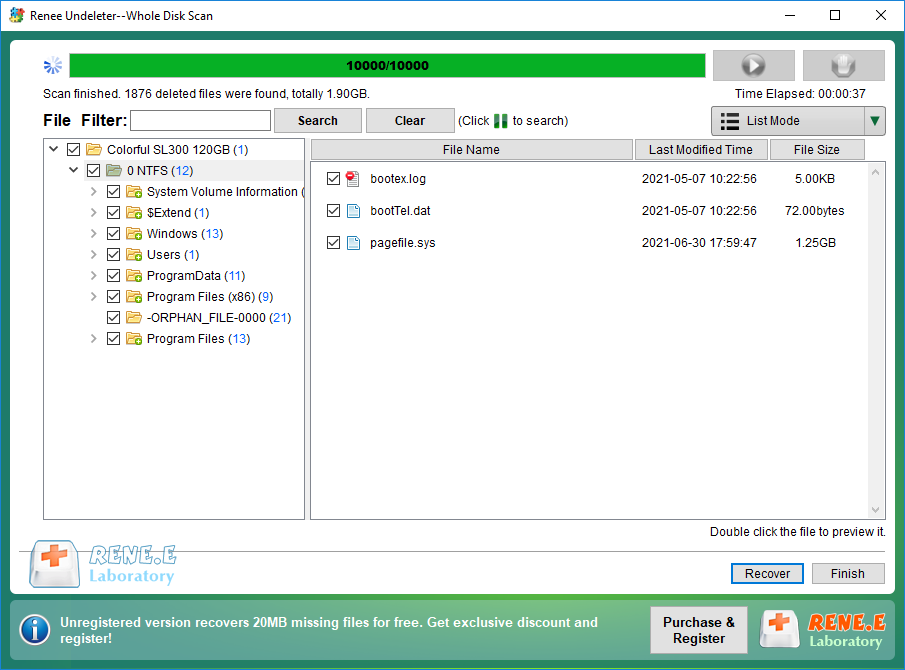
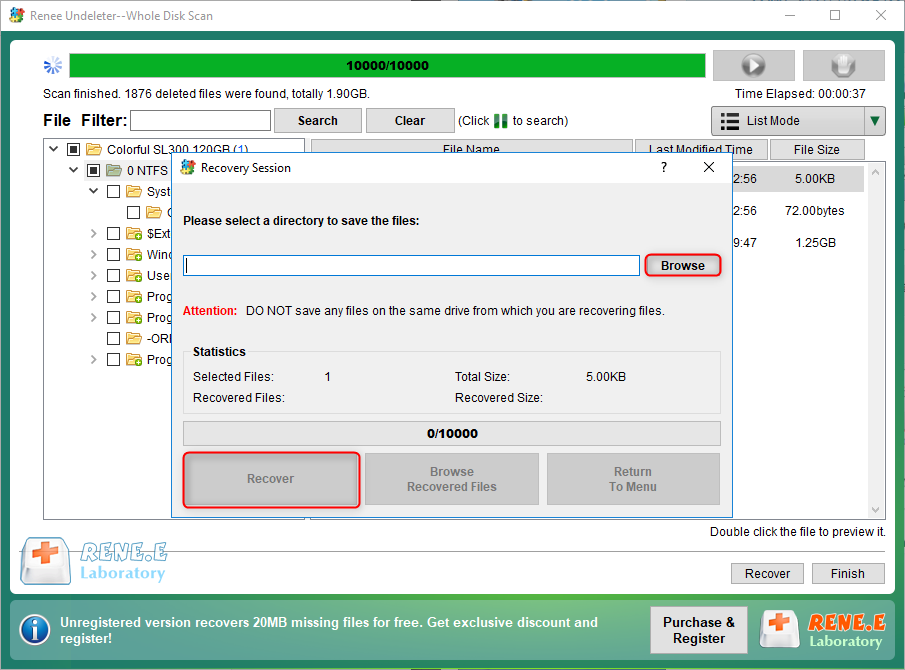
Data recovery is possible for minor faults if the data hasn’t been overwritten. It’s advisable to use professional data recovery software like Renee Undeleter to promptly retrieve the data. However, for major failures or if new data has overwritten the old, the chances of successful recovery are low. Data recovery isn’t always guaranteed; therefore, regular hard disk data backups are crucial to prevent important data loss.

II. Use Renee Undeleter to recover lost data from SSD

1. What is Renee Undeleter?

Renee Undeleter is a comprehensive data recovery software designed to recover various data files. Whether you’ve accidentally deleted files, emptied the recycle bin, or formatted your disk/storage, Renee Undeleter can help you retrieve your lost data. It features four key modules: Fast Partition Scan, Whole Partition Scan, Whole Disk Scan, and Image Creation, offering a complete solution for all potential data loss scenarios during system use.
Hot Topic - ADsRenee Undeleter – Simple & Powerful Software for Data Recovery

Easy to use Recover data by 3 steps;

Multiple scan modes Fast partition scan, whole partition scan and whole disk scan;

Supported file types Image, video, audio, text, email and so on;

Image creation Create a partition image to read and back up data;

Supported devices SD card, SDHC, SDXC, USB flash drive, hard disk and computer.

Easy to use Recover data by 3 steps;

Multiple scan modes Fast partition/whole partition/whole disk scan;

Supported devices SD card/USB/hard disk.

Free TrialFree TrialFree Trial 800 people have downloaded!

2. How to recover hard disk data with Renee Undeleter?

Step 1: Download, install, and run Renee Undeleter, select the (Whole Disk Scan) option on the main interface.
Note: Do not install on the disk that needs to restore data, so as not to cause data overwriting.
elect whole disk scan in renee undeleter
Data recovery function:

  • Fast Partition Scan – Quickly retrieve files lost due to accidental deletion or emptying the recycle bin.
  • Whole Partition Scan – Quickly recover files lost due to inaccessible or formatted partitions.
  • Whole Disk Scan – Analyze and get partition information and perform a full scan of the entire partition.
  • Image Creation – You can create a mirror image for a partition to back up the current partition state.
Step 2: Next, select the hard disk device to be scanned, and click (Next). Select (default setting) on the advanced setting interface.
select a disk to recover in renee undeleter
Step 3: The software will then proceed to analyze the hard disk. After the analysis, a prompt “select the partition you need to scan” may appear. Choose the desired partition or leave it unselected to scan all, which will take more time. Upon completion of the scan, preview the files on the right side, select the ones you wish to recover, and click the Recover button to initiate the restoration process.
select taget files to recover with renee undeleter
Step 4: Next, select the target folder, click (Browse) to select another disk to save the recovered files, and then click the (Recover) button to start the file recovery command, you just need to wait patiently.
recover files from whole disk scan with renee undeleter
The above are the detailed operation steps for recovering hard disk data. Although the hard disk may have various faults, we can still use some methods to try to fix some problems.

III. How to fix SSD failure on Mac/Windows?

1. Fix SSD Failure on Mac

Use the built-in disk tool of the Mac system to check and repair SSD errors. The specific steps are as follows:
Step 1: Run the Mac device and press the (Command + Space) keys simultaneously to open Spotlight Search.
Step 2: Type (Disk Utility) and press the (Enter) key.
Step 3: Next find (Display)-(Display all devices), and then select the SSD device that needs to be repaired. Then click the (First Aid) button.
Step 4: If at this point the repair report shows that the SSD is about to fail, then you need to back up your data and replace the SSD. If there is no error report, click the (Run) button to repair the SSD device normally.
run first aide

2. Fix SSD failure on Windows

Windows devices also have a built-in hard disk fault checking and repairing function. The specific operations are as follows:
Step 1: Open “My Computer/This Computer”, right-click the SSD to be repaired, and select (Properties). Switch to the (Tools) option in the Properties window and click the (Check) button.
check disk from my computer
Step 2: Next, select the (Scan and repair drive) option in the check disk interface, then wait for the scan and repair according to the prompts.
scan drive