author avatar
    Senior Product Manager
 

Summary
Uncover your precious memories and restore deleted photos from your hard disk with these simple methods. From using Recycle Bin to leveraging photo recovery software and backup utilities, this guide will walk you through every step of the way.


Have you ever accidentally deleted precious photos from your hard disk and thought they were gone forever? Or perhaps you intentionally deleted them, only to regret it later on. The good news is, all hope is not lost. With the right tools and knowledge, you can still recover those deleted photos. In this guide, we will take a closer look at the anatomy of deletion and understand what happens to photos after they are deleted. By understanding this process, you will be better equipped to recover your photos and avoid losing them in the future. So, let’s dive into the fascinating world of deleted photos and discover how to bring them back to life.

The Anatomy of Deletion

When you delete a photo from your hard disk, it may seem like it is gone forever. However, the truth is that the file is not completely erased from your disk. It is simply marked as “deleted” in the file system, making it inaccessible to the user. It is important to understand what happens to your photos after they are deleted in order to effectively recover them.
Understanding the File System
The file system is a way for your operating system to organize and manage the files on your hard disk. When a file is created, it is assigned a location on the disk and metadata that describes the file, such as its name, size, and type. However, when a file is deleted, the file system simply removes the metadata and marks the space on the disk as available for new data.
recover pictures from hard drive
deleted file data block (blue blocks) still exists somewhere in your disk
The Role of the Recycle Bin
Many people assume that when a file is deleted, it is automatically sent to the Recycle Bin. However, this is not always the case. When you delete a file from a removable storage device, such as an external hard disk, it will not be sent to the Recycle Bin. Instead, it will be permanently deleted.
On the other hand, if you delete a file from your internal hard disk, it will most likely be sent to the Recycle Bin. The Recycle Bin acts as a temporary storage for deleted files, allowing you to easily restore them if needed. However, once you empty the Recycle Bin or the deleted files exceed the allotted storage space, they will be permanently deleted from your hard disk.
The Risk of Overwriting
One of the biggest risks to recovering deleted photos is the chance of overwriting them. When you continue to use your hard disk, new data will be written to the disk, potentially overwriting the “deleted” photos. It is important to stop using the hard disk immediately after realizing that you have deleted photos, in order to increase the chances of successful recovery.
In summary, when a photo is deleted from your hard disk, it is not immediately erased. Instead, the file system simply removes the metadata and marks the space as available for new data. By understanding the file system and the role of the Recycle Bin, you can effectively recover your deleted photos before they are permanently overwritten.
For the best chance of recovering deleted photos, the first method to try is checking the Recycle Bin for recently deleted photos. If the photos are not there, you can then move on to more advanced recovery methods, such as using a free photo recovery software like RePicvid.

Method 1: Check the Recycle Bin for Recently Deleted Photos

One of the easiest ways to recover deleted photos from a hard disk is by checking the Recycle Bin. This is the storage location for all the files that have been deleted from the hard drive. So, before using any advanced recovery methods, it is always a good idea to check the Recycle Bin first.
Step 1: Open the Recycle Bin by either clicking on its Desktop icon or navigating to it from the Start Menu.
Windows Recycle Bin Versions
Step 2: Once the Recycle Bin is open, look for the deleted photos that you wish to recover. You can use the search bar at the top to filter the results. Alternatively, you can sort the items by date or name to make it easier to find the photos.
Step 3: Once you have found the photos you wish to recover, right-click on them and select “Restore“. This will restore the photos to their original location on the hard drive.
Note: You can also select multiple photos by clicking on them while holding down the Ctrl key, and then restore all of them at once.
By following these simple steps, you can easily recover recently deleted photos from your hard drive without the need for any advanced tools. It is always a good practice to check the Recycle Bin first before using any other methods as it can save time and effort.
Advantages of Checking the Recycle Bin First
1. Easy and convenient way to recover recently deleted photos without the need for any additional tools.
2. Saves time and effort as you don’t have to go through the process of using advanced recovery methods.
3. Can potentially recover the photos without any loss of quality.

Method 2: Use the Renee Undeleter to Restore Deleted Photos from Hard Disk

If you have accidentally deleted your photos from your hard drive and can’t find them in the Recycle Bin, you can use a third-party software like Renee Undeleter to recover them.
Step 1: Download, install and run Renee Undeleter on your Windows computer.
Hot Topic - ADsRenee Undeleter – Simple & Powerful Software for Data Recovery

Easy to use Recover data by 3 steps;

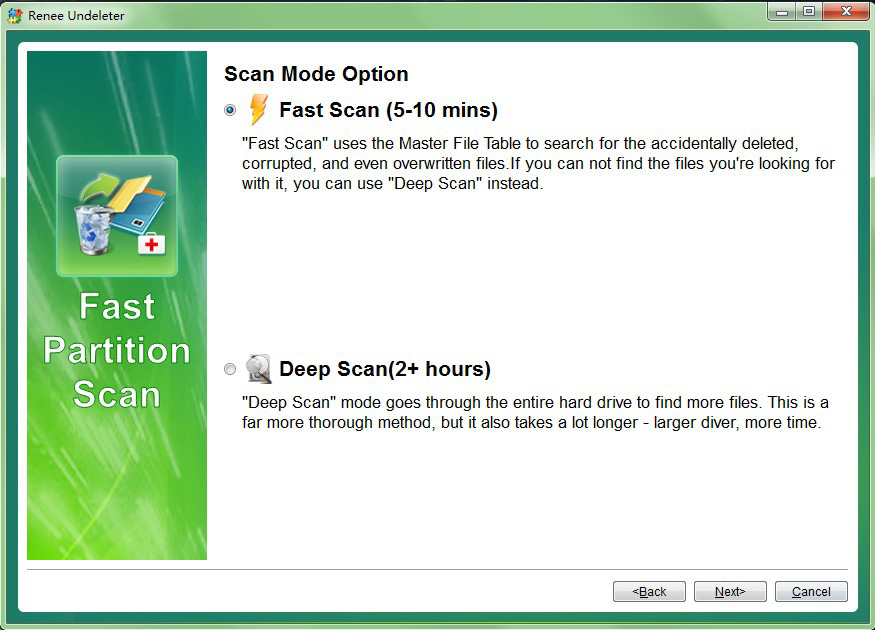
Multiple scan modes Fast partition scan, whole partition scan and whole disk scan;

Supported file types Image, video, audio, text, email and so on;

Image creation Create a partition image to read and back up data;

Supported devices SD card, SDHC, SDXC, USB flash drive, hard disk and computer.

Easy to use Recover data by 3 steps;

Multiple scan modes Fast partition/whole partition/whole disk scan;

Supported devices SD card/USB/hard disk.

Free TrialFree TrialFree Trial 800 people have downloaded!
Step 2: Select the [Fast Partition Scan] option in the main interface.
Please avoid installing the software on the disk containing the data to be recovered in order to prevent data overwriting. Also, refrain from saving new data to the same disk partition after a file is lost to avoid further damage or complete loss of the lost file.
Renee Undeleter, select Fast Partition Scan
Step 3: Next, select the partition where the lost data is located, and click [Next].
select partition to scan for fast partition scan
Step 4: Select the [Fast Scan] option and click the [Next] button to scan.
The [Fast Scan] mode scans the initial 30GB of available space on the chosen disk. If desired files are not found, the [Deep Scan] mode can be used for a thorough scan of the hard disk partition, though it will require additional time.
Select Fast scan in Fast Partition Scan
Step 4: Wait for the scan to complete
you can double-click the file to preview, then check the files that need to be recovered, and click the [Recover] button to recover the files to other disks.
preview before recovery
Tips:Please select a disk without any important data when installing the software to avoid overwriting it. If the quick scan mode doesn’t find the necessary files, we suggest trying the deep scan mode for a full search.
Renee Undeleter is a powerful and user-friendly software that can help you recover various types of data, including photos, videos, and music. It offers a free version with limited features, but you can upgrade to the Standard version for a more comprehensive recovery process. However, the software is not available for free, so you will have to purchase a license to use it.
Summary:
Using Renee Undeleter is a secure and efficient way to recover deleted photos from your hard drive. It offers a user-friendly interface and a variety of advanced features to help you recover your lost data. However, the software is not free and you will have to purchase a license to unlock all of its features.
To learn about other methods to recover deleted photos from hard disk, you can continue reading our next chapter about Engaging the Windows Previous Version function to recover photos without third-party software.

Method 3: Free Photo Recovery Software for Lost Image Files

Have you accidentally deleted important pictures from your hard disk? Don’t worry, there’s still hope to recover those lost image files. While traditional methods like checking the Recycle Bin may work in some cases, there are limitations to what they can do. To ensure a more thorough and efficient recovery process, it’s best to utilize photo recovery software like PhotoRec.
recover pictures from hard drive
Step 1: Download and Install PhotoRec. Make sure to choose the correct version for your operating system. PhotoRec is available for Windows, macOS, and Linux.
Step 2: Launch the software and select the hard drive where the images were originally stored. Click “Proceed” to continue with the recovery process.
photorec select hard disk
Step 3: Choose the file types you want to recover. If you only want to retrieve images, select the file types JPG, PNG, or GIF. You can also choose “All” to scan for all file types. Click “Search” to start the scanning process.
Step 4: Wait for the scanning process to complete. Depending on the size of your hard drive, this may take some time. Once completed, all the found files and folders will be listed on the left pane of the main window. The bottom-right pane will display the files in the selected folder.
Step 5: Preview the files in the right pane to ensure they are the ones you need. Select the desired files and click on the “Recover” button.
Step 6: In the dialog box, choose the location where you want to save the recovered images. Make sure to select a different location from the one you are recovering from to avoid overwriting any data.
Congratulations, you have successfully recovered your deleted photos using PhotoRec! This software also has the ability to scan large capacity disks up to 2TB, making it ideal for recovering photos from modern storage devices.
It’s always best to act fast when trying to recover deleted photos. As soon as you realize that your images are missing, stop using the storage device to avoid overwriting any data. This will increase the chances of a successful recovery. Additionally, always make sure to regularly back up your important photos to avoid losing them permanently.
If PhotoRec is not able to recover your lost images, there’s still one more method you can try. Continue reading to learn about the following chapter.
Pros:
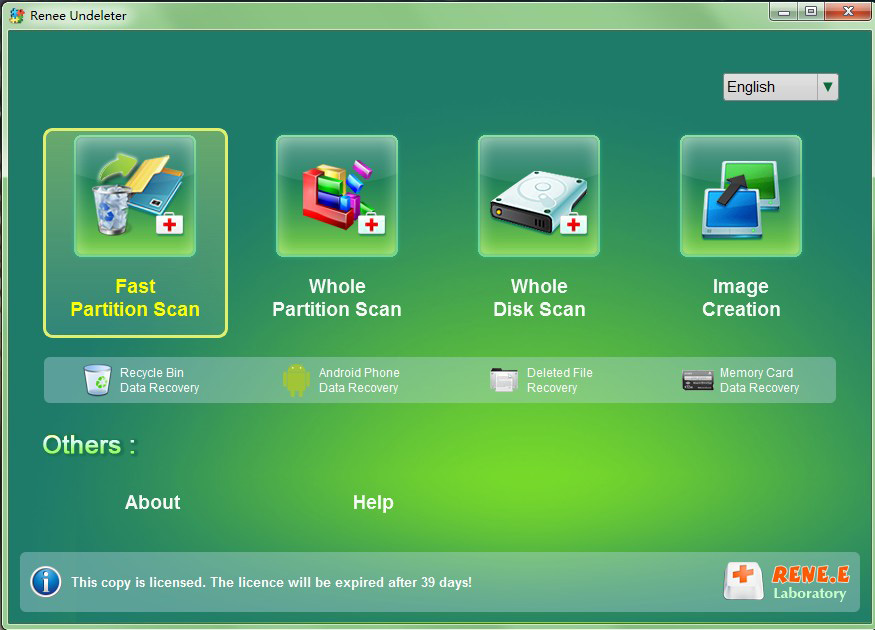
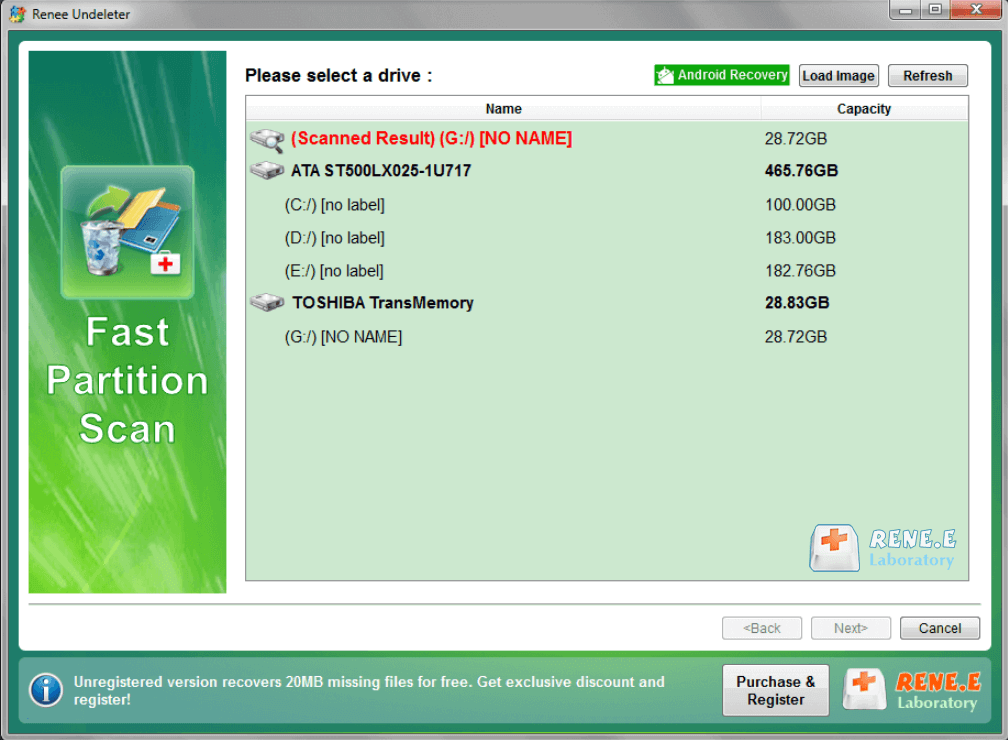
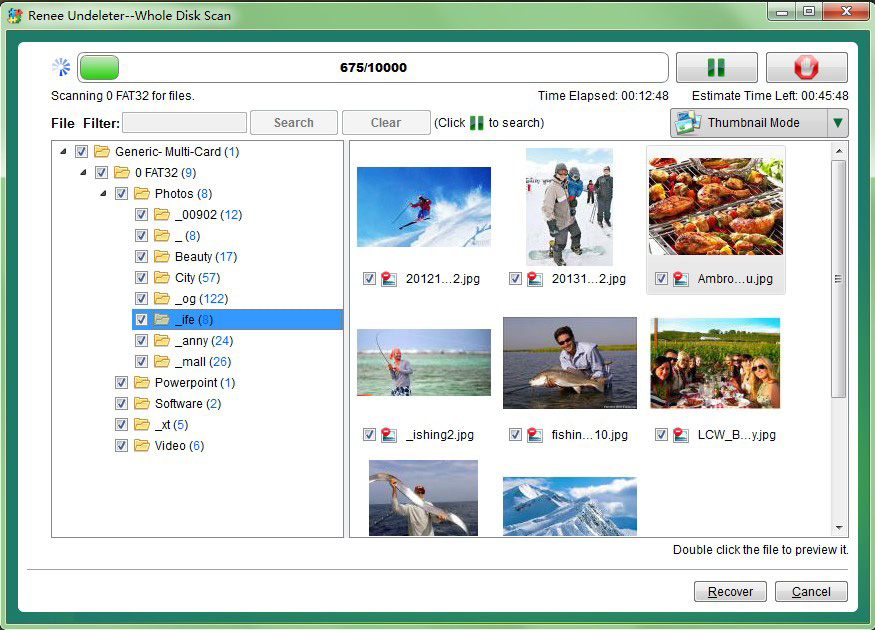
  • Ability to scan and recover lost images from various types of storage devices
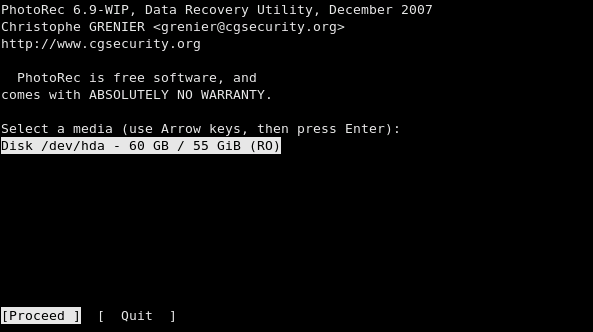
Cons:

  • May not guarantee a complete recovery
  • No user-friendly
  • Some files may still be unrecoverable due to certain scenarios, such as overwriting or formatting of the hard drive

Method 4: Engage the Windows File Recovery to recover photos without third-party software

Tips:This method is only available for Windows 10/11 users.
If you have accidentally deleted your photos from your hard disk, don’t worry. You can use the Windows File Recovery function to recover them without using any third-party software. This method is simple and convenient, and it can help you get back your lost photos quickly.
Note: Download and install Windows File Recovery from the Microsoft Store. Carefully follow the installation directions provided.
Microsoft's Windows File Recovery Work
Step 1: To begin using the Windows File Recovery tool, open the File Explorer and navigate to the folder where your deleted file was located. You can also search for the file by name using the search bar at the top of the File Explorer window.
Step 2: Once you have located the folder or file, open the Command Prompt by pressing the Windows and R keys on your keyboard, typing “cmd” into the Run dialog, and pressing Enter. Alternatively, you can right-click on the Start menu and select “Command Prompt” from the list.
type cmd in run dialog
Step 3: In the Command Prompt, type

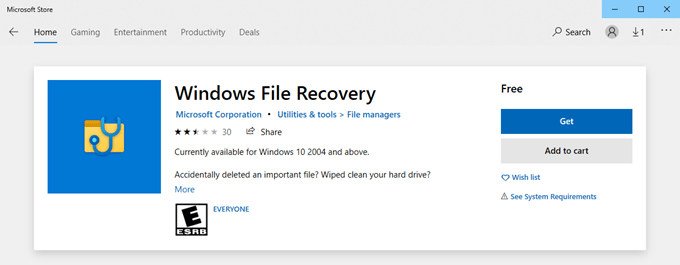
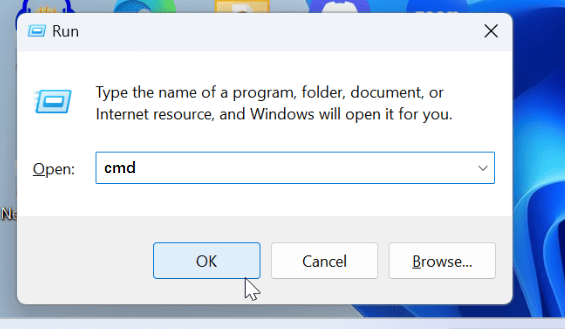
winfr source: destination

and press Enter. The source refers to the drive where the deleted file was located, while the destination is where you want to recover the file to. For example, if you want to recover a file from drive C and save it to the desktop, you would type

winfr C: C:\Users\YourUsername\Desktop

Step 4: The tool will start running in either regular or extensive mode, depending on the size of the file and the current status of the drive. It may take some time for the tool to finish scanning and recovering the file, so be patient.
By following these simple steps, you can easily recover your deleted photos from your hard disk without using any third-party software in Windows 10/11. This method works best if you have recently deleted your photos and have not made any changes to your hard disk since then.
This method also ensures that you do not overwrite any of the deleted photos while recovering them, which can happen if you use third-party software. Therefore, it is a safer option for recovering your photos from your hard disk.
Note: In order to prevent overwriting your deleted photos, it is important to stop using your hard disk for storing or creating new files. Also, make sure to close any running programs on your computer as they may produce new data on the hard disk.
What to pay attention to:
- Stop using the hard disk for storing or creating new files to prevent overwriting the deleted photos.
- Close any running programs on your computer to avoid new data being produced on the hard disk.
Now that you have successfully recovered your deleted photos, it is important to take measures to avoid losing them in the future. Make sure to check out our next chapters on “What Users should do to avoid photo lost in the future” for helpful tips and precautions to prevent photo loss on your hard disk.
Pros:
  • No need to use any third-party software.
  • Ensures that deleted photos are not overwritten during recovery.

Cons:

  • Can not preview deleted photos
  • Works best if photos were recently deleted and no changes were made to the hard disk.
  • May not be effective for recovering photos that were deleted a long time ago.

4 Tips to Avoid Photo Loss in the Future

Losing precious photos from your hard disk can be a heart-wrenching experience. Whether it’s due to accidental deletion, formatting, or a system crash, it’s important to have a backup plan in place to protect your memories. Here are 5 tips to help you avoid photo loss in the future.
Step 1: Regularly Back Up Your Photos
The first step is to regularly back up your photos to a separate location, such as an external hard drive or cloud storage. This way, even if your hard disk fails, you’ll still have a copy of your photos. You can set up automatic backups using software like “Time Machine” for Mac users or “Windows Backup” for Windows users. This will ensure that your photos are constantly being backed up in case of any unexpected events.
Hot Topic - ADsProfessional Data Backup & Restore Software - Renee Beccadata bacup software Renee Becca

Provides multiple functions like backup, restore, clone, system migration.

Clone all data (including system) in HDD to smaller SSD or larger HDD. Disk could boot PC after clone finished.

Supports to migrate Windows to SSD with a few clicks.

4K alignment will be processed when clone disk, migrate system, restore disk or system.

Backup & restore system/disk/folder. Auto backup plans are available.

Provides functions like backup, restore, clone, system migration.

Clone all data (including system) in HDD to smaller SSD or larger HDD.

Backup & restore system/disk/folder. Auto backup plans are available.

Compatible with: Windows 10 / 8.1 / 8 / 7 / Vista / XP / 2008 / 2012(32bit/64bit) / Server 2008

Free TrialFree Trial

5000 people have downloaded and made the disk clone successfully!

Step 2: Use Reliable Software for Photo Management
Using reliable software to manage your photos is essential to avoid loss in the future. “Photos”, “iPhoto” or “Lightroom” for Mac users, and “Photos”, “Picasa” or “Adobe Bridge” for Windows users are popular choices for organizing and managing photos. These software have built-in backup features and also allow you to easily export and transfer photos to external devices or cloud storage.
Step 3: Be Cautious When Deleting Photos
One of the most common reasons for photo loss is accidental deletion. To avoid this, make sure to double check before clicking the delete button. It’s also helpful to use the “trash can” or “recycle bin” function when deleting photos, as this allows you to recover them if needed. You can also use the “undo” function immediately after deleting a photo to retrieve it.
Step 4: Engage the Windows Previous Version Function
If you’re a Windows user, another way to protect your photos is by engaging the “previous version” function. This allows you to restore previous versions of files or folders that have been changed or deleted. To use this function, right-click on the folder or file, select “properties“, and then click on the “previous versions” tab. You can then choose the previous version you want to restore.

Conclusion

In conclusion, recovering deleted photos from a hard drive may seem like a daunting task, but with the right tools and knowledge, it can be done successfully. In this guide, we have discussed various methods such as checking the Recycle Bin, using photo recovery software like PhotoRec and Renee Undeleter, and leveraging the Windows Previous Version function. Each method has its own benefits and steps, and it is important to carefully follow them to ensure successful photo recovery. Additionally, we have also highlighted the importance of regularly backing up your photos to prevent loss in the future. By following these steps and being cautious with your photo management, you can ensure that your precious memories are always safe and secure. Don’t wait until it’s too late, take action now and recover those lost photos from your hard drive.