author avatar
    Senior Program Developer
 

Summary
Learn why your hard disk capacity is reduced and discover a practical solution to restore its full capacity. Don't miss out on this helpful article.


restoring factory hard drive capacity

I. Why is the capacity of the hard disk shrinking?

1. The external hard disk is infected by virus or malware

When using a external hard disk, be cautious of downloading malicious software that may contain viruses. If you notice a decrease in the capacity of the hard drive, use antivirus software to scan and remove any virus files before checking if the capacity has been restored.

2. Turn on the system protection function

System Protection periodically creates and saves information about computer system files and settings, saving modified content in a restore point in time. Enabling this function can shrink hard disk capacity due to the space it takes up. Turning it off can solve this issue.

3. External hard disk failure

The sector damage of the external hard disk may reduce capacity or cause partitions to disappear, appearing as unallocated space in disk management. To resolve, create a simple volume for the unallocated space in Disk Management for reuse.

4. The partition table of the external hard disk is MBR

When the partition table format of the external hard disk is MBR, it only supports a maximum capacity of 2TB. To restore the full capacity, you can convert MBR to GPT partition table format.
After identifying the reasons for the decrease in hard disk capacity, let’s explore how to restore the full capacity of the external hard disk.

II. How to restore the hard disk to display the full capacity?

1. Clean up hard disk virus

The hard disk attacked by a virus can be repaired with anti-virus software already installed on the computer. Anti-virus software is now a standard configuration on computers, and the built-in anti-virus function of Windows 10 can also be used.
Step 1: Run the Windows computer, click the Settings icon in the lower left corner, and open it.
settings in Windows
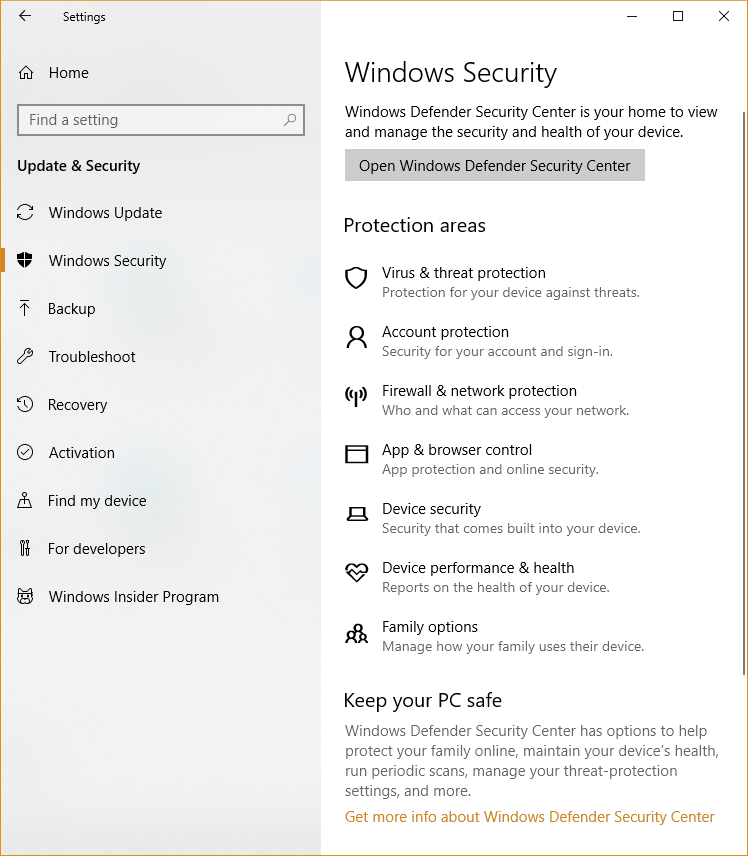
Step 2: Go to (Update and Security) -> (Windows Security) -> (Virus & Threat Protection). Look for any virus threats under “Current Threat” and click (Scan Now) to clean them. If there are no viruses, no action is needed.
windows defender security center

2. Turn off the system protection function

Enabling system protection will consume more hard disk storage space. To restore full capacity, turn it off with the following steps:
Step 1: Run the Windows computer, search (Control Panel) in the “Search Box” in the lower left corner, and open it.
search windows Control Panel
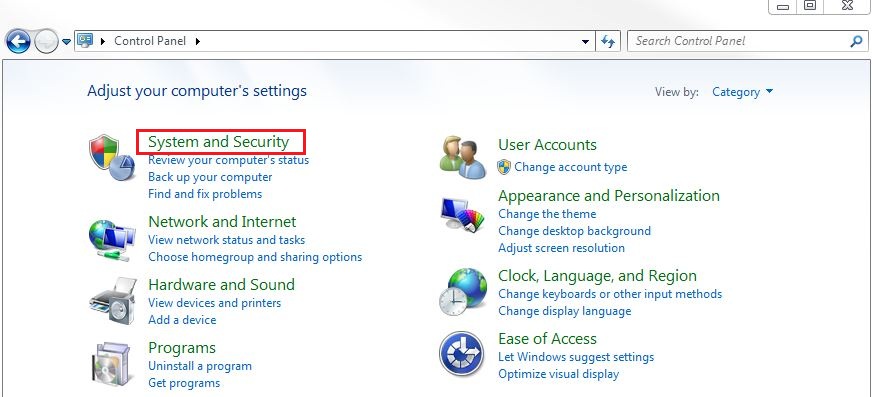
Step 2: Next, click the (System and Security) option.
system and security in control panel
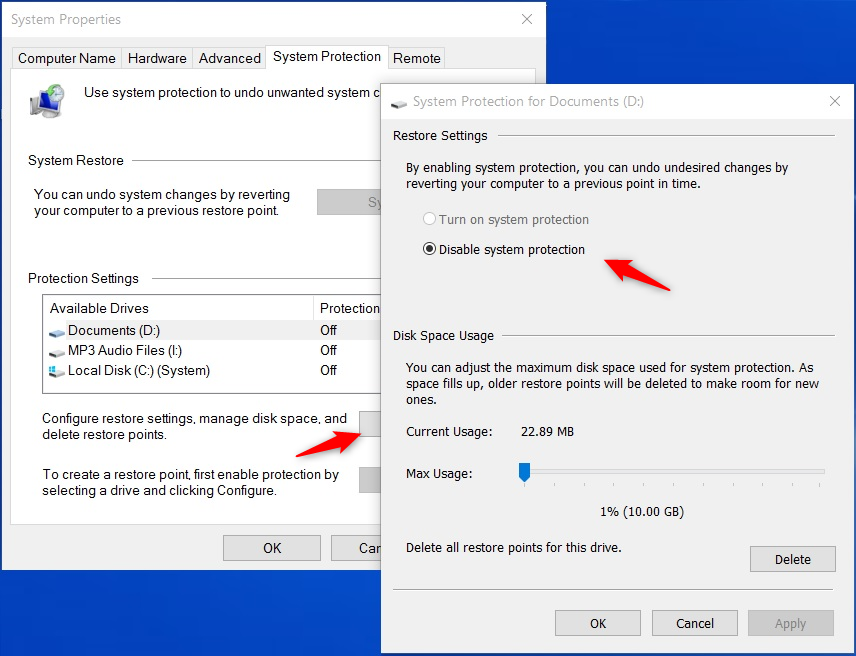
Step 3: Navigate to (System)-(System Protection)-(Configuration), choose (Disable System Protection), and click (OK).
disable system protection windows

3. Format the external hard disk

To repair the situation where the hard disk does not display full capacity due to faults, it is recommended to format the hard disk. However, this will clear all data on the hard disk, so it is advised to back up in advance. The specific operation steps are as follows:
Step 1: Connect the external hard disk to the computer and press (Windows+X) keys to open Disk Management.
open windows disk management
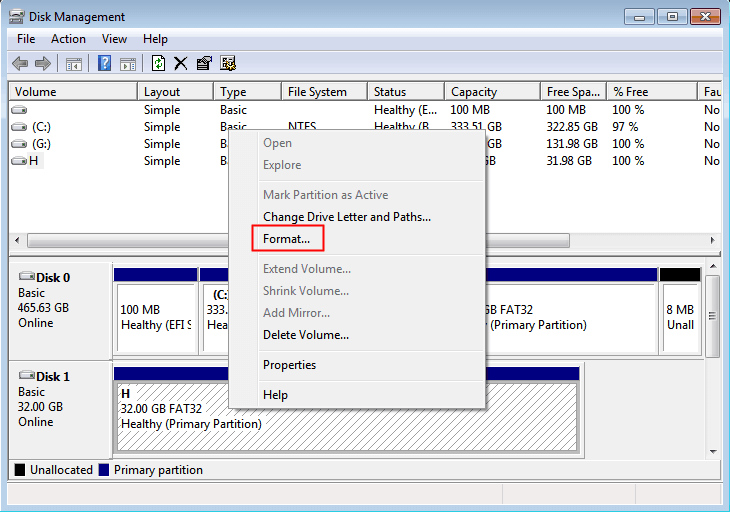
Step 2: Next find the removable hard drive, right-click it, and select the (Format) option.
format sd
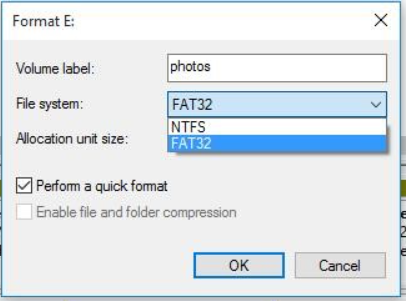
Step 3: Select the required file system: FAT32, NTFS or exFAT. If used in a Windows system, it is recommended to select NTFS. Check "Perform a quick format", click "OK", and follow the instructions to complete the formatting process. After completion, restart the computer and reconnect the external hard disk to check if its capacity is fully displayed.
Select the required file system
If the hard disk cannot display full capacity, try using the methods above. If data is lost after restoring full capacity, use professional data recovery software to retrieve it.

III. Use Renee Undeleter to recover lost data in the external hard disk

1. What is Renee Undeleter?

Renee Undeleter is specialized software for restoring various data files. Whether you accidentally delete important files, empty the recycle bin, or format the disk/storage, this tool can help you recover lost data. The software includes four functional modules: file recovery, format recovery, partition recovery, and image creation, making it a comprehensive solution for all potential data loss issues during system use.
Hot Topic - ADsRenee Undeleter – Simple & Powerful Software for Data Recovery

Easy to use Recover data by 3 steps;

Multiple scan modes Fast partition scan, whole partition scan and whole disk scan;

Supported file types Image, video, audio, text, email and so on;

Image creation Create a partition image to read and back up data;

Supported devices SD card, SDHC, SDXC, USB flash drive, hard disk and computer.

Easy to use Recover data by 3 steps;

Multiple scan modes Fast partition/whole partition/whole disk scan;

Supported devices SD card/USB/hard disk.

Free TrialFree TrialFree Trial 800 people have downloaded!
2. How to recover external hard disk data with Renee Undeleter?

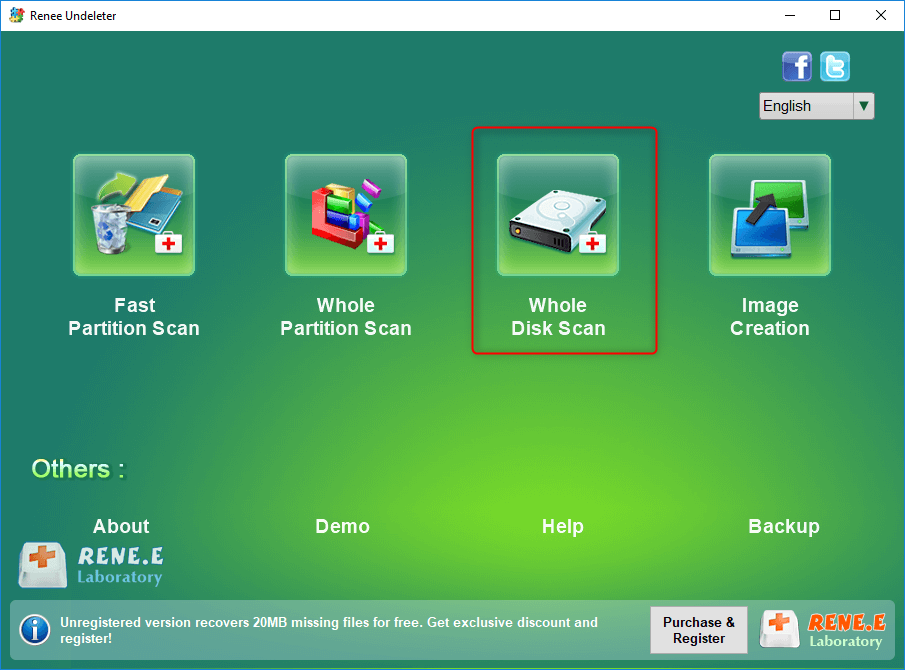
Step 1: Download, install, and run Renee Undeleter. Select the (Whole Disk Scan) option on the main interface.
Note: Do not install on the disk that needs to restore data, so as not to cause data overwriting.
elect whole disk scan in renee undeleter
Data recovery function:
Fast Partition Scan – Quickly retrieve files lost due to accidental deletion or emptying the recycle bin.
Whole Partition Scan – Quickly recover files lost due to inaccessible or formatted partitions.
Whole Disk Scan – Analyze and get partition information and perform a full scan of the entire partition.
Image Creation – You can create a mirror image for a partition to back up the current partition state.
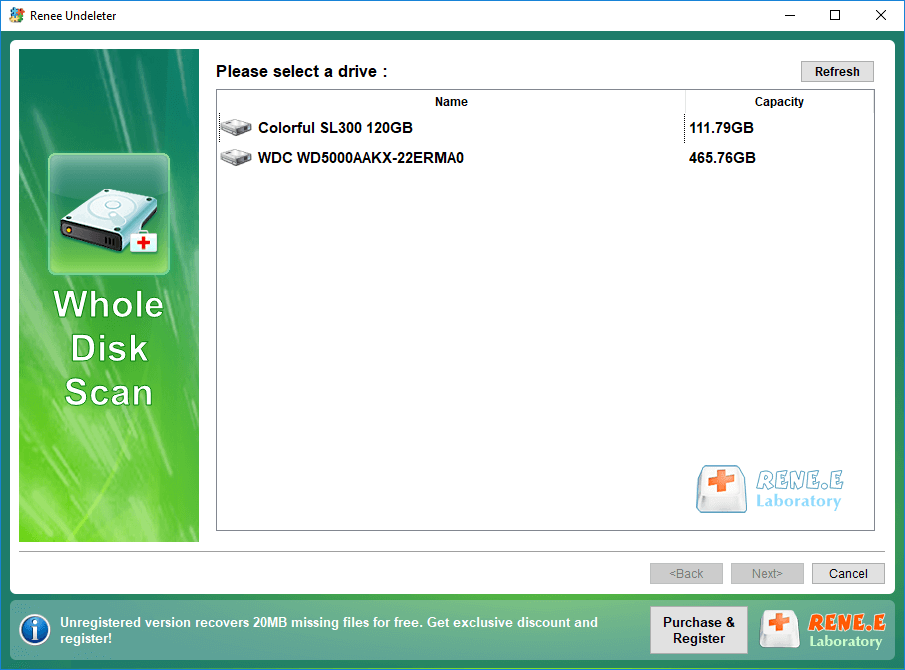
Step 2: Select the hard disk to be scanned, and click (Next).
select a disk to recover in renee undeleter
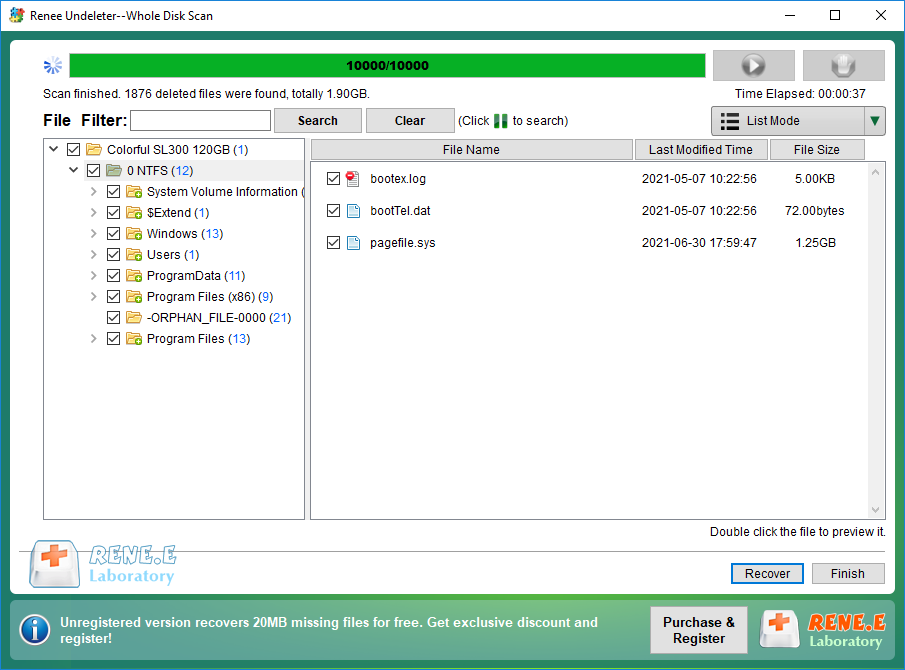
Step 3: The software will analyze the hard disk device and prompt you to select the partition you need to scan. You can preview and select the files you need to restore, then click the (Recover) button in the lower right corner to restore them.
select taget files to recover with renee undeleter
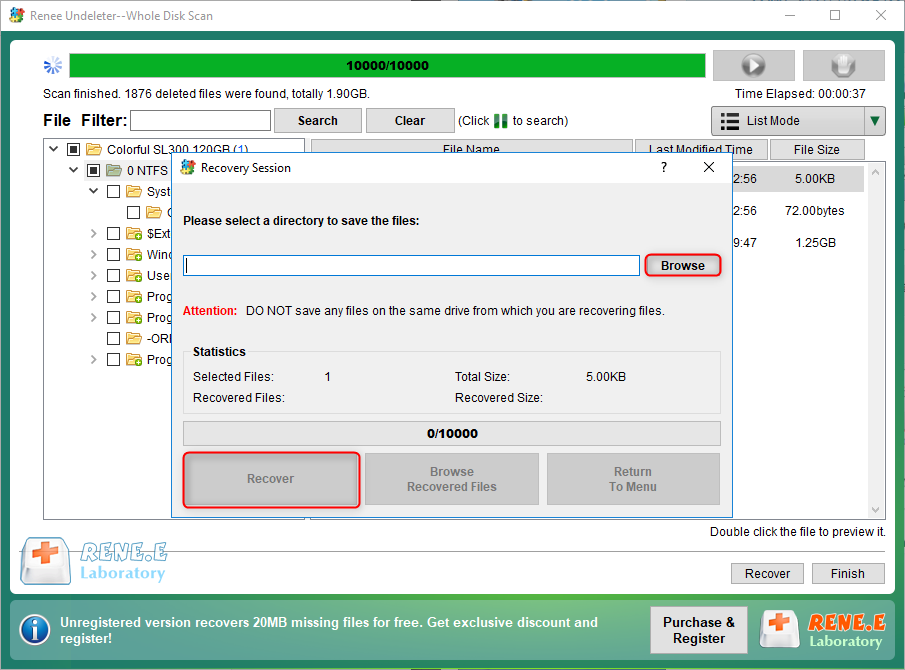
Step 4: Select the target folder, click (Browse) to choose another disk to save the recovered files, then click (Recover) to start the file recovery process.
recover files from whole disk scan with renee undeleter