31 August 2023Amanda J. Brook Senior Product Manager
Last update by Emma Johnson at 3 April 2024
Summary Discover the seamless method to safeguard your Windows 10 by backing up or transferring it to a USB flash drive. Our concise tutorial equips you with the essential steps to ensure your data's security, offering peace of mind for any eventualities. Dive in to gain valuable insights and be future-ready.
I. Why should I backup/transfer the Windows 10 system to a USB flash drive?
As computers become integral to work and daily life, backing up the Windows 10 system onto a USB drive is practical. It enables users to easily carry the backup and restore their system whenever needed. Moreover, transferring the Windows 10 system image to a USB drive and creating a Windows To Go workspace is advantageous for users who need to access their Windows environment on different computers, such as Macs, while traveling.
If you also have the need to backup/transfer the Windows 10 system to a USB flash drive, you can continue to view the methods shared below.
II. How to backup/transfer Windows 10 system to USB flash drive?
1. Use Renee Becca to back up Windows 10 to a USB flash drive
Renee Becca is a comprehensive tool for system and hard disk data backup and recovery. It enables you to safeguard vital computer data, including programs, system settings, emails, photos, videos, documents, and bookmarks. Utilizing advanced incremental/differential backup technology, it saves time and conserves disk space. Renee Becca supports various backup types such as system, partition, and file backup, as well as disk cloning and system migration to meet diverse requirements.
Renee Becca - Reliable Data Backup & Restore Software
Quick Backup files at up to 3,000MB/min.
Fullfill different backup needs Supports system backup, disk / partition backup, file backup and disk clone.
Intelligent Automatically analyze the differences between source and backup data.
Convenient Support VSS, allowing to freely view webpages when backing up system.
Highly compatible Supports various files and storage devices.
Quick Backup files at up to 3,000MB/min.
Fullfill different backup needs Backup for disk, partition and system. Save disk space by backing up incremental /differential data.
Highly compatible Supports various files and storage devices.
b, How to use Renee Becca to back up the system to a USB flash drive?
Backup system with Renee Becca is very simple, the specific operation steps are as follows:
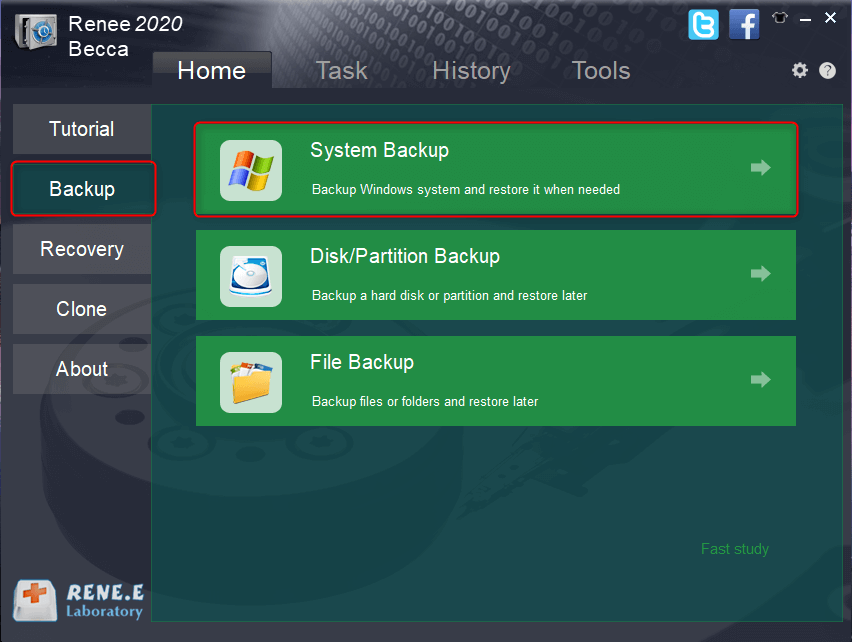
Step 1: Connect a USB flash drive with sufficient capacity to store the system partition to the computer, then download, install and run Renee Becca, and select the (System Backup) option in the main interface (Backup) column.
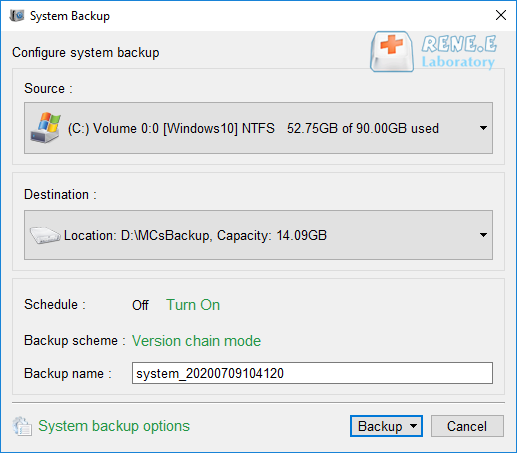
Step 2: Next, select the source file (device) and the destination. The source file (device) generally selects the system partition by default, and the destination can choose the location you want to save the system backup. Here, select the U disk.
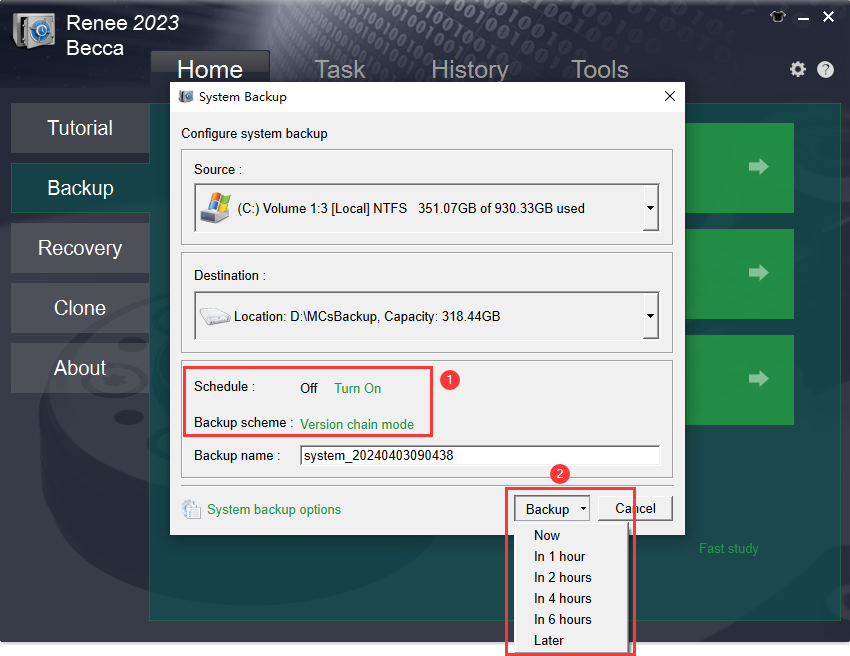
Ensure your U disk has ample capacity to enable the automatic backup functionality, allowing you to set up daily, weekly, or monthly backups at predetermined intervals. The software provides a range of backup options, including version chain, single version, full, incremental, and differential modes. Once in place, the system will consistently and autonomously execute backups, while also purging obsolete backups in accordance with the chosen strategy, thereby optimizing both time and storage efficiency.
Step 3: After all the settings are completed, click (Backup Now) and wait for the system backup to complete.
c, How to restore the backup system with the help of Renee Becca?
If you want to restore the system backed up to the USB flash drive to the computer, you can check the following content.
Notice: To successfully restore the system to a different computer, ensure that both the original and target computers are equipped with the same brand of CPU and motherboard. This is imperative since the system setup involves installation of hardware-specific drivers. Deviations in hardware can lead to incompatibilities that may necessitate a new product license for activation. Adhere to the following steps to execute the procedure.
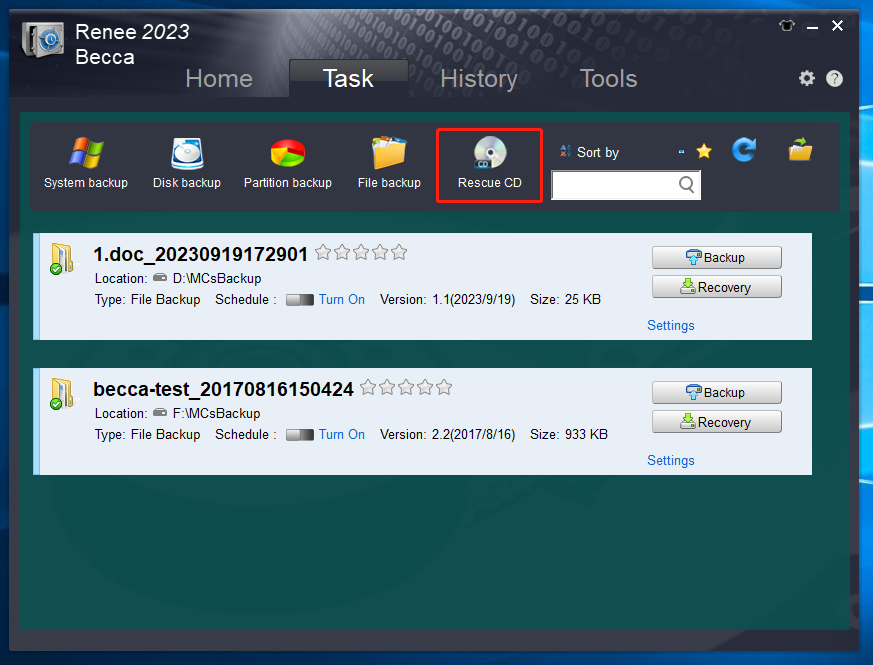
Step 1: Run Renee Becca, switch to (task) in the function bar at the top of the interface, and then select the (rescue disk) option.
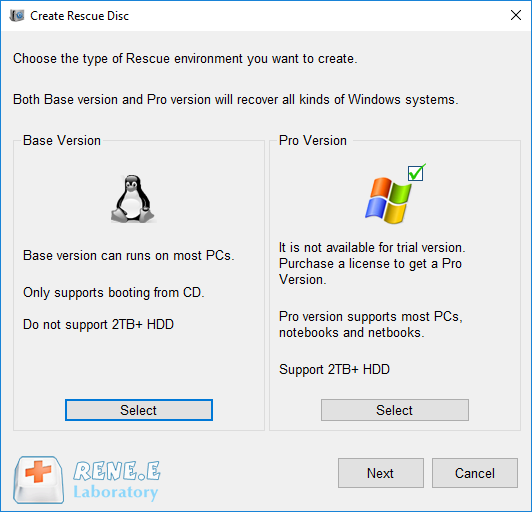
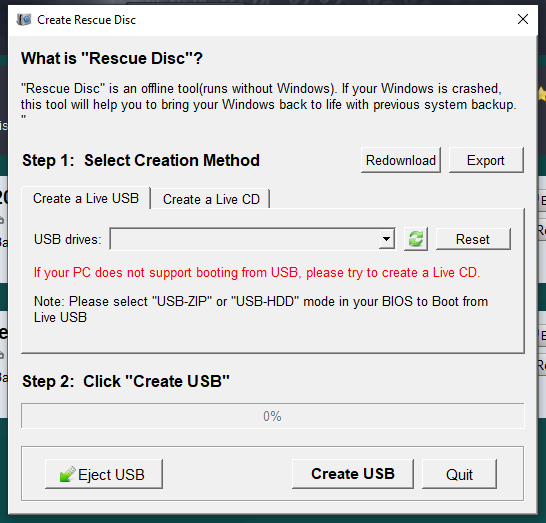
Step 2: Select the rescue disk type that matches your disk and system specifications. Connect a blank CD or USB drive to your computer and click ‘Select’ (Next) to begin crafting the boot disk. Confirm that the USB drive designated for the boot disk does not contain any system backups.
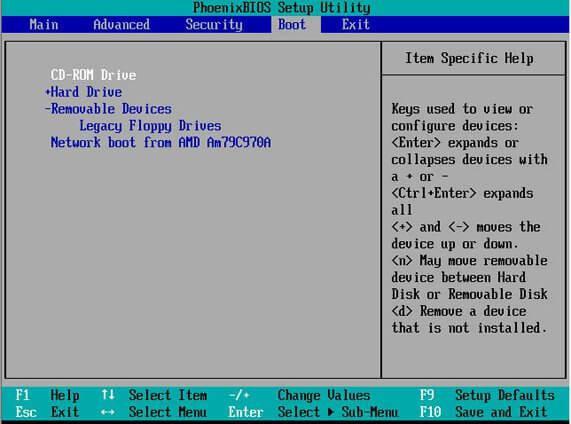
Step 3: Attach the boot disk (CD or USB drive) to the target computer. Restart the computer and access the BIOS interface using the appropriate shortcut key (typically F2, Del, or F12). Modify the boot sequence to prioritize the USB/CD boot disk. For example, in the BIOS interface, choose CD-ROM Drive to boot from a CD, or Removable Devices to boot from a USB flash drive.
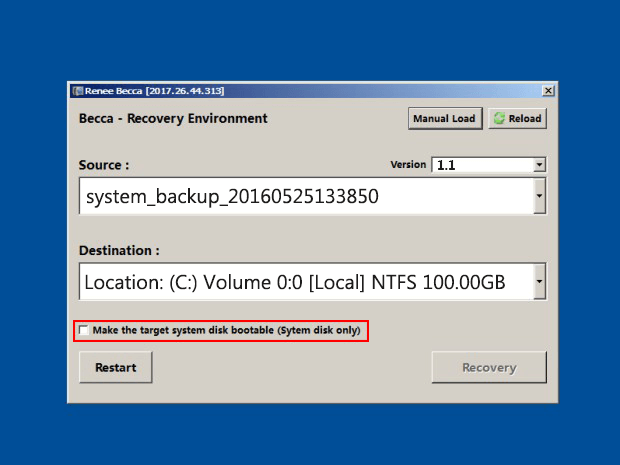
Step 4: After booting the system, select the appropriate backup version and designate the restoration destination. Insert your USB flash drive with the backup into your PC and choose it. Confirm that the “Let target disk can be booted” option is selected. To commence the system restoration process, click on “Restore“.
2. Transfer the system to the U disk through Windows To Go
Windows To Go allows users to boot and run Windows from USB storage devices, including flash drives and external hard drives. This functionality is restricted to Windows 10 Education and Windows 8/8.1/10 Enterprise editions. Nonetheless, it has been discontinued from Windows 10 version 2004 and later.
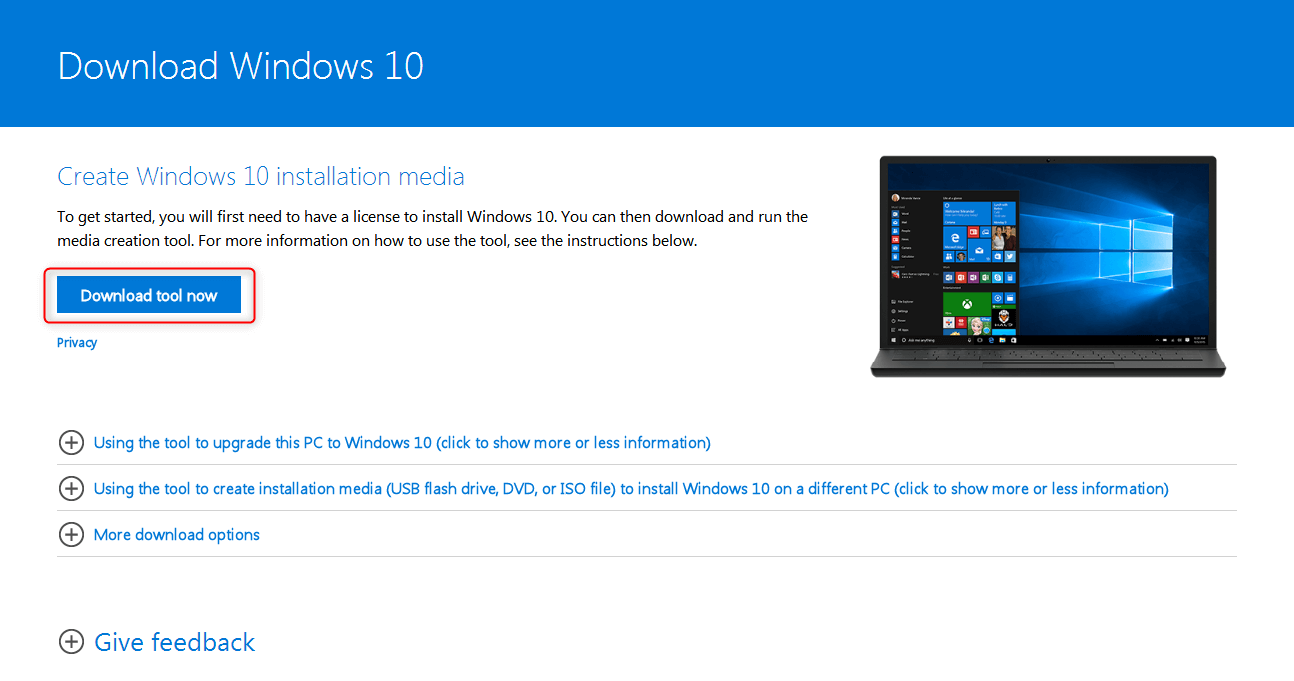
Step 1: Navigate to the official website at https://www.microsoft.com/software-download/windows10 to download the Windows 10 Enterprise Edition system image. Click the ‘Download Tool Now’ button to acquire the Media Creation Tool (MediaCreationTool.exe). If you already possess the system image file from an alternative source, advance to step 5.
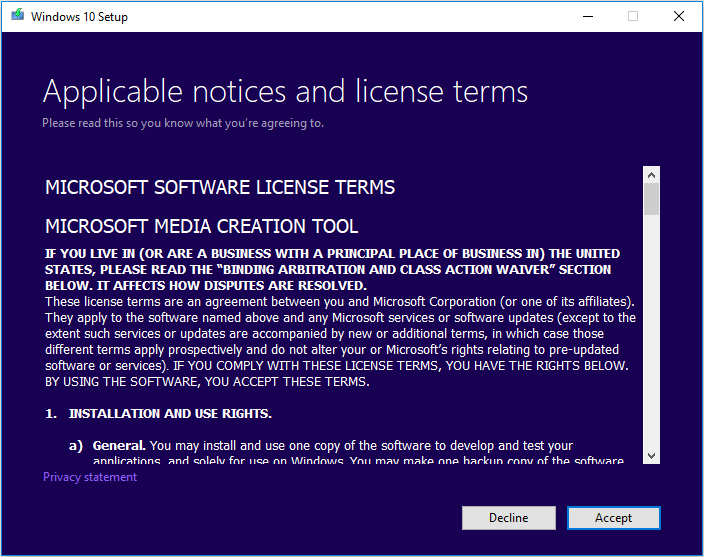
Step 2: Run the Media Creation Tool, and after reviewing the license terms, click the (Accept) button to continue.
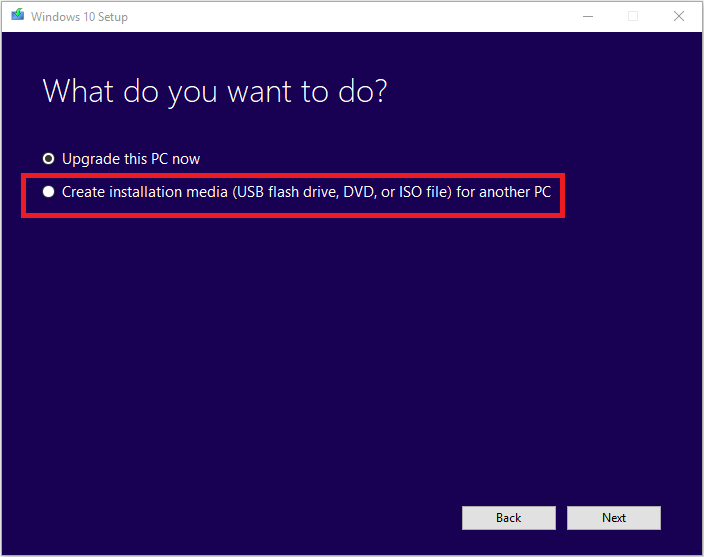
Step 3: Then select the (Create installation media (USB, DVD, or ISO file) for another computer) option and continue.
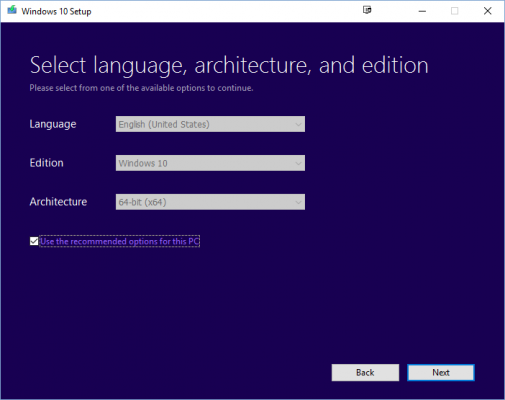
Step 4: Choose the language, version, and architecture for Windows 10. Select the default (Use the recommended option for this PC), click Next, choose ISO file, and the system image ISO file will download to your computer.
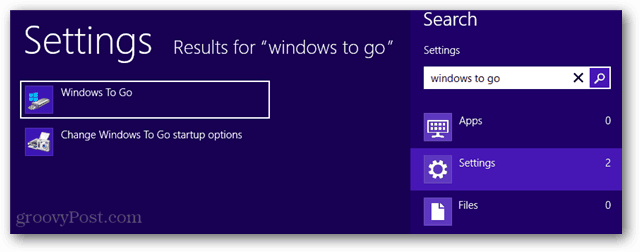
Step 5: Download the system image file and connect a USB flash drive with a minimum of 32GB to your computer. For storing additional content such as work files or applications, consider using a 128GB drive or larger. Use the search box in the lower left corner of your desktop to search for “Windows To Go” and initiate the feature by launching it.
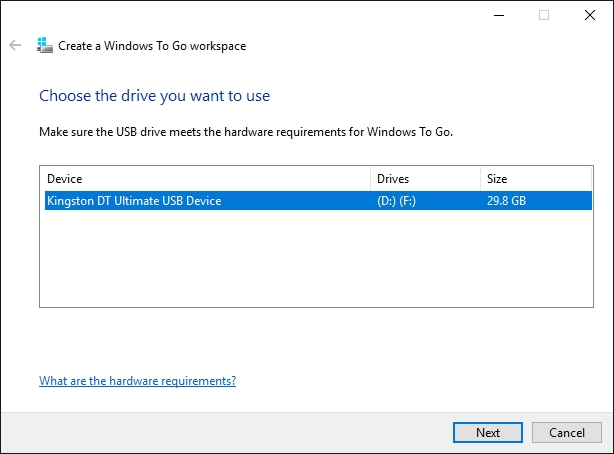
Step 6: In the “Create Windows To Go Workspace” window, select the USB flash drive that needs to store the Windows 10 system.
Step 7: Click (Add Search Location) to search for the Windows 10 installation ISO file. It is recommended that you choose the Enterprise Edition.
Step 8: Verify and finalize the details in the “Use BitLocker in my Windows To Go workspace” section, or opt to Skip if not applicable. Upon completion of the system image transfer, click “Yes” to configure the PC to boot from the newly created USB drive, or select “No” if you intend to use the Windows To Go workspace on different computers.
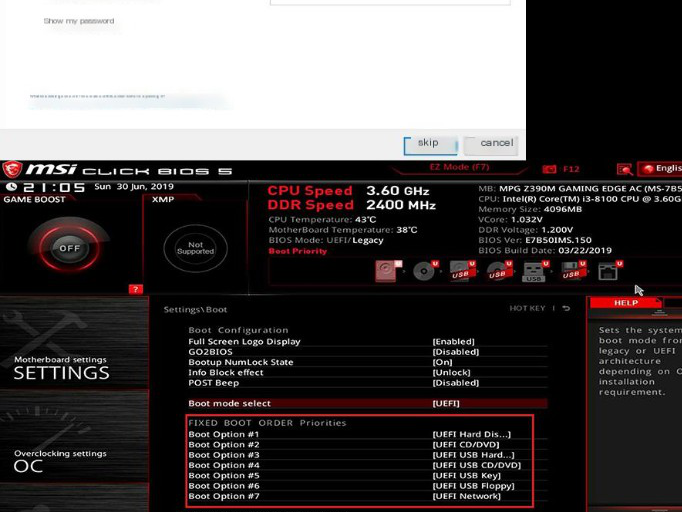
Step 9: After the Windows To Go workspace is established on the USB drive, plug it into the target PC. Reboot the system, and during startup, press the designated key to access the BIOS or UEFI settings. Subsequently, set the USB drive as the primary boot device in the boot sequence.
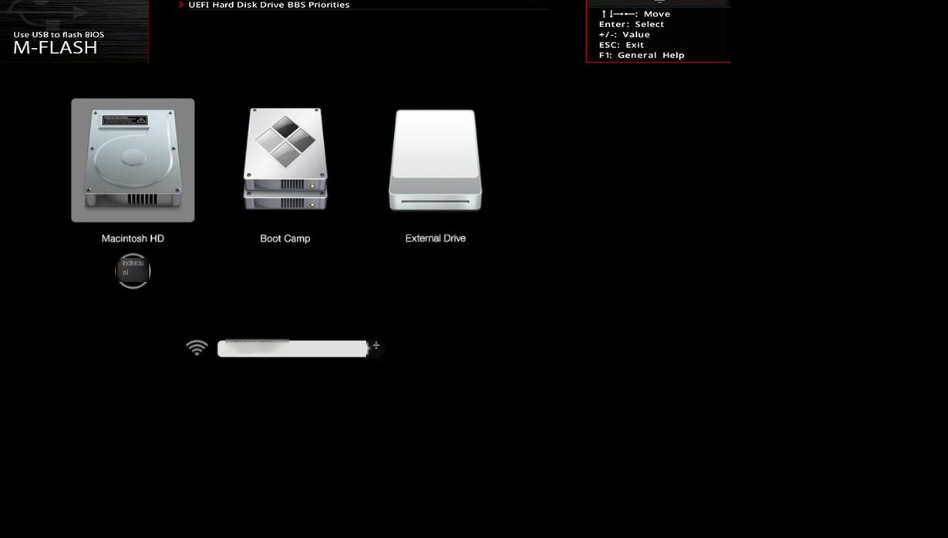
If you want to access the system in the U disk in the Mac computer, you can press and hold the (Option) key when starting the Mac computer until the boot switch menu appears, and select the U disk to access the Windows system inside.
To use Windows To Go on a Mac for the first time:
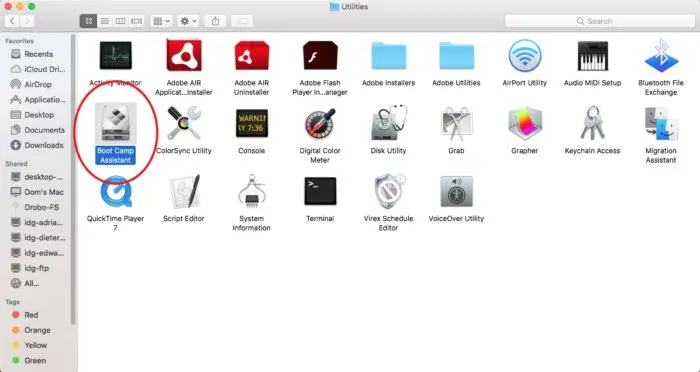
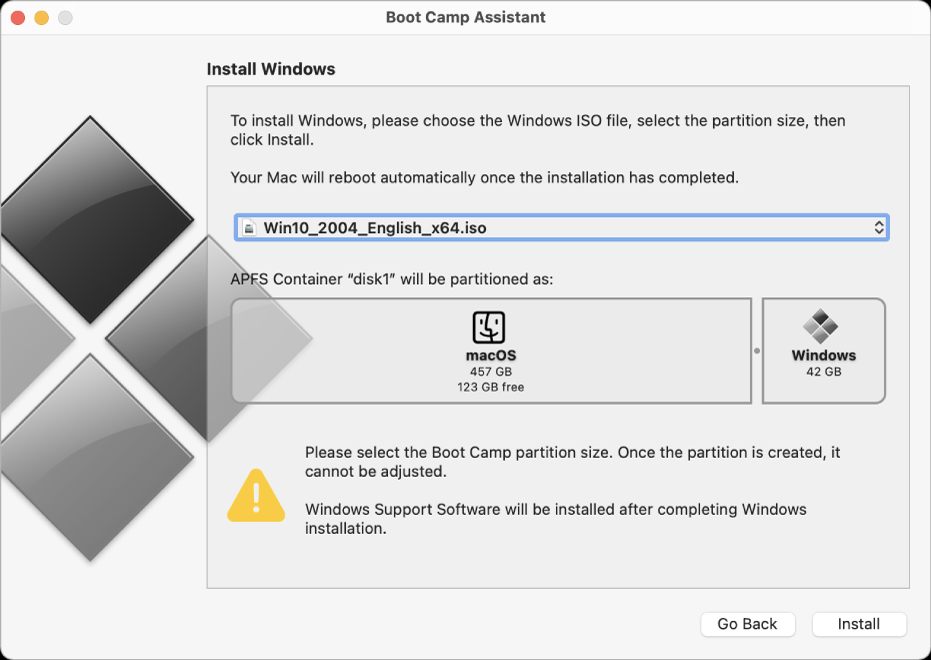
Boot the Mac and run the Conversion Assistant.
Go to the top menu bar, select “Operation,” then choose “Download Windows Support Software.”
Save the WindowsSupport folder to a USB drive or external hard drive.
After booting your Mac from Windows To Go, connect an external mouse or hard drive if needed.
Once in Windows, connect the drive with the WindowsSupport folder, open it, and execute the BootCamp.exe file to install necessary drivers.
Use the Alt key to access the boot menu during the Mac startup to select the Windows To Go drive.