Lost Files After Cut and Paste in Windows? 5 Fast Ways to Recover
15 July 2025Amanda J. Brook Senior Product Manager
Last update by William Davis at 15 July 2025
Summary Learn how to recover cut files in Windows quickly using five proven methods. This guide helps users restore lost data, offering step-by-step solutions to recover cut files windows and minimize data loss.
Losing a file during a cut-and-paste operation can feel like a disaster. You hit Ctrl + X to move a file, but before you can paste it with Ctrl + V, something goes wrong—a system crash, a power outage, or just a simple mistake. Suddenly, your file is gone. Don’t panic! Your data is often recoverable. This guide walks you through five straightforward methods to recover cut files on Windows, with clear steps to get your files back fast. Act now to avoid overwriting your data, and let’s dive in!
Common Reasons You Need to Recover Cut Files in Windows
The cut-and-paste process seems simple, but several things can go wrong, leaving your files in limbo. The table below lists common reasons for file loss, where the data might be, and the best recovery method from this guide.
Reason for Loss
Last Location of File Data
Recommended Recovery Method
User Interruption (e.g., user cancel operation) / System Interruption (e.g., power outage, system crash)
Likely still on the original drive, not yet overwritten
Method 2: Use Data Recovery Software
Method 3: Use Built-in Windows Tools
Human Error (e.g., overwriting clipboard, forgetting to paste)
May still be on the original drive or lost in clipboard
Method 1: Use Windows Search to Find Cut Files
Hardware or File System Issues (e.g., faulty drive, corrupted USB)
Possibly partially written to the target drive or lost
Method 2: Use Data Recovery Software
Software Conflict (e.g., antivirus or clipboard manager interference)
Likely overwritten or untraceable in file system
Method 2: Use Data Recovery Software
Method 4: Use Windows File Recovery
Method 3: Use Built-in Windows Tools
Critical Tip: Stop using your computer immediately after losing a file. Saving new files or installing software can overwrite the space where your lost file resides, making recovery nearly impossible.
How to Recover Cut Files in Windows
If the Ctrl + Z (Undo) command doesn’t work because the file is no longer visible, try these five reliable methods to retrieve your data.
Method 1: Use Windows Search to Find Cut Files
Sometimes, a file isn’t truly lost—it’s just misplaced in a subfolder or another directory, or it’s still in the clipboard. Before trying advanced tools, first attempt to paste the file and then use Windows’ built-in search feature to locate it. Make sure to enable the “Show hidden files” option to catch any hidden files.
Step 1: Try Pasting with Ctrl + V again
Navigate to the folder where you intended to paste the file. Press Ctrl + V to paste. If the file appears, move it to a safe location and you’re done!
Step 2: Enable Show Hidden Files
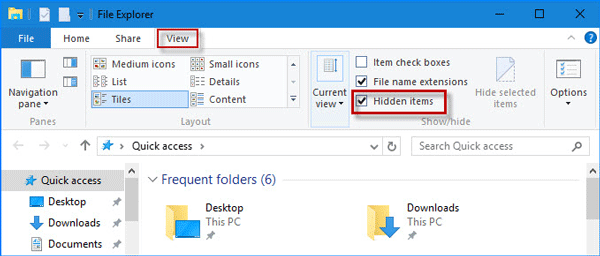
In File Explorer, click View in the top menu (or the three dots in Windows 11).
Select Show > Hidden items.
Step 3: Search for the File
1. In File Explorer, navigate to the drive or folder where the file was last located (e.g., D: drive or Documents).
2. Click the Search bar in the top-right corner or press Ctrl + F.
3. Type the file name or part of it (e.g., “vacation” for “vacation.jpg”). You can also use file type filters like *.jpg for images or *.docx for documents.
4. Press Enter and check the results, including subfolders or unexpected locations (e.g., Desktop or Downloads).
5. If the file appears, right-click it, select Open file location, and move it to a safe folder.
If the file isn’t found, avoid saving new files to the drive to prevent overwriting your data. Proceed to the next method for deeper recovery options.
Method 2: Use Data Recovery Software
If you can’t find your file in either the source or target folder, it likely means the file is still on your computer but not easily accessible. When a file is “lost”, it’s often still on the drive, marked as available for overwriting. Data recovery software can scan the drive and recover these files before they’re gone for good. Renee Undeleter is a user-friendly option with a free version that recovers up to 200MB—great for small documents or photos. For larger files, consider the paid version or alternatives like EaseUS Data Recovery Wizard, Disk Drill, Recuva, or AnyRecover.
Steps to Use Renee Undeleter
Step 1: Download, install, and run Renee Undeleter on your Windows computer.
Renee Undeleter - Powerful Data Recovery Software
Easy to use Only simple steps to recover data from storage devices.
Multiple scan modes Fast partition scan, whole partition scan and whole disk scan for different recovery needs.
File types Support to recover pictures, videos, audios, documents, mails, etc.
3000 users have downloaded Renee Undeleter and found data back!
Important Tip: Install the software on a different drive from where your file was lost to avoid overwriting data. Don’t save new files to the same partition.
Step 2: Select the [ Fast Partition Scan ] option in the main interface.
Renee Undeleter offers several recovery modes:
- Fast Partition Scan: Recovers files from accidental deletions or Recycle Bin.
- Whole Partition Scan: Restores files from formatted or inaccessible partitions.
- Whole Disk Scan: Analyzes entire disk for comprehensive recovery.
- Image Creation: Creates a partition backup for safe recovery.
Step 3: Select the partition where the lost data is located and click [ Next ] .
You can also try scanning both the source and target drives to locate any lost files.
Step 4: Choose the [ Fast Scan ] option and click [ Next ] to start scanning.
Fast Scan checks the first 30GB of the disk. If it fails, use Deep Scan for a thorough search, though it takes longer.
Step 5: Wait for the scan to complete.
Double-click files to preview, select those you want, and click [ Recover ] to save them to another disk.
Pro Tip: Choose a safe disk for installation and recovery to avoid overwriting. If Fast Scan fails, Deep Scan may find more files.
Act fast with recovery software, as delays increase the risk of data being overwritten.
Method 3: Use Built-in Windows Tools
Windows offers built-in tools like OneDrive and File History, which can recover files if backups were previously enabled. These are great for non-technical users and require no additional software.
Check OneDrive
If you use Windows 10 or 11 with a Microsoft account, OneDrive may have backed up folders like Documents, Pictures, or Desktop. Lost files might be in the cloud or OneDrive’s Recycle Bin.
2. Click Recycle Bin in the left menu and browse for your file.
3. Select the file and click Restore to return it to its original OneDrive folder.
Check Other Cloud Services
If you use Google Drive or Dropbox, check their trash or deleted files section:
- Google Drive: Go to drive.google.com, click Trash, and restore if found.
- Dropbox: Visit www.dropbox.com, check Deleted files, and recover as needed.
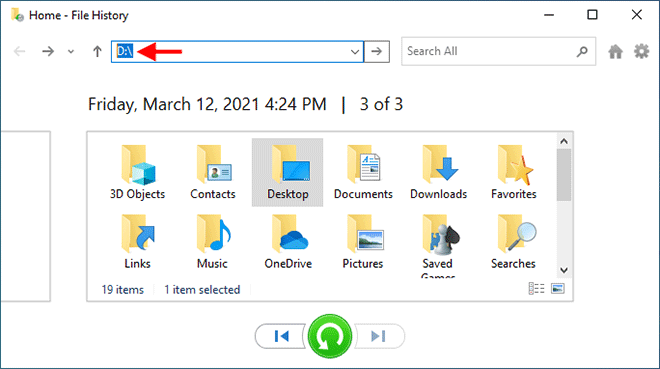
Use File History
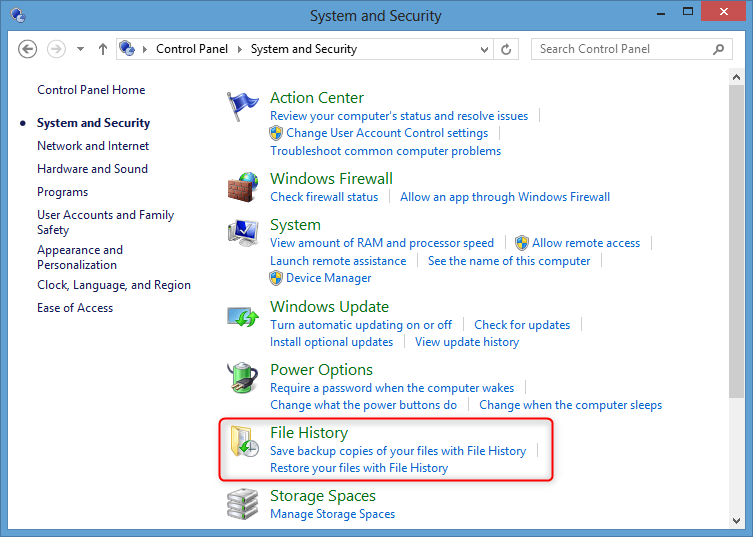
Before using File History, ensure it is enabled in Control Panel > System and Security > File History. If not enabled, this method won’t work.
File History, if enabled, saves copies of files in folders like Documents and Pictures.
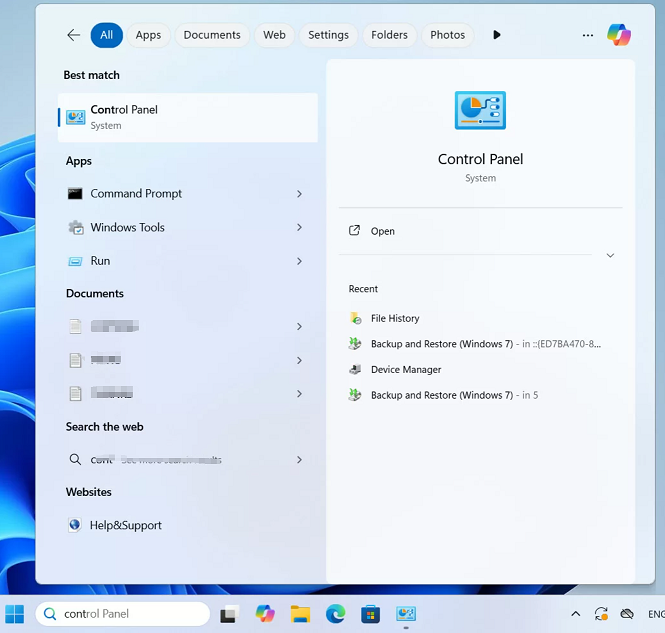
Open the Start menu, type Control Panel, and select it.
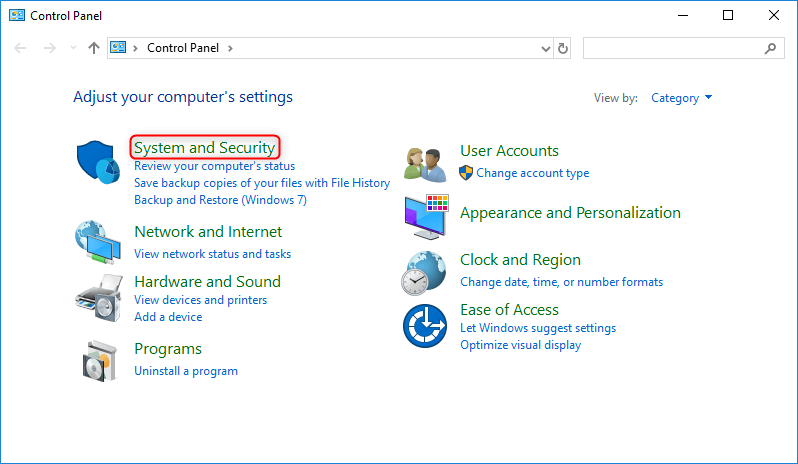
Click System and Security, then File History.
Select Restore personal files from the left menu.
Browse backups using the arrow buttons, find your file, and click the green Restore button.
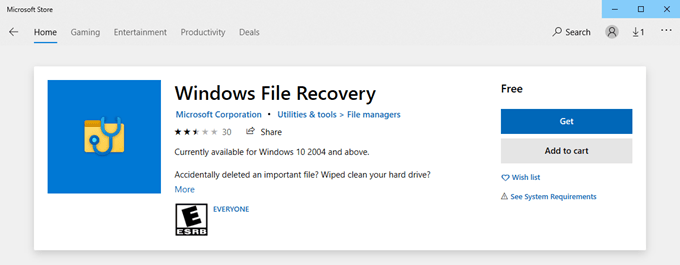
Method 4: Use Windows File Recovery
Windows File Recovery is a free command-line tool from Microsoft for Windows 10 and 11 (Microsoft Store). It’s ideal for recovering files from NTFS, FAT, or exFAT drives, especially after cut-and-paste failures. While it requires some technical know-how, it’s powerful and free.
Steps to Use Windows File Recovery
1. Download and install Windows File Recovery from the Microsoft Store if not already installed.
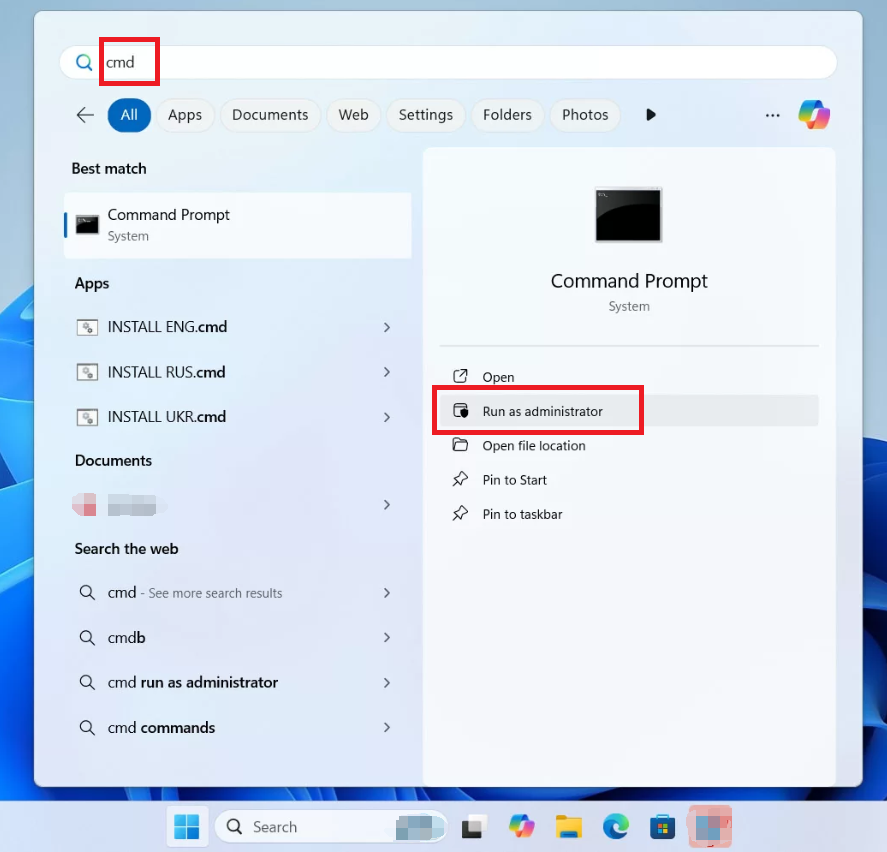
2. Open Command Prompt as administrator (search “cmd” in Start, right-click, select Run as administrator).
3. Run a basic recovery command:
winfr C: D: /regular /n .
C: is the source drive where the file was lost.
D: is the destination drive for recovered files (must be different to avoid overwriting).
/regular is for recent deletions; use /extensive for deeper scans (takes longer).
This targets Word documents, PDFs, or a specific file named “important_file.txt.”
Follow the prompts to confirm recovery. Files will be saved to a folder on the destination drive (e.g., D:\RecoveredFiles).
Important Notes:
- Always use a different destination drive to avoid overwriting data.
- If you’re unsure of the file name, use /extensive for a thorough scan, but it’s slower.
- Check the recovered files for integrity, as some may be partially corrupted.
Example Command for USB Drive:
If your file was lost on a USB drive (e.g., F:), recover to another drive (e.g., D:):
winfr F: D: /regular /n *.jpg
Troubleshooting Tip: If the command fails, ensure you’re running as administrator and double-check drive letters (use diskpart and list volume in Command Prompt to confirm).
Method 5: Advanced Recovery Options
For tough cases where other methods fail, these advanced techniques can help, though they’re more technical.
When to Use chkdsk
Use it when you suspect file system errors (e.g., files disappear after a crash or USB disconnect). It’s a low-risk step that can fix issues before trying data recovery tools. However, it won’t recover files that have been overwritten.
Fix File System Errors with Command Prompt
File system errors can hide files or make them inaccessible. The chkdsk command checks and repairs disk errors, potentially restoring access to lost files.
Open Command Prompt as administrator (search “cmd” in Start, right-click, select Run as administrator).
Fix File system to retrive lost files
Type
chkdsk C: /f
(replace C: with your drive letter) and press Enter to fix file system errors.
What it does: chkdsk /f scans the drive for logical errors in the file system (e.g., corrupted file allocation tables or directory entries) and repairs them. This can restore file paths lost during a cut-and-paste operation, making files visible again.
For example, if a system crash corrupted the file system, chkdsk may restore access to the file by repairing its directory entry.
Benefits: It’s free, built into Windows, and can improve the success rate of recovery software by fixing underlying issues. It’s especially useful for external drives (e.g., USBs), common in cut-and-paste failures.
Note: In many cases, files recovered by chkdsk may lose their original names and appear as .chk files (e.g., chk00001.chk) inside the Found.000 folder. To restore these .chk files to their original names, refer to: Understanding the Found.000 Folder on Windows 10/11 Systems.
Unhide hidden files
To unhide files that may have been marked as system or hidden files, run:
Run Command Prompt as administrator before executing this command.
attrib -h -r -s /s /d C:\*.*
What it does: Removes hidden (-h), read-only (-r), and system (-s) attributes from files and folders (/s /d) on the specified drive. This can reveal files hidden due to file system errors.
Benefits: Simple and quick, it may make files visible without needing recovery software.
Use System Restore
System Restore reverts your PC to a previous state, which may recover lost files if they were present in a prior backup. Use this as a last resort, as it affects system settings.
1. Search for Create a restore point in the Start menu.
2. Click System Restore and choose a restore point from before the file loss.
3. Follow the prompts to complete the process and check for your file.
FAQs: Your Questions on Recovering Cut Files in Windows
How can I recover cut-and-paste files without software?
Check OneDrive, Google Drive, or Dropbox trash bins, or use File History if enabled (Method 3). Windows File Recovery (Method 4) is another free option, though it’s command-line-based.
Can I recover cut files on an Android phone using these methods?
No, these methods are specific to Windows. For Android, check cloud services like Google Photos or Drive in their “Trash” folders.
Renee Undeleter - Powerful Data Recovery Software
Easy to use Only simple steps to recover data from storage devices.
Multiple scan modes Fast partition scan, whole partition scan and whole disk scan for different recovery needs.
File types Support to recover pictures, videos, audios, documents, mails, etc.