author avatar
    Specialist of Customer Service Dept.
 

Summary
Learn how to create and restore a system image on Windows 10. This comprehensive article will guide you through the process for a better understanding.


system image backup windows 10

I. What is system image backup? How to create and restore?

1. What is system image backup?

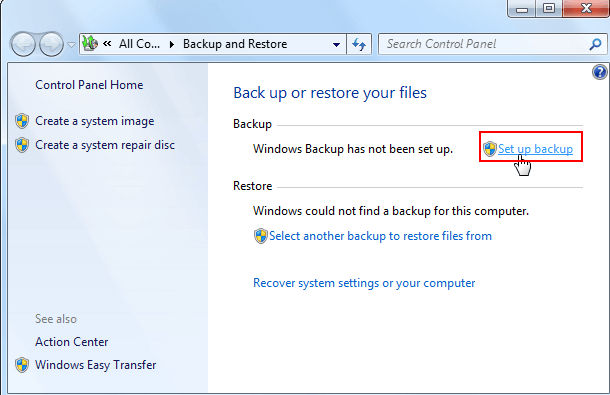
System image backup generally refers to “creating a system image” in the Windows 10 system. A system image is a copy of the drive required to run Windows. After creating a system image, users can restore the computer when the hard drive or the computer fails, but cannot Restore an individual item. The setting path for creating a system image is: Control Panel – System and Security – Backup and Restore (Windows 7) – Create a System Image. In fact, under the same interface, there is another backup function, that is, the Windows backup function. After clicking on the right side (Set Backup), you can set the location to save the backup and the content to be backed up. You can choose the content to be backed up, which can include hard drives and system image, and also set up a backup schedule.
In comparison, the system image can be created only once, and then enter the system recovery environment to restore the system image when the computer cannot operate, while Windows backup is more inclined to daily file backup, and the system image can be regularly backed up when the system is running normally and other important documents.
Create system images and backup settings

2. How to create a system image?

Step 1: Run the computer, enter (control panel) in the search box in the lower left corner and enter the application.
Go to Control Panel application
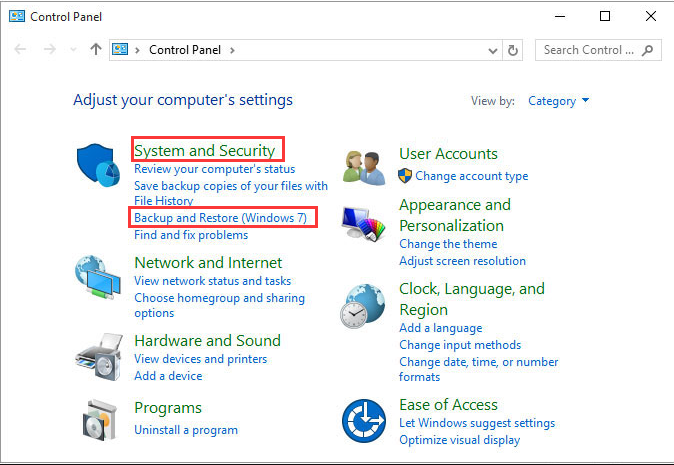
Step 2: Next, click into the (System and Security) option.
Go to System and Security Options
Step 3: After that, click into the (Backup and Restore (Windows 7)) option.
Click to enter the backup and restore option
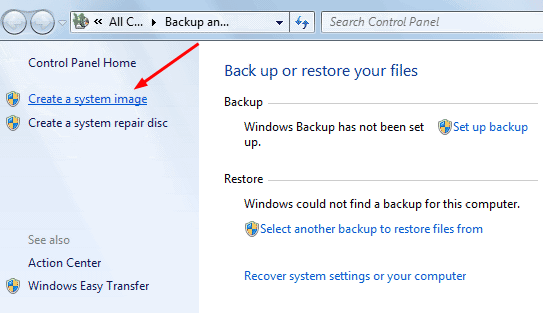
Step 4: Then click on the (Create System Image) button.
Create a system image
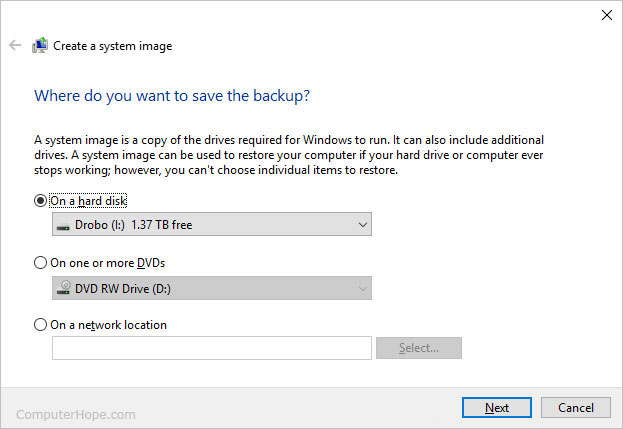
Step 5: On the “Where do you want to save the backup” interface, select the hard disk where you want to save the system image backup. After that, follow the step-by-step instructions on the page to successfully create a system image.
Choose where to save the system image

3. How to restore the system image?

Step 1: Click (Start) – (Settings), select (Update and Security) in the interface. From the (Recovery) menu, select (Restart Now) under Advanced Startup to enter the Windows Recovery Environment. If you can no longer enter the Windows system normally, you can also try to press the power button to shut down the computer, press the power button immediately when the Windows logo appears, repeat this three times, and it will automatically enter the Windows recovery environment after the third restart.
Advanced Startup and Restart Now from the Recovery Menu
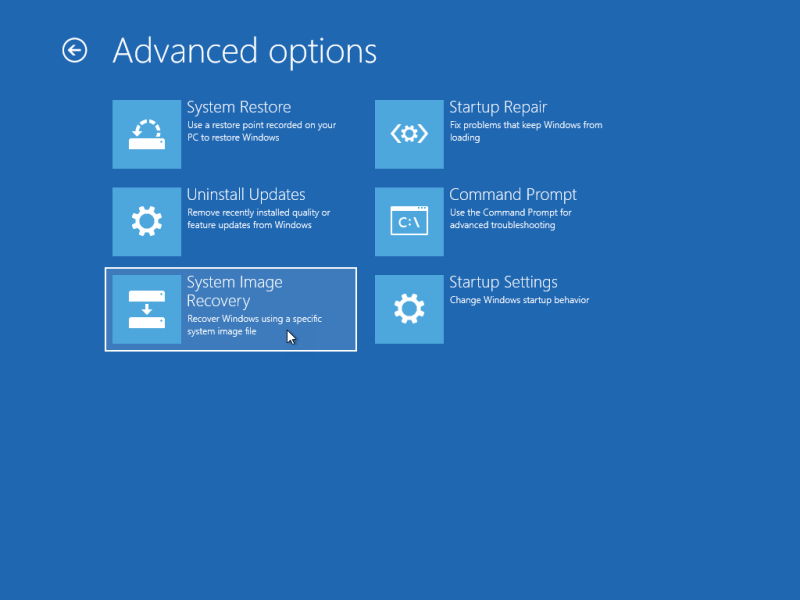
Step 2: Then select (Troubleshooting) – (Advanced Options) – (System Image Recovery).
System Image Recovery under Advanced Options
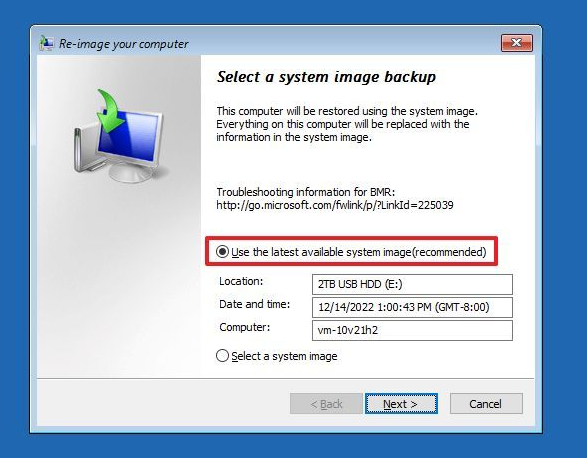
Step 3: After entering the system image recovery, select the current account and enter the password. If no password is set, the password is empty, and the next step is performed directly. In the new window that pops up, you can choose the (Use latest available system image) or (Select system image) option. By default, the system recommends using the latest backup system image file, of course, you can also manually select the system image version to be restored. Then, click (Next).
Re-image your computer Select system image backup
Step 4: Finally, confirm the system image. After the selection is correct, click (Finish), and the computer will start to restore the system image. Please wait patiently. In addition, if it is a laptop, it needs to be plugged in.

II. Simpler and more convenient Windows 10 system backup software: Renee Becca

1. What is Renee Becca?

Renee Becca It is a tool specially used for system/hard disk data backup and restoration. It can help you back up and restore important data in your computer, such as programs, system configuration, emails, photos, videos, documents, bookmarks, etc. It adopts the leading incremental/differential backup technology, which can save you more time and disk space. In addition to supporting system backup, it also supports partition backup, hard disk backup, file backup, and disk cloning to meet your needs. need. In addition, the software also supports the establishment of automatic backup plans, saving time and trouble.
Renee Becca - Reliable Data Backup & Restore Software

Quick Backup files at up to 3,000MB/min.

Fullfill different backup needs Supports system backup, disk / partition backup, file backup and disk clone.

Intelligent Automatically analyze the differences between source and backup data.

Convenient Support VSS, allowing to freely view webpages when backing up system.

Highly compatible Supports various files and storage devices.

Quick Backup files at up to 3,000MB/min.

Fullfill different backup needs Backup for disk, partition and system. Save disk space by backing up incremental /differential data.

Highly compatible Supports various files and storage devices.
Free TrialFree Trial 2000 users have downloaded and enjoy Renee Becca!

2. How to use Renee Becca to backup Windows 10 system?

Backup system with Renee Becca is very simple, the specific operation steps are as follows:
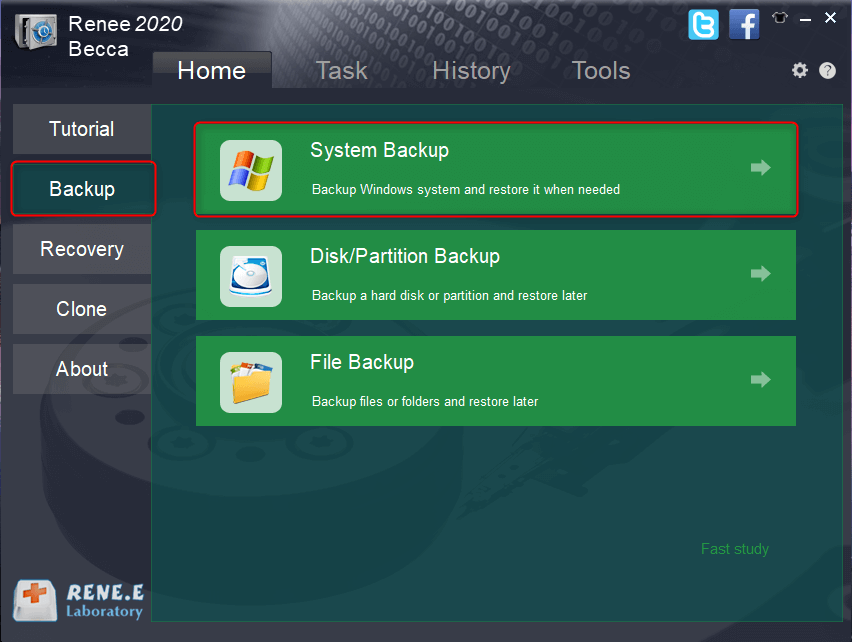
Step 1: Download, install and run Renee Becca on the computer, and select the (System Backup) option in the main interface (Backup) column.
Renee Becca System Backup
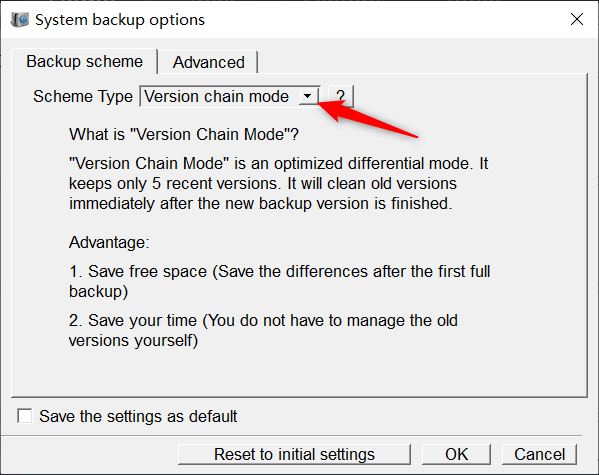
Step 2: Next, select the source file (device) and the destination. The source file (device) generally selects the system partition by default, and the destination can choose the location you want to save the system backup. In (backup plan), you can choose according to your personal needs Choose a suitable backup scheme. Renee Becca has 5 backup schemes to choose from, namely version chain mode, single version mode, overall mode, incremental mode and differential mode.
System Backup Choose a backup plan
Renee Becca has 5 backup plans to choose from:
Version chain mode: Only the latest 5 versions are kept, and useless old versions are automatically deleted after the backup is complete.
Single version mode: Only the most recent version is kept, and the previous version is automatically deleted after the backup is complete.
overall pattern: Create a full backup.
Incremental mode: After the initial full backup, only incremental backups are created.
diff mode: After the initial full backup, only differential backups are created.
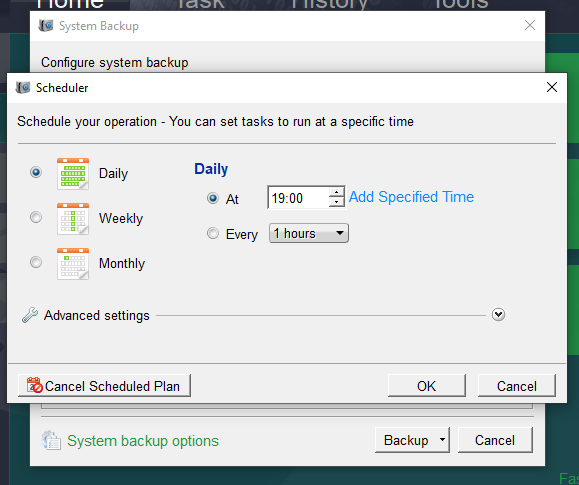
In addition, in (task plan), you can set a daily/weekly/monthly automatic backup plan and the time to start the backup, click (OK) to enable the automatic backup function.
System backup Turn on automatic backup
Step 3: After all settings are completed, click (Backup Now), and you can check the backup progress in the task bar. If you need to restore the system, please check thesystem Restore A step of.
System backup progress