

Fix 0×00000109 (CRITICAL_STRUCTURE_CORRUPTION) Blue Screen Error with Easy Solutions

Summary
Learn how to fix the 0x00000109 (CRITICAL_STRUCTURE_CORRUPTION) error with proven solutions in Windows 10/11/8/7. This guide also walks you through safe data recovery and transfer steps using Renee PassNow, especially when your system fails to boot or crashes unexpectedly.


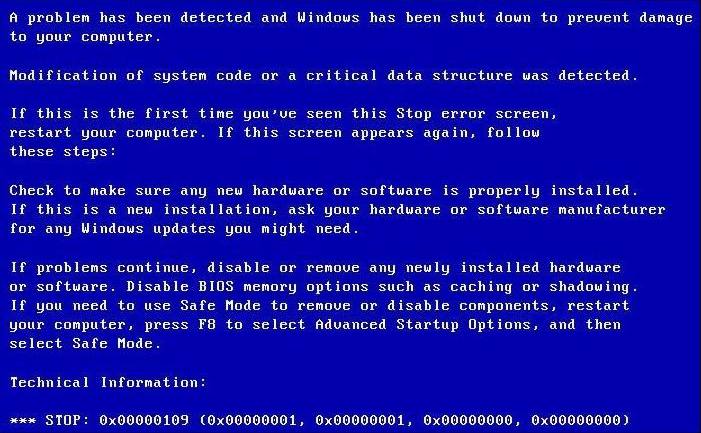
The 0x00000109 error (CRITICAL_STRUCTURE_CORRUPTION)
* During Gaming or Heavy Load: If you experience a BSOD while gaming or under high system load, it’s often caused by faulty RAM, conflicts with antivirus software (such as Kaspersky), or outdated drivers.
* Random Freezes: Frequent system restarts may occur due to virus infections, disk read/write errors, or sudden power loss—raising concerns about potential data loss.

0xc00000e, startup failures, and black or blue screen errors. Compatible with Windows 11/10/8.1/8/7/XP/Vista, it caters to a wide range of system rescue requirements.
Remove Windows Login Password 3 steps for whole password remove process.
Recover the files Recover the deleted files without Windows system.
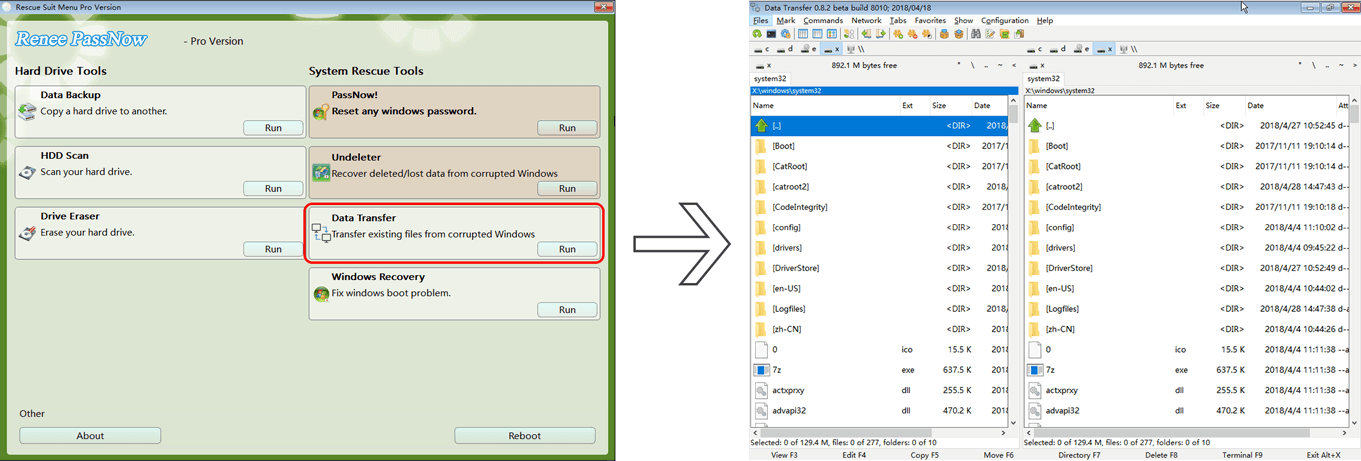
Transfer the data Transfer the important files of the computer with system.
Multifuctional Data transfer, data recovery, bootable problem recovery can be run without system.
Highly compatible Windows 11/10/8.1/8/7/XP/Vista. UEFI boot.
Remove Login Password Support Windows 11/10/8.1/8/7/XP/Vista. UEFI boot.
Recover the files Recover the deleted files without Windows system.
Transfer the data Transfer the important files of the computer with system.

To transfer data, select the source drive (e.g., C) on the left, the destination drive (e.g., G) on the right, choose your files, and click Copy.
To delete a file, select it and click Delete. Note: Deletion is permanent—use with care.
Power key button for 10 seconds to shut down the computer. Next, press the power key again to start the computer.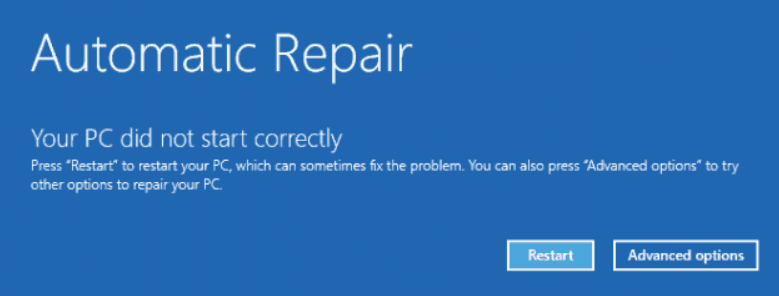
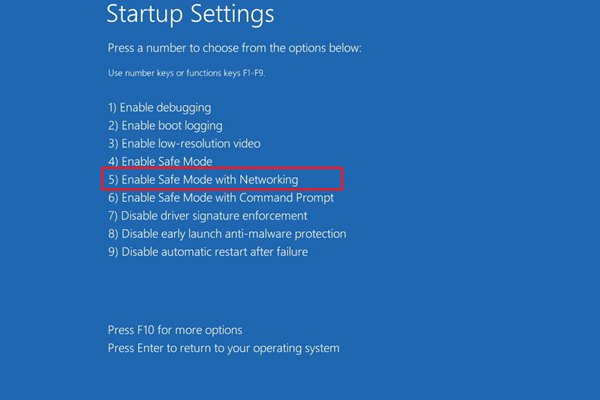
After restart, press 4 or F4 to boot into Safe Mode.
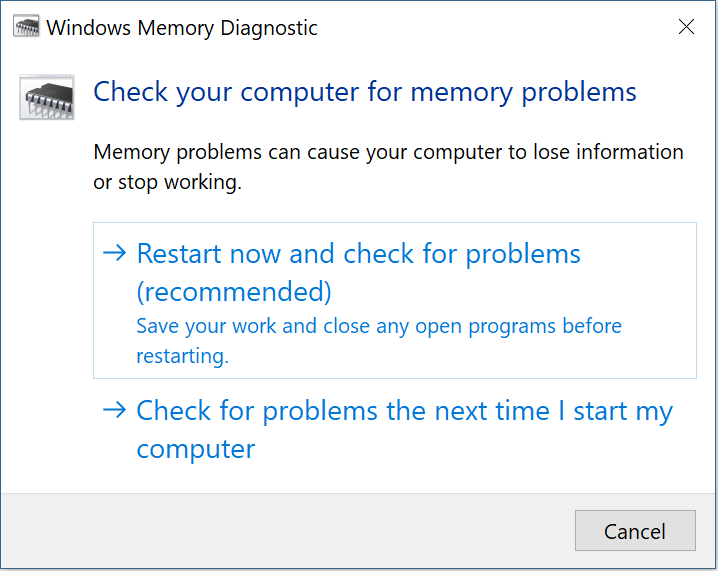
mdsched.exe) command to open the Windows Memory Diagnostic Tool.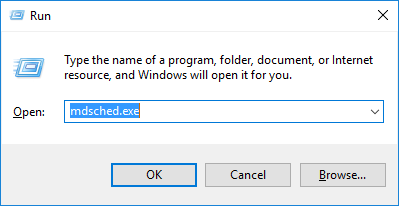


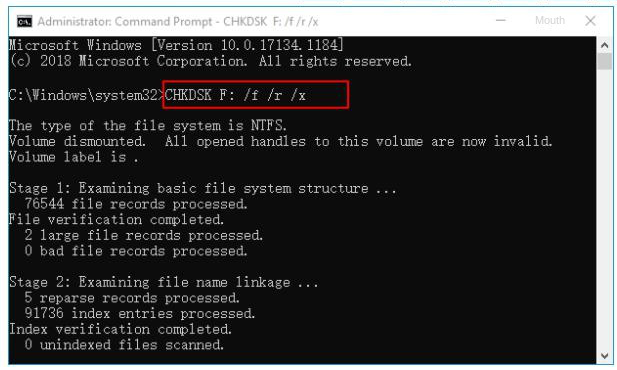
To address hard disk issues causing the 0×00000109 error, use the chkdsk utility. Follow these steps to run the program and repair the disk:

chkdsk C: /f /r /x
- /f — Fixes disk errors
- /r — Finds bad sectors and recovers readable data
- /x — Forces the drive to dismount before scanning
Press Enter to begin the scan. Once the process is complete, restart your computer to see if the issue has been resolved.
5. Run System File Checker (SFC) and DISM Commands
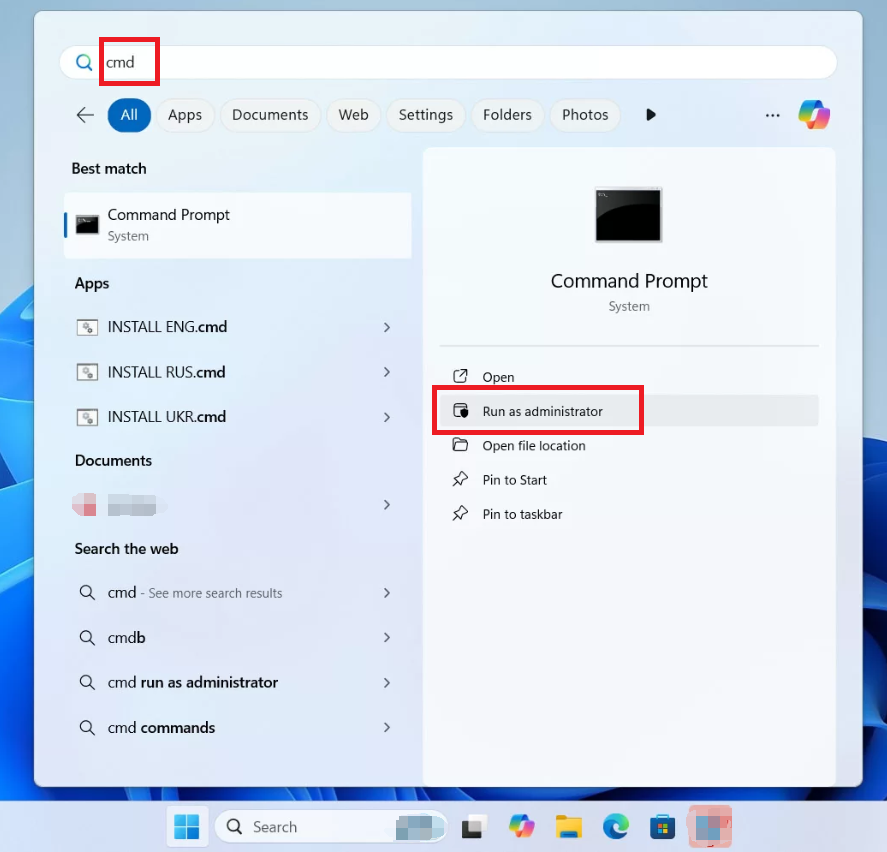
sfc /scannow and press Enter. This scans and repairs corrupted files.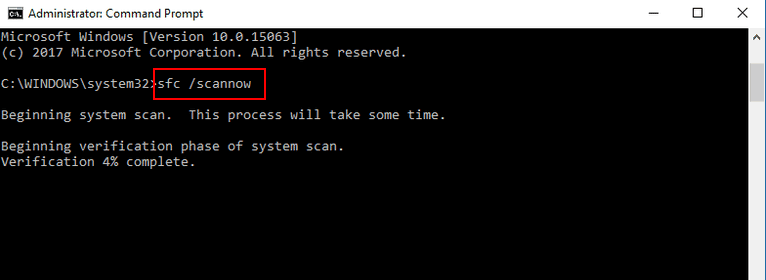
DISM /Online /Cleanup-Image /RestoreHealth
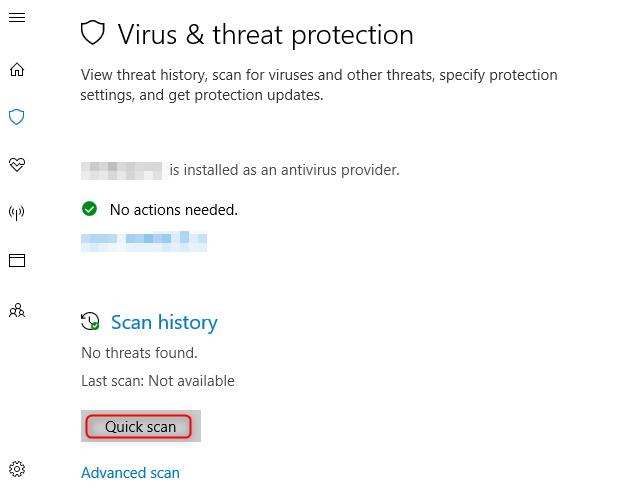
6. Scan for Malware or Viruses
Summary: Resolving the 0x00000109 Error
Before performing any repairs, use Renee PassNow to back up or recover important files (see Section II) to prevent data loss.
To avoid future errors, keep your system up to date, use trusted antivirus software, and maintain regular backups. If the problem persists after completing all steps, consider seeking help from a professional technician or reinstalling Windows.
Relate Links :
Easy Solutions for Fixing HP Computer's SMART Hard Disk Error 301 Error

12-09-2023
Jennifer Thatcher : Learn how to solve the SMART hard disk error 301 prompt on HP computers with this comprehensive article...
Fix the Blue Screen Error Code Process1 Initialization Failed in Windows

12-09-2023
John Weaver : Learn how to solve the Windows blue screen error code "Process1 Initialization Failed" with practical solutions and data...
Ultimate Guide for the NETIO.SYS Blue Screen Error on Windows

08-12-2023
Amanda J. Brook : Resolve the NETIO.SYS blue screen error with our article guide. Before the reparation, we recommend you to transfer...
Ultimate Guide to Fix the error CRITICAL_STRUCTURE_CORRUPTION
12-03-2024
Ashley S. Miller : Learn how to analyze and fix the "CRITICAL_STRUCTURE_CORRUPTION" blue screen error on your Windows system. Also discover how...

