author avatar
    Specialist of Customer Service Dept.
 

Summary
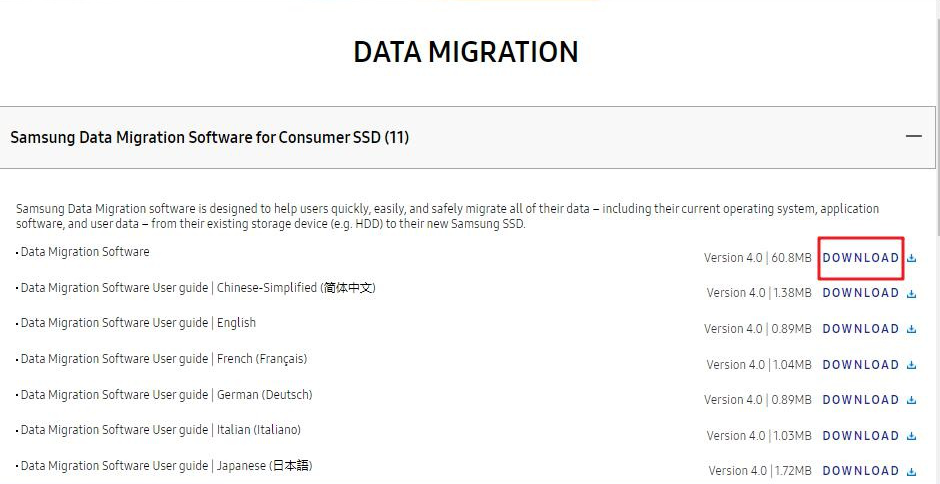
Upgrade your computer's speed with a Samsung SSD. Enjoy fast read and write speeds, high performance, small size, and quiet operation. Samsung also offers free HDD to SSD cloning software.


samsung ssd clone software

I. About Samsung hard drive cloning software: Samsung Data Migration Software

1. Introduction of Samsung HDD Clone Software

Samsung HDD cloning software is also known as Samsung Data Migration Software, which can help users quickly and safely migrate all data (including operating system, applications, and user data) in a hard disk (such as HDD) to a new Samsung SSD.
The software offers a multi-language interface version, including Simplified Chinese, English, French, Japanese, Korean, German, Russian, Portuguese, Spanish, and Italian. You can choose the corresponding language when installing the software.

2. How to clone HDD to SSD using Samsung Data Migration

① Download the Samsung Data Migration software from Samsung’s official website at https://www.samsung.com/semiconductor/minisite/ssd/download/tools/.
Download Samsung Data Migration
② Install the software and select your language. Then connect the new Samsung SSD to the computer and run the software.
③ Upon launching the software, a note at the top of the interface states, “Copy the operating system and data from the original storage device to the new Samsung SSD. Note: Do not disconnect the drive during the cloning process.” Maintain the connection between the Samsung SSD and the computer throughout. Next, select the source drive, which defaults to the system disk, showing its used space and total capacity. The target drive must be the Samsung SSD (back up any important data beforehand). The interface displays both the space the cloned system disk will occupy and the Samsung SSD’s total capacity. Click 'Start' and follow the on-screen instructions for the cloning process.
Samsung Data Migration
④ Once you’ve successfully cloned your hard drive, you can swap out the original HDD for an SSD. Simply remove the HDD and install the new SSD. Then, during startup, use the shortcut key to access the BIOS and ensure the new Samsung SSD is set as the primary boot device. If it’s not, adjust the settings manually to enable booting from the new SSD.
Samsung Data Migration software, designed for cloning to Samsung hard drives, offers an easy-to-use interface. However, some users encounter an error mid-clone: 
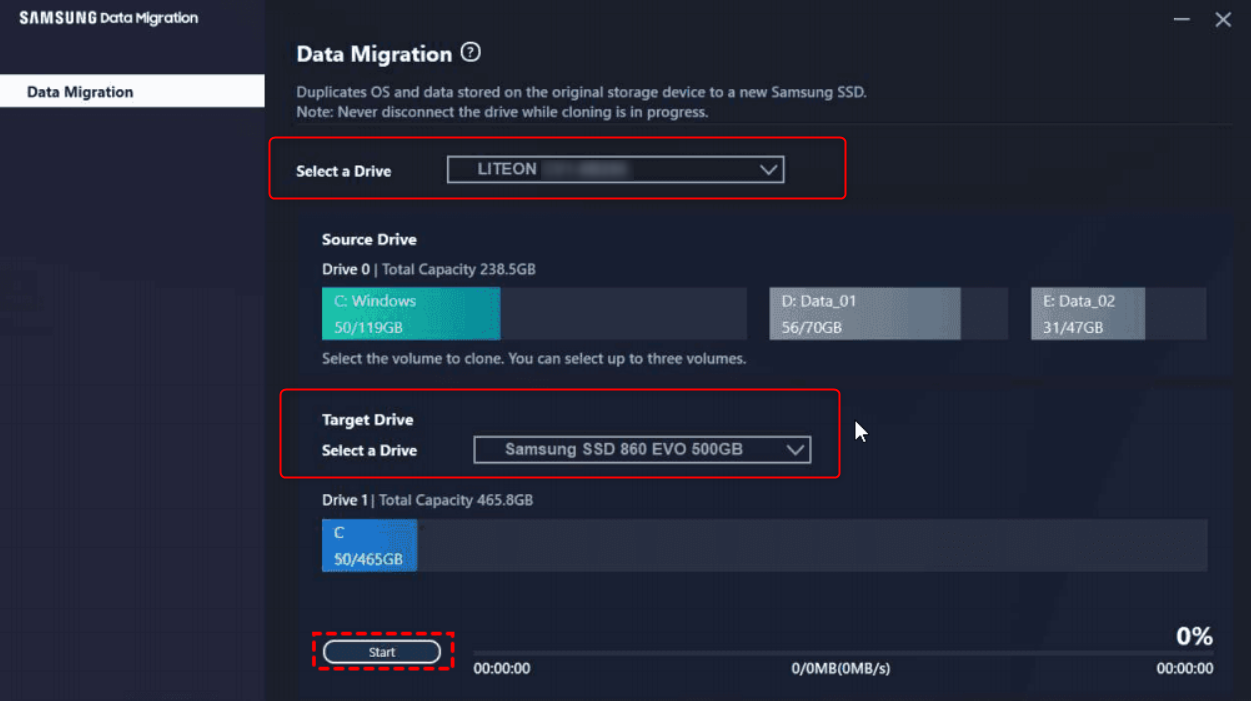
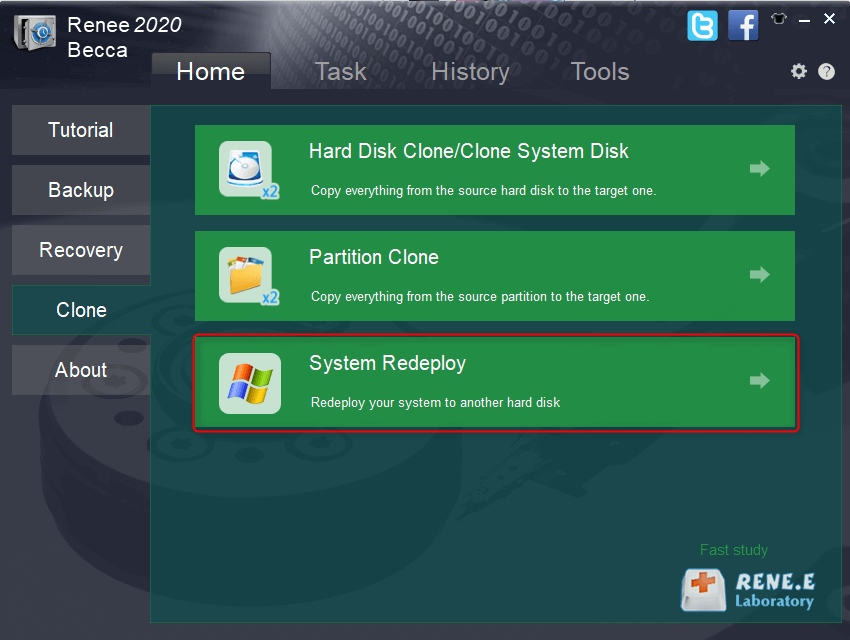
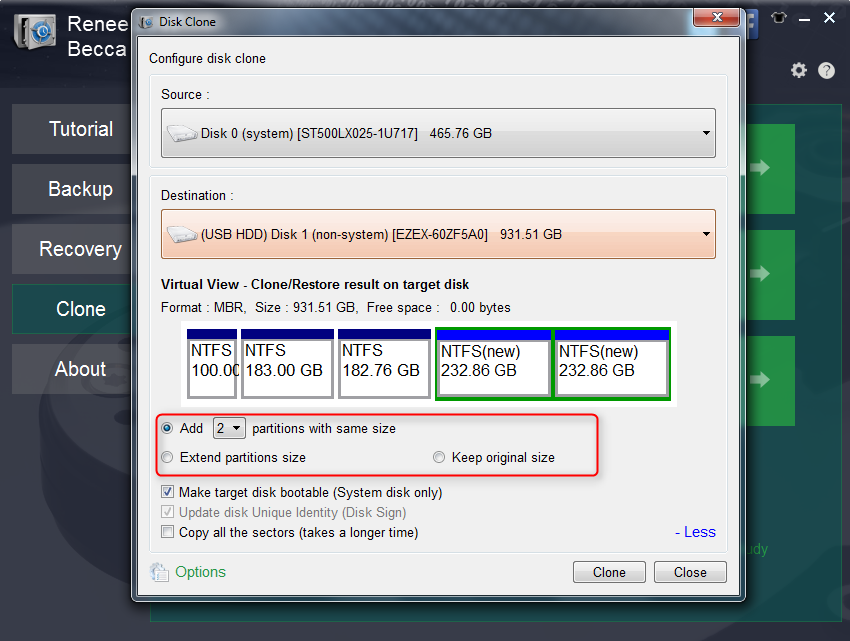
"Clone failed. An error occurred while reading the disk." To resolve this, power off your computer, disconnect any non-system hard drives, install the SSD, power on your computer, install the SSD’s driver, and retry cloning with Samsung Data Migration. If the issue persists, consider using alternative cloning software such as Renee Becca, which supports various brands and offers multiple cloning options, including disk, partition, and system migration.

II. Clone HDD to SSD with Renee Becca

1. What is Renee Becca?

Renee Becca is a comprehensive tool designed for system and hard disk data backup and restoration. It enables the backup and recovery of critical computer data, including programs, system settings, emails, photos, videos, documents, and bookmarks. Utilizing advanced incremental/differential backup technology, it offers time and disk space efficiency. Renee Becca also features system migration, partition, hard disk, file backup, and disk cloning options to cater to various backup requirements.
Renee Becca - Reliable Data Backup & Restore Software

Quick Backup files at up to 3,000MB/min.

Fullfill different backup needs Supports system backup, disk / partition backup, file backup and disk clone.

Intelligent Automatically analyze the differences between source and backup data.

Convenient Support VSS, allowing to freely view webpages when backing up system.

Highly compatible Supports various files and storage devices.

Quick Backup files at up to 3,000MB/min.

Fullfill different backup needs Backup for disk, partition and system. Save disk space by backing up incremental /differential data.

Highly compatible Supports various files and storage devices.

Free TrialFree Trial 2000 users have downloaded and enjoy Renee Becca!

2. How to use Renee Becca to migrate the system in HDD to SSD?

When the old HDD contains many messy and useless files, you can just migrate the system from the HDD to SSD, and then replace the hard disk with SSD after migration.
With the help of Renee Becca, it is very convenient to migrate the system to a solid-state drive and turn it into a system disk. The specific steps are as follows:
Step 1: Connect the SSD to the computer. Download and install Renee Becca on the computer. Select the (System Redeploy) option in the main interface.
migrate system with renee becca
Step 2: In the “System Migration” pop-up window, select the new SSD as the target location. Click the “Redeploy” button to start the process.

Wait for the progress bar to reach 100%, indicating a successful migration. Then, replace the old hard drive with the new SSD and set it as the primary boot device in the BIOS.

To set the new SSD as the primary boot device, restart your computer and during startup, press the appropriate key (often F2, Del, or F12) to enter the BIOS. Navigate to the boot menu and select the new SSD as the first boot option.

select a destination to redeploy system with renee becca
Kind tips Ensure the new solid-state disk’s total capacity exceeds the system’s size before migration. Be aware that all data on the solid-state disk will be wiped during the process. Prior to migration, verify if the target disk contains important data and perform a file backup.

3. Use Renee Becca to clone the entire HDD data to SSD

This method is suitable for users who need to clone the entire HDD including the operating system, applications, and user data to SSD. The specific steps are as follows:
Step 1: Download, install, and run Renee Becca. Select the option (Hard Disk Clone/Clone System Disk) in the main interface.
select to clone hard disk within renee becca
Step 2: In the “Disk Clone” window, select the original disk and the replacement hard disk as the source and destination, respectively.

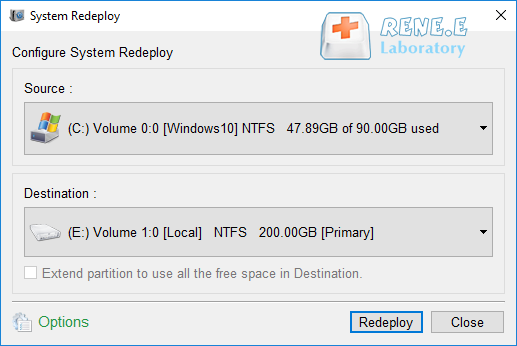
Upon completion of the cloning, access the BIOS and set the new disk as the primary boot device to start Windows from it.

clone to disk with larger size