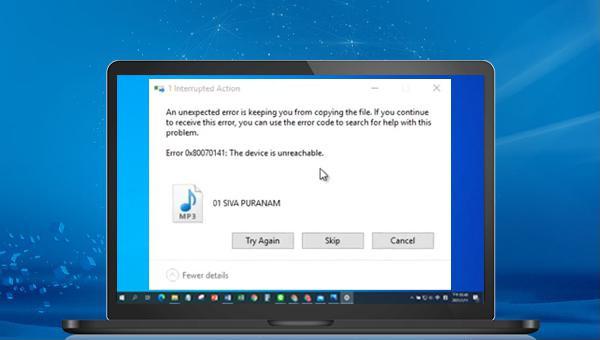
Part 1. How to fix error 0x80070141: Unable to connect to device?
When you copy photos/videos from your iPhone to your computer via a data cable, the error message “Error 0×80070141: Unable to connect to the device” appears, which may be related to the data cable, transfer settings, outdated iTunes, USB port failure, etc. The following will introduce several methods to solve this problem, and it is recommended to try them one by one.
1. Use the original Apple data cable
Using a third-party data cable to connect iPhone and computer may cause some problems during file transfer. Therefore, if the data cable you are using is not original, please switch to the original data cable and try to copy the file again to see if the problem is resolved.
2. Replace with USB 2.0 port
Some older iPhone models may not be compatible with the USB 3.0 ports (the connectors are blue) because they do not have the necessary drivers to function properly. So you can connect the data cable to the USB 2.0 port and try to copy the file, but the speed may be slower.
3. Change the transmission settings on the mobile phone
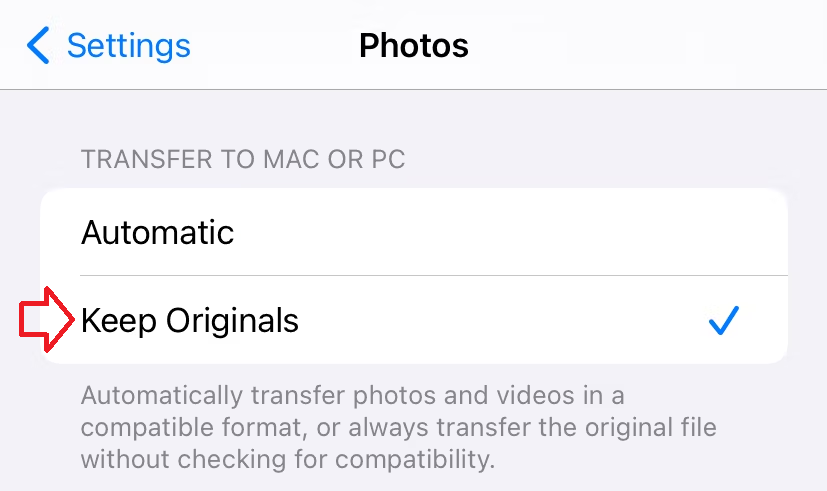
There are settings related to photo transfer in the iPhone, and some users reported that the transfer settings were changed to solve the error 0×80070141.
You just need to open the settings in your phone, scroll down to find (Photos), find “Transfer to MAC or PC” at the bottom of the photo settings interface, and select (Keep original photos). Then try to connect your phone and computer again and perform photo/video transfer.
Error 0×80070141 can also occur when copying multiple photos at once, so try copying the files one by one and you may be able to avoid this error. But this method is only applicable when you need to copy a few files. If you need to copy hundreds of files, please consider other methods.
An outdated version of iTunes may also cause unsmooth transfer between iPhone and computer, so you can try to update iTunes to solve this problem.
On a Windows computer, there are two ways to download iTunes, one is from the Microsoft Store, and the other is from the Apple website.
● iTunes download from Microsoft Store
iTunes obtained from the Microsoft Store automatically updates when new versions are released. But you can also check for updates through the Microsoft Store.
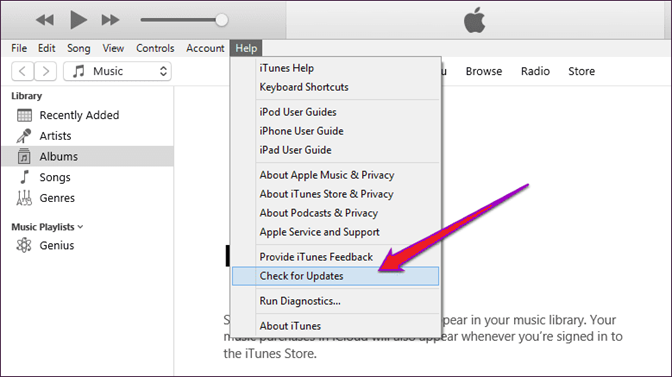
● iTunes download from Apple website
Operation steps: Open iTunes. From the menu bar at the top of the iTunes window, click (Help) > (Check for Updates). Follow the prompts to install the latest version.
If (Check for Updates) is not an option in the Help menu, your iTunes download was from the Microsoft Store.
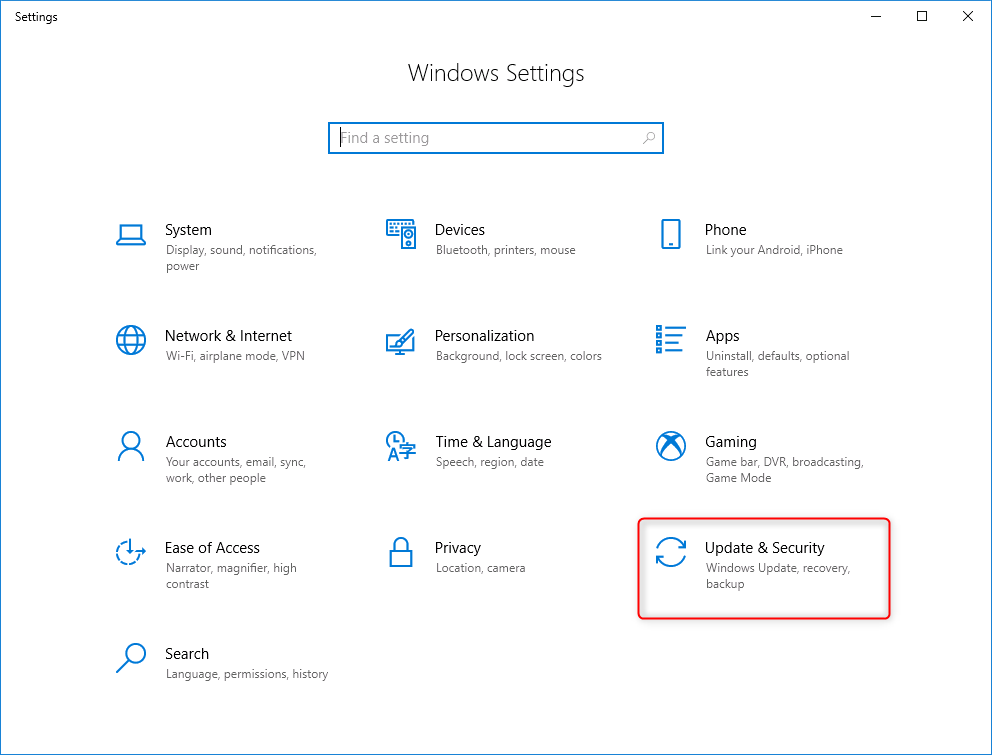
Microsoft will often release some Windows updates to fix previously discovered system glitches, so updating Windows may help resolve error 0×80070141. Specific steps are as follows:
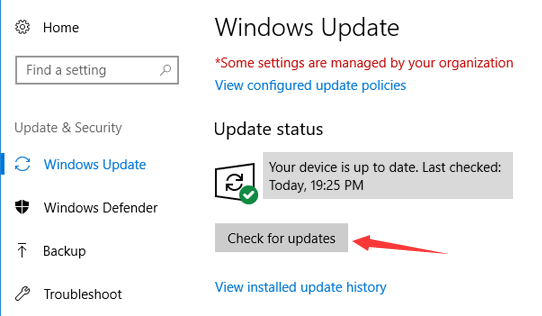
Step 1: Tap (Start) > (Settings) > (Update & Security).
Step 2: Click on (Check for Updates), if an update is found, Windows will start downloading the update. After downloading the update, click (Install Now), it may be necessary to restart several times during the installation of the update. Afterwards check if the problem is resolved.
7. Import photos to computer via iCloud
iCloud can also transfer photos/videos from your phone to your computer. Specific steps are as follows:
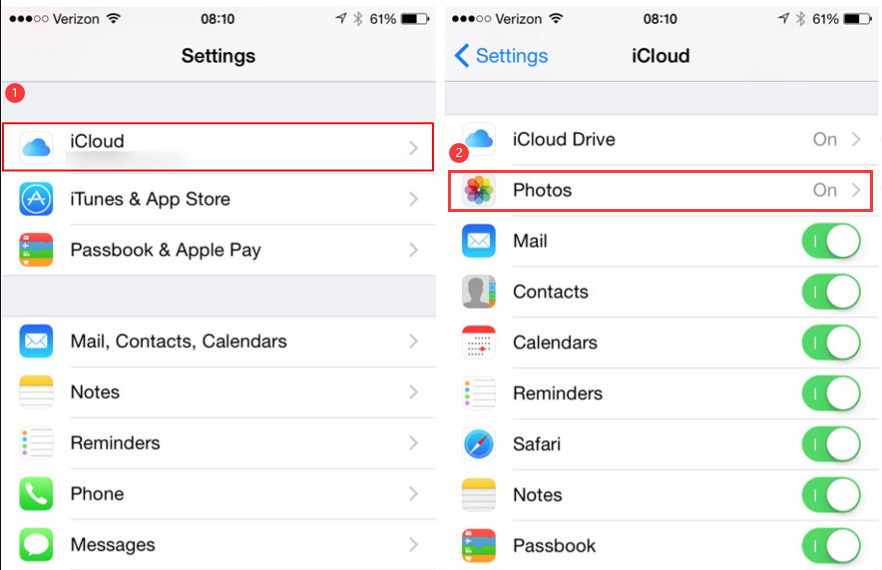
Step 1: Open (Settings) on the phone, click on the Apple personal account at the top, and then select (iCloud). After entering the next interface, click (Photos) to enable the (iCloud Photos) option, and then all photos and photos will be automatically uploaded. Video to iCloud.
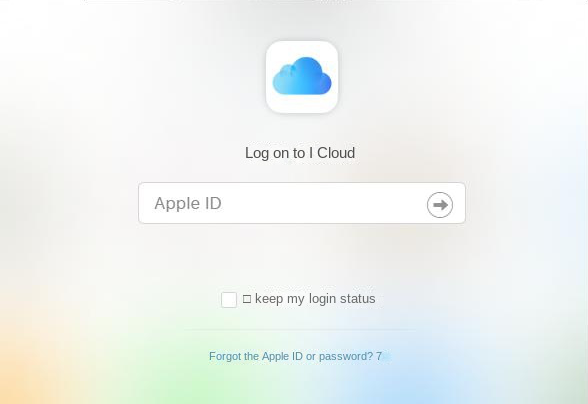
Step 2: Start the computer, open the browser, visit https://www.icloud.com/ website, and log in your Apple ID. Two-factor authentication may be required afterward, enter the verification code received on your iPhone or iPad to complete the login.
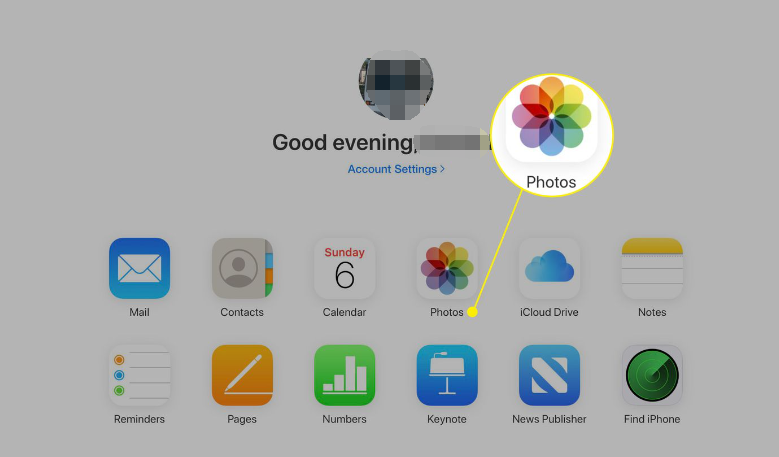
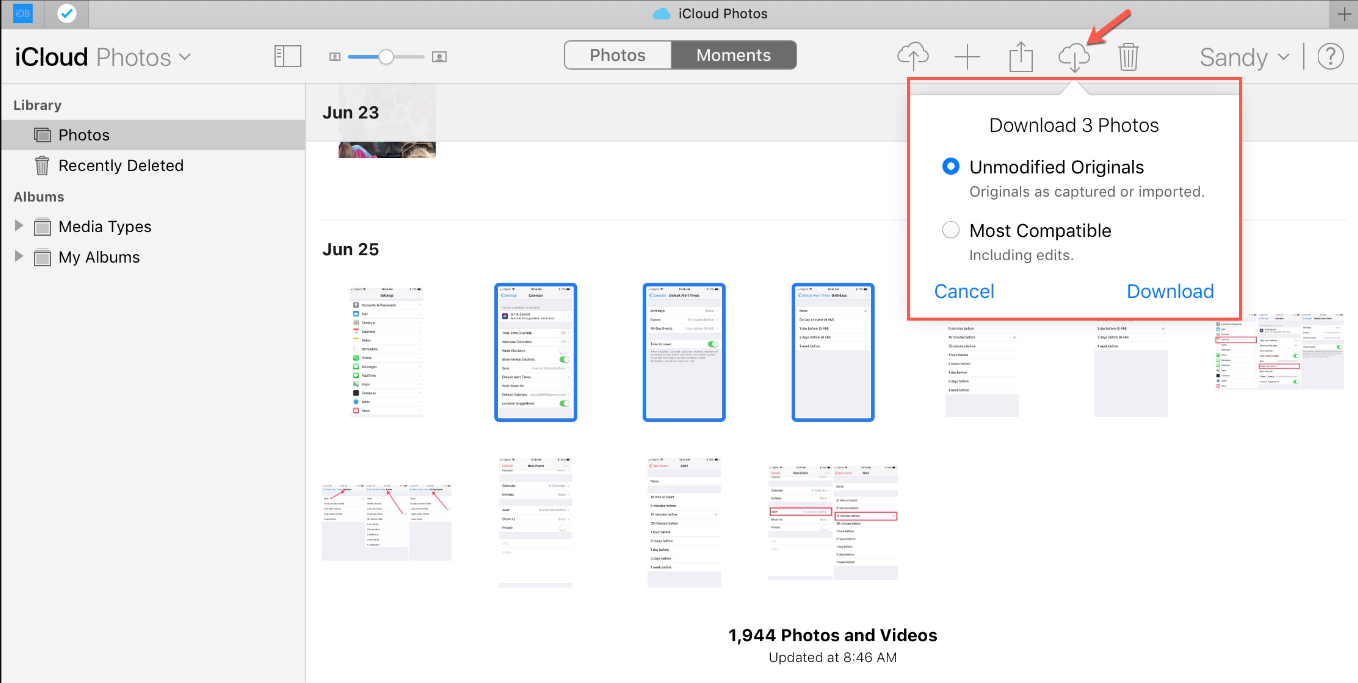
Step 3: After successful login, click (Photo) to view all photos in iCloud cloud.
Step 4: Select the photos that need to be transferred to the computer, click the download button in the upper right corner, and then the photos you selected will be downloaded to the computer. The downloaded photos will be in a compressed file, which can be viewed after decompression and Reset the backup location.
Note: The photos downloaded from iCloud will be saved in the default download location of the browser. You can search according to the download location of different browsers. )>(Downloads) to view the download location.