author avatar
    Specialist of Customer Service Dept.
 

Summary
Learn the significance of file backup and discover simple yet effective methods to back up files on Windows 10 computers. Keep reading to find out more.


how to backup files on windows 10

I. The importance of backing up Windows 10 files

Many people do not have the habit of backing up files, and feel that it is very safe to save files on the computer, and there will be no data loss. File backup is actually just in case. Although the probability of system or hard disk failure is not particularly high, once a failure occurs, your important data may be lost/damaged. If the data is lost, you can also try to use professional data recovery software (such asRenee Undeleter ) for recovery, and if the data is damaged, it can no longer be recovered. File backup is a preventive measure, while data recovery is a remedial measure, and the recovery success rate is not 100%.
During the daily use of the computer, there are some situations that may lead to the loss of file data, such as computer failure, system crash, hard disk sector damage, file system error, or computer virus infection, human error deletion, etc. In order to protect your important files, regularly backing up files and saving them to an external hard drive is a particularly effective method. It is recommended that you refer to the following methods to try to back up important files.

II. How to backup files in Windows 10?

1. Backup Windows 10 files with Renee Becca

Renee Becca It is a tool specially used for system/hard disk data backup and restoration. It can help you back up and restore important data in your computer, such as programs, system configuration, emails, photos, videos, documents, bookmarks, etc. It adopts the leading incremental/differential backup technology, which can save you more time and disk space. In addition to supporting system backup, it also supports partition backup, hard disk backup, file backup, and disk cloning to meet your needs. need.
Renee Becca - Reliable Data Backup & Restore Software

Quick Backup files at up to 3,000MB/min.

Fullfill different backup needs Supports system backup, disk / partition backup, file backup and disk clone.

Intelligent Automatically analyze the differences between source and backup data.

Convenient Support VSS, allowing to freely view webpages when backing up system.

Highly compatible Supports various files and storage devices.

Quick Backup files at up to 3,000MB/min.

Fullfill different backup needs Backup for disk, partition and system. Save disk space by backing up incremental /differential data.

Highly compatible Supports various files and storage devices.
Free TrialFree Trial 2000 users have downloaded and enjoy Renee Becca!
Backing up files with Renee Becca is very simple, the specific steps are as follows:
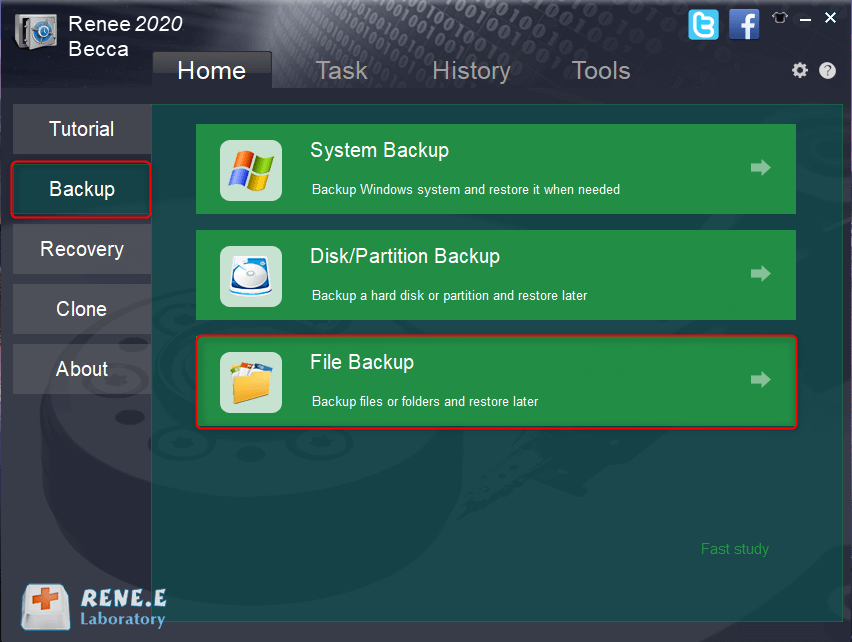
Step 1: Download, install and run Renee Becca on the computer, and select the (File Backup) option in the main interface (Backup) column.
Select file backup options
Step 2: Next, select all the files that need to be backed up in (source file (device)), and select the hard disk partition to store the backup data in (destination).
Select files to backup
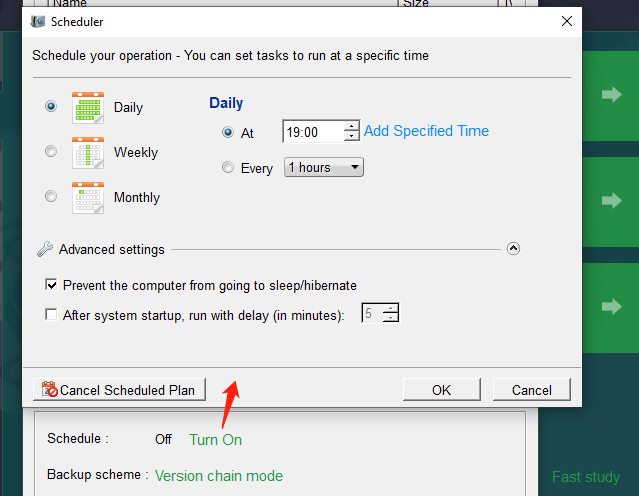
In addition, in (task plan), you can make a daily/weekly/monthly automatic backup plan and click (confirm) to enable the automatic backup function.
File backup set backup time
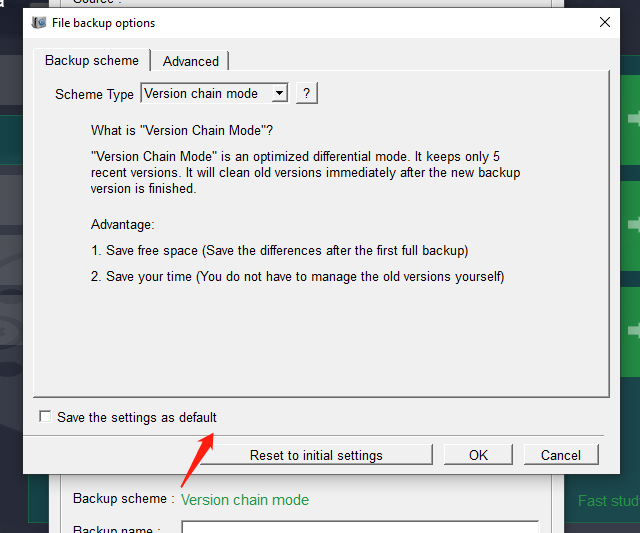
In (Backup Scheme)-(Scheme Type), you can choose a suitable backup scheme mode according to your individual needs. Renee Becca has 5 backup schemes to choose from, namely version chain mode, single version mode, overall mode, incremental mode and diff mode.
File backup select backup scheme mode
Renee Becca has 5 backup plans to choose from:
Version chain mode: Only the latest 5 versions are kept, and useless old versions are automatically deleted after the backup is complete.
Single version mode: Only the most recent version is kept, and the previous version is automatically deleted after the backup is complete.
overall pattern: Create a full backup.
Incremental mode: After the initial full backup, only incremental backups are created.
diff mode: After the initial full backup, only differential backups are created. You can view the difference between incremental backup and differential backup.

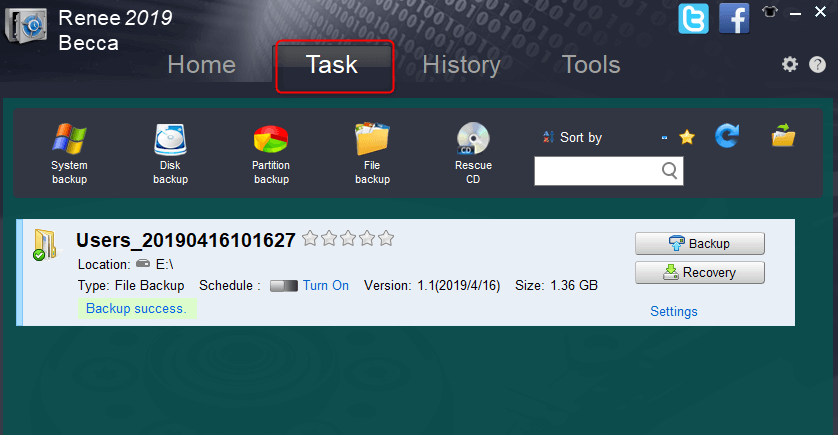
Step 3: Finally, click the (Backup Now) button to start executing the backup file command according to your settings, and you can see the progress of all backup tasks on the task bar. After the backup is complete, you can click the (Restore) button to restore the files to the specified hard disk when necessary.
File Backup Task Progress
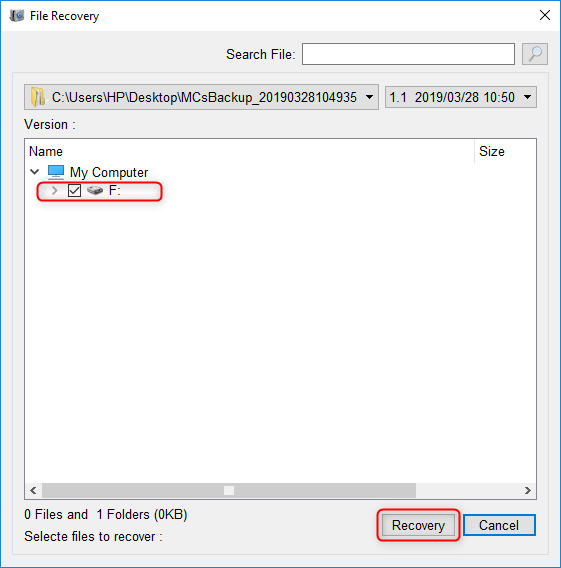
Step 4: Then select the location where the files are to be restored, and click the (Restore) button.
Choose where to restore files

2. Use the system's built-in backup function to back up files

Windows 10 comes with a file backup function, that is, file history, which can automatically back up selected files. The specific operation steps are as follows:
Step 1: Run the Windows 10 computer, click (Start)-(Settings) in the lower left corner (or directly use the shortcut key (Windows+I)).
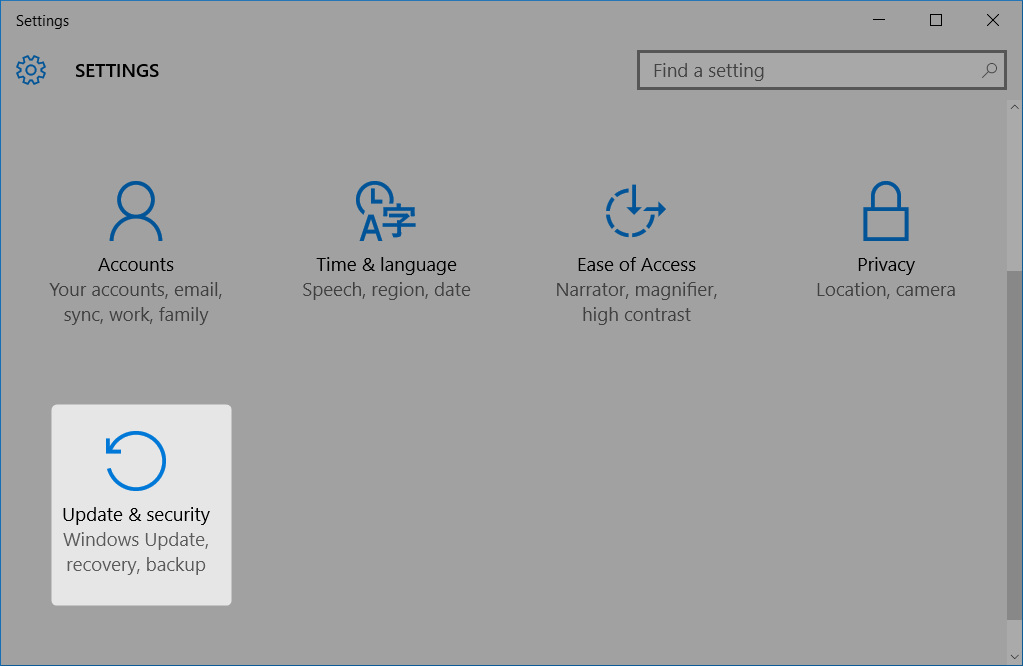
Step 2: Next, go to the (Update and Security) option.
Go to Update and Security Options
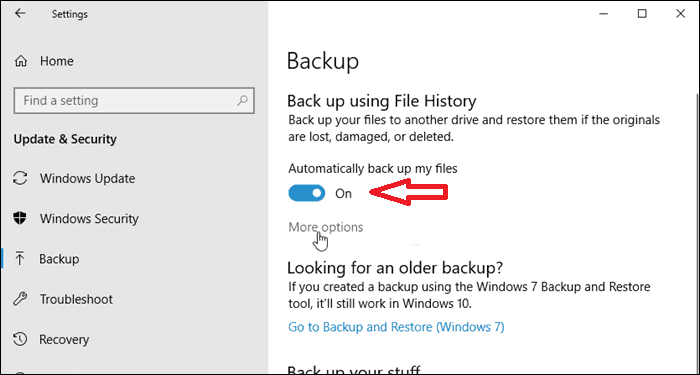
Step 3: After that, select (Backup) in the function list on the left, and you can see the “Backup using file history” column on the right, enable the (Automatically backup my files) function, and then click (More options) .
Note: In some versions of Windows 10 (automatically back up my files) the area displays “Add Drive”, which can be added and clicked (more options) for subsequent settings. It is recommended to back up files to an external hard drive to prevent data loss due to system or internal hard drive failure.
Click on the Backup with File History option
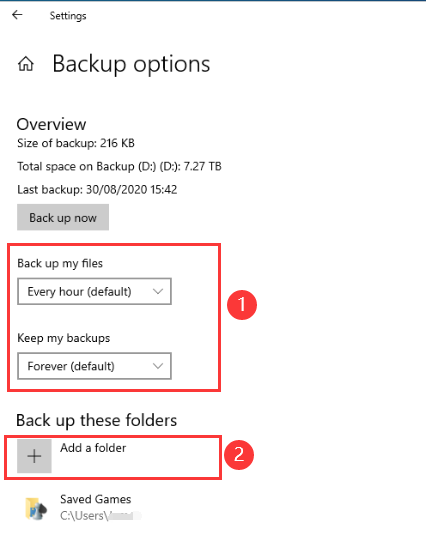
Step 4: In the backup options interface, you can choose the time interval for backing up files and the time period for keeping backup files. For example, the following figure selects to back up files every 3 hours, and keep the backup files of the latest month, which means 1 month ago The backup files of will be deleted automatically, which can save hard disk space. In the “Backup these folders” below, you can view the currently backed up folders, and you can also click (Add Folder) to add folders that need to be backed up.
File History Backup Options
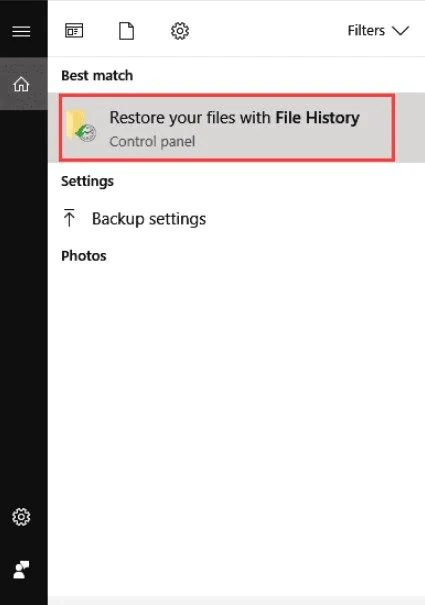
Step 5: If you need to restore files, you can enter (file history) in the search bar and click (Restore your files through file history).
Restore your files via File History
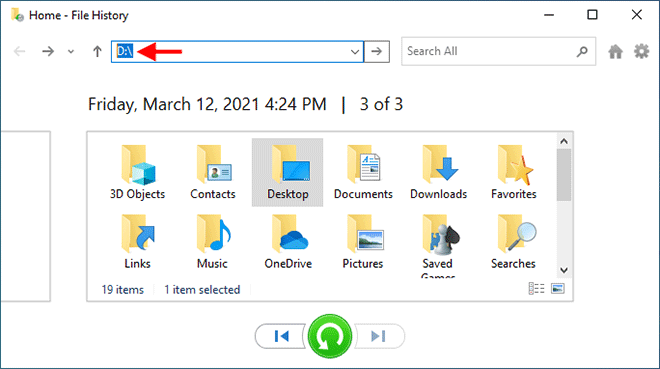
Step 6: After entering the file history, you can view the backup files of different dates through the control buttons below. After selecting the file/folder to be restored, click the restore button in the middle to restore the file to the original location.
File History Select File Restore
If you need to back up files to the cloud, you can also click here to view the introduction of the cloud backup and restore tool. The advantage of cloud backup is that it does not need to be connected to other hard drives, and it can be backed up as long as there is a network. However, such tools generally require monthly or annual paid subscriptions, and the follow-up costs are relatively high.