author avatar
    Technology Manager of Test Dept.
 

Summary
Besides knowing how to install SSD, get more about how to optimize SSD also very important. Contents below can help users to install the SSD correctly and optimize the SSD to get the best performance.


With the improvement of production technology, the price of SSD has dropped down recently. Besides, capacity and performance also get great improvement. The price of per GB SSD hits the bottom. More and more common computer users prefer to choose SSD to be the system disks or data storage devices due to the dropping price SSD.
SSD conversion
If you want to make SSD to be the data storage disk instead of system disk, please go to “Improve HDD performance with RST drive from Intel” after going through “How to Install SSD Correctly”.

How to Install SSD Correctly

Hot Topic - ADsRenee Becca – Safe and Quick System Migration to SSD

Automatic 4K alignment Improves SSD performance during system migration.

Support GPT and MBR Automatically adapt to the suitable partition format.

Support NTFS and FAT32 Redeploy various files in different file systems.

Back up quickly Back up files at up to 3,000MB/min.

Overall backup schedule Support system redeployment/system backup/partition backup/disk backup/disk clone.

Automatic 4K alignment Improve SSD performance

Support GPT and MBR Intelligently adapt to a partition format

Support NTFS and FAT32 Redeploy files in different file systems

Free TrialFree TrialNow 2000 people have downloaded!
SSD sold in the market could be divided into 6 types according to their interfaces. They are: SATA3, mSATA, M.2, SATA Express, PCIE, U.2. SATA 3 is one of the most popular SSD interfaces at present. And this passage will focus on the installation and optimization of this SSD.
Attention:

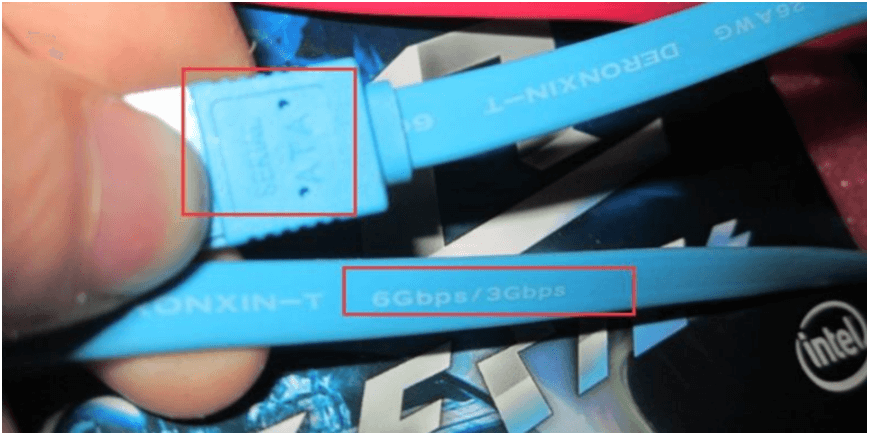
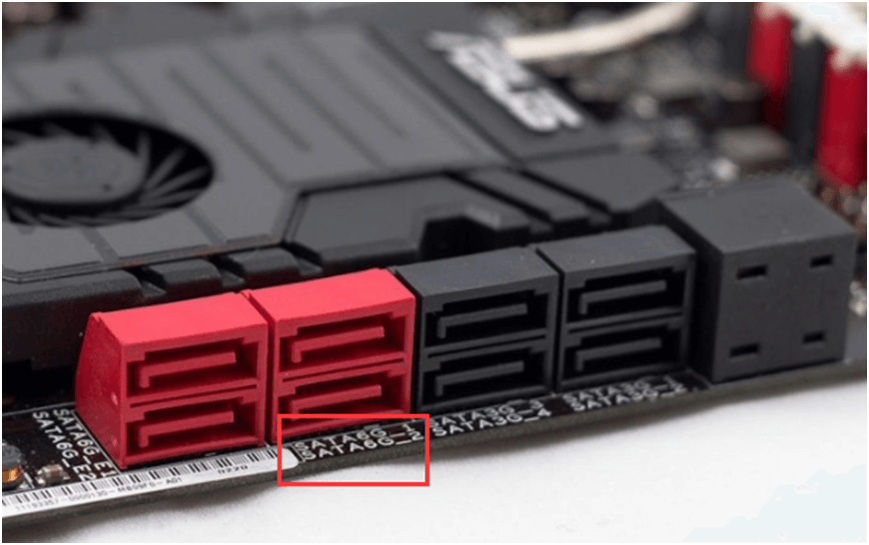
SATA3 here means SSD with SATA 3.0 interface. Data transfer speed of such kind of SSD can reach 600MB/second, which is 2 times of SATA 2.0 (300MB/second). Here, we will go through about how to install SSD with SATA 3.0 correctly.

Still can not find a suitable SSD? Try solutions here. Maybe you can find one. Before choosing SSD, we need to know more about different SSD interfaces and how to choose suitable SSD size. After that, you can get more about the recommendation of best SATA 3.0 SSD, M.2/NVMe SSD and SSD with best performance.

Preparation before Installing SSD

Tools:

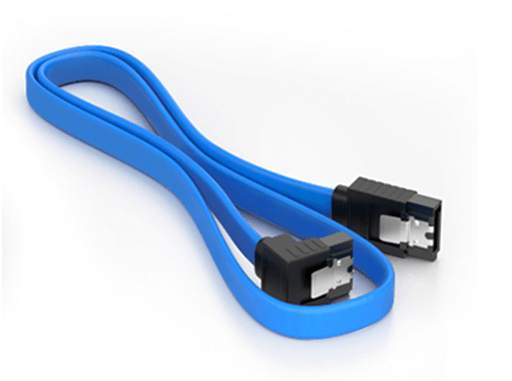
Phillips screwdriver, SATA cable, anti-static gloves, 2.5″ to 3.5″ SSD Hard Drive Converter (Optional).

Phillips screwdriver

It is recommended to use Phillips screwdriver with magnetic tip cross head.

tool preparation 1
SATA 3.0 Cable
connector
Most of the time we need to purchase the data cable for SATA 3.0 which is not equipped in SSD. It is recommend to purchase the reasonably SATA 3.0 cable. And 90 degree right-angle SATA 3.0 cable will be better. Besides, please make sure signs of SATA3 or 6Gbps are marked on the cable.
connector type
Anti-Static gloves (Essential in Winter)

Static can be generated by human body in winter. If we go through the SSD installation process with static, we may harm the hardware in PC. So wearing this gloves before making the operation is essential.

glove
2.5″ to 3.5″ SSD Hard Drive Converter

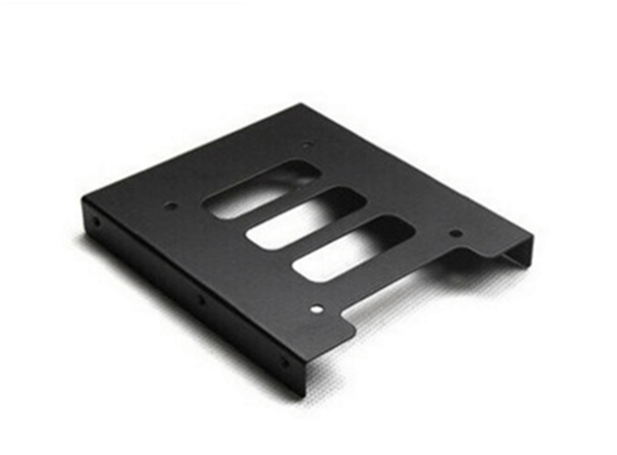
Some computer may not have space for 2.5″ hard drive. And2.5″ to 3.5″ SSD hard drive converter could help to solve this problem. Disk converters we could find in the market are compatible with SATA and IDE interface. Also, they are suitable for all kinds of PC.

disk holder
back to top botton

How to Install SSD in Desktop

Important: Please remove the power cable beforehand.
Please make sure you have connected the SSD to the SATA 3.0 connector in the motherboard with SATA 3.0 cable, which can get the best data transfer speed. If you do not know which one is SATA 3.0 connector, please refer to the motherboard manual. Also you can find it with the mark on the motherboard. For example:
connector illustrator
If SATA 6Gb/s or SATA6G could be found near a SATA connector, then we can make sure this connector is for SATA 3.0 devices.
connector illustrator2
If there is not any signs, then the SATA 3.0 connector would be in a special color.
connector illustrator3
As we could find on the above image, there is SATA_3 near the SATA connector. Please note this means it is the third connector for SATA instead of SATA 3.0.

Tutorial about How to Install SSD in Desktop >>>

install disk in desktop

How to Install SSD in Laptop

Important: Please remove the power cable and take off the battery beforehand.

Tutorial about How to Install SSD in Laptop >>>

install disk in laptop
back to top botton

How to Install System in New SSD

Method 1: Install Windows system in brand new computer with installation CD or USB disk directly.

Advantages
Entirely new system with all hardware drive installed.

Disadvantages

  • SSD may not make 4K alignment when installing system.
  • Need to re-install almost every common software.
  • Need to prepare activation code for software.
  • Documents in original disk need to be transfer to this new disk.
  • Preferences and settings need to be set again.
Method 2: Transfer/clone original system (Disk C) to SSD with professional system transfer software.

Advantages

  • Automatically 4K alignment helps SSD get the best data transfer performance
  • No need to reinstall system. Save time.
  • Free from software installation and activation.
  • No need to make all settings. Everything will remain to be the same.
  • Chat history in software will be reserved.
Here we recommend you to try a professional SSD system transfer software – Renee Becca

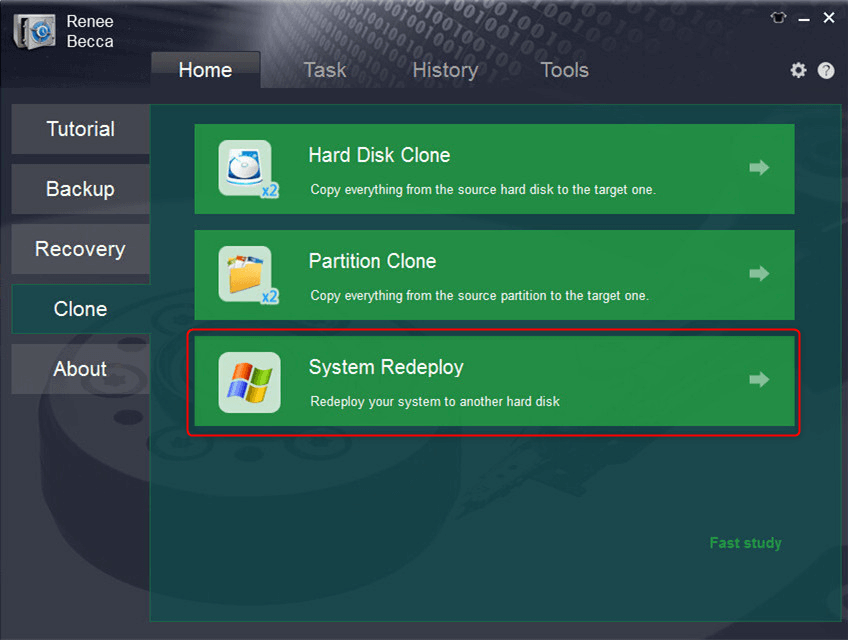
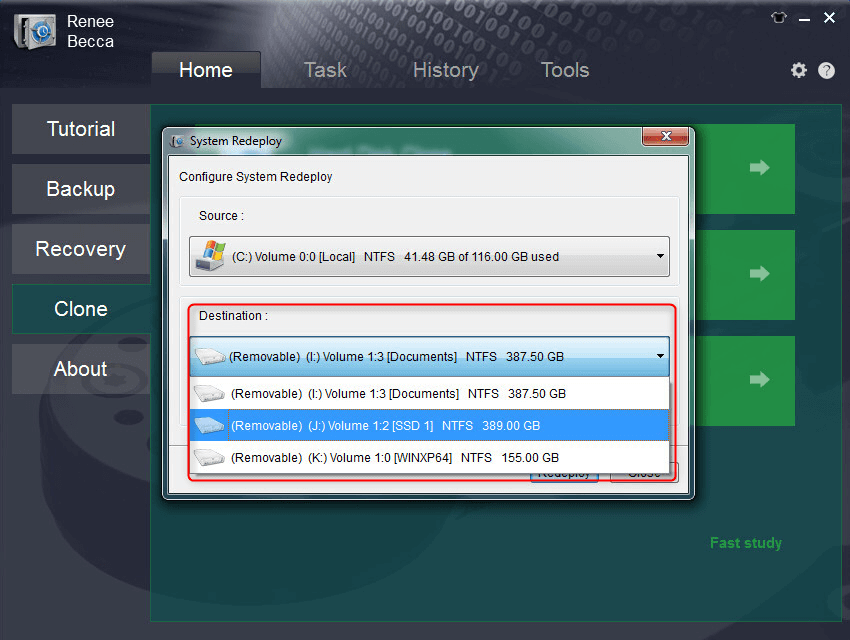
  • Renee Becca can help you make the system migration with 3 simple steps. No need of any professional knowledge.
  • No need to make image. Transfer system directly.
  • Automatically 4K alignment.
  • Support clone disk with large capacity to another with smaller capacity.
  • Support both GPT and MBR disk.
  • Boot computer with new SSD is available after system migration.
  • Compatible with Windows 10/8.1/8/7/XP/Vista/2K
press to the download button
Step 1: Launch Renee Becca and click “System Migration” in “Clone” function.
Tips: Please backup the system before migration or format the system disk after assuring the SSD can boot the computer as usual.
select system redeploy function in renee becca
Step 2: Select the new SSD you prepare for the migration.
select destination to migrate system
Step 3: After the migration finished, you can start your computer with the new SSD.
① Please choose the SSD to be the first disk to boot in BIOS. After computer succeeded to boot from SSD, format the original system disk to make use of the disk space.
② You can take off the HDD first and then start the PC. After start, please connect the HDD to computer for format.
Download the professional system migration and disk clone software now!
press to the download button
back to top botton
After system installation finished, you can make further optimization. Now follow us!

How to Optimize the SSD

Attention:

This parts aims at SSD with SATA3.0 interface. SSD with other interface could be different and can not optimize with guidance here.

Although the performance of SSD is quite good, it is different from HDD. Only go through the optimization and settings, users can get the best read/write speed of SSD.

Preparation: Check the connection between SSD and SATA 3.0 connector

This step is quiet important. If the SSD is not connected to SATA 3.0 connector, all the further optimization will not make sense. If motherboard does not support SATA 3.0, please skip this part directly.

First we need to test it with AS SSD Benchmark. If the test shows that the Seq result has reached 300MB/s, your SSD have been connected to SATA 3.0 connector correctly.

4k testpng

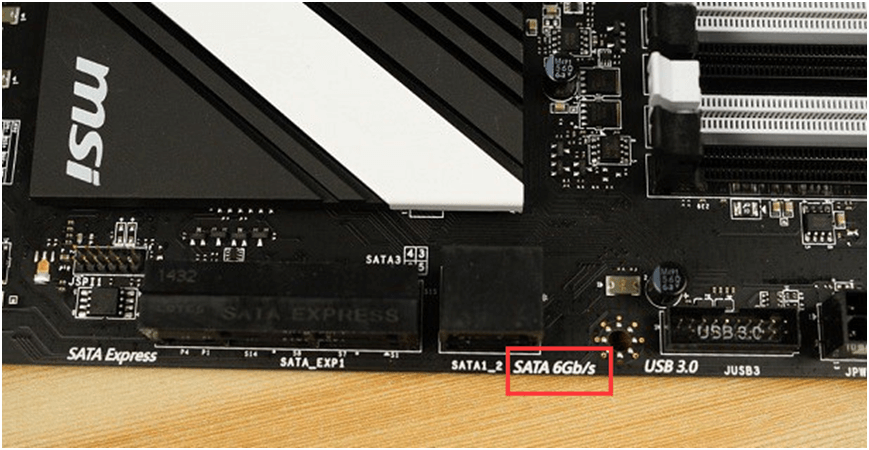
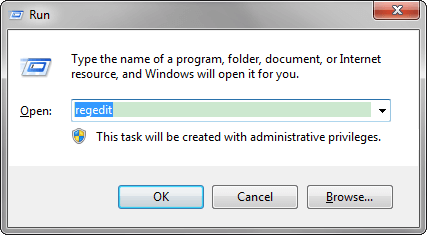
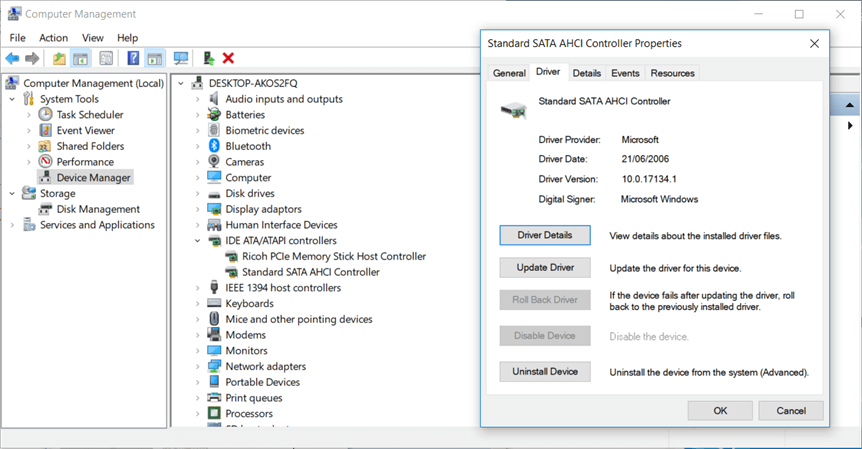
1. Check the AHCI Compatibility in Windows and BIOS

What is AHCI?

AHCI stands for Advance Host Controller Interface. Developed by Inter and other companies, AHCI allows software to communicate with Serial ATA, such as hot-plugging and native command queuing (NCQ).

Enabling AHCI in motherboard can help users to improve performance of SSD which could improve 30% of read/write speed.

Notice:If you hard disk is traditional HDD instead of SSD, please do not enable AHCI. Or the system performance will get bad.
How to Enable AHCI in BIOS
1. Get access to BIOS.
If you do not know how to enter BIOS in your computer, please click here for detailed process.
2. Please find SATA Mode after entering BIOS. After that, please set it to be AHCI. Detailed setting process please refer to BIOS manual.
3. If you installed Windows in IDE disk and want to migrate it to new SSD, you need to change some settings in registry.
Step 1: Press Win + R button
Step 2: Enter “regedit” in the pop up window.
enter regedit in run
Step 3: Go to HKEY_LOCAL_MACHINE\ SYSTEM\ CurrentControlSet\ Services\ iaStorV and double click “Start” on the right side. Make its value to be 0.
set start value to be 0
Step 4: Go to HKEY_LOCAL_MACHINE\ SYSTEM\ CurrentControlSet\ Services\ storahci and double click “Start” on the right side. Make its value to be 0.
After finishing all the steps above, please restart the computer. Then SSD will be compatible with AHCI.
set start value in storahci
How to Verify?

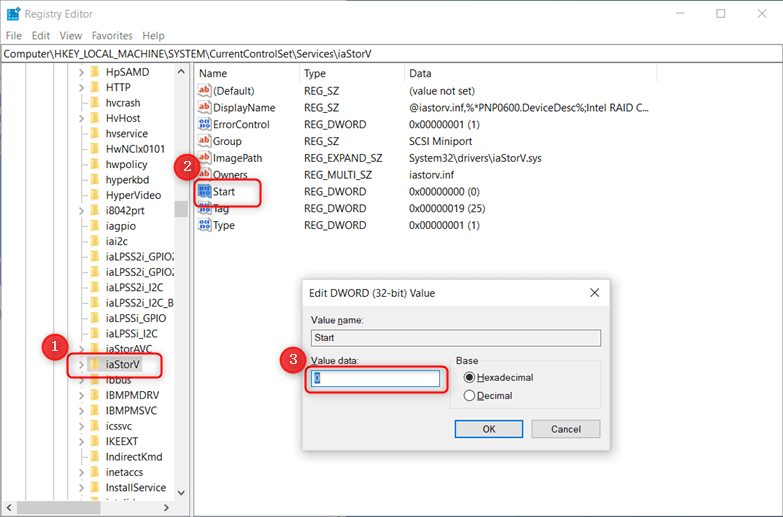
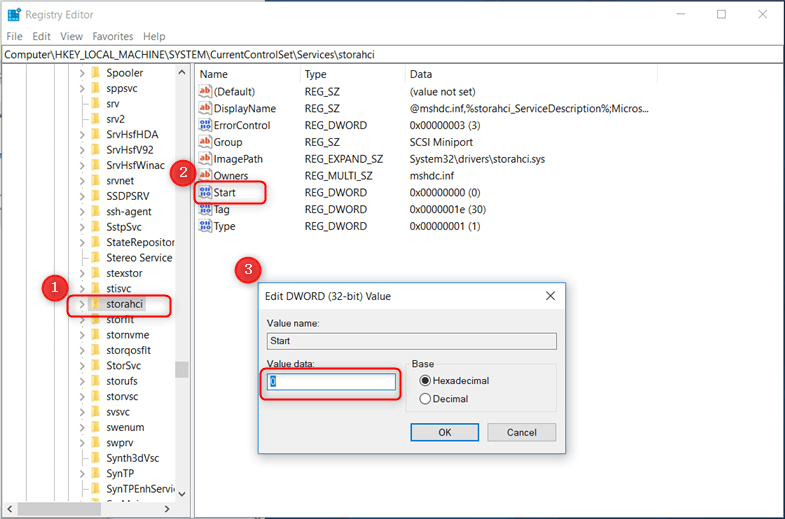
After finishing all the steps above, please launch AS SSD Benchmark. And if storahci or iaStorA could be found in the test result, your computer system is fully support AHCI.
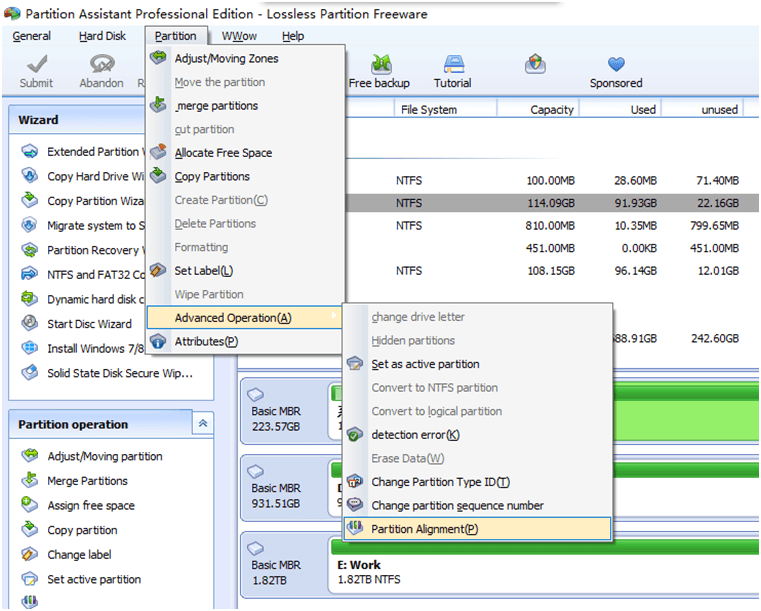
check 4K alignment
back to top botton

2. 4K Alignment

If you do not make use of professional system migration software or install system by your own, then your SSD could be not 4K aligned. As a result, you can not get the best performance of the SSD. If you do not know much about 4K alignment, please click Introduction of 4K Alignment for more.
First, we can check whether the disk has been 4K aligned with ASSS Benchmark:

1. XXXXX K – OK in the test result means the SSD is 4K aligned.

2. XXXXX K – Failed in the test result means the SSD is not 4K aligned.

If the SSD is 4K aligned, please skip this part directly. If it is not 4K aligned, freeware here could help you solve this problem without any data damage.
check 4K alignment
Before making the 4K alignment, please backup all the important data in the disk.
1. Download the freeware from the following link: http://www.drfreeware.org/PA_Green.zip
2. Decompress the software. Find and double click PastAssist.exe
3. Find your target disk after launching the software
make SSD 4K alignment with partition assistant
4. Select ”Partition” -> “Advanced Operation” -> Partition Alignment
make SSD 4K alignment with partition assistant -step 2
5. Click “Determined” in the pop-up window
After finish, please re-launch AS SSD Benchmark to check the 4K aligned status again.
check 4K alignment

3. Never make the SSD Full

It is recommend to leave 10% of SSD capacity to be free, which can help users to get its best performance. Because the SSD may get corrupted if it is full. (This will be depend on SSD’s controller chip. Some SSD will not get poor performance even it’s full.)

4. (Optional) Improve HDD Performance with RST Driver from Intel

Attention: This technology only works for traditional HDD with system inside and SSD for data storage devices. Users who do not want to transfer system to SSD for some reasons can make use of this technology. If you have make the SSD to be the system disk, please ignore this part.
What is Intel RST?
Intel RST, stands for Intel Rapid Storage Technology, also called to be Matrix Raid before, is a Windows-based software. This software offers better performance and stability for desktop, laptop and server which equips with SATA disk(s). Users can benefit from using one or more SATA disk like less power consumption, performance improvement and data protection.

Reasons for installing Intel RST?

1. Built-in AHCI driver for SATA is out of data and have not been update since 2006. It is same even in Windows 10. AHCI driver in RST from Inter updates every year. And performance will be better if we make use of this driver.
ahci details
2. RST technology will make SSD to be the cache saving disk, which can improve system loading and performance. This can greatly improve the system performance when users do not make SSD to be the system disk.

Requirements

1. Chipset-based motherboard supports Intel RST
2. Inter Core Processor like Intel Core i3, i5, i7
3. A traditional HDD and a SSD with a capacity between 18.6GB and 64GB
4. Users must make one or more HDD to be the system disk
5. Set the hard disk mode to be RAID in BIOS
6. Capacity of all disk under RST management can not exceed 2.2TB (All SSD and HDD)

Steps:

Step 1: Select the setting for SATA Mode and change the value to RAID.
raid settings
Step 2: Download the RST from the following link:
Step 4: After all settings finish, please restart the computer.
back to top botton