author avatar
    Senior Program Developer
 

Summary
Reset the BIOS to regain access or restore previous settings. Learn how to reset BIOS in this article. Plus, recover data when your computer fails to start Windows normally.


how to reset BIOS

I. What is BIOS and when do I need to reset BIOS?

The complete name of BIOS is Basic Input Output System, a collection of programs stored on the ROM chip of the computer’s mainboard. It reads and writes specific data related to system settings in CMOS. Its primary purpose is to offer the most basic and direct hardware configuration and management for the computer.
Upon starting your computer, the BIOS conducts tests and initiates programs to ensure smooth operation. After completing its assessment of the components, it sends an activation signal to the operating system, which then transfers control of program execution to the CPU.
Generally, resetting the BIOS is not a common occurrence. However, if you encounter issues with your computer’s hardware that require troubleshooting and resolution, or if you experience problems during startup due to changes in BIOS settings, or if you need to reset the BIOS password, you can perform a BIOS reset.
After understanding the relevant information of the BIOS, let’s learn how to reset the BIOS.

II. How to reset BIOS?

1. Reset from BIOS or UEFI

You can reset by going into traditional BIOS or UEFI setup. The specific steps are as follows, and we take a Windows 10 computer as an example:
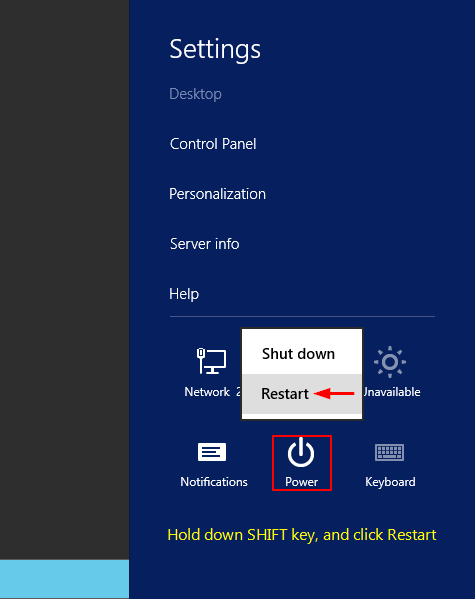
Step 1: Run the computer, press the (shift) key and click the (restart) button in the lower left corner (start)-(power) option to enter the Windows recovery environment.
hold down shft key and click to restart
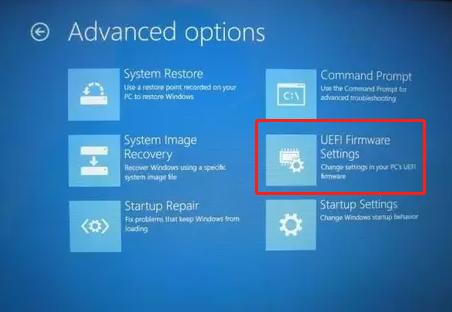
Step 2: Next, click the (Troubleshoot) – (Advanced Options) – (UEFI Firmware Settings) option, and then click the (Restart) button, the computer will restart and enter the BIOS setup screen.
UEFI firmware settings
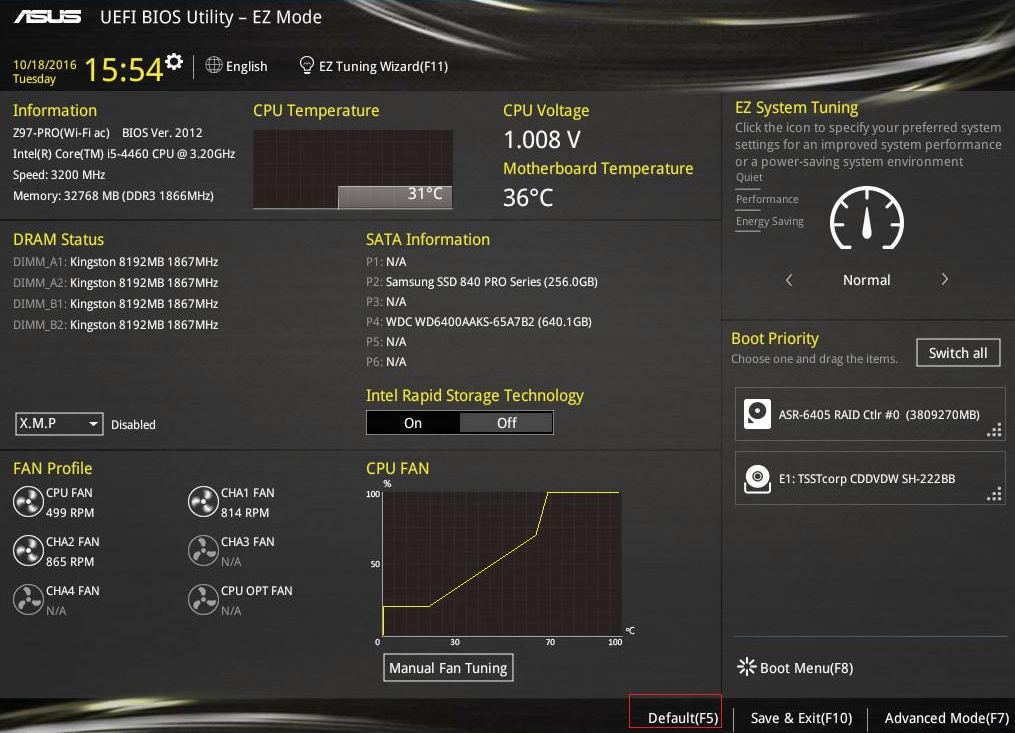
Step 3: Next, take ASUS UEFI BIOS as an example. If the UEFI BIOS is in easy mode, please press the Default(F5) button.
Default F5 button
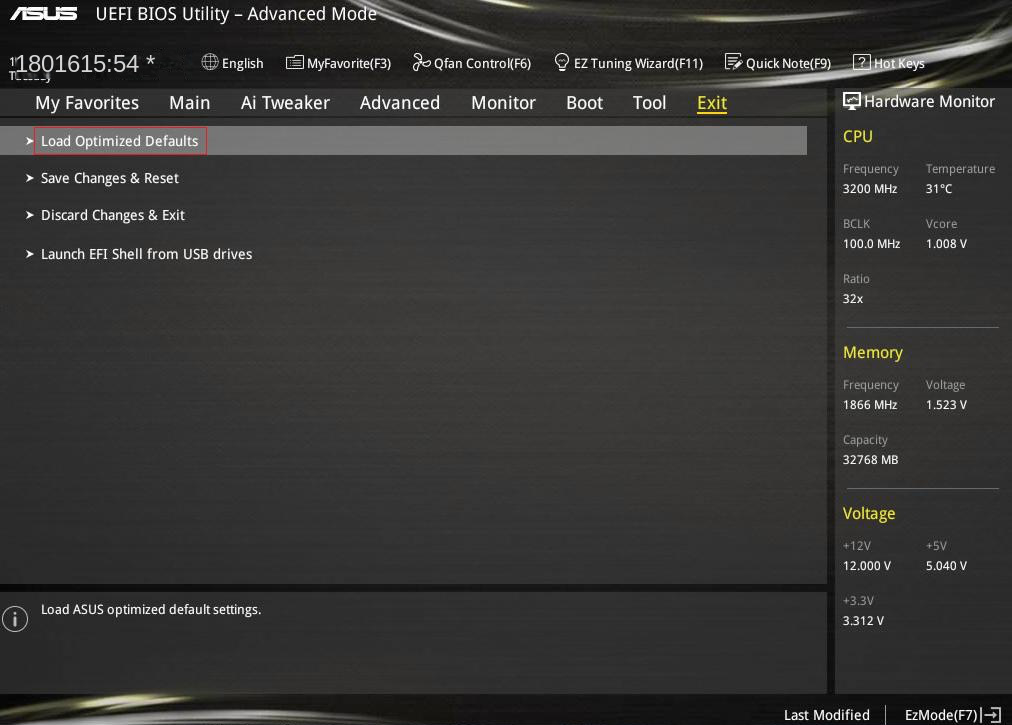
If the UEFI BIOS is in advanced mode, navigate to the (Exit) tab and click on (Load Optimized Defaults). When a confirmation window appears, click (OK) and then select (Save Changes & Reset) under the (Exit) tab. The BIOS will prompt which settings will be restored to default values, click (OK) in the prompt window. Your computer will restart normally.
Note: The option to load BIOS default values may have a slightly different name depending on your computer model. It may also be referred to as “Load Setup Defaults” or “Reset to Default”.
Execute the Load Optimized Defaults option

2. Use the motherboard discharge method to reset the BIOS settings

In addition to method 1, we can also discharge the motherboard to reset the BIOS settings.
Tools to be prepared: tweezers, Phillips screwdriver (with black magnet head), insulating gloves. Note: This method must disconnect the power supply, otherwise the motherboard cannot be discharged.
Step 1: Unplug the power supply, and wear insulating gloves (optional), open the case with a screwdriver.
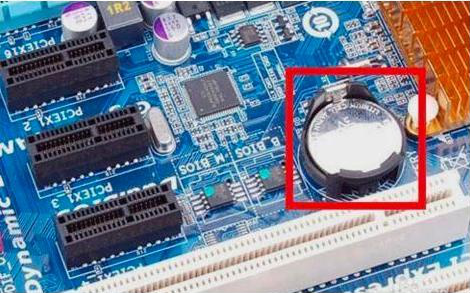
Step 2: Locate the silver button battery on the motherboard inside the case and remove it with tweezers. Use tweezers to pull the metal member next to the battery, let the battery pop out and take it out.
Remove the button battery
Step 3: Wait for 30 minutes after taking out the battery, put the battery back in, and then connect the power. Next, restart the computer.

Note: The anode of the button battery is up, that is, the side with the “+” sign is up.
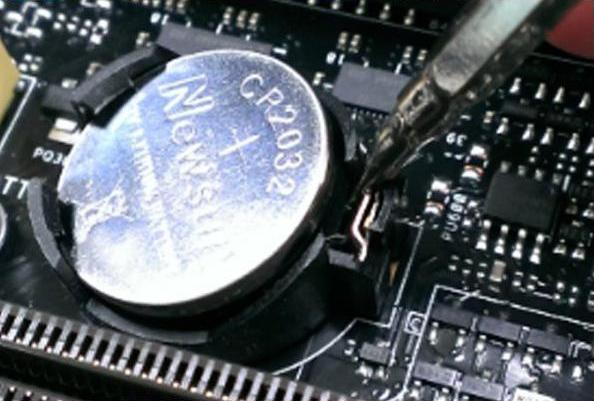
reinsert the battery

3. Reset the motherboard jumper

The process of resetting the BIOS using the motherboard jumpers is typically used for desktop computers. If you are not familiar with computer hardware, it is advised to proceed with caution.
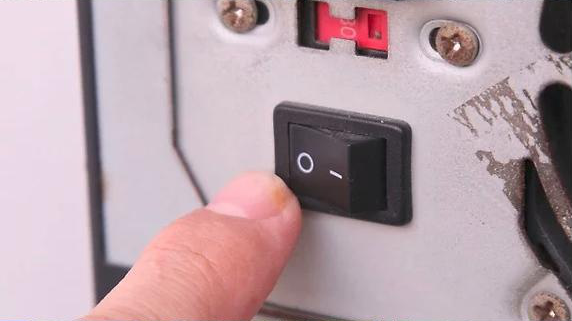
Step 1: Turn off the computer, and turn off the rocker switch on the back of the main chassis at the same time. (Note: O is the closed position)
rocker switch off
Step 2: Open the case and find the CMOS jumper, which is the three-pin jumper used to control the BIOS. It’s usually located near the CMOS battery. Near the jumper it may be labeled “CLEAR”, “CLR”, “CLEAR CMOS”, “PSSWRD”, etc.
Locate the CMOS jumper
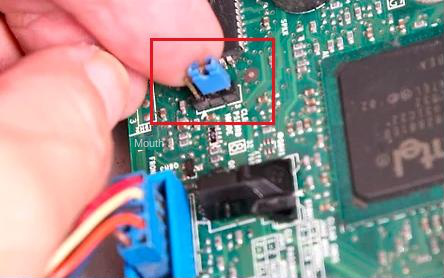
Step 3: Move the CMOS jumper to the other two pins. For example, if a jumper wire is connected to pins 1 and 2, remove it and move it to pins 2 and 3. Make sure to pull the jumper straight out during operation and not bend the pins.
Adjust the position of the jumper
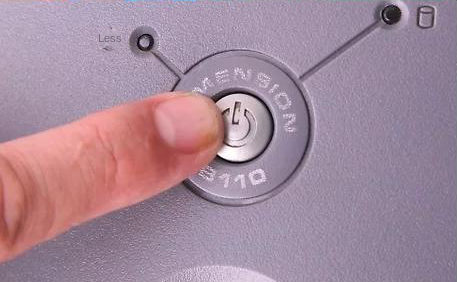
Step 4: Press and hold the computer’s power button for about 10-15 seconds (nothing will happen since it’s disconnected). This step will discharge the remaining power stored in the capacitor and also serve the purpose of resetting the BIOS.
press the power button
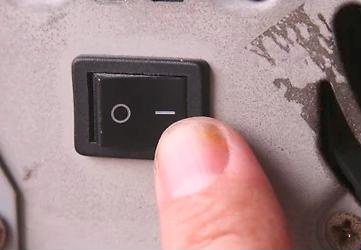
Step 5: Place the CMOS jumper back in its original position in order to access the BIOS interface smoothly on boot. Once the process is done, reattach the power supply and flip the rocker switch at the back of the computer to the “on” position (Note: the “-” signifies the “on” position).
Turn on the power rocker
There are three methods available for resetting the BIOS. Additionally, if your computer is unable to start up normally but you need to transfer or restore crucial data, you can use the following techniques to perform the necessary actions.

III. Use Renee PassNow to transfer or recover important data

1. What is Renee PassNow?

Renee PassNow is a professional system rescue software, which can help Windows users clear Windows account passwords, create new administrator accounts; restore disk/memory card data, recover data after hard disk formatting; transfer disk files; erase or scan Disk files, etc. In addition, this software also supports repairing Windows system problems, such as: repairing MBR boot records, DBR error parameters, 0xc00000e, Windows system startup failure, and some problems that cause black screen or blue screen, etc. As a system rescue tool with various functions, it is perfectly compatible with multiple systems including Windows 10/8.1/8/7/XP/Vista, and can meet the system rescue needs of different users.
Hot Topic - ADsRenee PassNow – 3 Steps to transfer data from the crashed system

Easy to use 3 steps to transfer the files.

Transfer the files Transfer the important files of the computer without system.

Preview the files Preview the files while transferring the data.

Multifuctional Data recovery, Windows password reset, bootable problem recovery can be run without system.

Highly compatible Windows 10/8.1/8/7/XP/Vista. Also supports UEFI boot mode.

Easy to use 3 steps to transfer the files.

Transfer the files Transfer the important files of the computer without system.

Preview the files Preview the files while transferring the data.

Free TrialFree TrialNow 2000 people have downloaded!

2. How to use Renee PassNow to transfer or recover data?

To resolve a situation where your computer fails to boot properly, you can use Renee PassNow to create a startup disk. This disk can then be used to boot your computer, giving you access to the software’s features for data transfer or recovery. Follow these steps to get started:
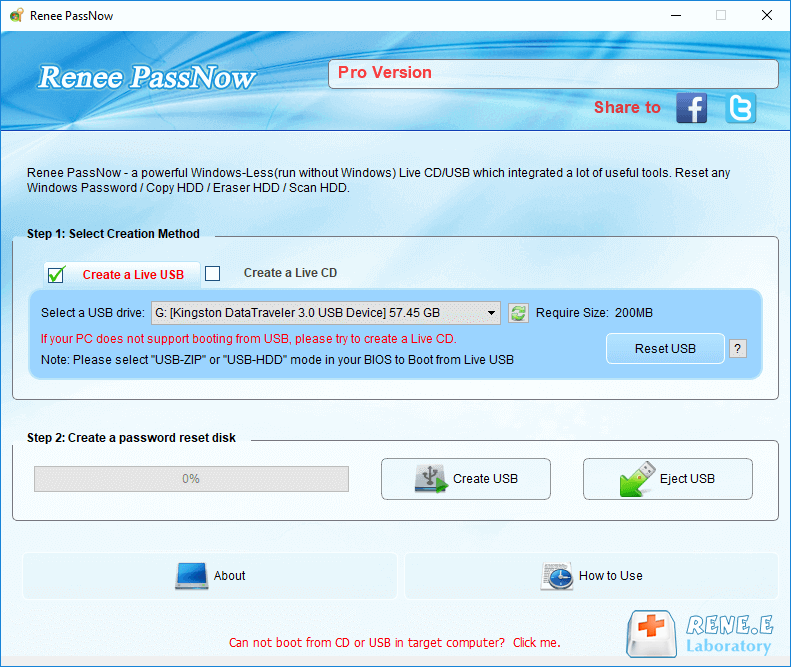
Step 1: Download and install Renee PassNow on another computer that can log in and run normally, then connect the USB disk to the PC.

Please select the (Create a Live USB) option under “Step 1: Select creation method” in the main interface.

Note: Before performing this operation, please make sure that the important files in the USB disk have been saved in other locations because the operation will delete all the data in the USB disk.
create a boot media with renee passnow
Step 2: Next, select (x64) or (x86) according to the system type, click the (Download Now) button to download the ISO file, and click the (Create USB) button. After the file is downloaded, click the (Eject USB) button.
use renee passnow to create usb to reset passnword
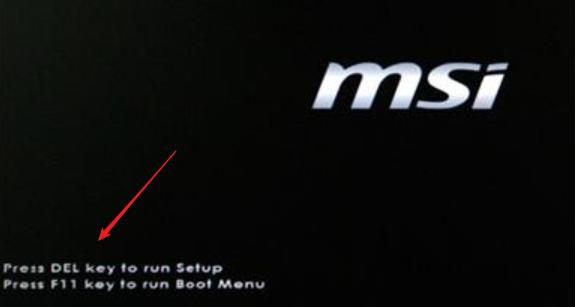
Step 3: Connect the created boot device to the computer that needs to transfer data.  Turn on the computer, and then use the shortcut key to enter the BIOS that will be displayed on the computer screen (the display time of this interface is very short, maybe only one or two seconds). Note: Press the BIOS shortcut key continuously to enter the BIOS setting interface.
Press DEL to enter BIOS setup
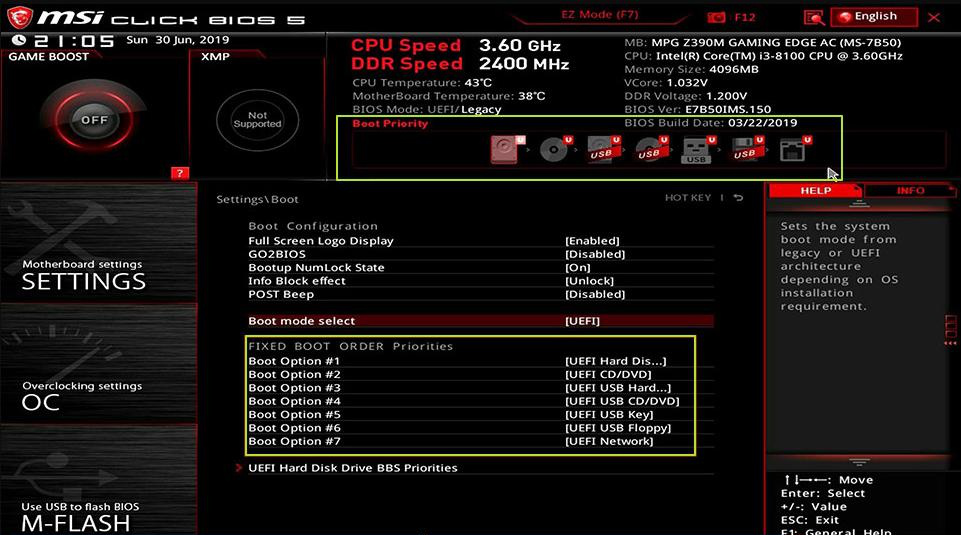
After that, you can set the boot USB disk as the first option in the boot order, then save the settings and restart the computer.
select boot order
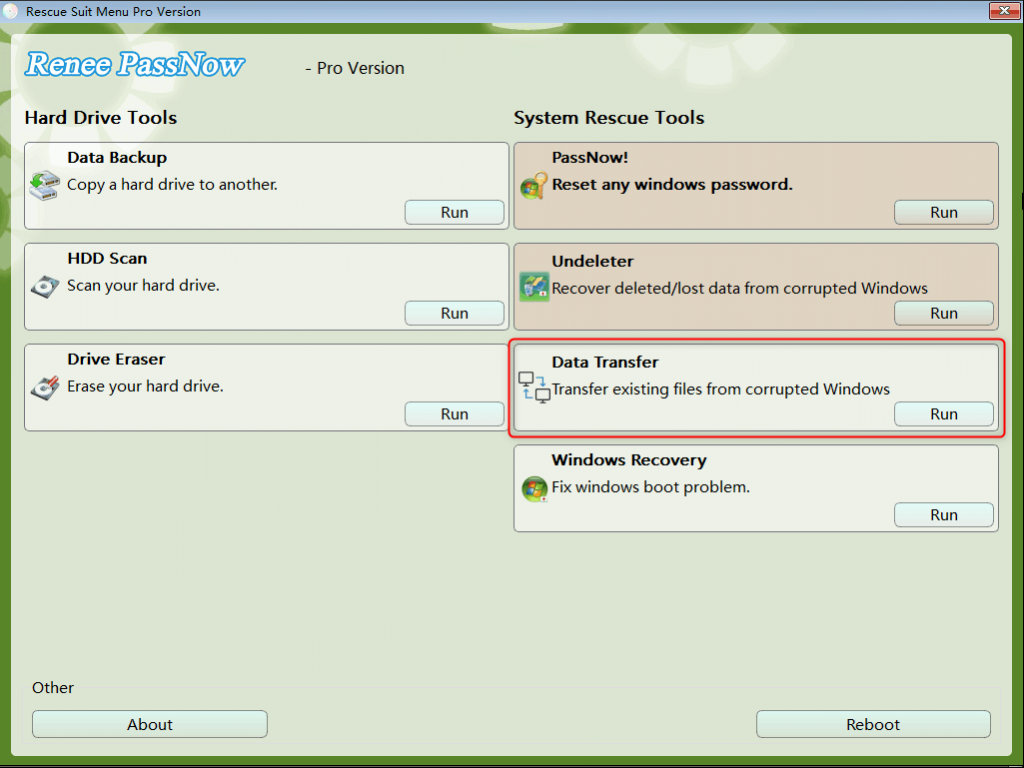
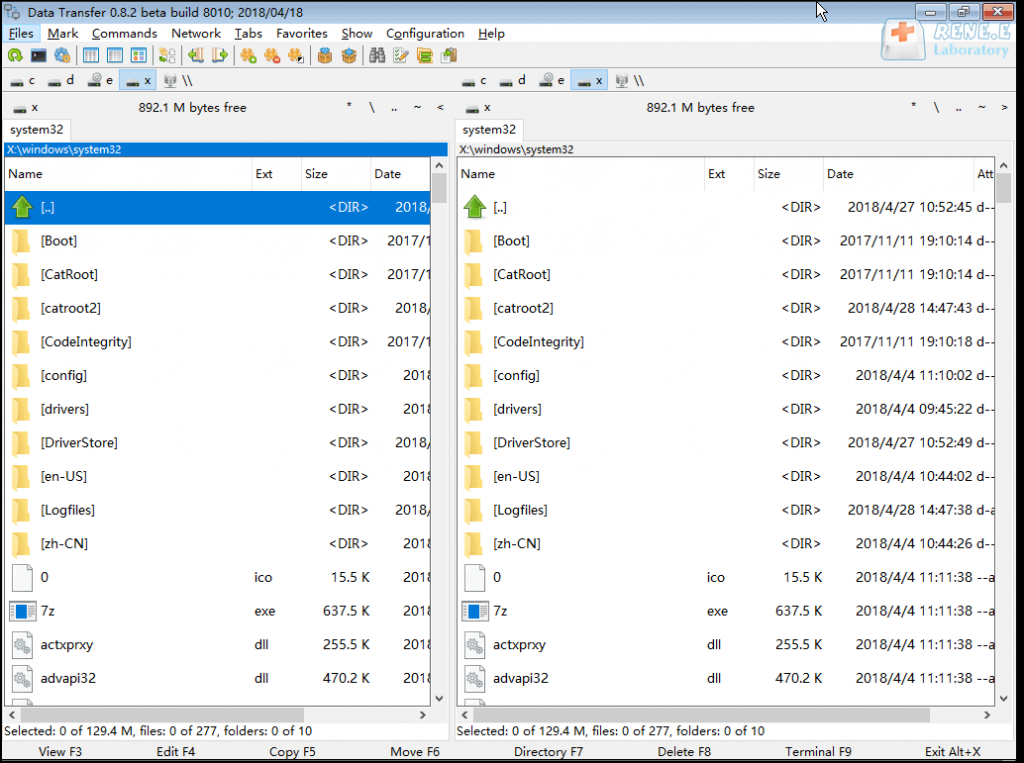
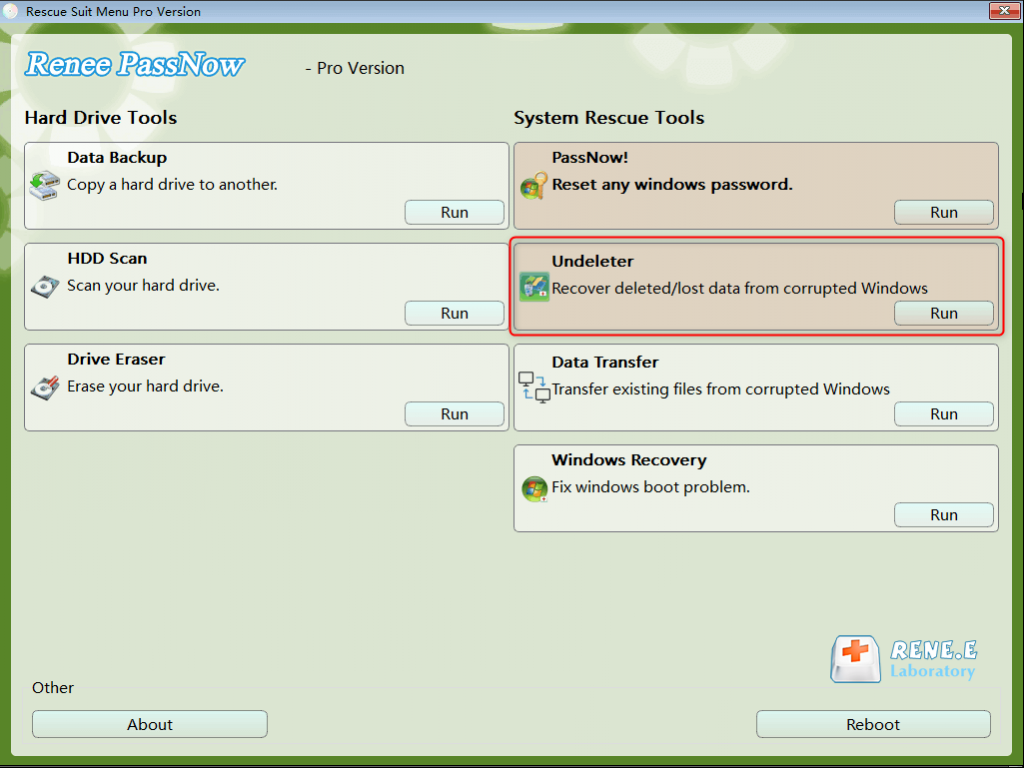
Step 4: Wait for a while, after Renee PassNow is loaded, select (Data Transfer). If you need to transfer the data of the entire hard disk, you can select the (data backup) option.
data transfer function in Renee Passnow
Step 5: You can click on each drive letter (C/D/E/F, etc.) to check whether important files are lost. If not, it is recommended that you transfer them to an external disk.

Transferring data is a simple process that can be done with ease. For instance, if you wish to transfer data from the C drive to the G drive, simply select the C drive on the upper left, followed by the G drive on the upper right. Then, choose the desired files from the C drive and click on the Copy function button in the middle. This allows for a smooth transfer of disk data. In case you need to delete a file, you can select it and click on the (Delete) button in the middle. However, please note that this action cannot be undone, so proceed with caution.

data transfer in Renee Passnow
Step 6: If you find that there is data loss, please select the (Undeleter) option on the main interface of the function, and click the (Run) button.
data recovery function in Renee Passnow
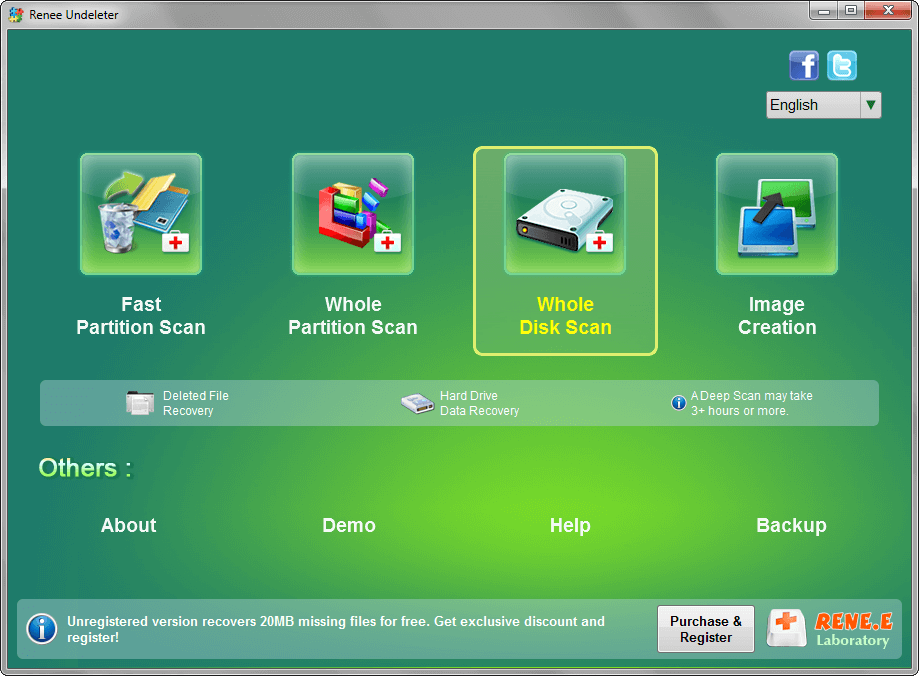
Step 7: Select (Whole Disk Scan) to scan the target hard disk.
select whole disk scan to scan disk in renee undeleter
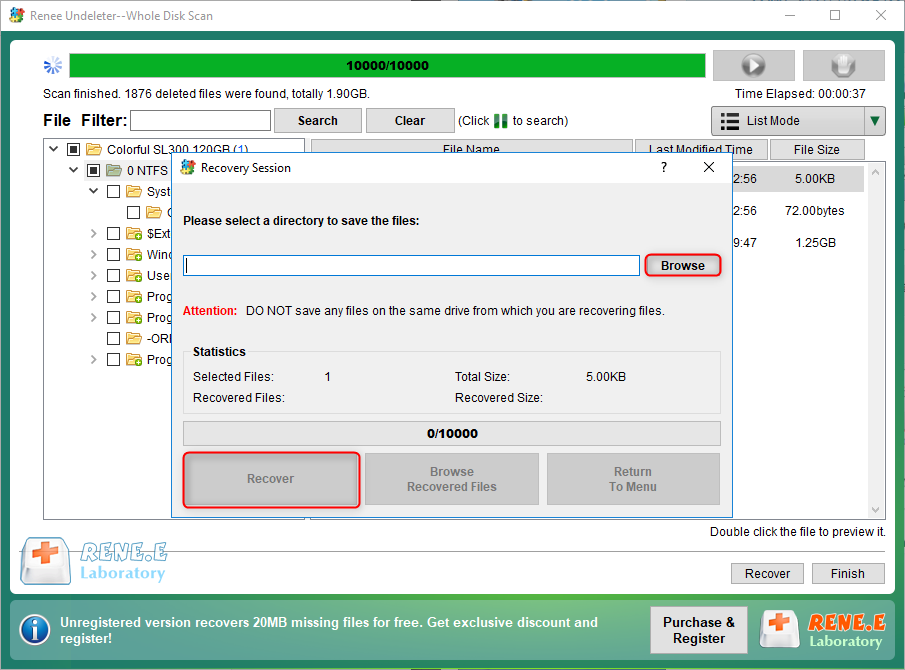
Step 8: After the scan is complete, select the file to be recovered, click the (Recover) button. Please save the file on another external disk, and eject the USB disk after the data recovery.
recover files from whole disk scan with renee undeleter