

A Step-by-Step Guide for Mastering Bootsect on Windows

Summary
Learn about Bootsect.exe program including its definition, scope of use, and how to use it. Also, discover how to backup data to avoid loss in case of system failure.
Table of contents
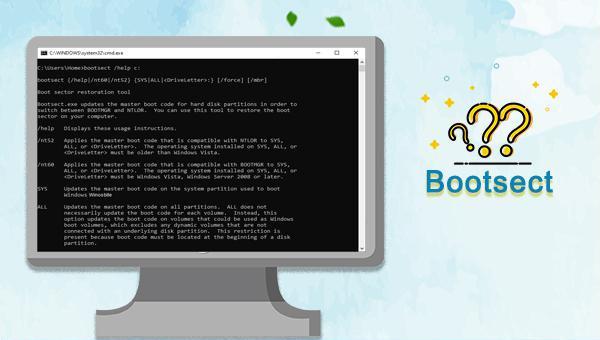
| Order | describe |
| /help | Show these usage instructions. |
| /nt52 | Applies NTLDR-compatible master boot code to SYS, ALL, or <DriveLetter>. The operating system installed on SYS, ALL or <DriveLetter> must be a system version earlier than Windows Vista. |
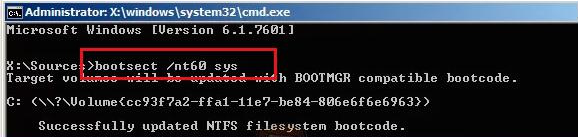
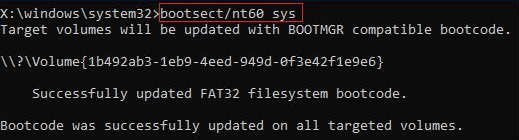
| /nt60 | Apply BOOTMGR-compatible master boot code to SYS, ALL, or <DriveLetter>. The operating system installed on SYS, ALL or <DriveLetter> must be Windows Vista and its later system versions, such as Windows 7, Windows 8, Windows Server 2012 or newer versions. |
| SYS | Updates the master boot code on the system partition used to boot Windows. |
| ALL | Update the master boot code on all partitions. ALL does not necessarily update the boot code for each volume. Instead, this option updates the boot code on volumes that can be used as Windows boot volumes, excluding any dynamic volumes that are not connected to an underlying disk partition. This limitation exists because the boot code must be at the beginning of the disk partition. |
| <Drive Letter> | Update the master boot code on the volume associated with this drive letter. If the <DriveLetter> is not associated with a volume or if the <DriveLetter> is associated with a volume that is not attached to the underlying disk partition, the boot code will not be updated. |
| /force | Force unmount volume during boot code update. You must use this option with caution. If Bootsect.exe cannot gain exclusive volume access, the file system may overwrite boot code before the next reboot. Bootsect.exe always tries to lock and unmount volumes before every update. When /force is specified, a force unmount will be attempted if the initial lock attempt fails. For example, locking may fail if the file on the target volume is currently open by another program. On success, force unmounting enables exclusive volume access and reliable boot code updates even if the initial lock fails. Also, a forced dismount invalidates all open handles to files on the target volume. This may cause unexpected behavior in programs that open these files. Therefore, use this option with caution. |
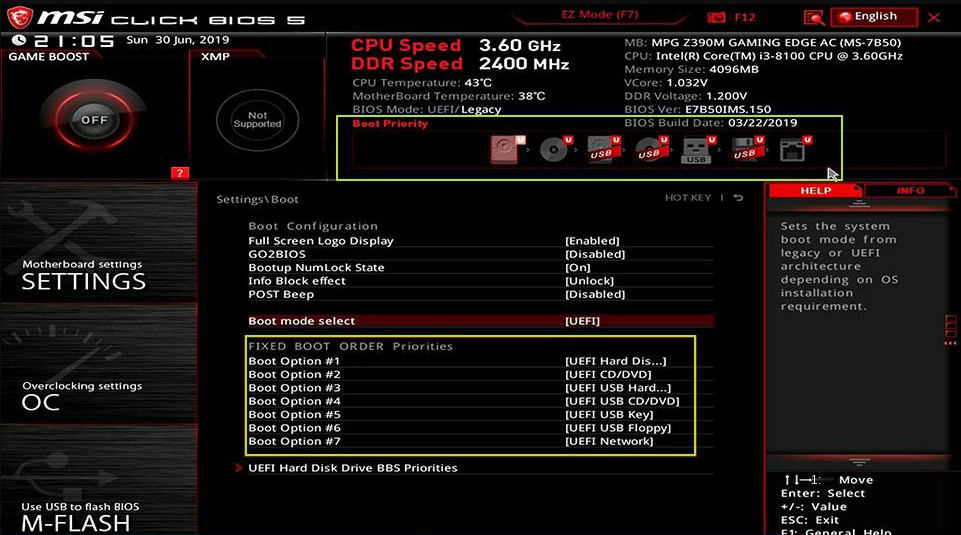
A. If you have a system installation medium, you can refer to the following method to use the Bootsect program, the specific steps are as follows:
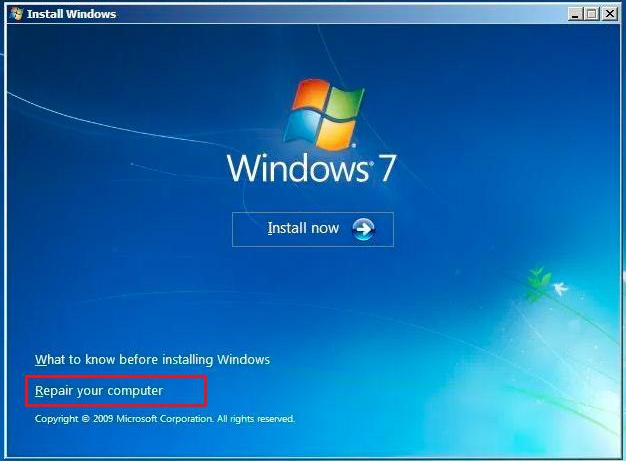
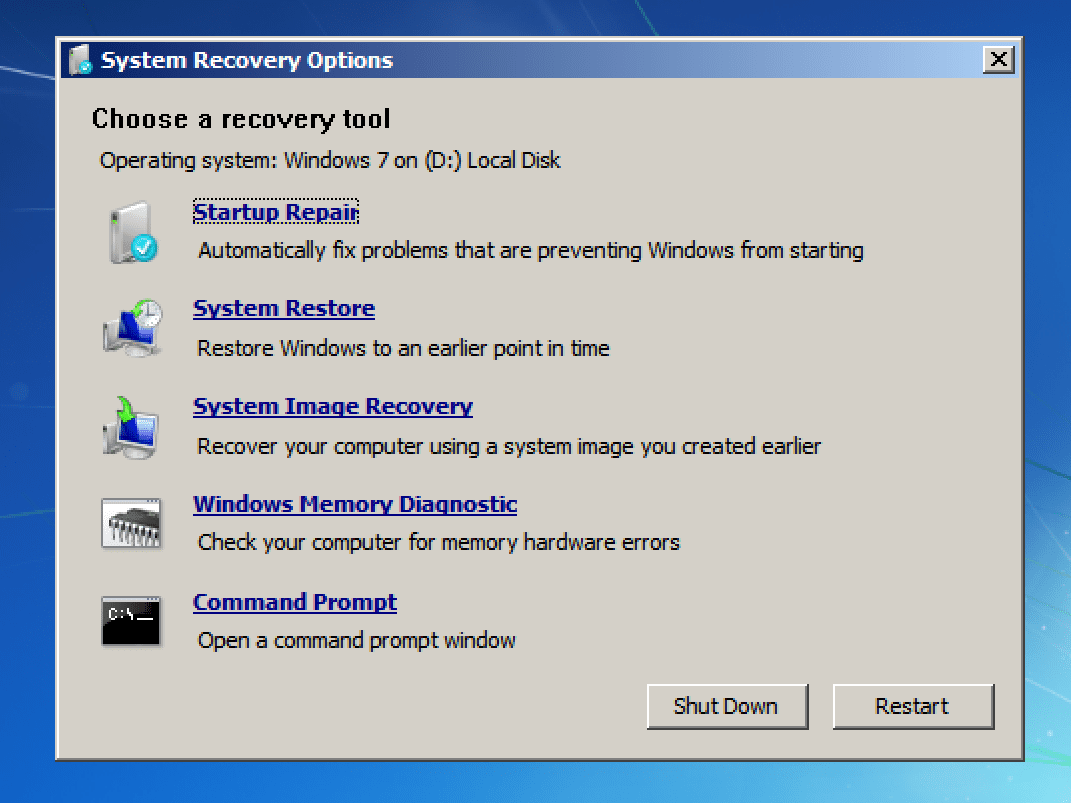
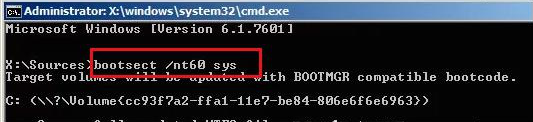
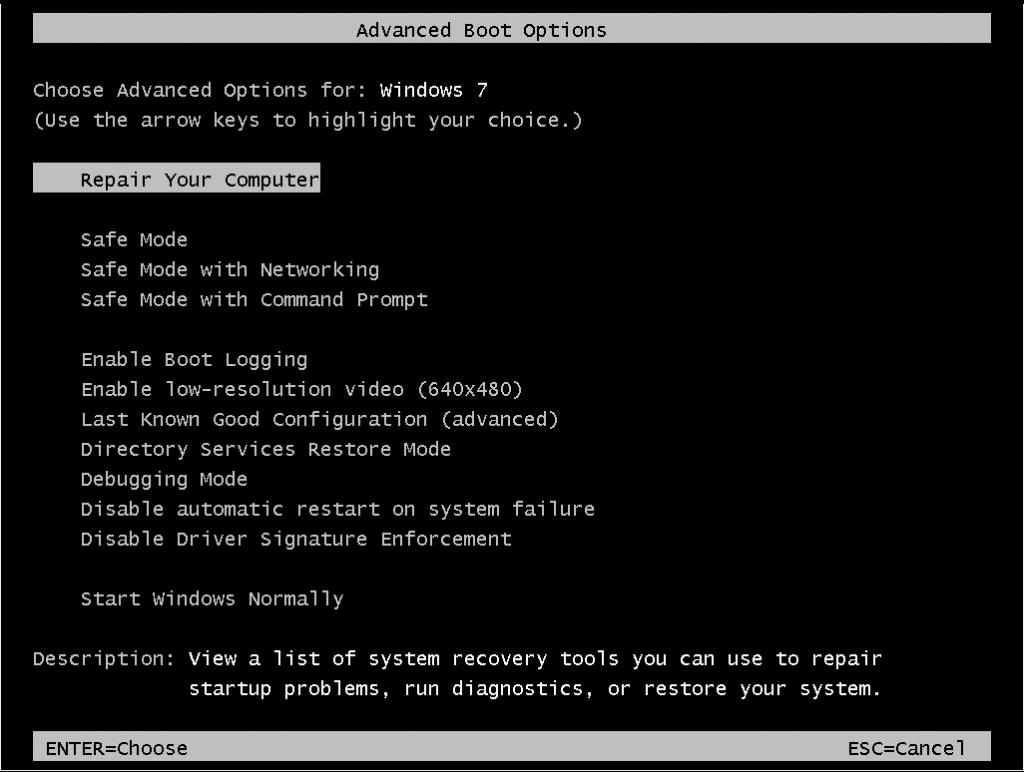
B. If you do not have a system installation medium, you can refer to the following method to use the Bootsect program, the specific steps are as follows:
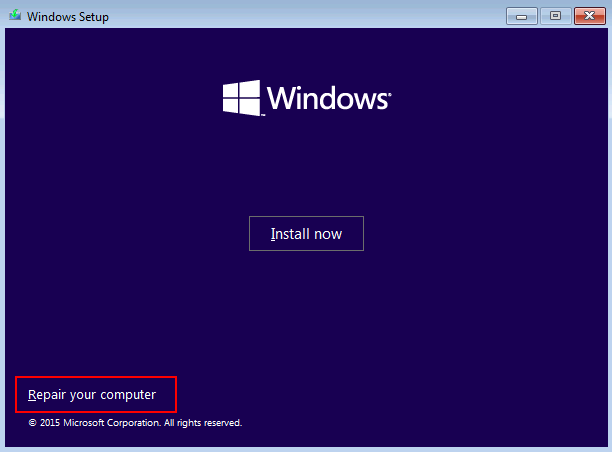
A. If you have Windows 8/10 system installation media, you can refer to the following method to use the Bootsect program, the specific steps are as follows:

B. If you do not have the Windows 8/10 system installation media, you can refer to the following method to use the Bootsect program, the specific steps are as follows:


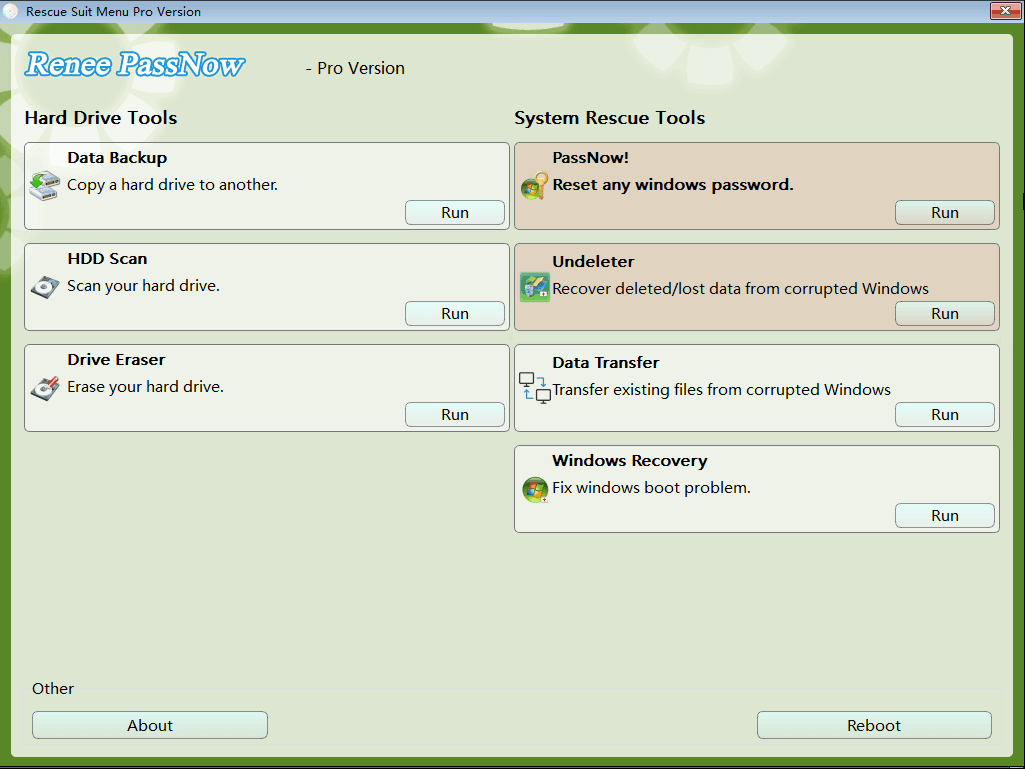
Easy to use 3 steps to transfer the files.
Transfer the files Transfer the important files of the computer without system.
Preview the files Preview the files while transferring the data.
Multifuctional Data recovery, Windows password reset, bootable problem recovery can be run without system.
Highly compatible Windows 10/8.1/8/7/XP/Vista. Also supports UEFI boot mode.
Easy to use 3 steps to transfer the files.
Transfer the files Transfer the important files of the computer without system.
Preview the files Preview the files while transferring the data.
Free TrialFree TrialNow 2000 people have downloaded!


Relate Links :
How to boot from CD in Windows 10?

03-04-2024
Ashley S. Miller : Discover the straightforward process for booting directly from a CD in Windows 10, whether you're aiming to repair...
Easy Solutions for Fixing the error BOOTMGR is Compressed
01-03-2024
Jennifer Thatcher : Discover effective methods to resolve the "BOOTMGR is compressed" error on Windows PCs and retrieve inaccessible data without...
Fixing "Advapi32.dll Missing" Error on Windows System

09-12-2023
John Weaver : When you meet the error Advapi32.dll missing on your computer, you can fix it with the solutions presented...
Tips and Tricks for Solving KMODE_EXCEPTION_NOT_HANDLED on Blue Screen

03-04-2024
Amanda J. Brook : If you're facing the KMODE_EXCEPTION_NOT_HANDLED error on your Windows system, this guide offers a range of solutions to...

