author avatar
    Technology Manager of Test Dept.
 

Summary
To run 64-bit software on a 32-bit Windows system, follow these methods for a possible solution despite the different operating rules. Besides, it's recommended to backup Windows system regularly.


how to run 64 bit programs on 32 bit

I. What are 32-bit and 64-bit operating systems?

A 32-bit operating system is designed for a 32-bit CPU. The internal registers and addressing bus of the CPU are 32-bit, and the instruction set can run 32-bit data instructions.
A 64-bit operating system is an operating system specially designed for computers with a 64-bit architecture. The advantage of this operating system is that it can take advantage of the 64-bit processor and have better performance when processing multimedia content. In computer architecture, a 64-bit integer, memory address, or other data unit is one that is up to 64 bits (8 bytes) wide.
Compared with the 32-bit and 64-bit operating systems, in addition to the different original design intentions, the configuration requirements, computing speed, and addressing capabilities of the devices are different. In short, a 64-bit operating system requires the support of 64-bit host hardware and the assistance of 64-bit software in order to maximize the advantages of a 64-bit system.
In general, 32-bit processors cannot run operating systems designed for 64-bit CPUs, nor can they support 64-bit applications. A 32-bit CPU can only run 32-bit operating systems and applications designed for 32-bit operating systems. A 64-bit system can support a 32-bit operating system and 32-bit applications. Therefore, if you want to install and run 64-bit software in a 32-bit system, you need to use a specific method to solve it, let’s continue to understand.

II. What are the methods for installing/running 64-bit software on a 32-bit operating system?

1. Upgrade the Windows system from 32-bit to 64-bit

Before officially upgrading the system, the first thing we need to do is to check whether your hardware device meets the upgrade standard. Only when your computer is compatible with the 64-bit system in terms of hardware, processor, CPU, and drivers can the system be upgraded smoothly.

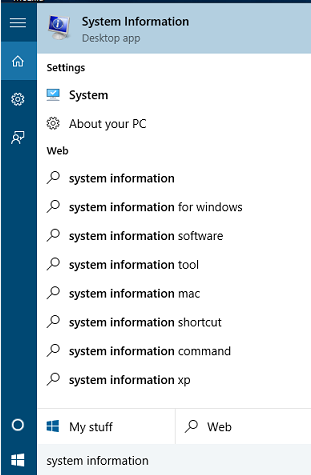
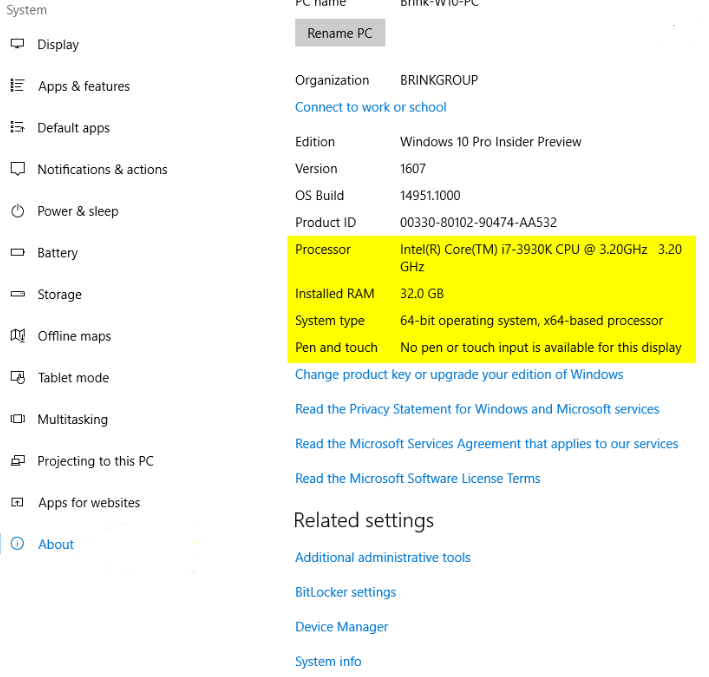
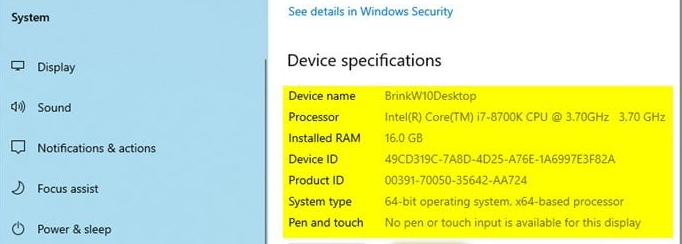
Phase 1: Check if your PC device is 64-bit compatible

a , Check whether the PC is 64-bit compatible
Step 1: Run the PC device, enter and open (system information) in the search box in the lower left corner.
type system information
Step 2: Next, check whether the device supports 64-bit system in the system type. When you see ×64, your computer can support 64-bit system upgrade; if you see ×86, you cannot install a 64-bit system.
system type
b , Check whether the processor supports Windows 64-bit
Step 1: Enter and open (Settings) in the search box in the lower left corner of the computer. Next, find the (System)-(About) option in turn. Check whether it is 2GB or higher in “Installed RAM”. If the RAM is less than 2GB, the 64-bit operating system cannot be upgraded.
Step 2: Next, look under “System Type”, if it says “x64-based processor”, it means you can upgrade your computer from 32-bit to 64-bit.
installed RAM
c , determine driver compatibility
In addition to the processor, other components that are compatible with the 64-bit version of the Windows operating system need to be confirmed, such as graphics and sound cards, disk drivers, and so on. If you’re running 32-bit Windows 10, but your PC hardware is new, they may be compatible with the 64-bit version of the driver. Verify that the component has 64-bit drivers through your device manufacturer’s website. After making sure your PC is relatively compatible with a 64-bit operating system, you can move on to the next stage.

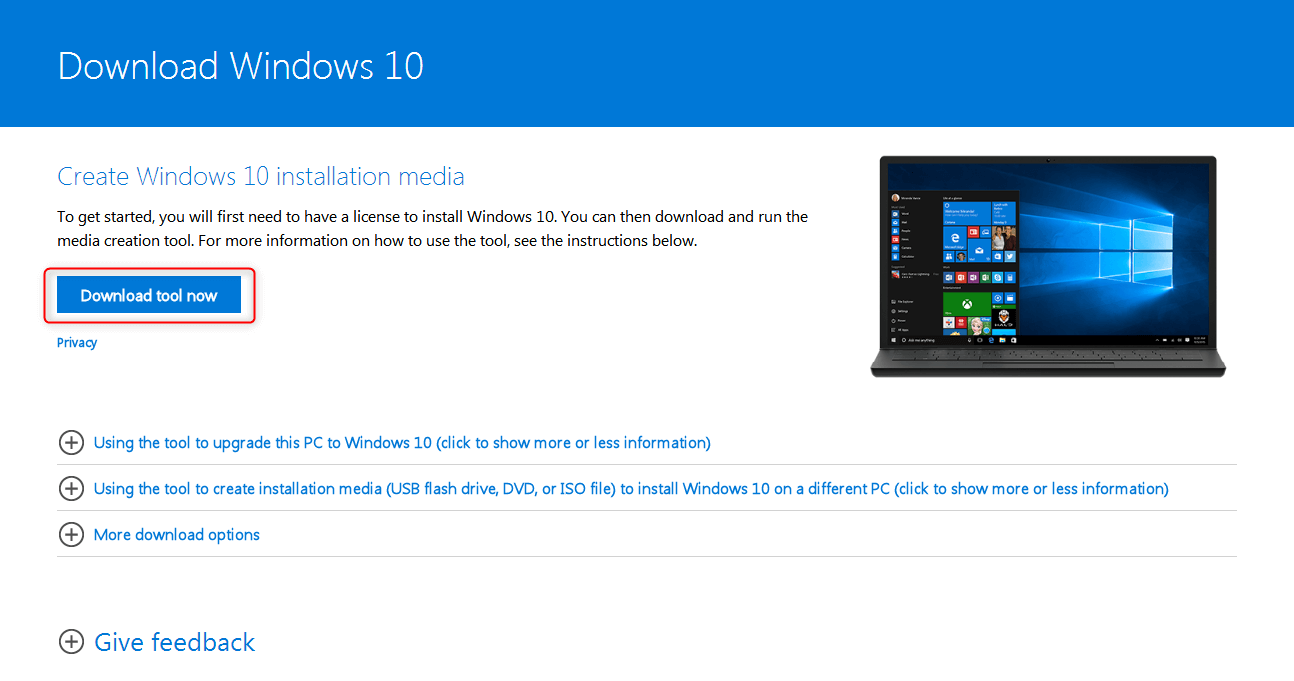
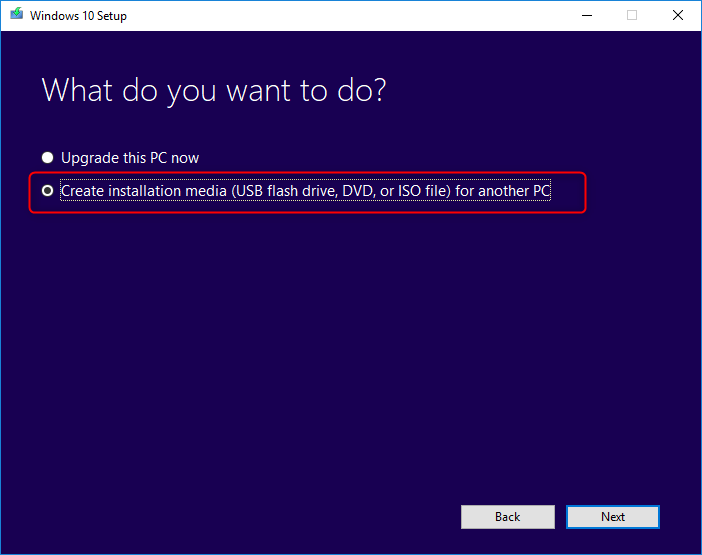
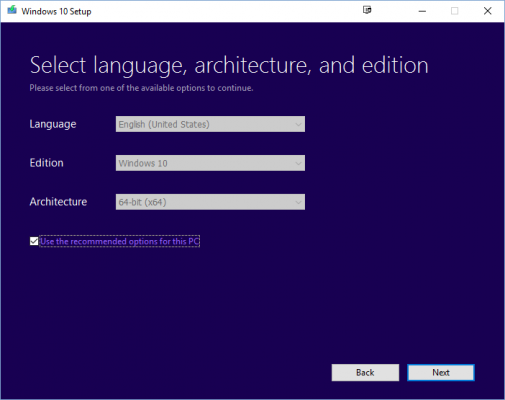
Phase 2: Upgrade OS to 64-bit

Here, we take installing Windows 10 as an example to show you the whole process of upgrading the 32-bit operating system to 64-bit. Here are the steps:
Step 1: Go to Microsoft official website to download Windows 10 Media Creation Tool (https://www.microsoft.com/software-download/).
windows media creation tool
Step 2: Connect an empty USB device of at least 8GB to your computer. Double-click to run MediaCreationTool.exe, follow the on-screen guide to create Windows 10 64-bit installation media on USB.
create media Windows 10
Step 3: Restart your PC afterwards and enter BIOS Set up to boot the computer from the USB installation media. After setting the language, version, and architecture (select 64-bit), click (Next), and then follow the prompts to start installing the Windows 10 64-bit operating system
media creation tool select architecture

2. Use a virtual machine to run 64-bit programs and software

A virtual machine allows you to run an operating system on a computer without changing the operating system. You can keep your old 32-bit OS and run a 64-bit OS on the same machine via a virtual machine (a VMware machine as an example here). By running a 64-bit operating system on a VMware machine and installing and running all types of 64-bit programs, applications, and software without any issues. The specific operation steps are as follows:
Step 1: Select and install a suitable virtual machine. You can choose a virtual machine program from VirtualBox, VMware Player, VMware Fusion, and Parallels Desktop.
Step 2: Download the 64-bit Windows ISO file and run the VMware machine.
Step 3: Choose to install the 64-bit version of the operating system and set up the hard drive where the 64-bit operating system will be installed. Then follow the prompts to complete the entire installation process. When asked about the operating system to be installed, select the 64-bit version.
Step 4: After installing the operating system, restart the VMware virtual machine. After that, you can proceed to download, install and run 64-bit programs and applications.
virtual machine
The above are two solutions that support running 64-bit software on a 32-bit operating system. If you use method 1, before the official upgrade operation, it is recommended to back up the system through professional backup and restoration software. It is recommended that you use Renee Becca to operate. The following is a detailed software introduction and operation method.

III. How to use Renee Becca to back up the system?

1. What is Renee Becca?

Renee Becca is a tool specially used for system/hard disk data backup and restoration. It can help you back up and restore important data in your computer, such as programs, system configuration, emails, photos, videos, documents, bookmarks, etc. It adopts leading incremental/differential backup technology, which can save you more time and disk space. In addition to system backup, it also supports partition backup, hard disk backup, file backup, and disk cloning to meet your different needs.
Hot Topic - ADsRenee Becca - Safe Data Manager for Disk

Safely erase disk data Erase data from disk with an unrecoverable way.

17 data erase standards Overall protection for data security.

Quick access to Disk Management One click for Disk Management to set partitions.

Supports different devices Including hard disk / memory card / USB disk, etc.

User friendly Even newbie can handle it in seconds.

Safety erase Prevent from recovered after erased.

Quick access One click for Disk Management.

Compatible with different devices Hard disk / memory card / USB disk, etc.

Free TrialFree Trial 800 users have downloaded and try Renee Becca

2. How to use Renee Becca to back up the system?

Backup system with Renee Becca is very simple, the specific operation steps are as follows:
Step 1: Download, install and run Renee Becca on the computer, and select the (System Backup) option in the main interface (Backup) column.
how to reinstall windows 10 with renee becca
Step 2: Next, select the source file (device) and the destination. The source file (device) generally selects the system partition by default, and the destination can choose the location where you want to save the system backup. In (Backup Scheme), you can choose the appropriate backup scheme mode according to your personal needs. Renee Becca has 5 backup schemes to choose from, namely version chain mode, single version mode, full mode, incremental mode and differential mode.
set the specific backup schemes
Renee Becca has 5 backup plans to choose from:
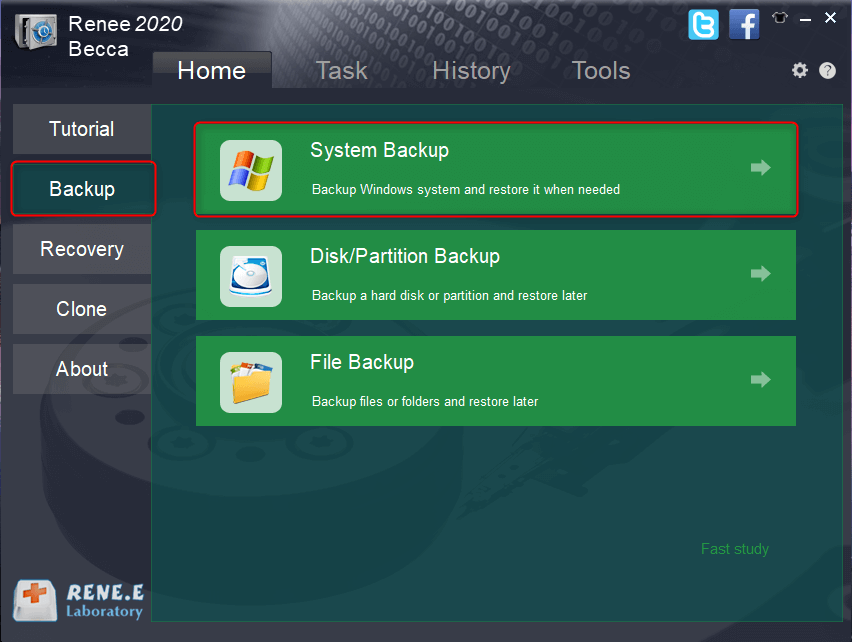
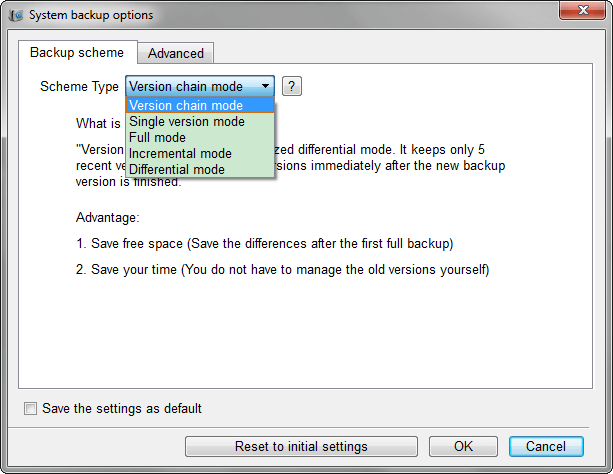
Version chain mode: Only the latest 5 versions are kept, and useless old versions are automatically deleted after the backup is complete.
Single version mode: Only the most recent version is kept, and the previous version is automatically deleted after the backup is complete.
Full mode: Create a full backup.
Incremental mode: After the initial full backup, only incremental backups are created.
differential mode: After the initial full backup, only differential backups are created. You can view the difference between incremental backup and differential backup.
In addition, in (Scheduler), you can set a daily/weekly/monthly automatic backup plan and the time to start the backup, click (OK) to enable the automatic backup function.
set the backup scheduler in Renee Becca
Step 3: After all settings are completed, click (Backup Now), and you can check the backup progress in the task bar. If you need to restore the system, please check the Recovery.
how to reinstall windows 10 with renee becca