author avatar
    Senior Program Developer
 

Summary
Learn how to perform lenovo ssd upgrade of your Lenovo computer and save costs with this comprehensive hardware upgrade tutorial.


lenovo ssd upgrade

I. What is SSD and what are the advantages after upgrading?

Solid State Drives (SSDs) are storage devices crafted from NAND electronic flash memory, encompassing a control unit and storage unit. While they uphold the same interface specifications, definitions, and usage methods as traditional mechanical Hard Disk Drives (HDDs), SSDs are lauded for their significantly faster read and write performance, lower operating noise, enhanced durability, security, and energy efficiency. Consequently, SSDs have ascended as the preferred choice for contemporary storage solutions.
The data processing capability of HDDs is restricted. For Lenovo computers experiencing slower running or boot-up speeds, upgrading to an SSD can significantly enhance performance, aligning with the current mainstream trend.
After understanding the concept of SSD and the advantages of upgrading SSD, the following will introduce the method of upgrading/replacing Lenovo computer HDD to SSD.

II. How to upgrade Lenovo computer to SSD?

The hard disk serves as the primary data storage component in a computer system. Prior to upgrading to a new solid-state drive (SSD), ensure data and system migration from the existing hard disk by utilizing a specialized backup tool. For this purpose, consider using Renee Becca for efficient operation. Detailed instructions are provided below.

1. Use Renee Becca to clone Lenovo computer hard disk to SSD

What is Renee Becca?
Renee Becca is a dedicated software for system and hard disk data backup and recovery. It enables you to safeguard and restore essential computer data, including applications, system settings, emails, photos, videos, documents, and bookmarks. Additionally, Renee Becca offers disk and system data cloning with three options: hard disk cloning, partition cloning, and system migration, allowing you to select the cloning technique that best fits your requirements.
Overview of Renee Becca Clone Function

  • Hard Disk/System Hard Disk Clone: This feature allows you to duplicate a selected disk, providing the flexibility to adjust partition sizes using mouse control. It guarantees the creation of a bootable system disk clone.
  • Partition Clone: This tool enables precise replication of a chosen partition, ensuring an exact copy.
  • System Migration: Effortlessly transfer your system to a different hard disk, simplifying system upgrades and replacements.
Renee Becca - Reliable Data Backup & Restore Software

Quick Backup files at up to 3,000MB/min.

Fullfill different backup needs Supports system backup, disk / partition backup, file backup and disk clone.

Intelligent Automatically analyze the differences between source and backup data.

Convenient Support VSS, allowing to freely view webpages when backing up system.

Highly compatible Supports various files and storage devices.

Quick Backup files at up to 3,000MB/min.

Fullfill different backup needs Backup for disk, partition and system. Save disk space by backing up incremental /differential data.

Highly compatible Supports various files and storage devices.
Free TrialFree Trial 2000 users have downloaded and enjoy Renee Becca!
How to clone a hard drive with Renee Becca?
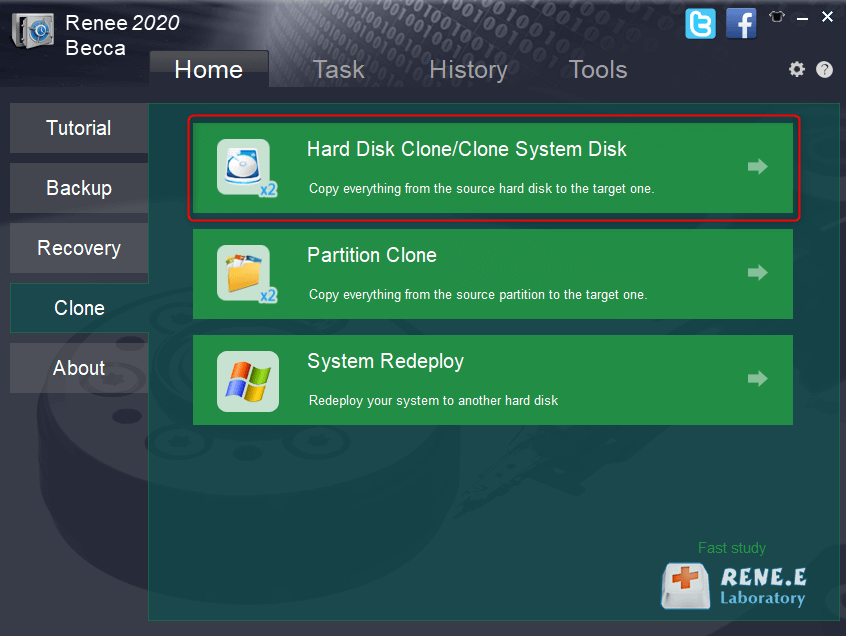
Step 1: Download, install and run Renee Becca, select the option (Hard Disk Clone/Clone System Disk) in the main interface (Clone) column.
select to clone hard disk within renee becca
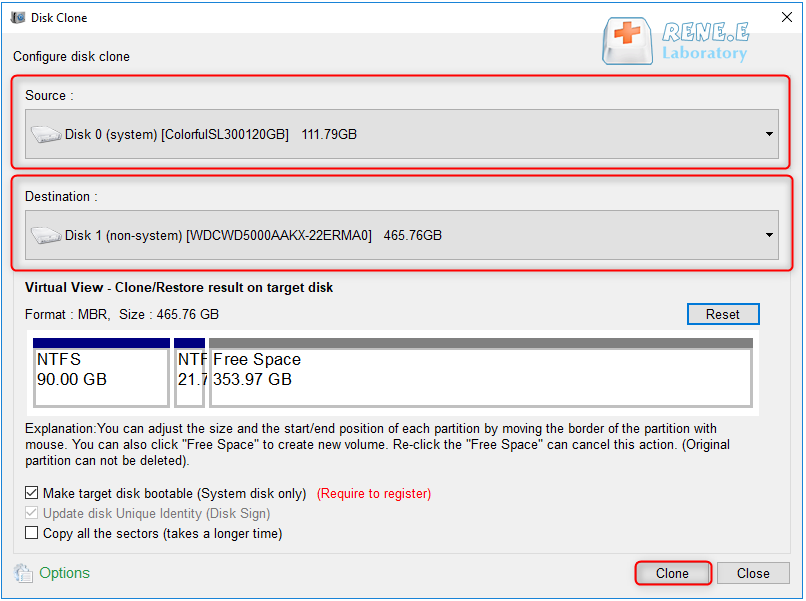
Step 2: Select the original disk and the new hard disk as the source and destination in the “Disk Clone” window. Adjust the partition size by dragging the boundary line. If cloning a system disk, check “Make target disk bootable” for the system partition. Click “Clone” to start the process. Be aware that cloning will overwrite the destination disk, so ensure you back up files beforehand.
clone disk with renee becca

2. How to replace the hard disk

To upgrade your Lenovo computer’s HDD to an SSD, select an appropriate SSD based on your device model. Refer to the computer’s manual or the specifications listed on the official website to identify the compatible SSD type. For a comprehensive guide on choosing the right SSD, click here.
Laptop SATA SSD replacement steps:
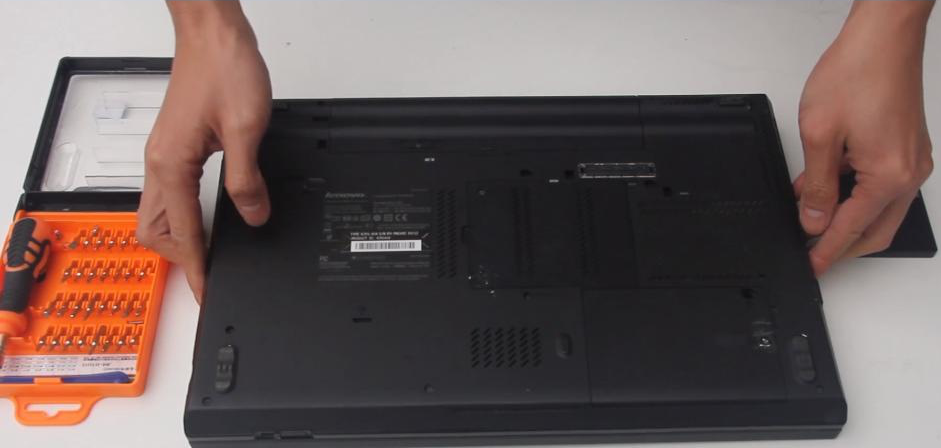
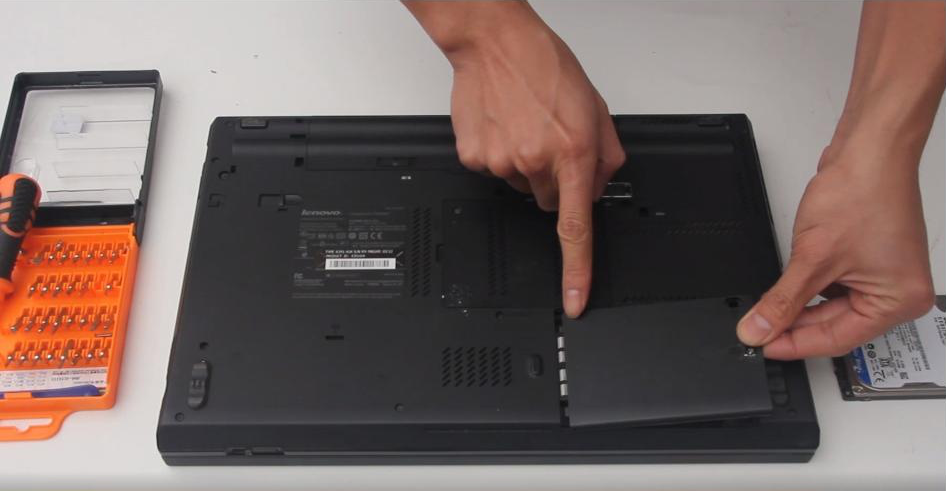
Step 1: Invert the laptop to expose its underside. Utilize a professional-grade screwdriver to detach the back panel, thereby gaining access to the hard disk compartment. (Note: The position of the hard disk can differ across brands. Refer to the user manual, visit the official website, or reach out to the manufacturer for precise instructions.)
Remove the back cover where the hard drive is installed in the notebook
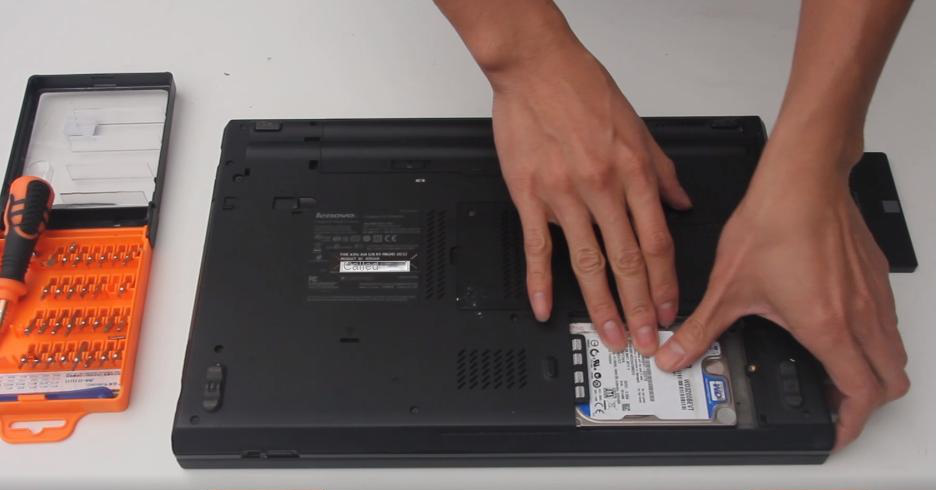
Step 2: After opening the back cover of the hard disk, pull out the 2.5-inch HDD from the hard disk slot.
Pull out the HDD from the hard disk slot
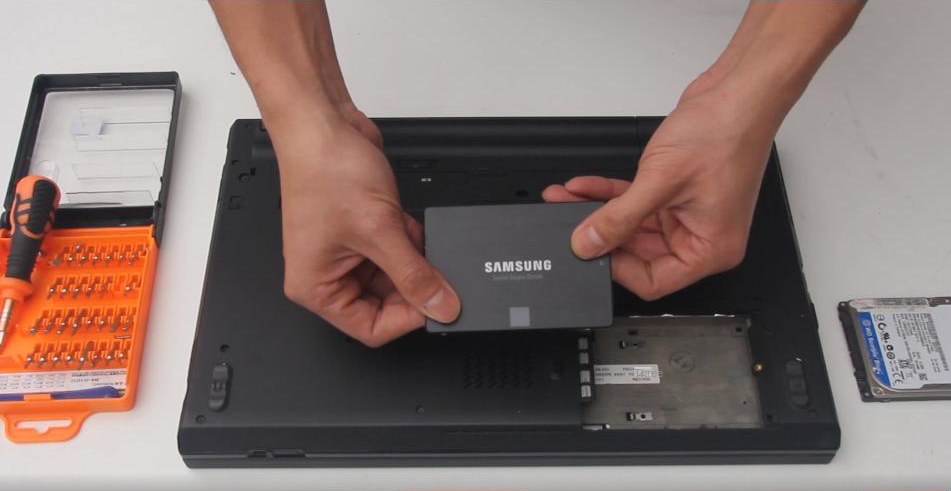
Step 3: Insert the solid-state drive to be replaced into the hard drive slot, and note that the position of the solid-state drive disk interface should match the position of the disk interface in the card slot.
Insert the solid state drive to be replaced into the hard drive slot
Step 4: After the installation is complete, reinstall the back cover of the notebook hard drive to complete the entire replacement procedure of the solid state drive, which is very simple.
Reinstall the back cover of the laptop hard drive
Tips Click here to view the installation video of the solid-state hard disk of the two interfaces, and users who need it can view it.
Laptop M.2 SSD replacement steps:
Note: Some laptops may not have an M.2 interface. In this case, you can only replace the SSD with the SATA interface.
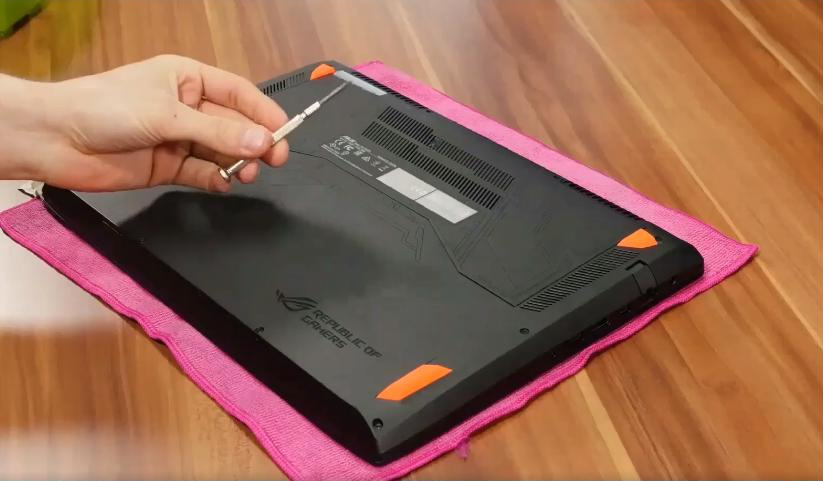
Step 1: Carefully invert the laptop and, using a professional screwdriver, detach the back panel. (Note: The hard disk’s position may differ according to the brand; consult the user manual, visit the official website, or reach out to the manufacturer for specific instructions.
Remove the back cover where the hard drive is installed in the notebook
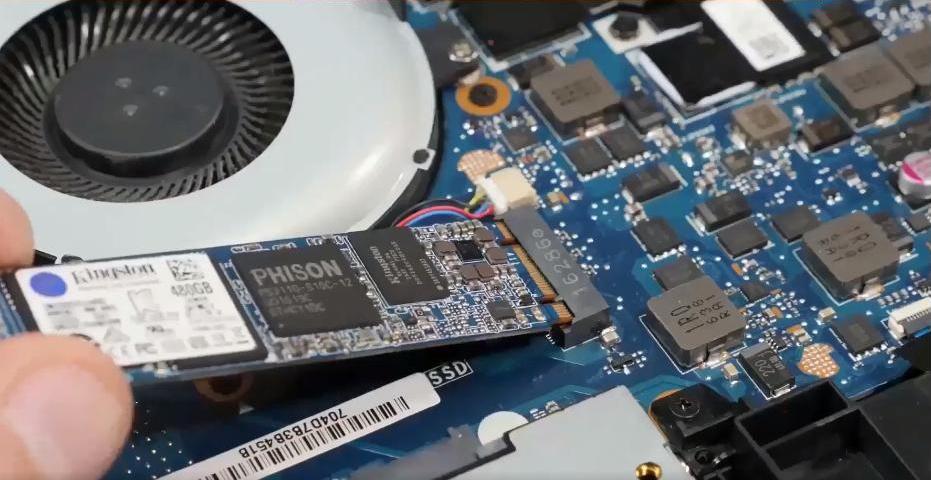
Step 2: Identify the M.2 slot on your motherboard. Carefully insert the SSD at an angle into the slot, and then gently press it down until it clicks into place, ensuring a secure connection with the motherboard interface.
Insert the SSD obliquely into the corresponding interface
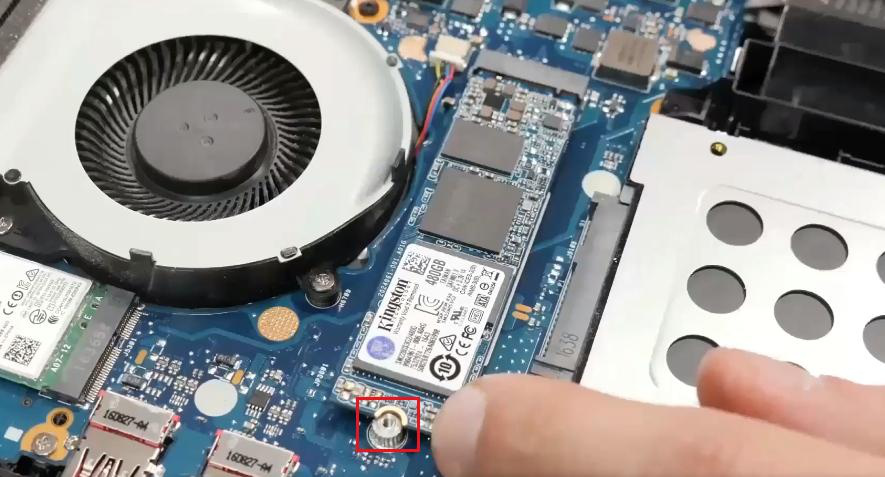
Step 3: After the SSD is installed, fix the screws at the end. Finally, reinstall the back cover of the laptop to complete the replacement of the M.2 solid-state drive.
Screws to fix the tail
TipsTo replace your computer’s original system hard disk with a new SSD and migrate the system, use Renee Becca’s system migration feature. After migration/cloning and installing the new SSD, access the BIOS to set the SSD as the primary boot device for successful booting. For BIOS access and boot sequence modification instructions, click here.