

How to Recover Deleted Files from a Network Drive (Windows Server & NAS)

Summary
This guide outlines systematic approaches to recover deleted file from network drive across Windows Server and NAS environments. It covers native recovery features, administrator-mediated options, and professional software solutions that access physical storage directly.


Here are the typical environments where this happens:
| Environment | Recovery Approach |
|---|---|
Windows Server SMB/CIFS Shared Folders | - Use Previous Versions (VSS snapshots) if enabled - Check server‑side Recycle Bin - If unavailable: run recovery software on the server itself or remove the disk for direct scanning |
Consumer NAS Devices (Synology, QNAP, WD, etc.) | - Check NAS Recycle Bin - Check NAS snapshots (if supported) - If not recoverable: remove NAS disks and scan them directly with recovery software |
Workgroup Computer Shared Drives | - Use local Recycle Bin - Use Previous Versions (if enabled) - If not available: run recovery software on the host PC |
First actions checklist (do these immediately):
| Your Setup | Most Likely First Steps | Key Limitation |
|---|---|---|
Windows Server shared folder (no admin access) | Ask admin to check Server Recycle Bin / Previous Versions | You cannot run recovery tools directly |
Windows Server shared folder (admin access) | Check Server Recycle Bin → Previous Versions → use recovery software on server | Requires direct server login |
NAS device (Synology, QNAP, etc.) | Log into NAS admin panel → check #recycle folder or snapshots | Built-in features must be pre-enabled |
Unknown / no built-in recovery available | Plan to scan the physical disk (extract drive or use server-hosted software) | Requires hardware access or admin rights |
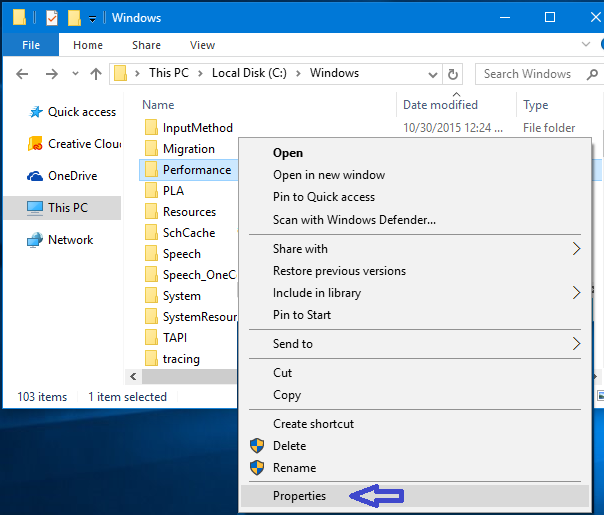
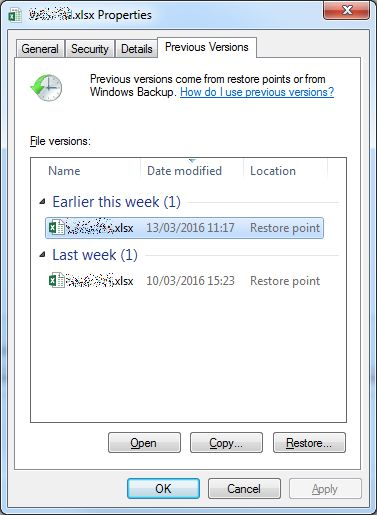
- Native Windows / NAS features – Previous Versions, server-side Recycle Bin, NAS recycle bin, or snapshots
- Admin-mediated recovery – Checking server backups or Volume Shadow Copy
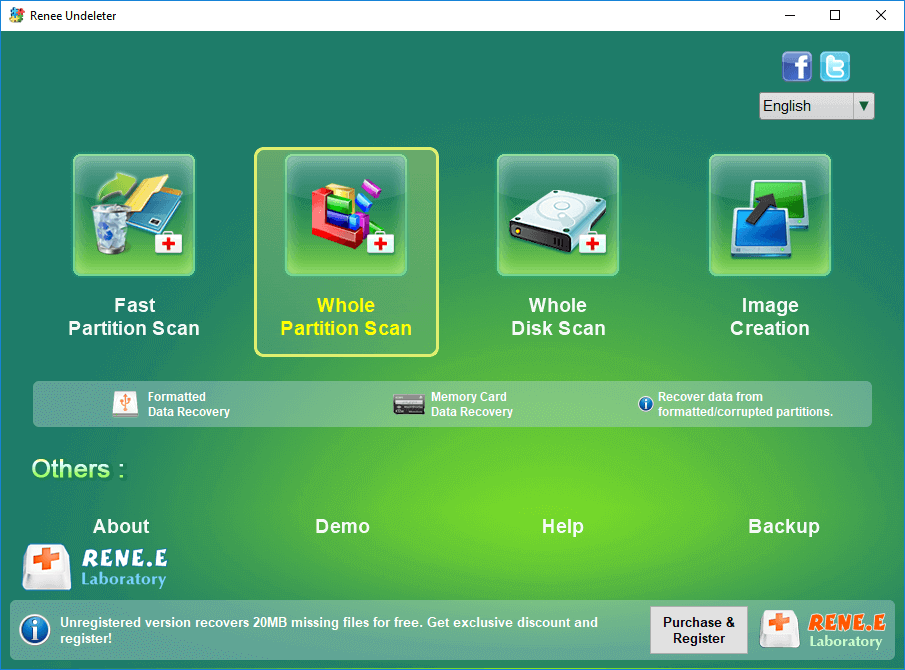
- Professional DIY software scanning the physical storage – Renee Undeleter installed on the server or used on extracted drives
- No software installation required
- Free when configured
- Restores entire folder structures quickly
Disadvantages:
- Requires Volume Shadow Copy to be pre-enabled
- Short retention window (often days or weeks)
- Not available on most consumer NAS devices
| NAS System | Recycle Bin & Snapshots | Typical Retention | Access Method |
|---|---|---|---|
Synology DSM (DiskStation Manager) | - Recycle Bin enabled per shared folder - Snapshots supported on Btrfs volumes - Windows “Previous Versions” integration | - Default recycle bin retention ~30 days - Snapshots retention customizable (Grandfather‑Father‑Son policy) | - File Station → Right‑click folder → “Enable Recycle Bin” - Snapshot Manager in DSM - Windows Explorer → Properties → “Previous Versions” |
QNAP QTS / QuTS hero | - Network Recycle Bin enabled per shared folder - Snapshot Manager supports block‑level snapshots - Windows “Previous Versions” supported on SMB shares | - Default recycle bin retention ~30 days - Snapshots retention configurable (daily/weekly/monthly schedules) | - QTS File Station → “Network Recycle Bin” folder - Snapshot Manager in QTS - Windows Explorer → “Previous Versions” tab |
WD My Cloud OS | - Recycle Bin available on shared folders - No advanced snapshot system (basic file versioning only) | - Default recycle bin retention ~30 days (user‑configurable) | - My Cloud Dashboard → Settings → “Recycle Bin” - Access deleted files via hidden “Recycle Bin” share |
- No extra software or hardware needed
- Snapshots protect against ransomware and accidental deletion
- Recycle Bin gives instant recovery for recent deletes
Disadvantages:
- Both features must be pre-enabled before data loss occurs
- Snapshots take up significant storage space
- Recycle Bin retention is often short (default 7–30 days)

Easy to use Only simple steps to recover data from storage devices.
Multiple scan modes Fast partition scan, whole partition scan and whole disk scan for different recovery needs.
File types Support to recover pictures, videos, audios, documents, mails, etc.
Supported storage devices Recover data from recycle bin, SD card, external disk, etc.
Supported systems Windows 11,10, 8.1, 8, 7, Vista, XP, 2000 and Mac OS X10.6, 10.7, 10.8+.
Easy to use Only simple steps to recover data from storage devices.
Multiple scan modes - 3 scan modes for different recovery needs.
Supported storage devices Recover data from recycle bin, SD card, external disk, etc.
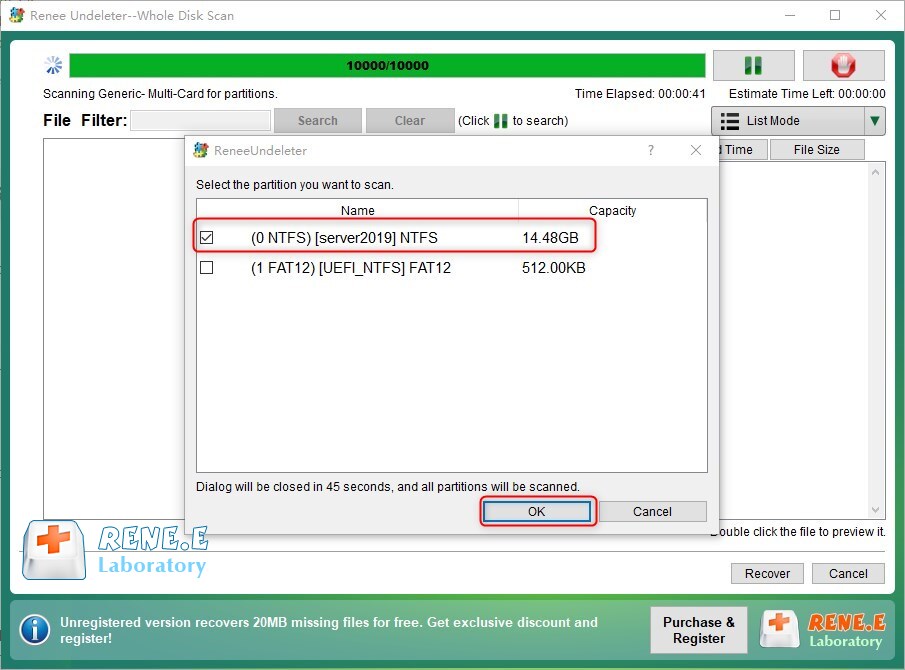
Scenario A: Direct Scan on Windows Server (Admin Access Available)
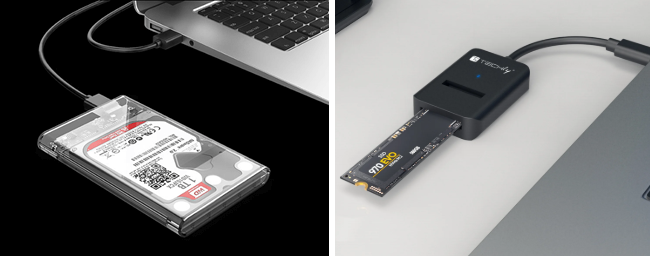
Scenario B: NAS with Removed Hard Drives (No Admin Access or NAS Recovery Failed)
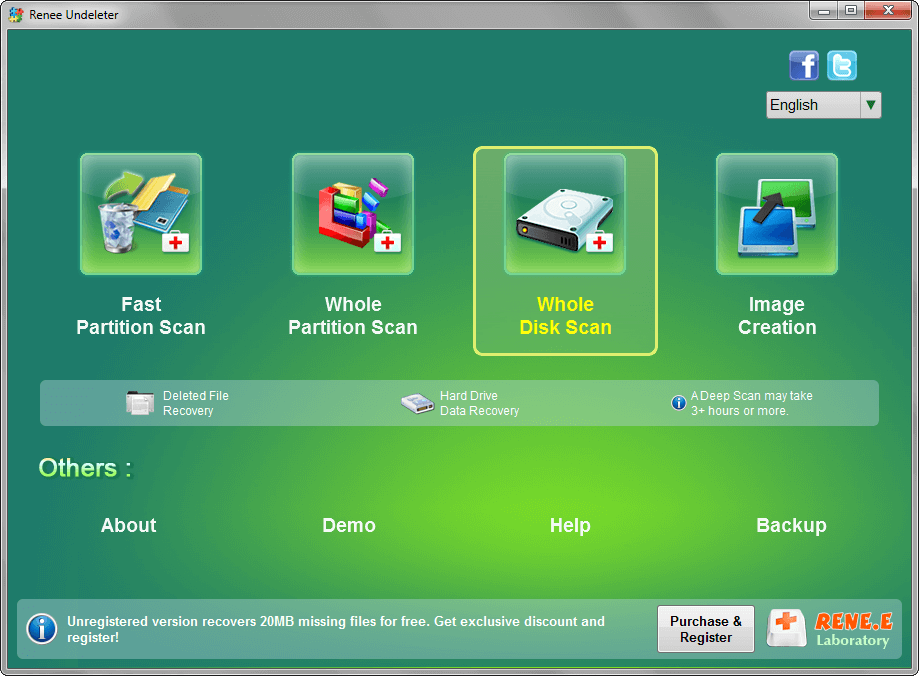


- Fast Partition Scan: Best for recent accidental deletions (limited direct use on network storage)
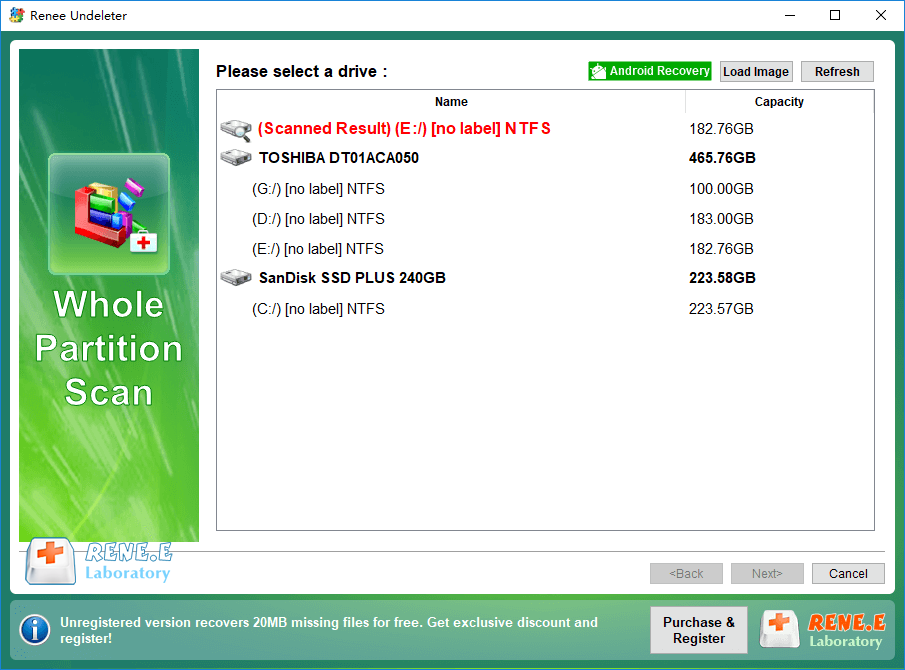
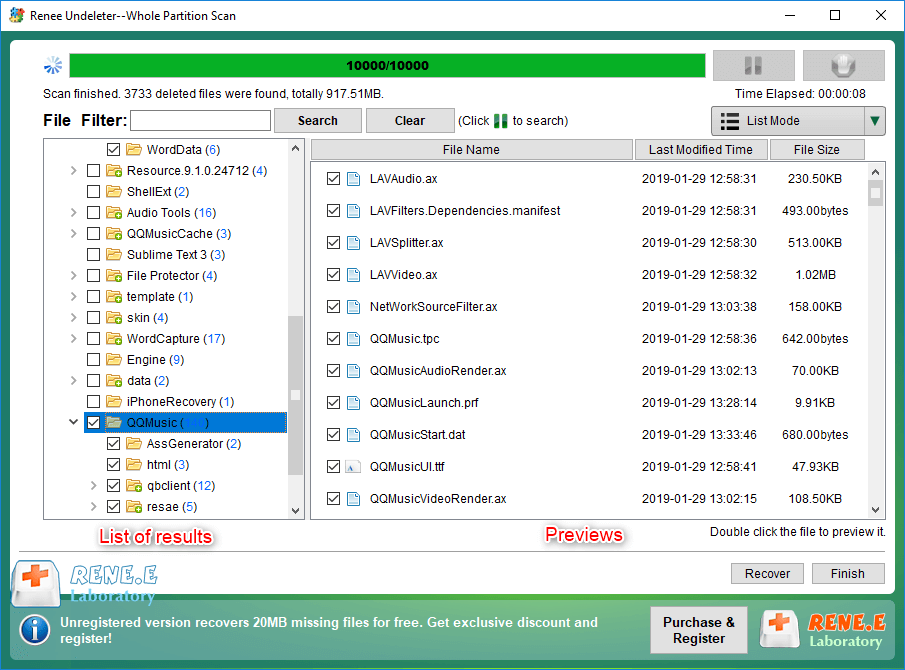
- Whole Partition Scan: Restores files from inaccessible or formatted partitions—your primary choice for server partitions
- Whole Disk Scan: Analyzes and scans the entire physical disk. Recommended for extracted NAS drives or when the partition table is damaged.
- Image Creation: Creates a safe byte-by-byte backup of failing drives before you attempt recovery
- Enable and schedule Volume Shadow Copy on Windows Server
- Turn on the NAS recycle bin with extended retention (e.g., 30 days)
- Set up regular automated backups to a separate device or cloud storage
- Review and tighten user permissions on shared folders to reduce accidental deletes
Why can’t I recover a deleted file by scanning the mapped drive (Z:) from my laptop?
Does Renee Undeleter work if the server has been used for days after deletion?
Can I recover files from a NAS without taking out the hard drives?
What is the difference between Fast Partition Scan, Whole Partition Scan, and Whole Disk Scan?
Easy to use Only simple steps to recover data from storage devices.
Multiple scan modes Fast partition scan, whole partition scan and whole disk scan for different recovery needs.
File types Support to recover pictures, videos, audios, documents, mails, etc.
Supported storage devices Recover data from recycle bin, SD card, external disk, etc.
Supported systems Windows 11,10, 8.1, 8, 7, Vista, XP, 2000 and Mac OS X10.6, 10.7, 10.8+.
Easy to use Only simple steps to recover data from storage devices.
Multiple scan modes - 3 scan modes for different recovery needs.
Supported storage devices Recover data from recycle bin, SD card, external disk, etc.
Relate Links :
BSOD : CRITICAL_PROCESS_DIED Error (0x000000EF) - Data Recovery and System Repair
10-05-2026
Jennifer Thatcher : This comprehensive guide addresses the bsod critical_process_died error by prioritizing data recovery before any system repair attempts. It...

26-11-2025
Ashley S. Miller : Images are among the most frequently lost files during data loss incidents. Knowing how to recover them—especially high‑quality...
How to Recover NEF Files from Your SD Card: Top Methods That Work
04-09-2025
Ashley S. Miller : Learn how to recover NEF files from your SD card with straightforward, proven methods. This guide explains what...
Lost Files After Defrag? Here’s How to Recover Your Hard Drive
11-07-2025
Ashley S. Miller : Learn how to recover a defragmented hard drive with proven methods. This authoritative guide covers why files disappear...


User Comments
Leave a Comment