

Ultimate Guide to Recover PNG Files: Emergency Fixes for Deletion, Formatting & Loss (2025 AI Methods)

Summary
Images are among the most frequently lost files during data loss incidents. Knowing how to recover them—especially high‑quality PNG logos and design assets—is essential. This article explains the common causes of PNG file loss and walks you through effective recovery methods.


Table of contents
Windows PC
macOS
Android Phones/Tablets
- Google Photos → Library → Trash (files typically retained for 60–72 days)
iPhone / iPad
- Photos App → Albums → Recently Deleted: Deleted photos and videos are kept in the “Recently Deleted” album for 30 days by default—you can restore them anytime during this period.
- iCloud Photo Sync: If iCloud Photos is enabled, your “Recently Deleted” album syncs to iCloud. You can access and recover these files from any iCloud-signed-in device or via iCloud.com.
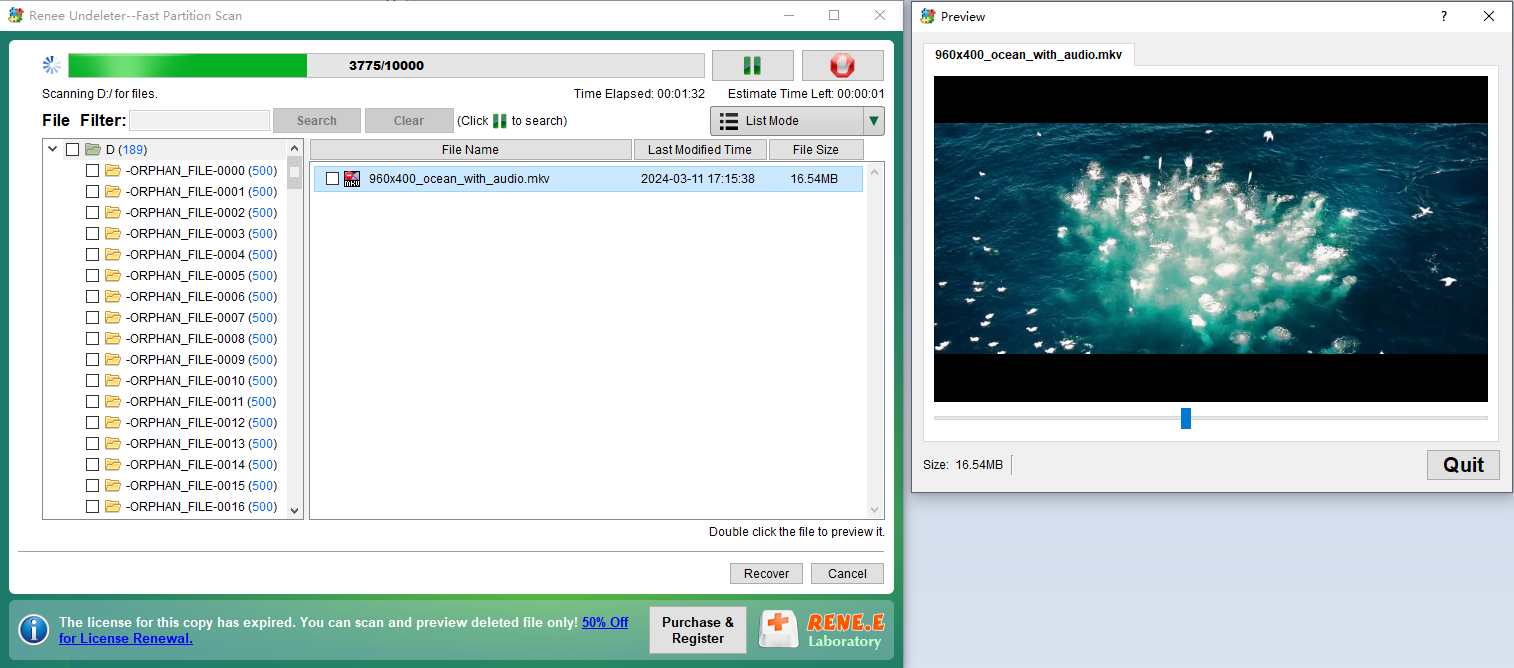
It supports 400+ file formats and combines file system scanning with raw signature scanning (accurately detecting PNG headers: 89 50 4E 47 0D 0A 1A 0A), offering real thumbnail previews—with the latest version leading in recovery success rates after deep formatting.

Easy to use Only simple steps to recover data from storage devices.
Multiple scan modes Fast partition scan, whole partition scan and whole disk scan for different recovery needs.
File types Support to recover pictures, videos, audios, documents, mails, etc.
Supported storage devices Recover data from recycle bin, SD card, external disk, etc.
Supported systems Windows 11,10, 8.1, 8, 7, Vista, XP, 2000 and Mac OS X10.6, 10.7, 10.8+.
Easy to use Only simple steps to recover data from storage devices.
Multiple scan modes - 3 scan modes for different recovery needs.
Supported storage devices Recover data from recycle bin, SD card, external disk, etc.
Key Advantages
- View clear PNG thumbnails before recovery—nearly 100% confirmation of restorability
- Three scan modes: Quick, Deep, and Full Disk
- Modern, intuitive interface—perfect for beginners
- Create disk images to prevent secondary damage
- Recovers files even from RAW partitions
Step-by-Step Instructions


| 🛠️ Tool | 🎨 UI Experience | 🔍 PNG Signature Scan | ⚡ Recovery Speed | 📂 Best For | 📈 Success Rate |
|---|---|---|---|---|---|
| Recuva | 😀 Beginner-friendly GUI | ❌ No | 🚀 Fast | 👶 Simple accidental deletions | ⭐ Average |
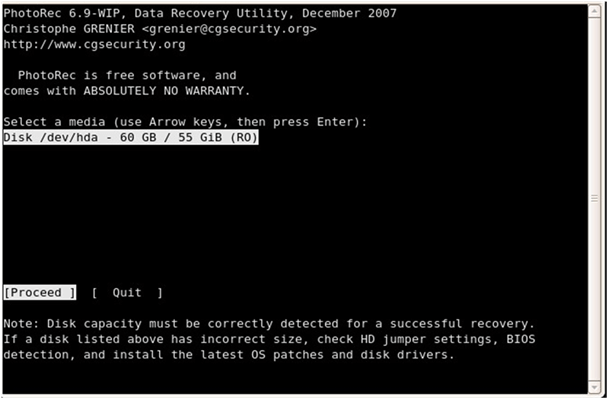
| PhotoRec | 💻 Command-line | ✅ Yes (very powerful) | Slow | 💾 Formatted or severely damaged drives; optimal for photos/videos | ⭐⭐⭐ High |
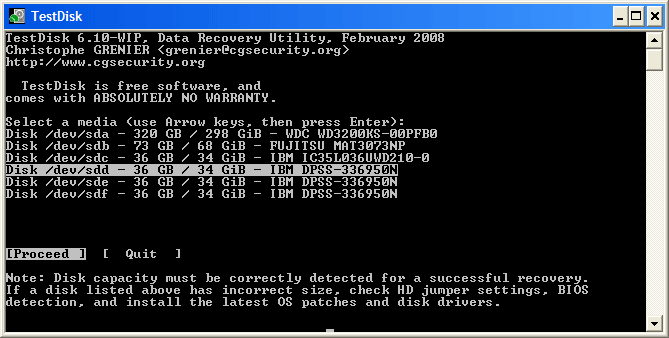
| TestDisk | 💻 Command-line | ✅ Yes (use with PhotoRec) | Medium | 🔧 Partition table repair; unreadable drives | ⭐⭐⭐ High |
| DMDE Free | 🙂 Good GUI | ✅ Yes | Medium | 🗂️ NTFS / ReFS / exFAT file systems | ⭐⭐ Medium |
| DiskDigger (Android) | 📱 Great mobile UI | ⚠️ Yes (Pro version required) | 🚀 Fast | 📲 Direct phone recovery | ⭐⭐ Medium |
Recuva

PhotoRec

TestDisk
DMDE Free

- Max 4,000 files per recovery session from a selected directory
- No “one-click folder recovery”—requires Standard or Pro version for batch automation
DiskDigger
- Partial overwriting or file fragmentation
- Bad sectors on the storage device
- Incomplete reconstruction of file headers or data blocks during recovery

| 🔧 Method | 🌟 Best For | ✅ Pros | ⚠️ Cons |
|---|---|---|---|
| Specialized Repair Software | Users wanting dedicated PNG repair | Designed for PNGs, fixes transparency/palette, batch support, previews | Paid features, limited on badly fragmented files, can be slow |
| Hex Editor (Manual) | Tech‑savvy users | Precise control, can fix headers/chunks | Complex, time‑consuming, risk of errors |
| AI Tools (2025) | Everyday users | Fast, simple, no skills needed | Won’t fix 0‑byte or missing‑header files |
| Stable Diffusion Inpainting | Pro users seeking quality | Free, offline, pixel‑level precision | Setup required, slower than one‑click AI |
- Stellar Repair for Photo: Batch-repairs PNGs, fixes transparency and color palette issues, simple UI.
- Hetman Photo Recovery: Combines recovery + repair with real-time preview of fixed files.
- PNGGauntlet + Repair Plugins: Free but requires manual intervention.
- Specifically designed for PNG structure repair
- Fixes transparency and palette issues
- Supports batch processing
- Most offer preview functions
Disadvantages:
- Premium features usually require payment
- Limited effectiveness on heavily fragmented files
- Repair process can be slow
| Offset / Position | Hex Value | Meaning |
|---|---|---|
| 0–7 | 89 50 4E 47 0D 0A 1A 0A | PNG signature (fixed, unchangeable) |
| 8–11 | 00 00 00 0D | Length of first chunk (IHDR—always 13 bytes) |
| 12–15 | 49 48 44 52 | IHDR chunk type (image header) |
| 16–28 | (13 bytes: width, height, bit depth, color type, etc.) | IHDR data (basic image parameters) |
| 29–32 | (CRC checksum) | IHDR CRC |
| … | 49 44 41 54 | IDAT chunk type (compressed image data—may be multiple) |
| Last 12 bytes | 00 00 00 00 49 45 4E 44 AE 42 60 82 | IEND chunk (end marker—fixed) |
- Bytes 0–7 must be
89 50 4E 47 0D 0A 1A 0A→ otherwise, no software will recognize it - First 33 bytes (0–32) intact = 90% chance it opens (as long as IDAT and IEND exist)
- Last 12 bytes must be
00 00 00 00 49 45 4E 44 AE 42 60 82→ missing this usually prevents opening
Recommended Free Tools:HxDor010 Editor

89 50 4E 47 0D 0A 1A 0A. If missing or altered, replace them with a valid signature from a working PNG.49 48 44 52 (IHDR). If corrupted, copy the full IHDR block (typically first 33 bytes: 8-byte signature + 4-byte length + 4-byte type + 13-byte data + 4-byte CRC) from a reference file.49 45 4E 44 (IEND) near the end. If the file lacks the full IEND block (00 00 00 00 49 45 4E 44 AE 42 60 82), append these 12 bytes manually.
Professional AI Repair Tools
- Adobe Firefly – Upload corrupted PNG → use “Generative Fill” or “Heal”
- Photopea.com (free Photoshop alternative) → Open file → use Content-Aware Fill or Generative Fill
- Topaz Photo AI or Luminar Neo – One-click AI restoration
Free AI Large Models for PNG Repair
- ChatGPT
- Microsoft Copilot
- Grok (with image support)
- Tongyi Wanxiang(Alibaba), Doubao, Kimi (in China)
Please fix this photo for me. Restore to natural state.
- Gray blocks or checkerboard artifacts
- Overall color casts or banding
- Transparent backgrounds turned solid or noisy

Precise PNG Repair with Stable Diffusion (Free & Top-Tier Quality)
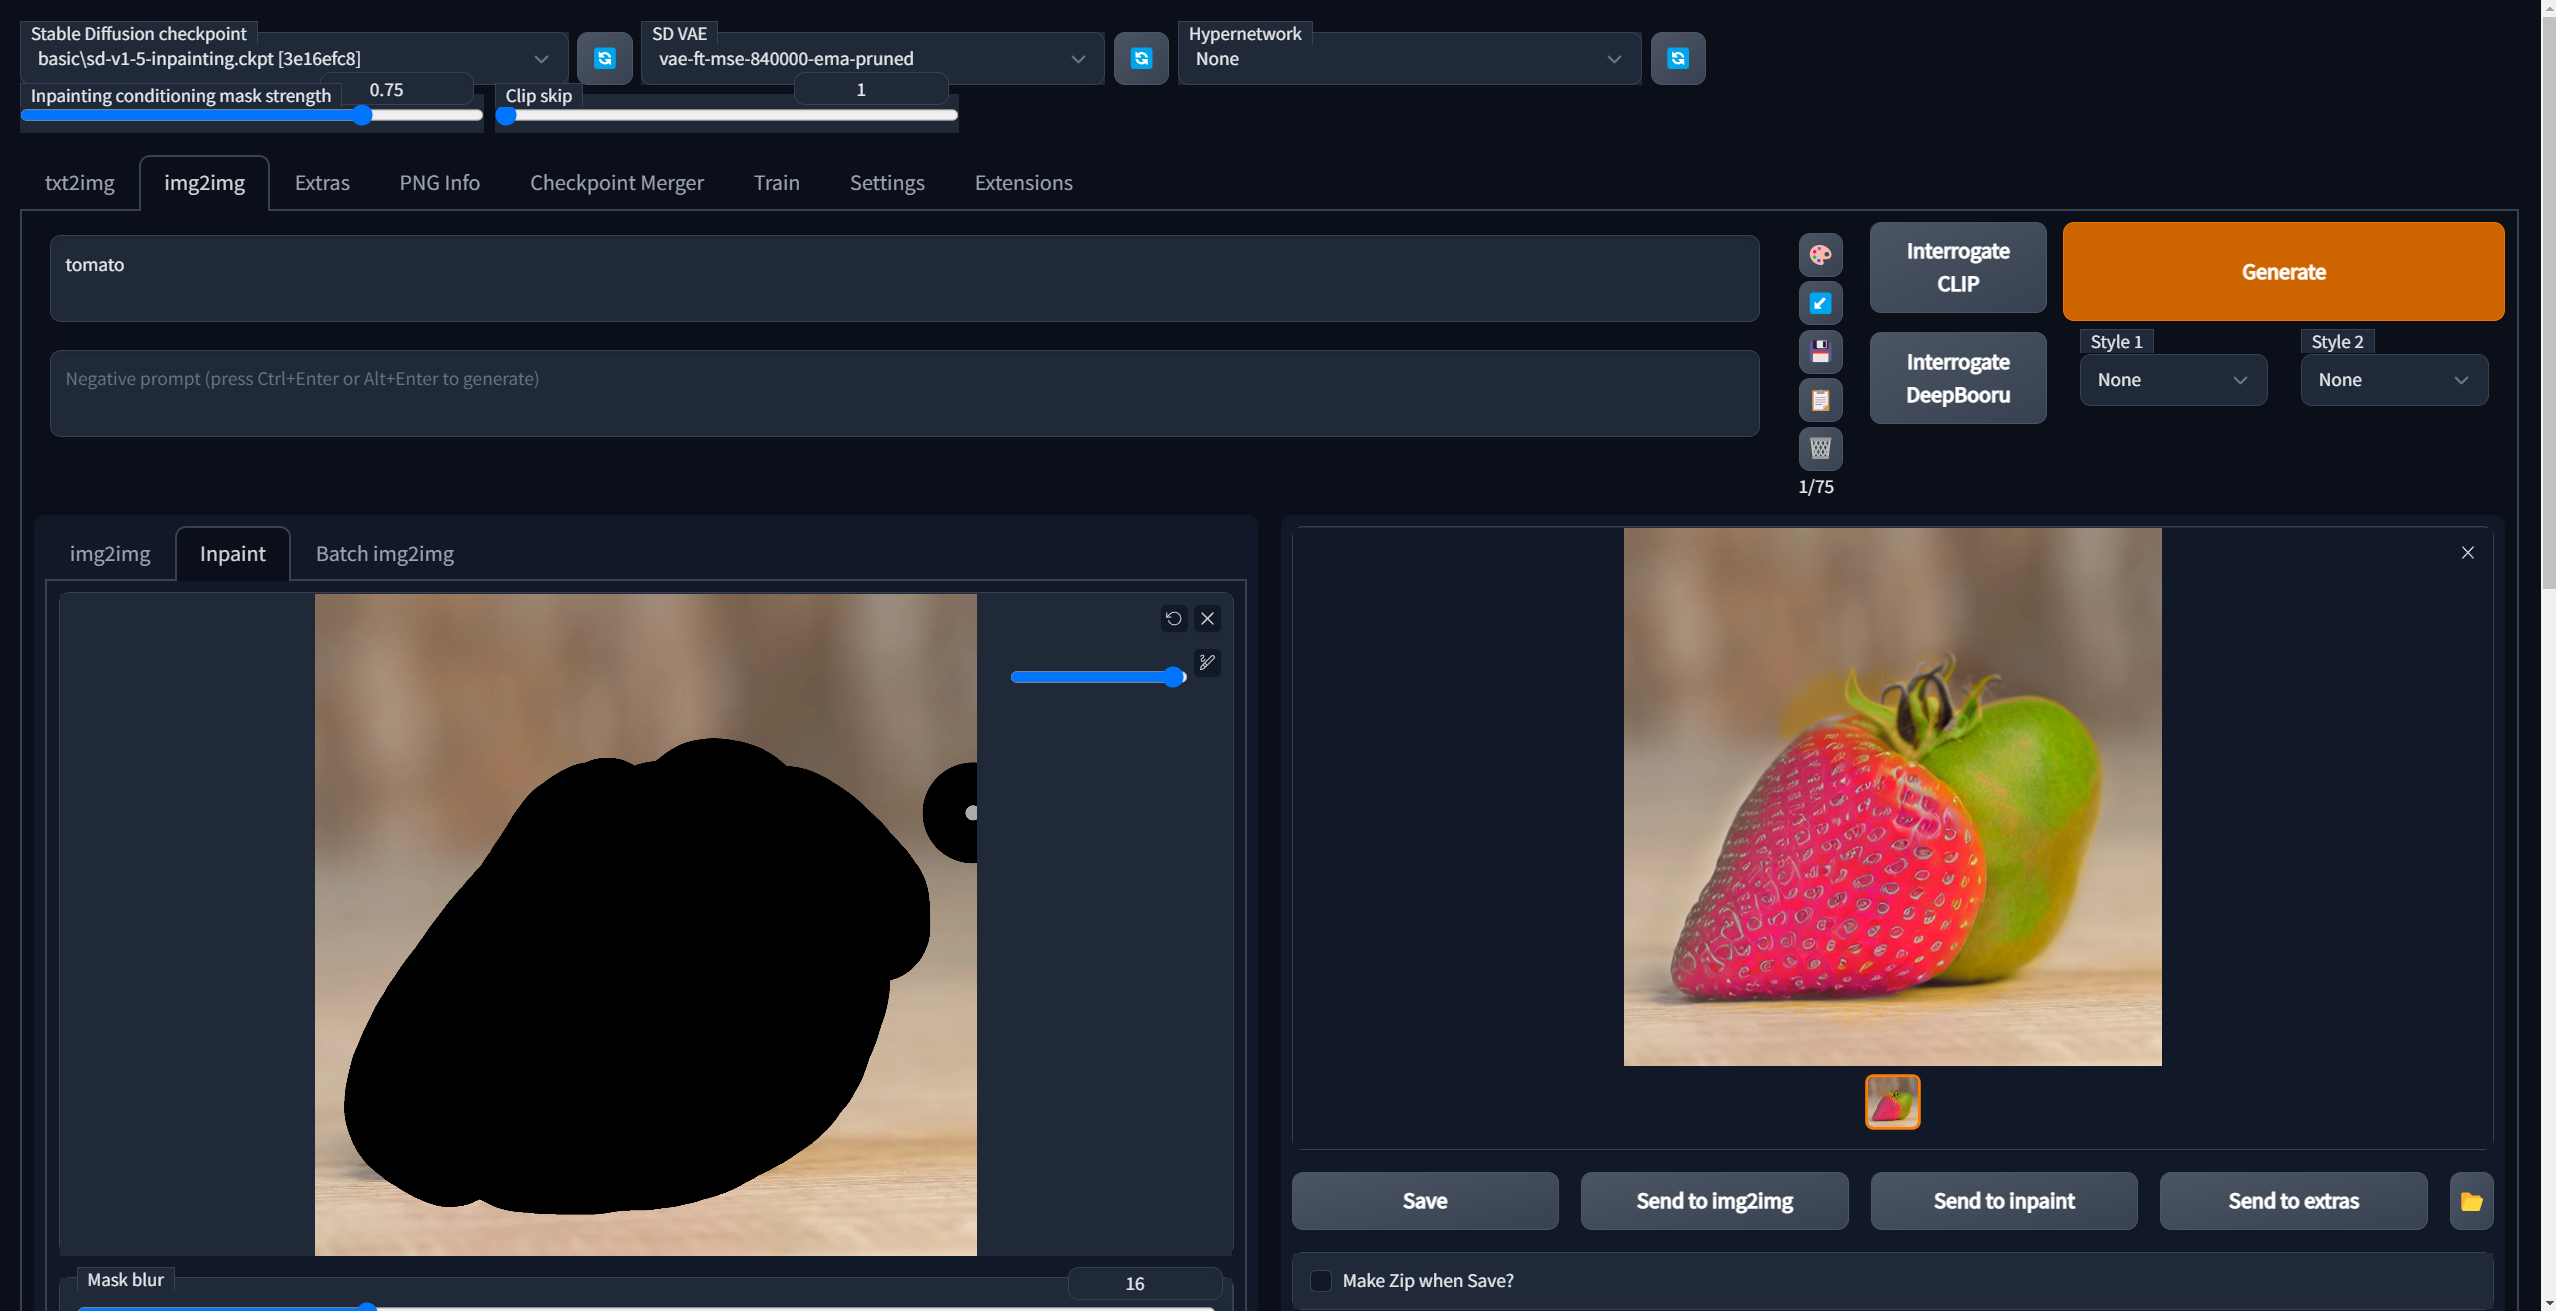
- Cover all gray blocks, noise, or color anomalies
- Also mask areas with broken transparency (AI will regenerate correct alpha)
- Paint slightly beyond damaged zones—but avoid covering good areas
masterpiece, best quality, highly detailed, realistic, natural lighting
blurry, low quality, artifacts, jpeg artifacts, text, watermark, deformed, bad anatomy, extra limbs, missing fingers
- Denoising strength: 0.45–0.65 (0.45–0.55 for minor damage, 0.6–0.65 for severe)
- Mask blur: 4–8
- Inpaint area: Only masked
- Only masked padding: 32
- Enable Windows File History or macOS Time Machine immediately
- Turn on Google Photos or iCloud backup
- Store critical PNGs in OneDrive/Dropbox/Google Drive (version history can save you)
Easy to use Only simple steps to recover data from storage devices.
Multiple scan modes Fast partition scan, whole partition scan and whole disk scan for different recovery needs.
File types Support to recover pictures, videos, audios, documents, mails, etc.
Supported storage devices Recover data from recycle bin, SD card, external disk, etc.
Supported systems Windows 11,10, 8.1, 8, 7, Vista, XP, 2000 and Mac OS X10.6, 10.7, 10.8+.
Easy to use Only simple steps to recover data from storage devices.
Multiple scan modes - 3 scan modes for different recovery needs.
Supported storage devices Recover data from recycle bin, SD card, external disk, etc.
Why do recovered PNGs sometimes appear gray or corrupted?
Can I recover PNGs deleted years ago?
Is it safe to install recovery software on the same drive where files were lost?
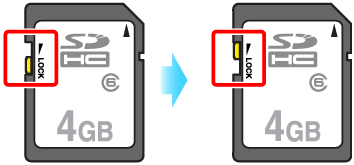
I formatted an SD card with PNG photos—can they still be recovered?
Which tool offers the best PNG preview before recovery?
Does Android’s “Recently Deleted” folder preserve PNG transparency?
Easy to use Only simple steps to recover data from storage devices.
Multiple scan modes Fast partition scan, whole partition scan and whole disk scan for different recovery needs.
File types Support to recover pictures, videos, audios, documents, mails, etc.
Supported storage devices Recover data from recycle bin, SD card, external disk, etc.
Supported systems Windows 11,10, 8.1, 8, 7, Vista, XP, 2000 and Mac OS X10.6, 10.7, 10.8+.
Easy to use Only simple steps to recover data from storage devices.
Multiple scan modes - 3 scan modes for different recovery needs.
Supported storage devices Recover data from recycle bin, SD card, external disk, etc.
Relate Links :
Top Ways to Recover Deleted JPEG Files on Windows & Mac

04-11-2025
Jennifer Thatcher : Learn how to recover deleted JPEG files on Windows and Mac with easy-to-follow steps, prevention tips, and essential...
Lost Your Nikon Photos? Quick Recovery Tips & Best Tools Revealed
23-10-2025
Ashley S. Miller : Learn expert nikon photo recovery techniques tailored for users. Discover top software and best practices to quickly restore...
How to Recover NEF Files from Your SD Card: Top Methods That Work
04-09-2025
Ashley S. Miller : Learn how to recover NEF files from your SD card with straightforward, proven methods. This guide explains what...
How to Recover Data from a RAW SD Card: Step-by-Step Guide
26-08-2025
Jennifer Thatcher : Learn how to recover raw SD card data quickly and fix the card for future use. This authoritative...


User Comments
Leave a Comment